
Solana's lightning-fast blockchain has revolutionized the crypto world, and creating your own SPL token (Solana Program Library token) is now easier than ever. But what if you could add an extra layer of functionality to your token? Enter the concept of transfer tax - a feature that allows you to automatically charge a fee on each transaction, opening up new possibilities for token economics and project funding.
In this ultimate guide, we'll walk you through the process of creating a Solana token with transfer tax. You'll learn how to use the power of the Solana Token-2022 program to implement this innovative feature, from setting tax rates and maximum fee caps to managing authorities and handling withdrawals. Whether you're an experienced developer or new to the Solana ecosystem, this comprehensive tutorial will equip you with the knowledge to create and deploy your own custom SPL token with transfer tax functionality.
NOTE: If you already have an SPL token with transfer tax enabled, check out our guides on using the Solana Tax config tool and Solana Withdraw fees tool to easily manage transfer tax in your existing token.
What is the Transfer Tax Feature?
The transfer tax feature is a powerful tool available in the Solana Token-2022 program, designed to add an extra layer of functionality to your SPL token. At its core, this feature allows token creators to implement an automatic fee system on every transfer of their Solana token.
When you create an SPL token with transfer tax, a predetermined percentage of each transaction is deducted and held separately. This tax can serve various purposes, from generating revenue for project development to creating token sinks that help manage token supply. It's important to note that while this feature offers great flexibility in token economics, it doesn't allow for whitelisting or exempting specific wallet addresses from the tax.
The Solana transfer tax feature comes with several key components:
- Tax rate: This is the percentage of tokens that will be charged as a fee for each transaction.
- Maximum fee per transaction: This cap limits the total amount of tax that can be charged on a single transfer, especially beneficial for large transactions.
- Config authority: An address with the power to adjust the tax rate and maximum fee, subject to a time delay for user protection.
- Withdraw authority: An address permitted to collect the accumulated tax from holders' token accounts.
How to Create Your Solana Token with Transfer Tax
Creating an SPL token with transfer tax may sound complex, but with the right tools it can be a straightforward process. Enter 20lab - our easy-to-use Solana token generator simplifies the entire process of creating your custom Solana tax token. 20lab's intuitive interface guides you through every step, from setting up your token's basic parameters to configuring the details of the transfer tax feature.
In the following steps, we'll walk you through the process of using 20lab's SPL token generator to create your Solana token with transfer tax. You'll learn how to set your tax rate, define the maximum fee per transaction and assign the necessary permissions.
Step 1: Choose Token Type and Connect Wallet
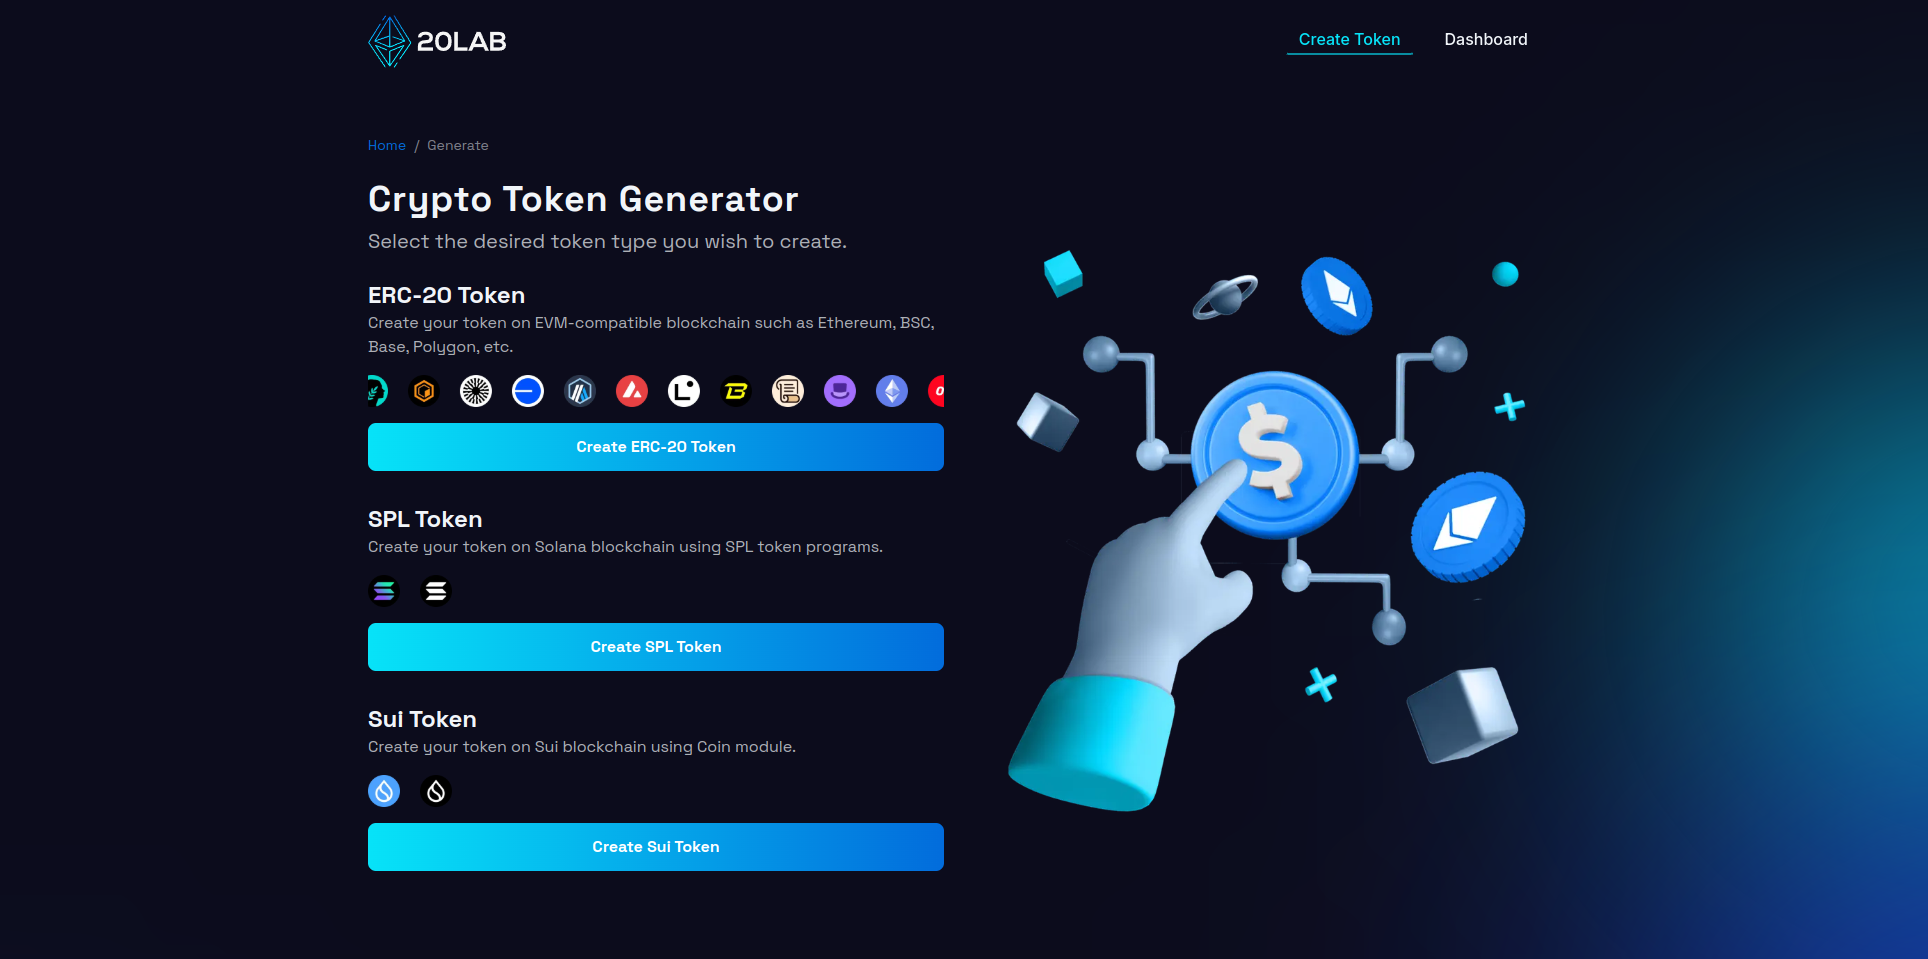
To begin creating your SPL token, first visit 20lab.app in your web browser. Open the app and navigate to the "Create SPL Token" option, which will take you to the token generator page.
Once there, you'll need to connect your Solana wallet. Click on the "Connect Wallet" button and select your preferred wallet from the options provided, which include popular choices like Phantom, Solflare, or Backpack. Follow your wallet's instructions to authorize the connection. Once you've successfully connected, you'll see your wallet address in the top right corner of the page.
Next, make sure you're connected to the appropriate Solana network. You can choose between Mainnet, Testnet or Devnet, depending on the current stage of your project and your needs. Use Mainnet to launch your actual token, or Testnet/Devnet for testing and development purposes. Make sure that the blockchain in your wallet matches the one selected on the 20lab interface, as at the time of writing, many Solana wallets don't support this type of synchronization.
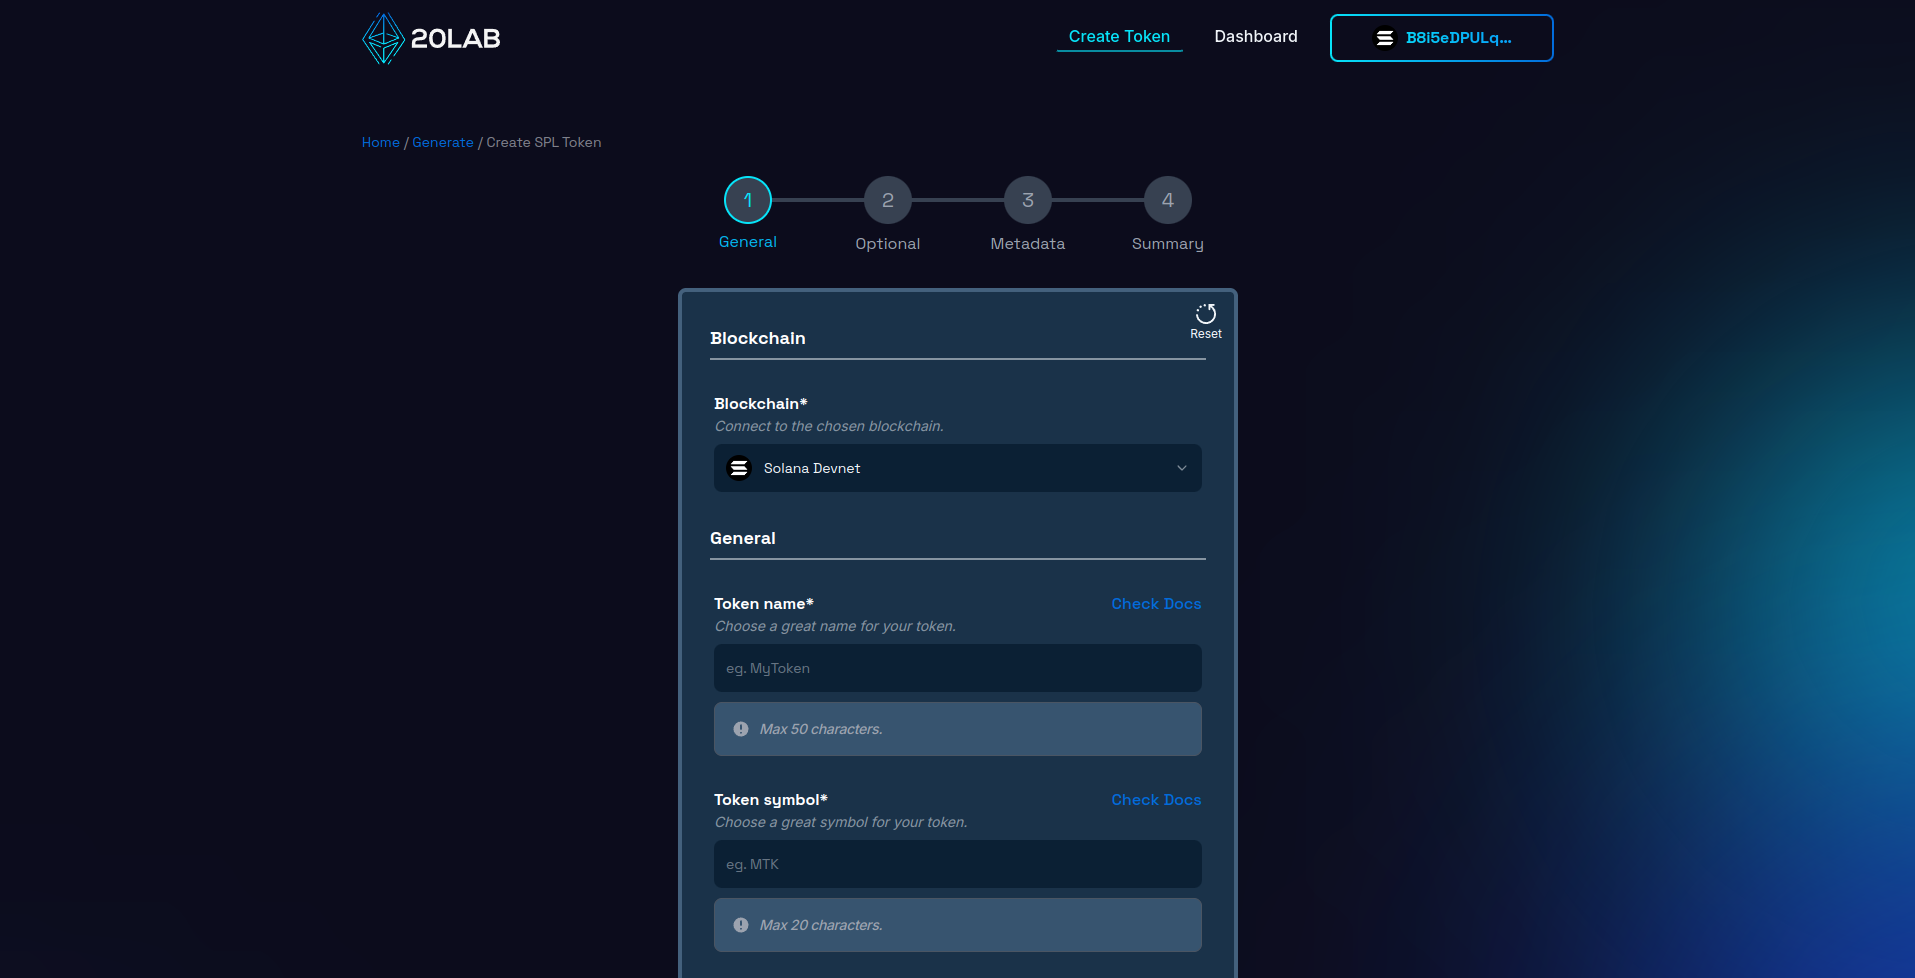
Step 2: Add General Token Information
Configuring the general information for your SPL (Solana) token is a critical step in defining its core attributes and unique economic model. Begin by entering a distinctive, descriptive name for your token and creating a short, memorable symbol. It's a good idea to research existing Solana tokens to ensure that your choice stands out in the ecosystem.
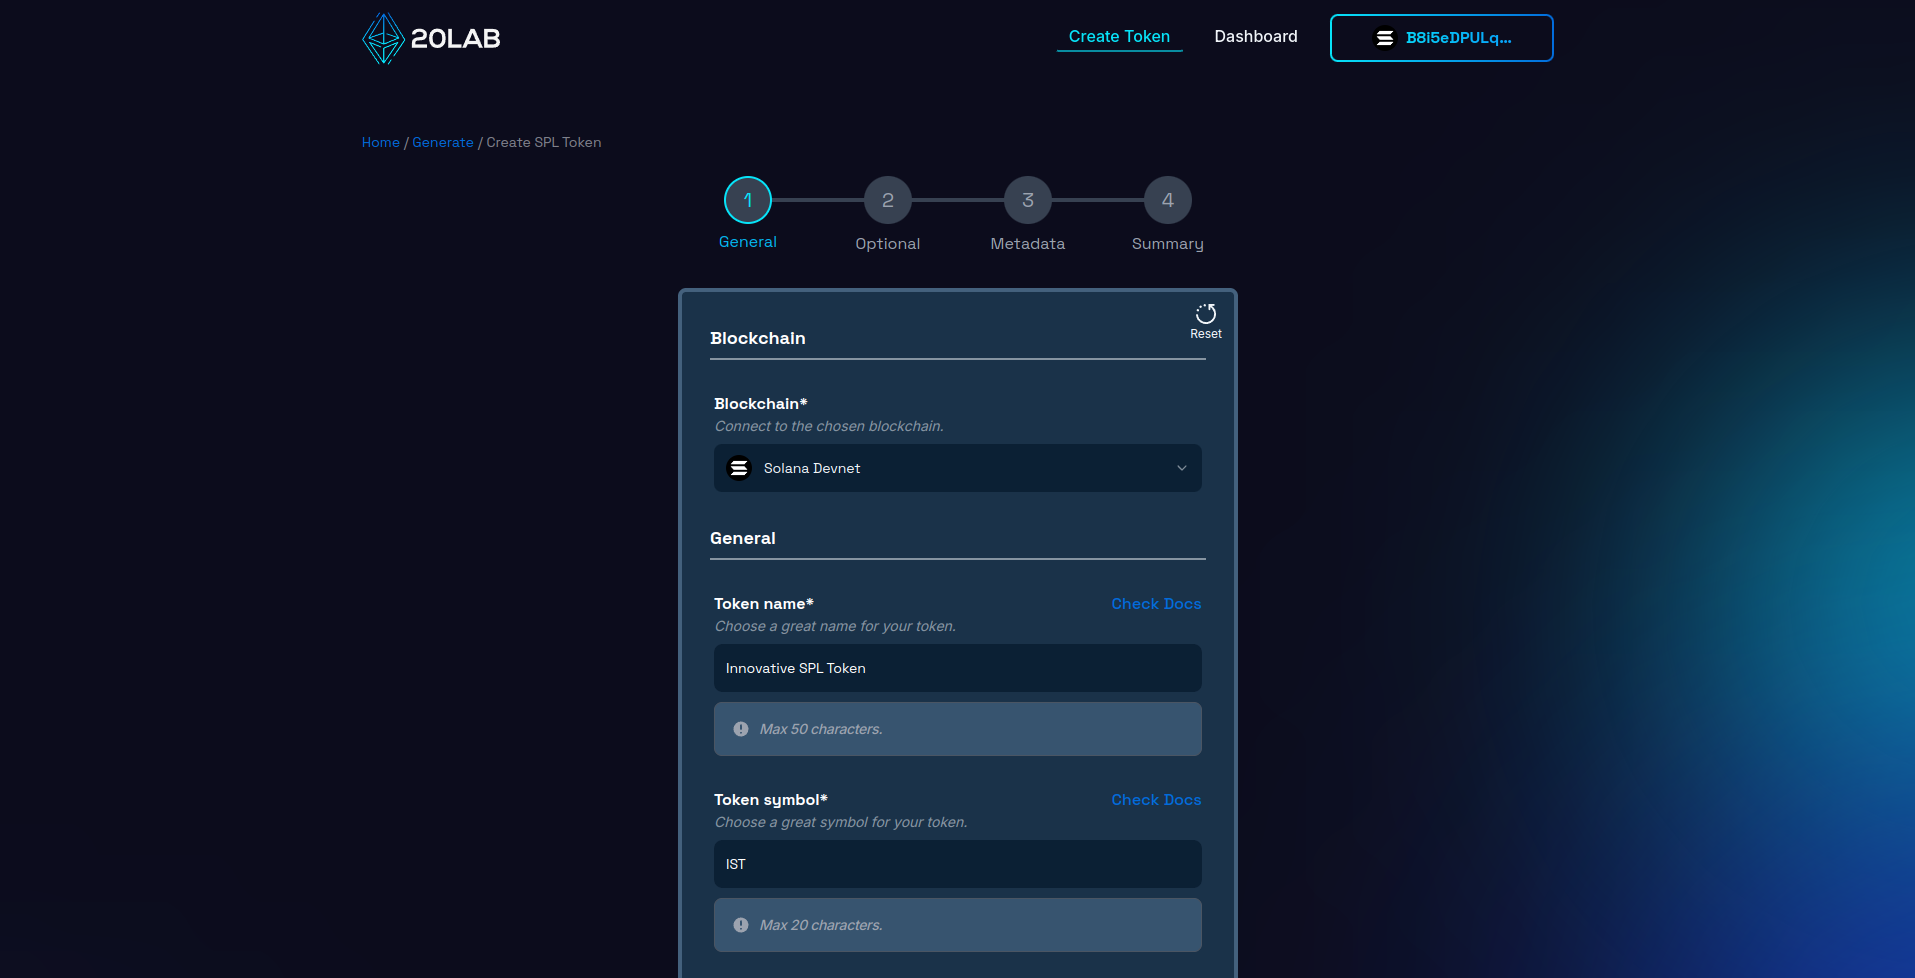
Next, determine the total supply of your token. For tokens with a transfer tax, it's important to carefully consider this amount in relation to your tax rate. The total supply should be in line with your project's goals and tokenomics. For example, you might choose a supply of 1,000,000 tokens if you want a relatively scarce asset, or a larger amount if you plan on wider distribution.
When it comes to decimals, SPL tokens typically use 6 or 9 decimal places, which matches the divisibility of SOL. This allows for micro-transactions and precise token allocation, which is essential for various use cases within the Solana ecosystem. For tokens with transfer tax, choosing the right number of decimal places is critical as it affects how accurately the tax can be calculated and collected, especially for smaller transactions. Since Solana uses a smaller variable size to store balance data, choosing a smaller decimal also allows for a larger overall supply.
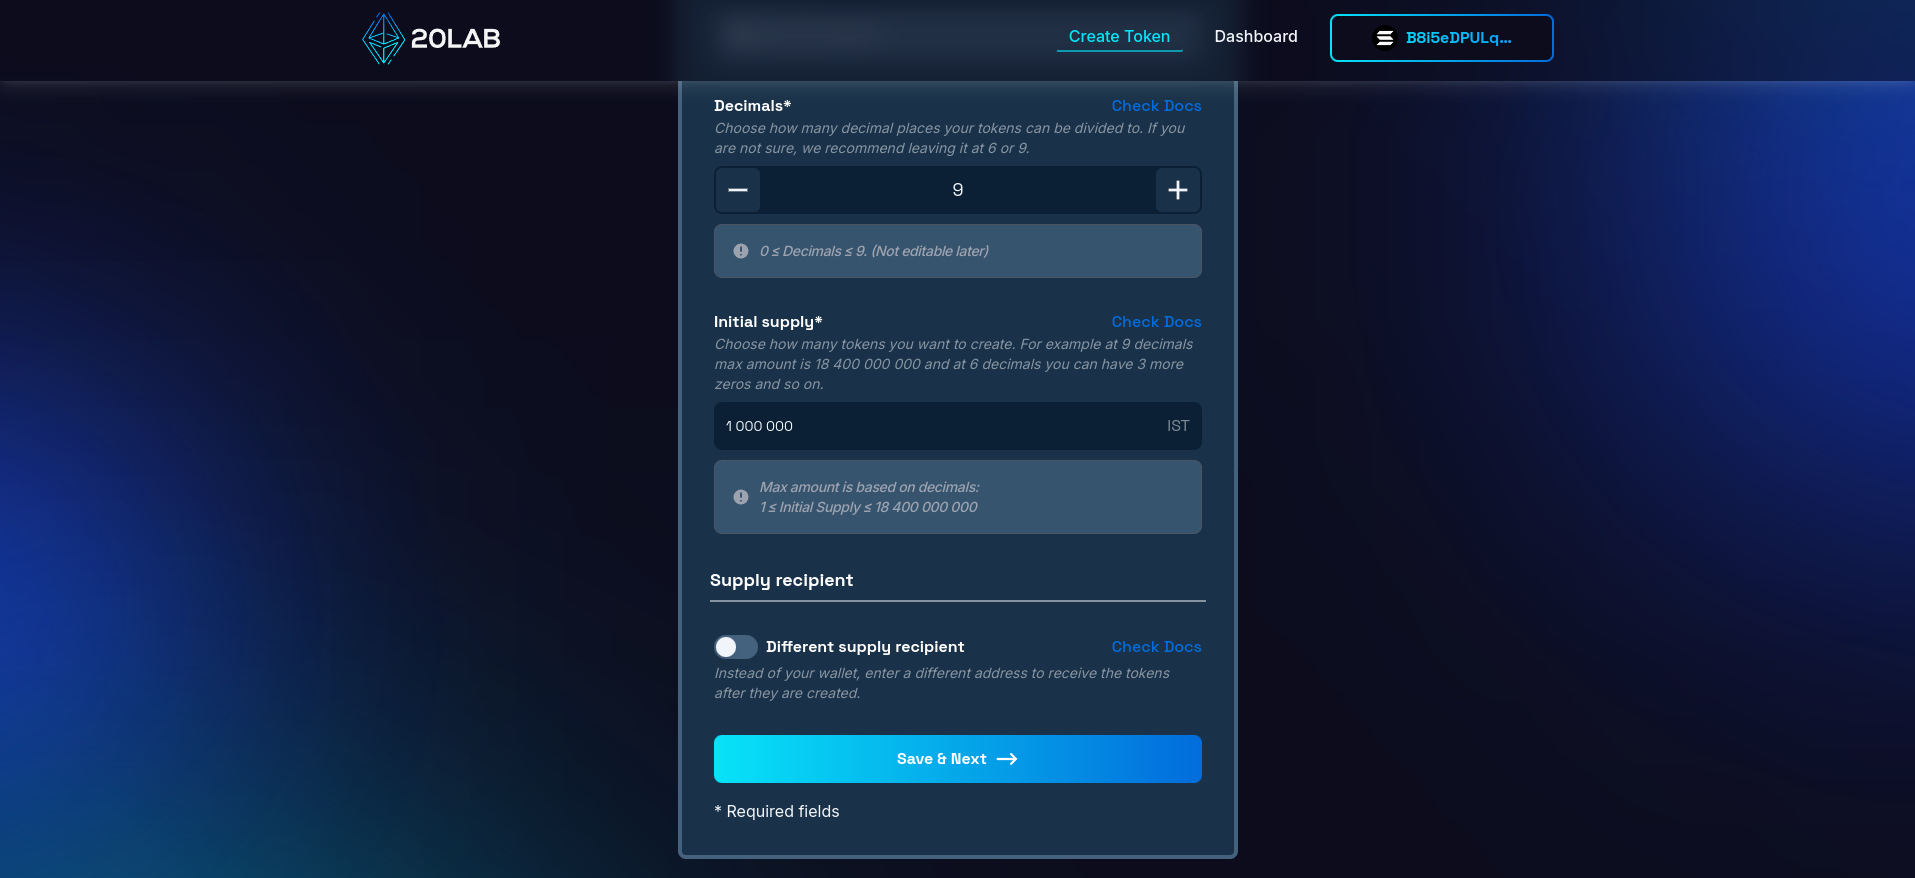
An important decision is choosing which wallet will receive the initial supply. This supply recipient will hold all tokens at launch, but will have no other permissions unless directly assigned later. You can use your personal wallet or a dedicated project wallet. Note that this wallet will also be subject to the transfer tax when tokens are moved, so plan your initial distribution strategy accordingly.
Step 3: Enable Transfer Tax Option
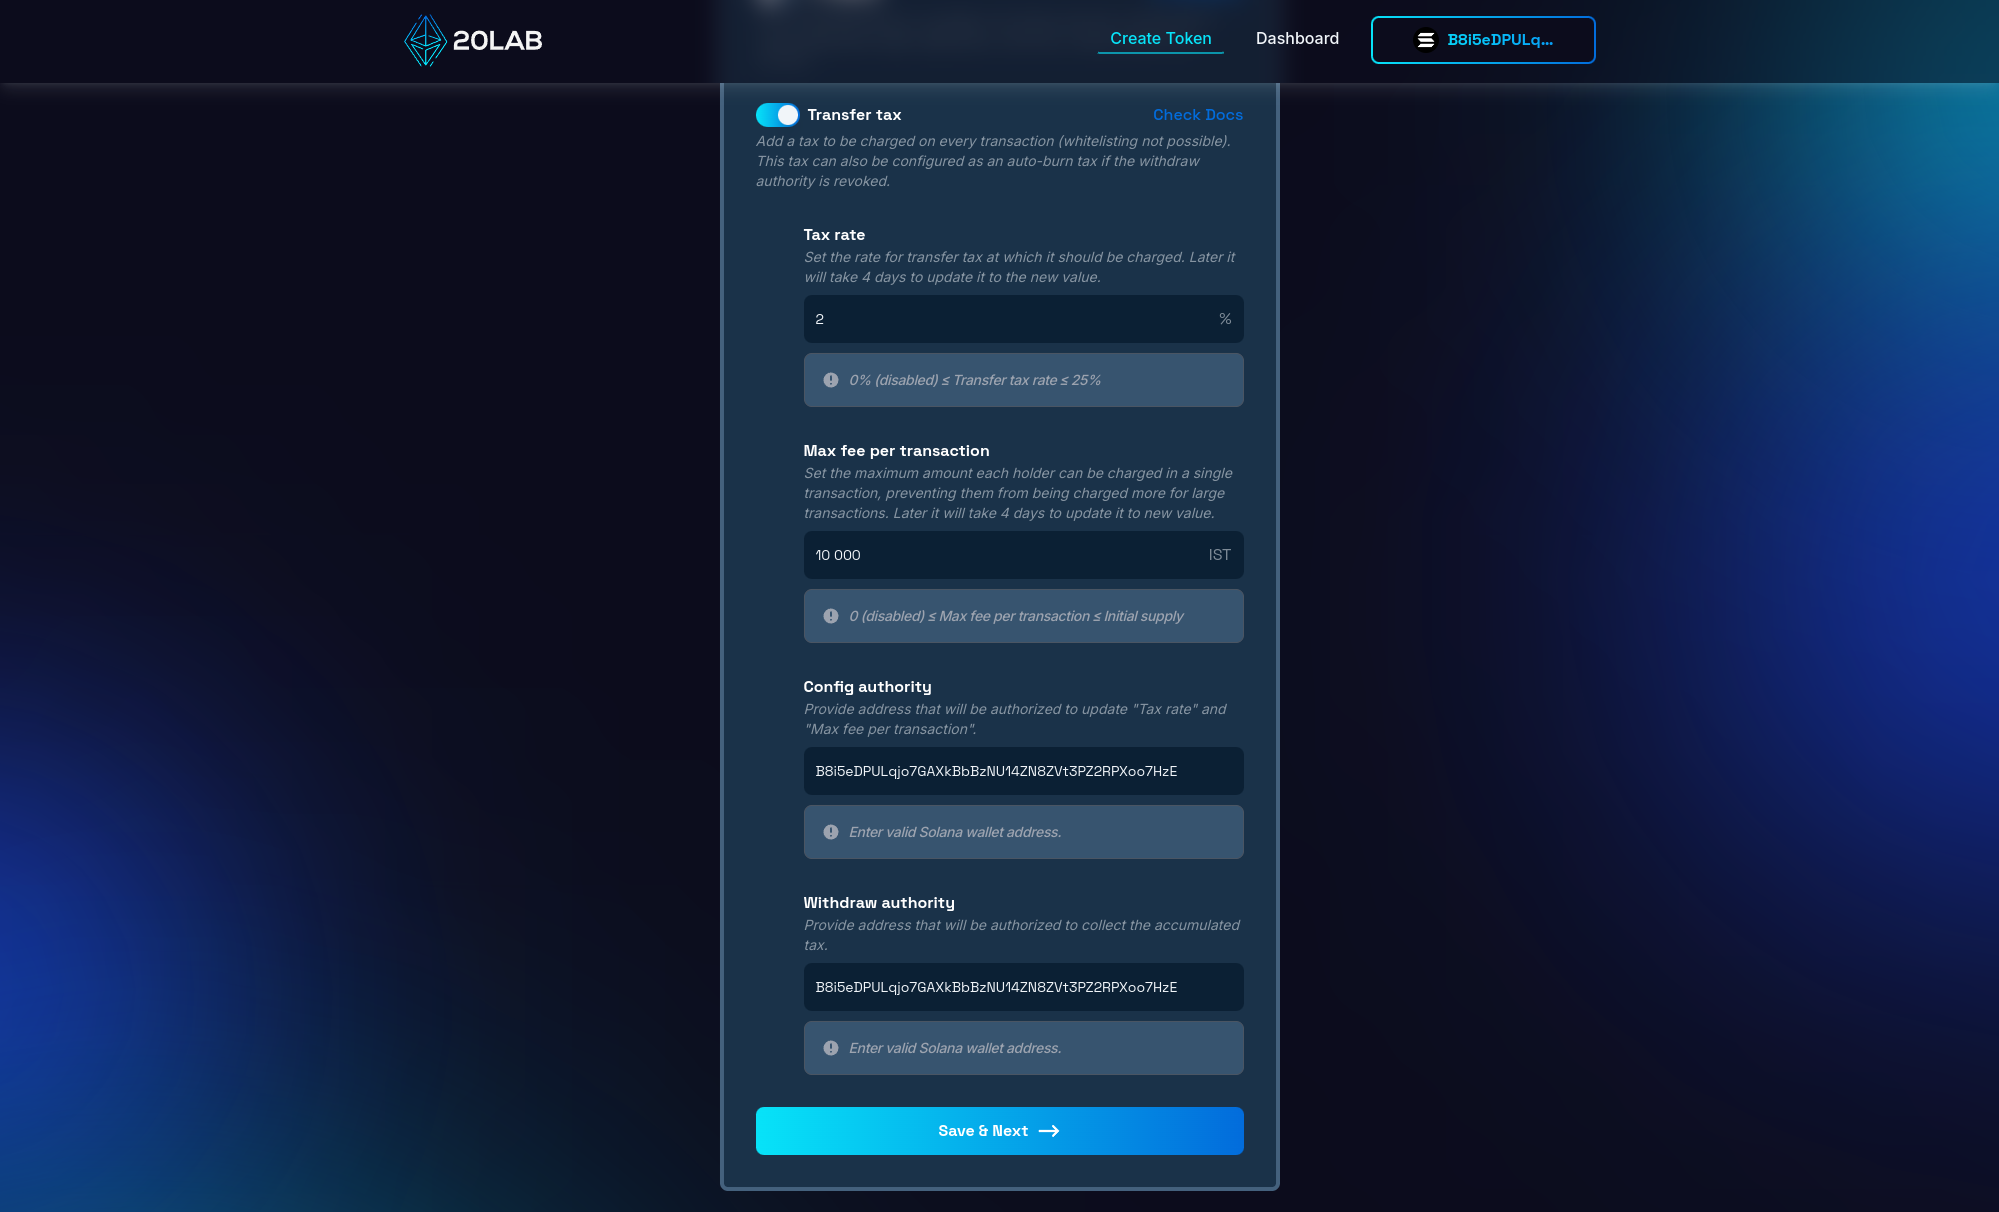
On the 20lab token creation form, navigate to the next section. There you'll find an option called "Transfer Tax".
When you enable the Transfer Tax option, you're creating an SPL token that automatically deducts a certain percentage from each transfer. You'll need to set the following properties:
- Tax rate: The actual tax rate that will be applied to each transaction.
- Max fee per transaction: The maximum fee that can be charged for a single transaction. This limit overrides the tax rate, i.e. even if the user should pay a higher fee, it will be reduced to not exceed the maximum fee.
- Config authority: An address that is authorized to change both the tax rate and the maximum fee. After your token is created, any such change will be subject to a 4-day delay. This was done intentionally by the Solana team in case new configuration is very unfavorable for token holders.
- Withdraw authority: An address that will be authorized to withdraw all collected fees. Fees can be withdrawn from the holder's token account and mint account.
Remember, the transfer tax feature is a powerful tool that should be implemented thoughtfully. High tax rates can discourage transactions and potentially impact the usability of your token. It's important to have a clear strategy for how the taxes collected will be used and to communicate this transparently to your token holders. Consider how the tax rate and maximum fee align with your project's goals and your community's expectations.
Step 4: Review and Deploy
As you reach the final step of creating your SPL token with transfer tax, take a moment to carefully review all of the settings on the "Summary" page. This crucial step serves as your final checkpoint before deployment. Review each detail to ensure accuracy and alignment with your project goals.
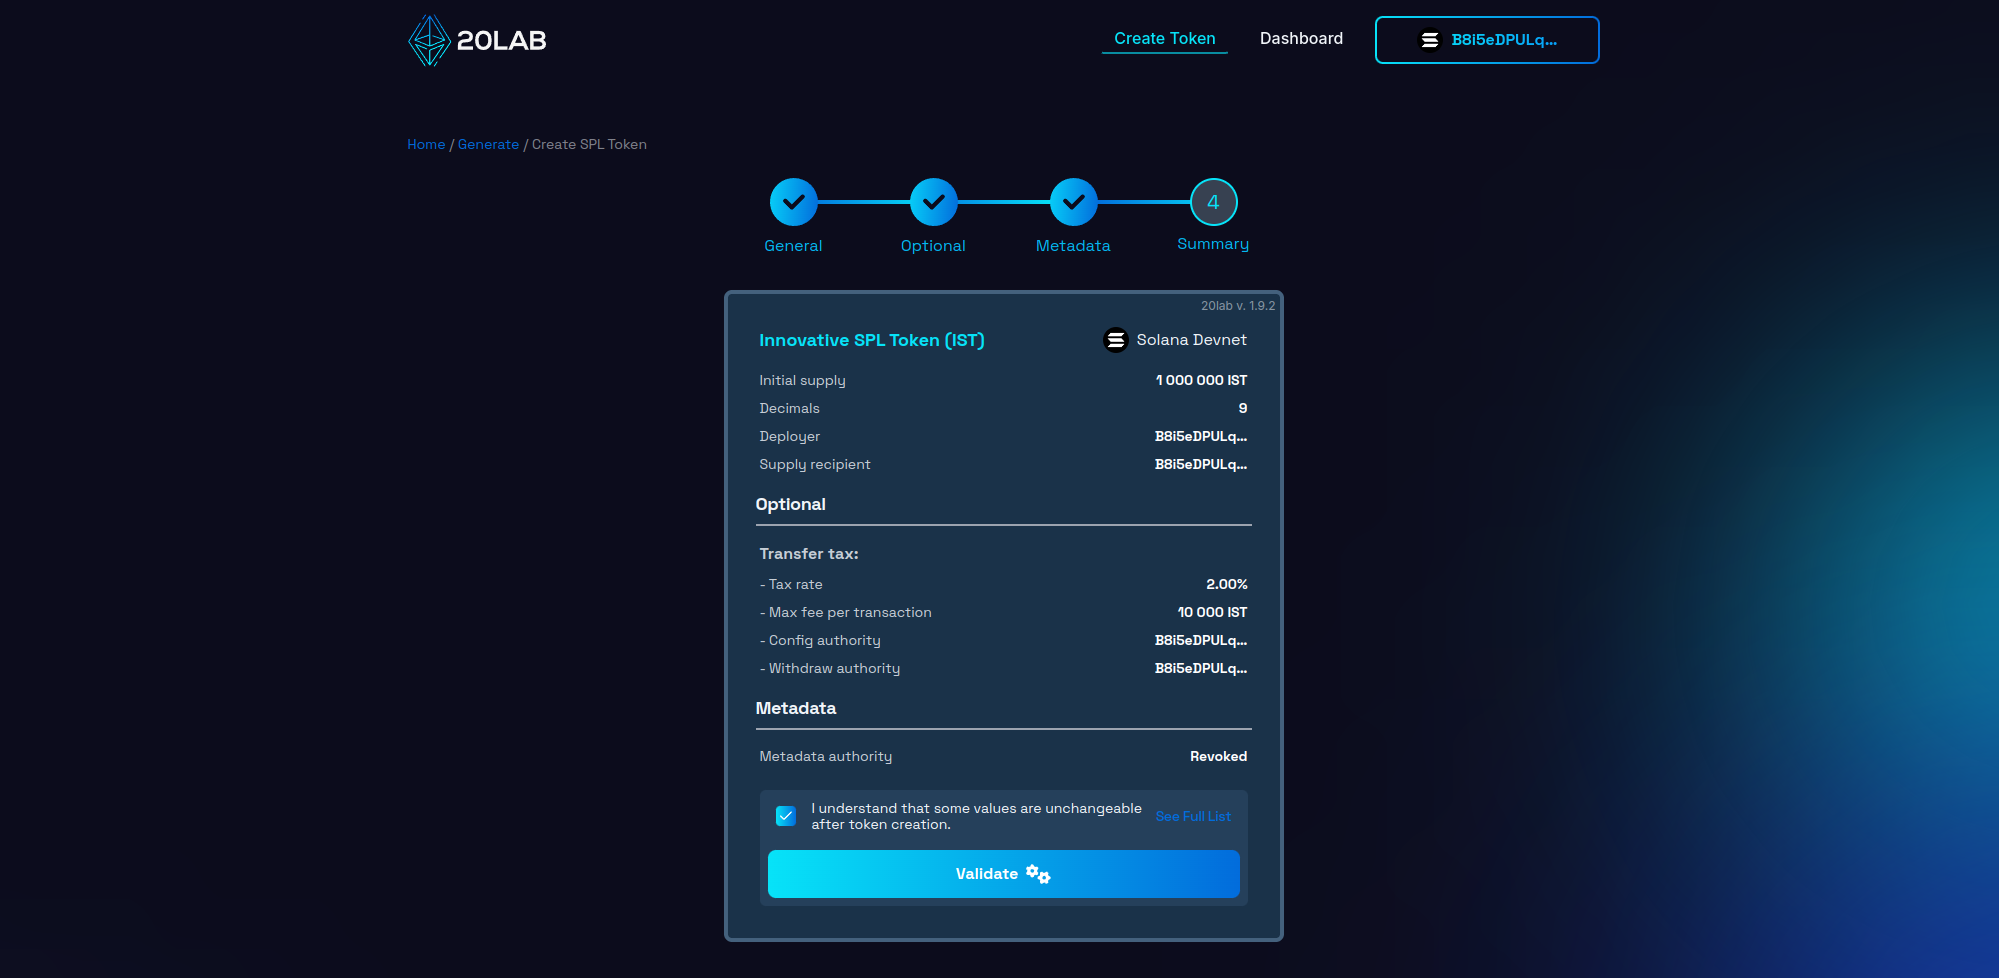
After completing a thorough review, click the "Validate" button to begin deployment. This action triggers a final validation, an important safeguard that can identify any technical issues before your token is committed to the Solana blockchain.
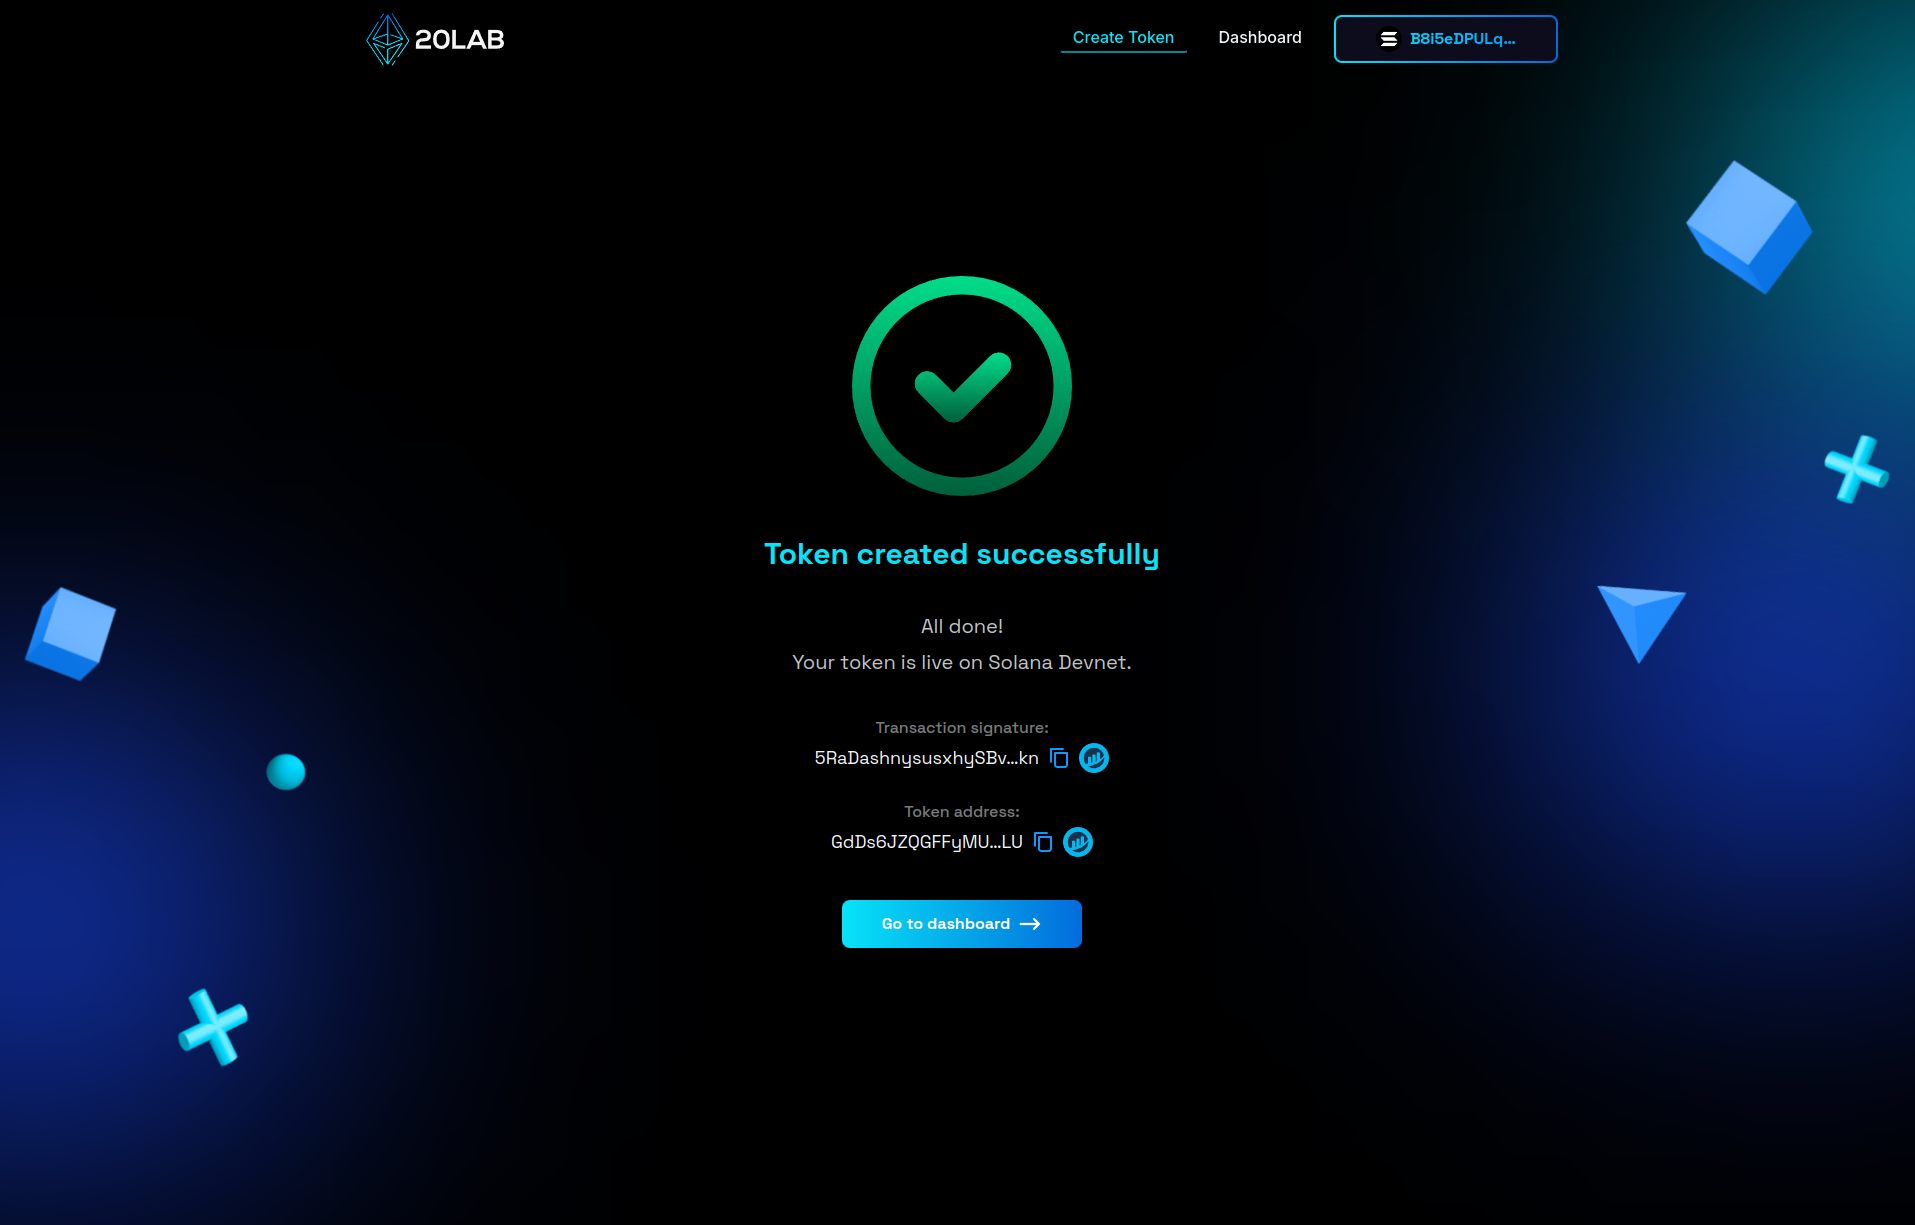
If everything is in order, you're ready to launch your token. Confirm the action and your connected Solana wallet will prompt you to approve the transaction. This approval is the final step in creating your SPL token on the Solana blockchain.
Remember, once created, many of these parameters cannot be changed. Your careful attention during this review process will ensure that your token enters the Solana ecosystem exactly as you intended.
Dashboard Panel for Your Solana Token with Transfer Tax
After creating your SPL token with transfer tax on 20lab, you'll have access to a comprehensive dashboard that allows you to manage and interact with your token. This dashboard provides a number of features to help you maintain and use your Solana tax token effectively.
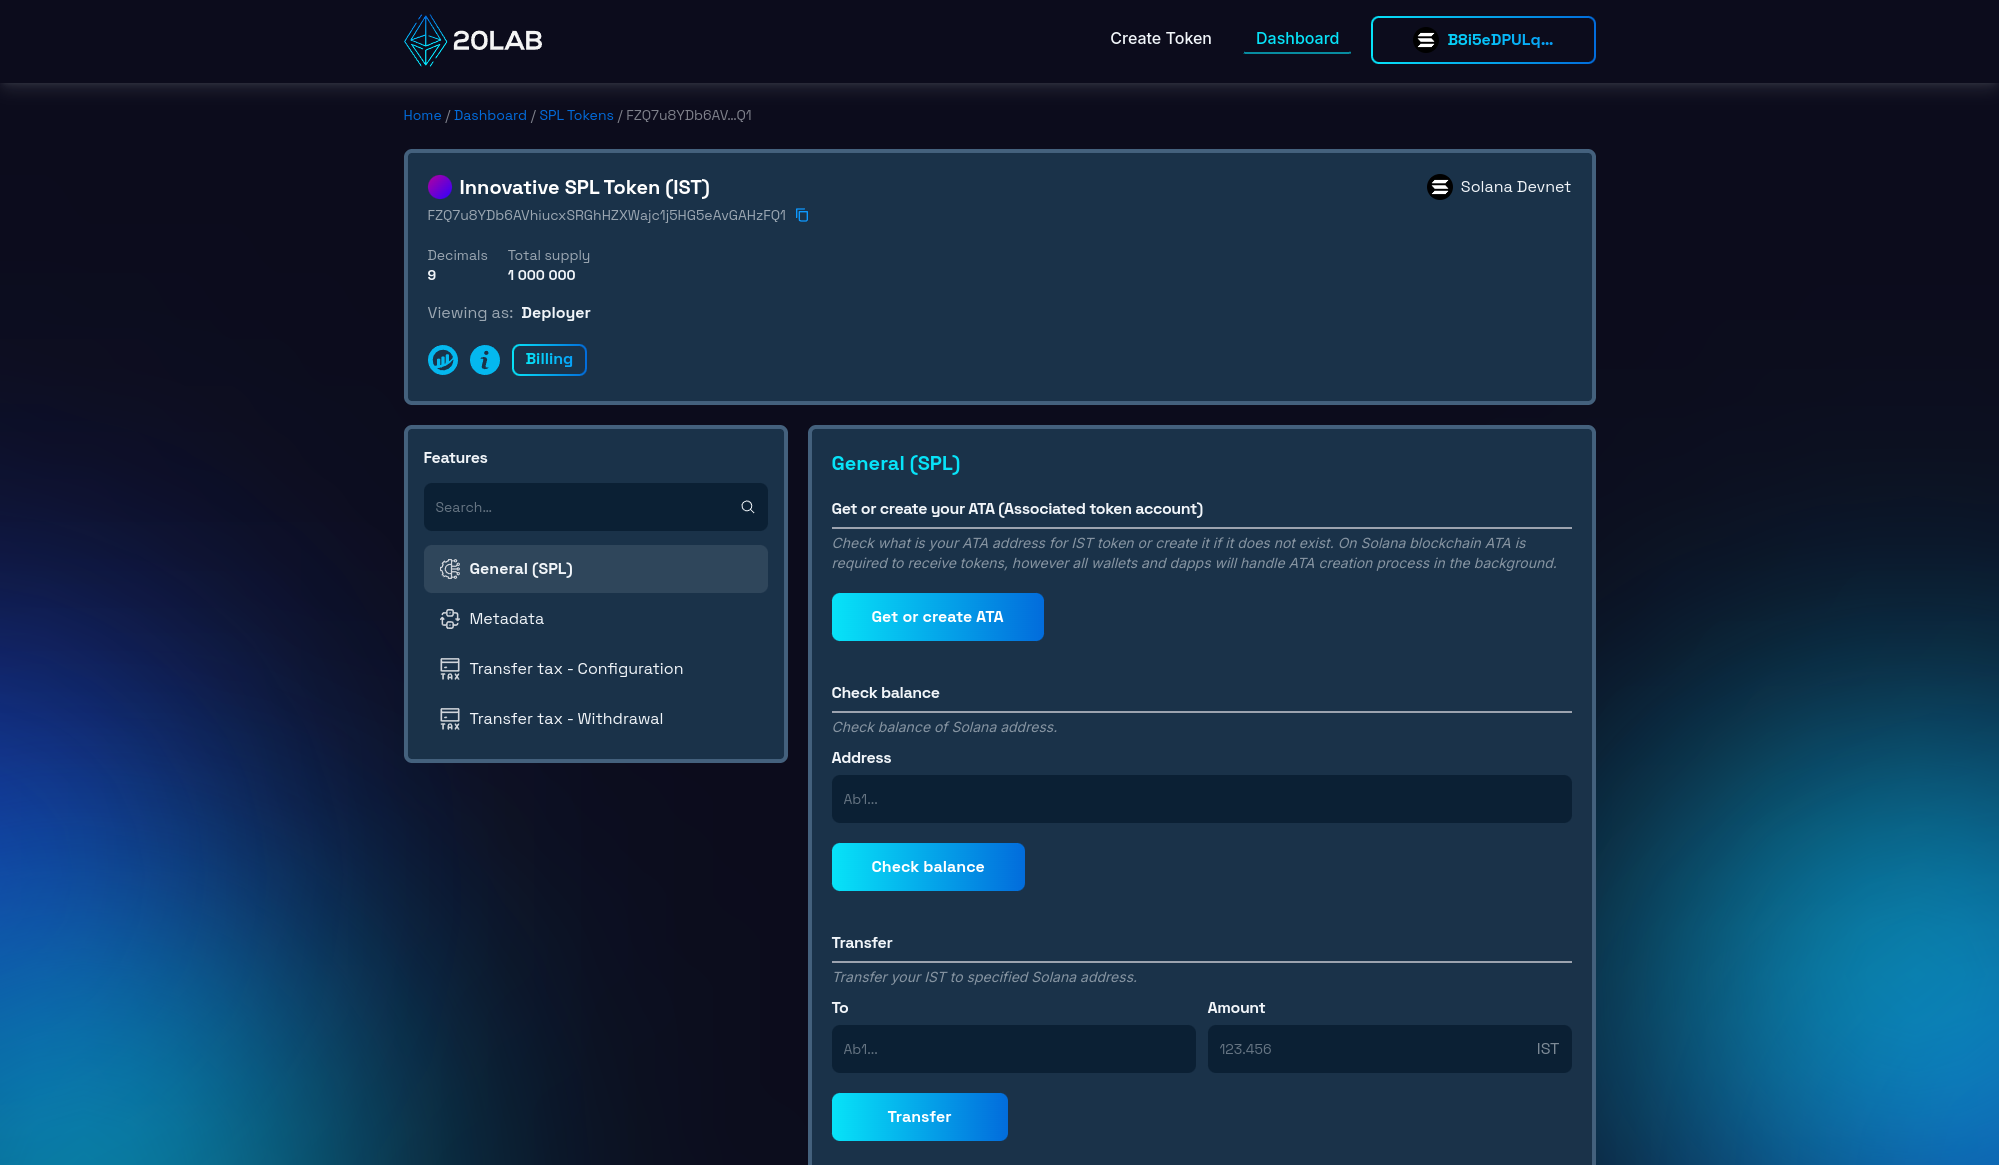
Token Overview
At the top of the dashboard you'll find an overview of your token, including: token name and symbol, token address, decimal places, total supply and network (Solana Devnet in the example).
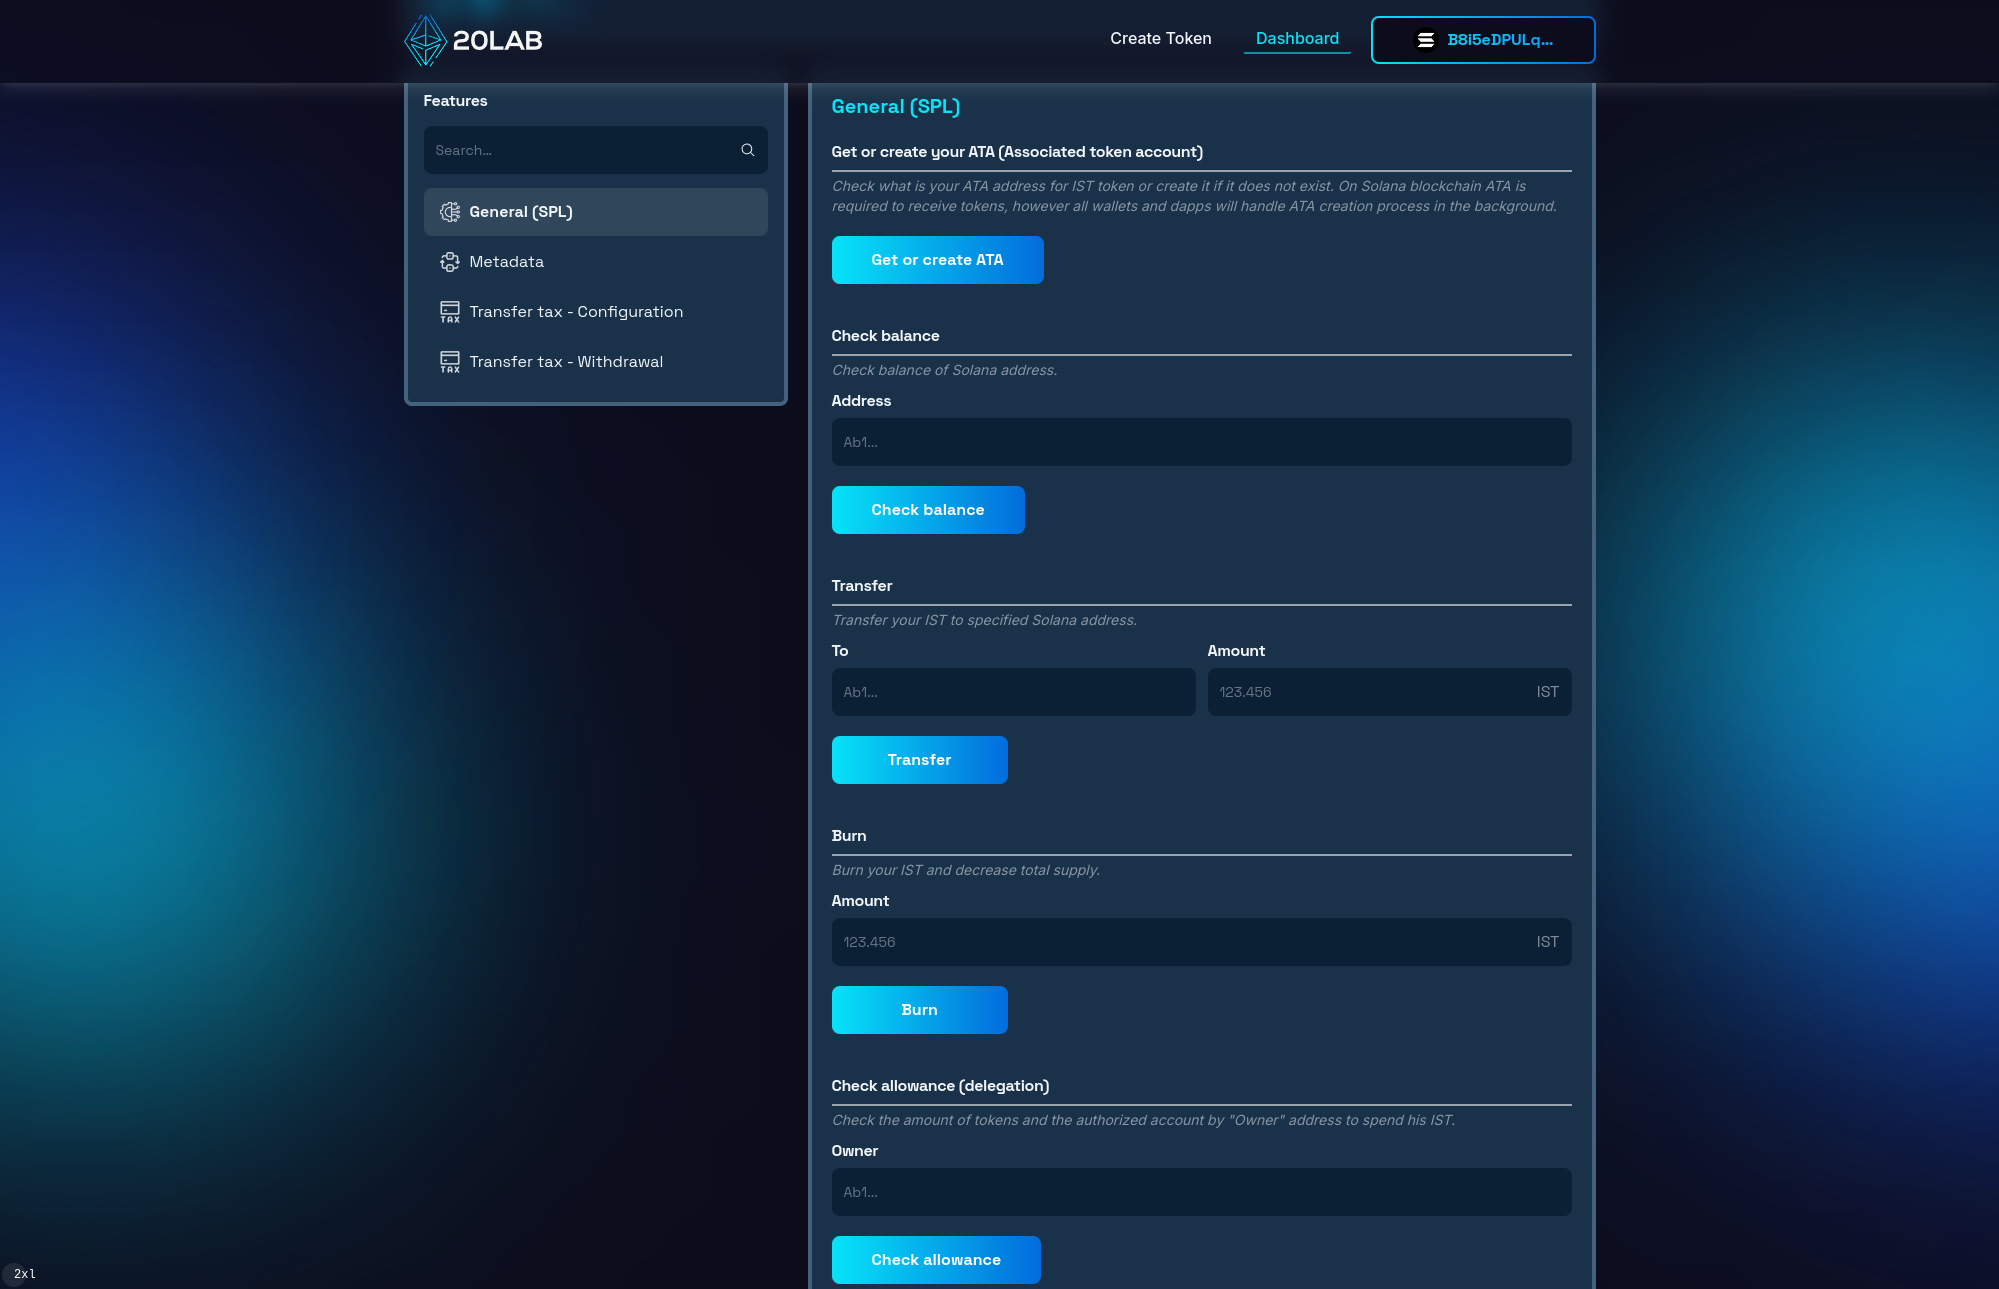
General SPL Features
The General (SPL) section of the 20lab dashboard provides essential functions for managing your SPL token. Here you can get or create an Associated Token Account (ATA), check the balance of specific addresses, transfer tokens, burn and approve tokens.
Transfer Tax Feature
For tokens with transfer tax, the dashboard provides special controls in the "Transfer Tax - Configuration" and "Transfer Tax - Withdrawal" sections. First section is related to config authority wallet, and the second to withdraw authority. These functions give you full control over the tax collection and management aspects of your token.
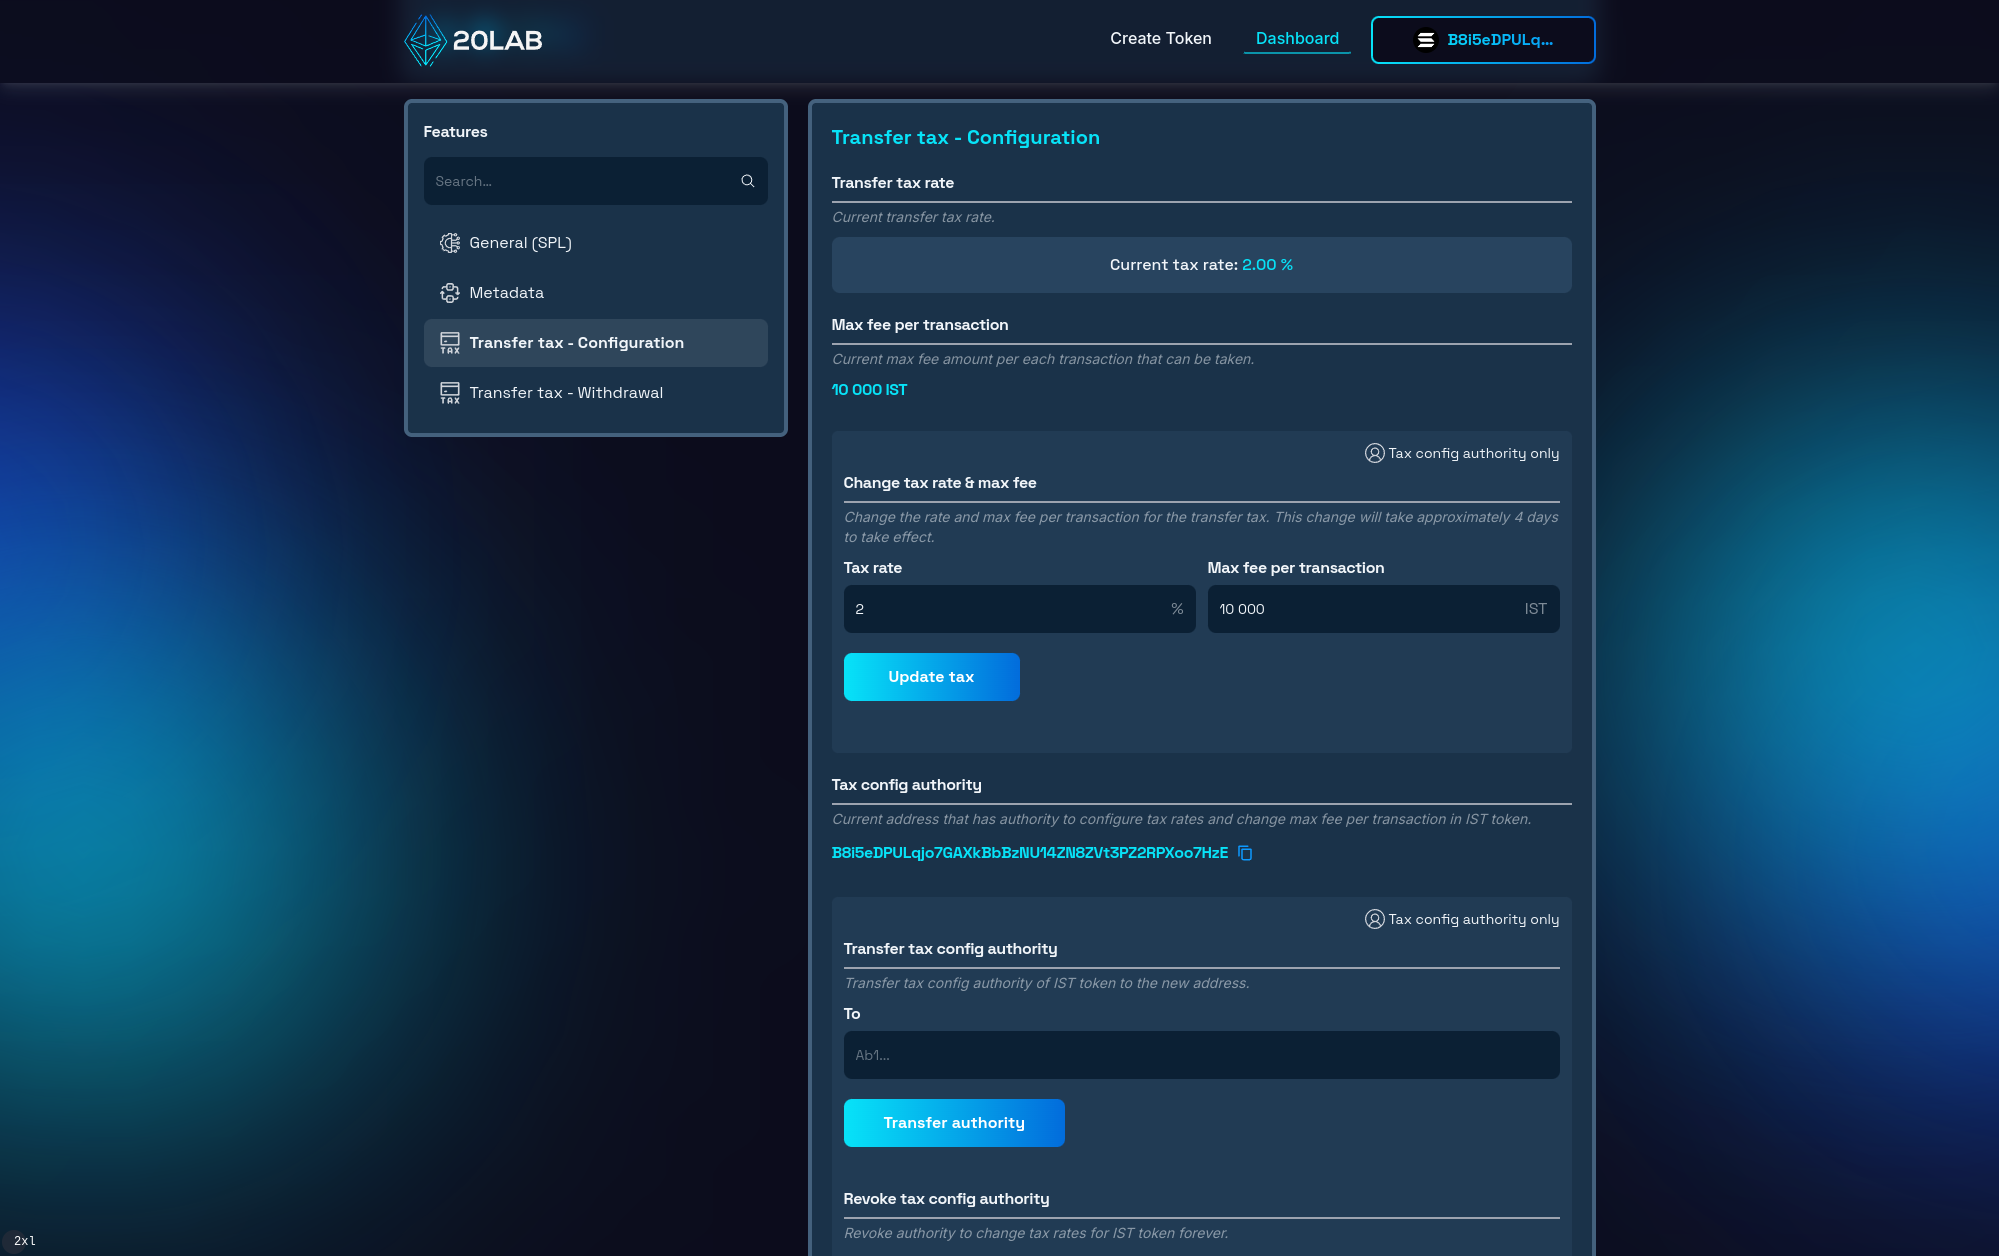
In the Transfer Tax - Configuration section, you'll find tools to:
- Check tax parameters: View the current (and upcoming) tax rate and maximum fee per transaction.
- Update tax parameters: Adjust the tax rate and maximum fee.
- Authority management: View, transfer, or permanently revoke config authority.
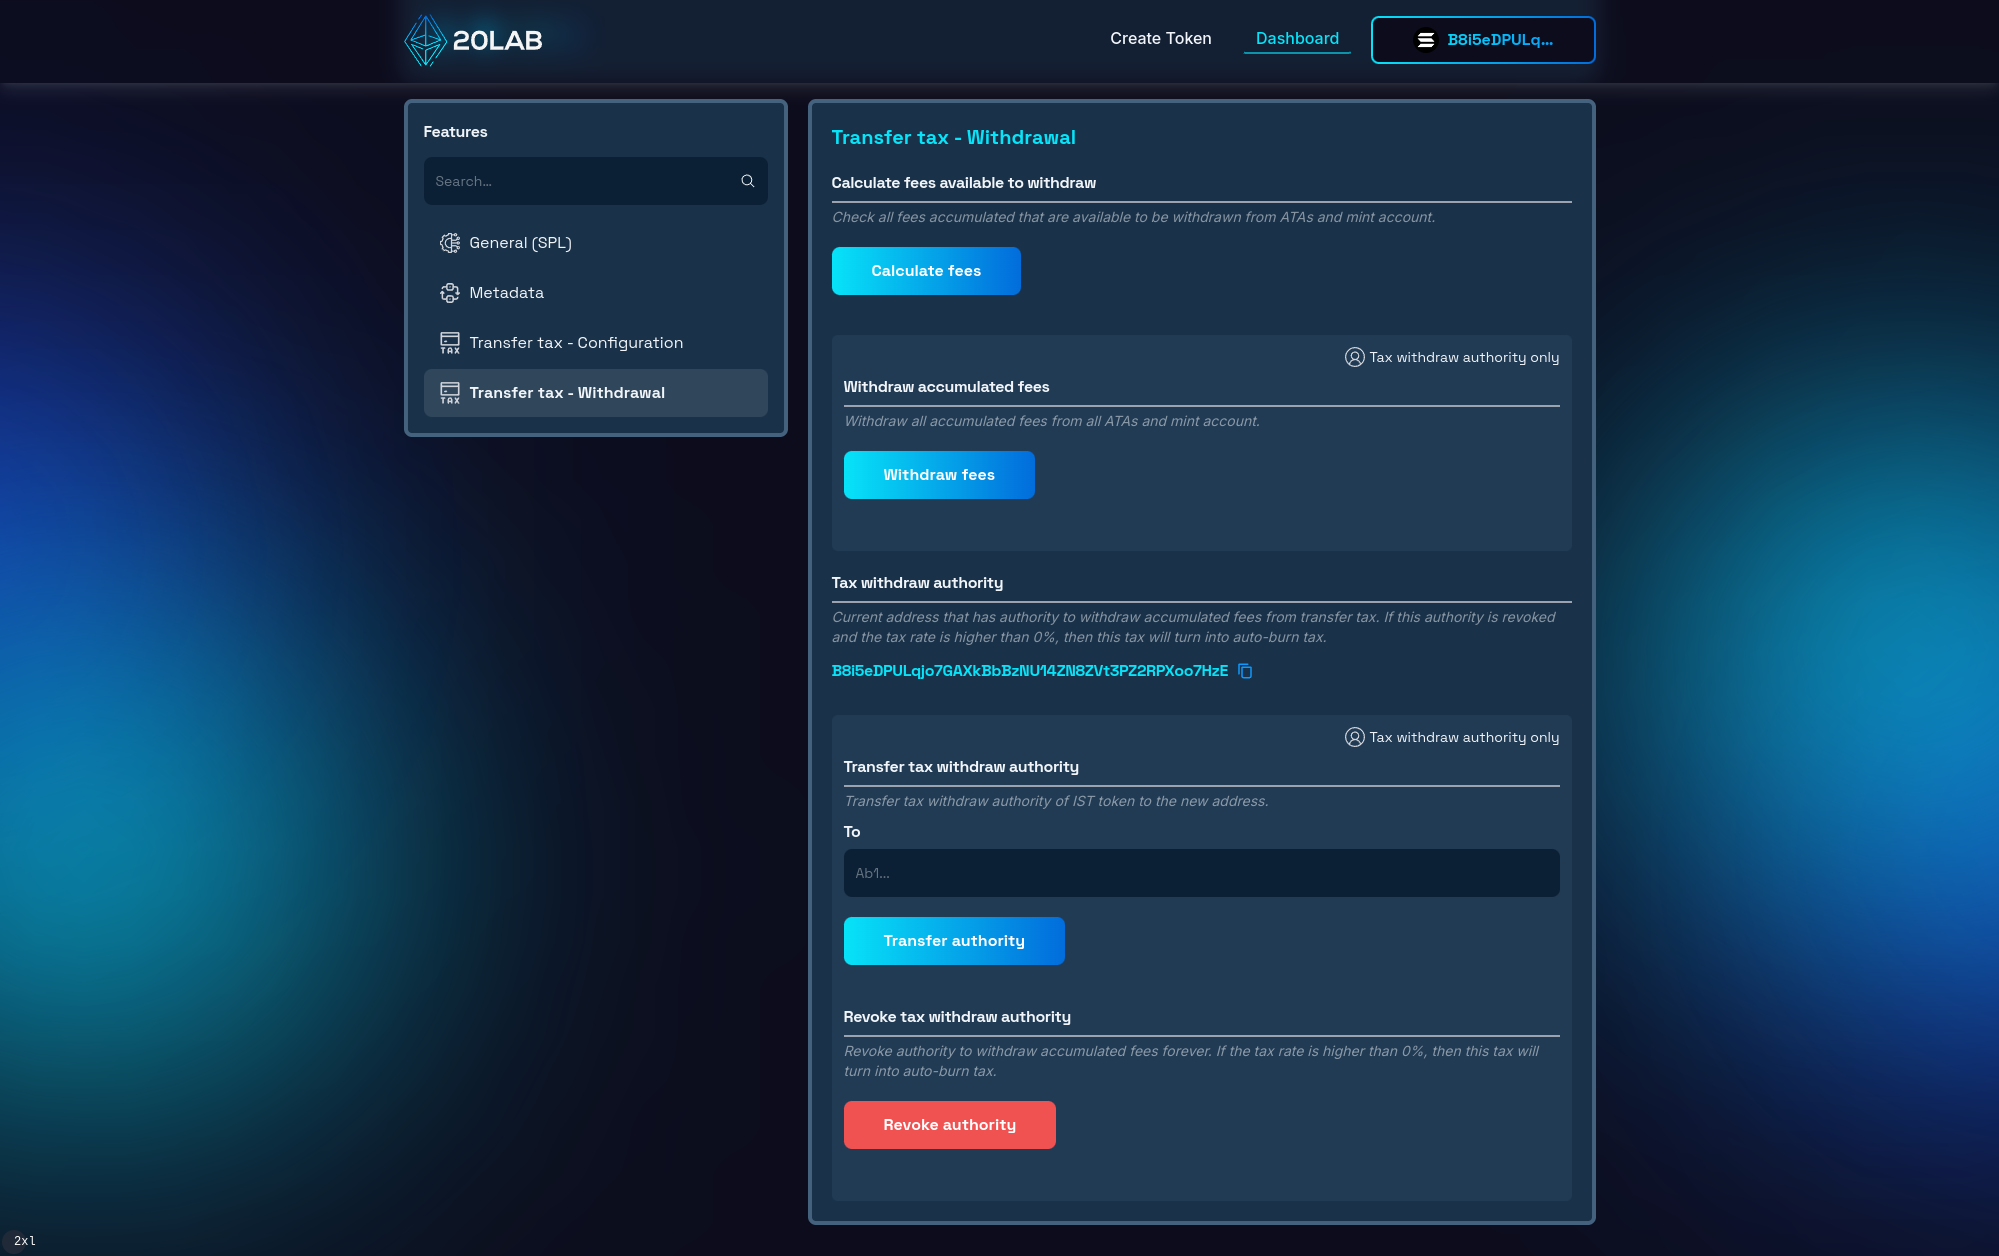
In the Transfer Tax - Withdrawal section, you can:
- Calculate and withdraw collected taxes: Collect accumulated taxes from token holders' accounts and mint account.
- Authority management: View, transfer, or permanently revoke withdraw authority.
Testing Transfer Tax in Action
Transferring Tokens
As a quick test, let's try sending tokens to see how the transfer tax works. To do this, follow these steps:
- Navigate to the "Transfer" function in the General (SPL) section of the dashboard.
- Enter the recipient's address and the amount of tokens you wish to send.
- Click the "Transfer" button and confirm the transaction with your wallet.
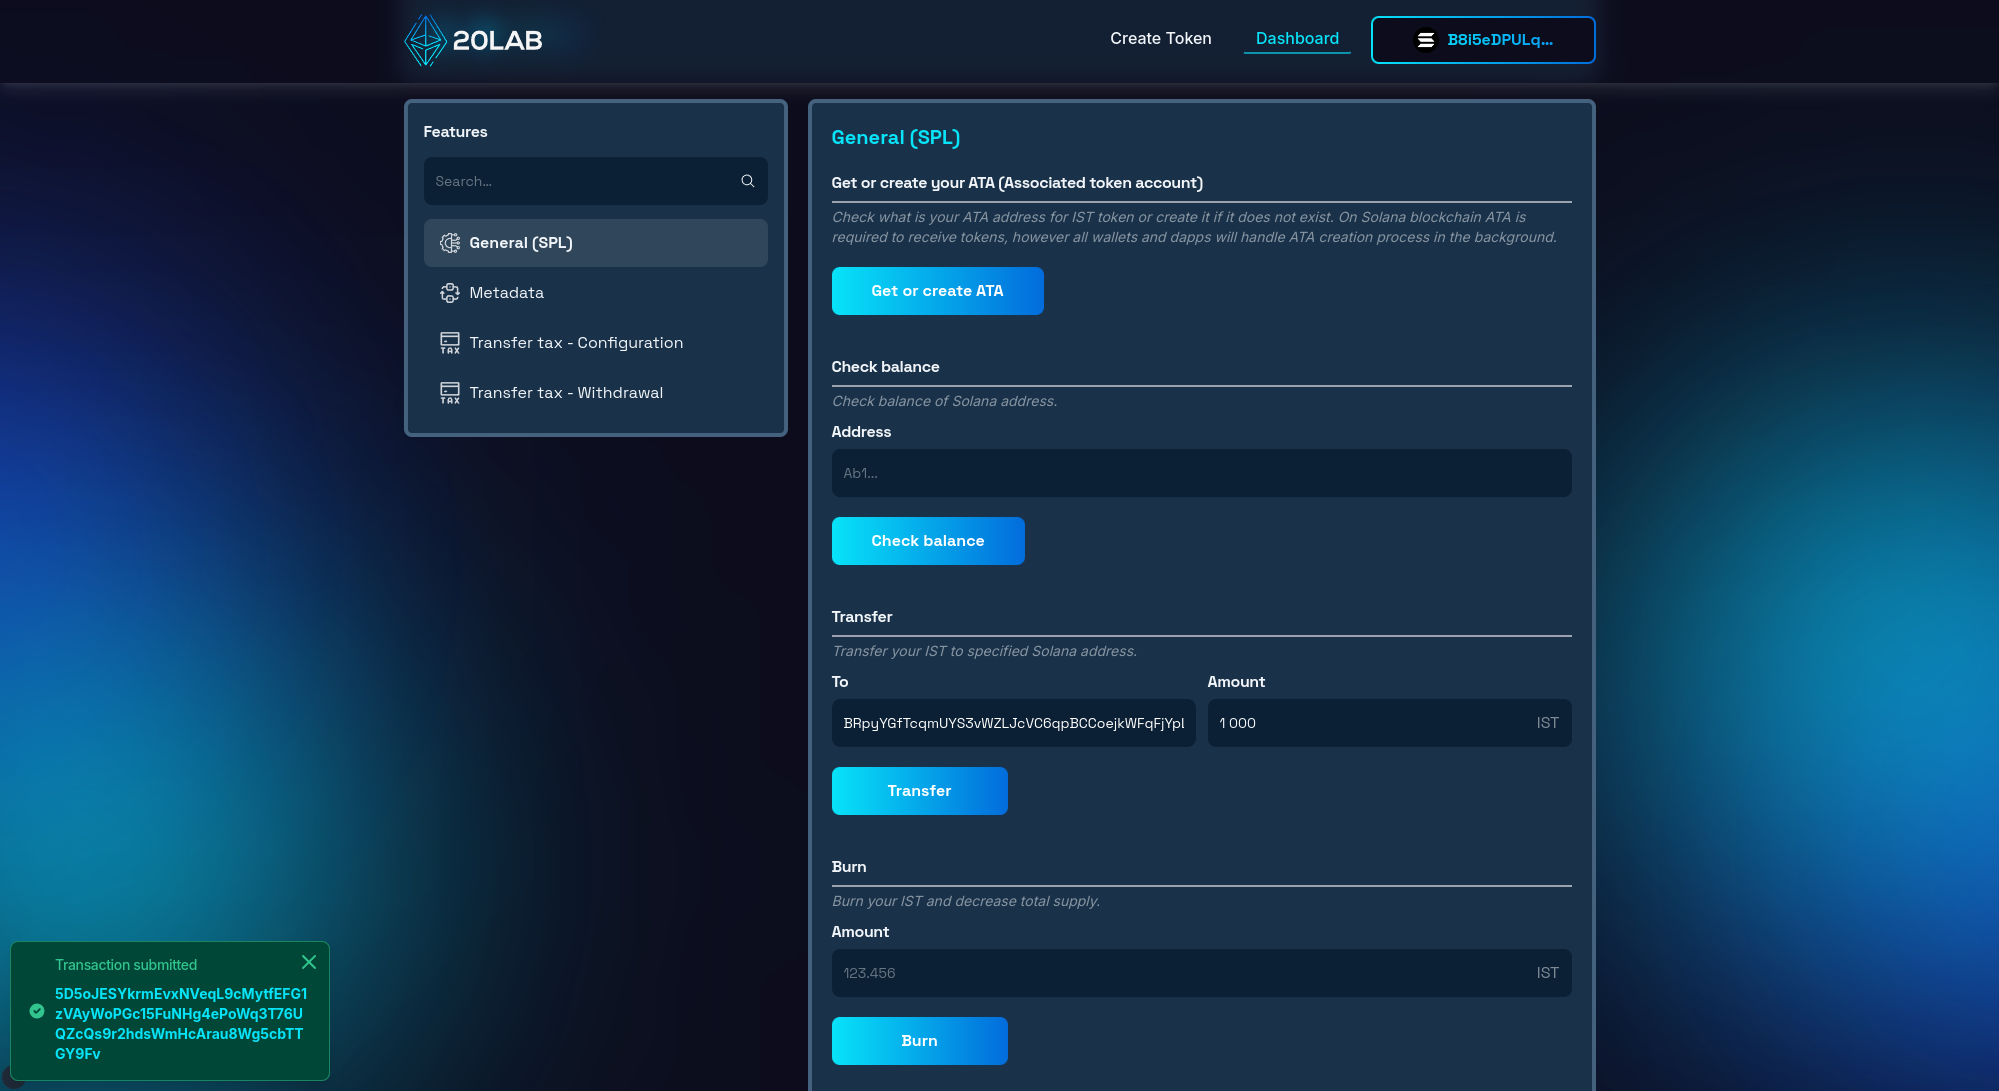
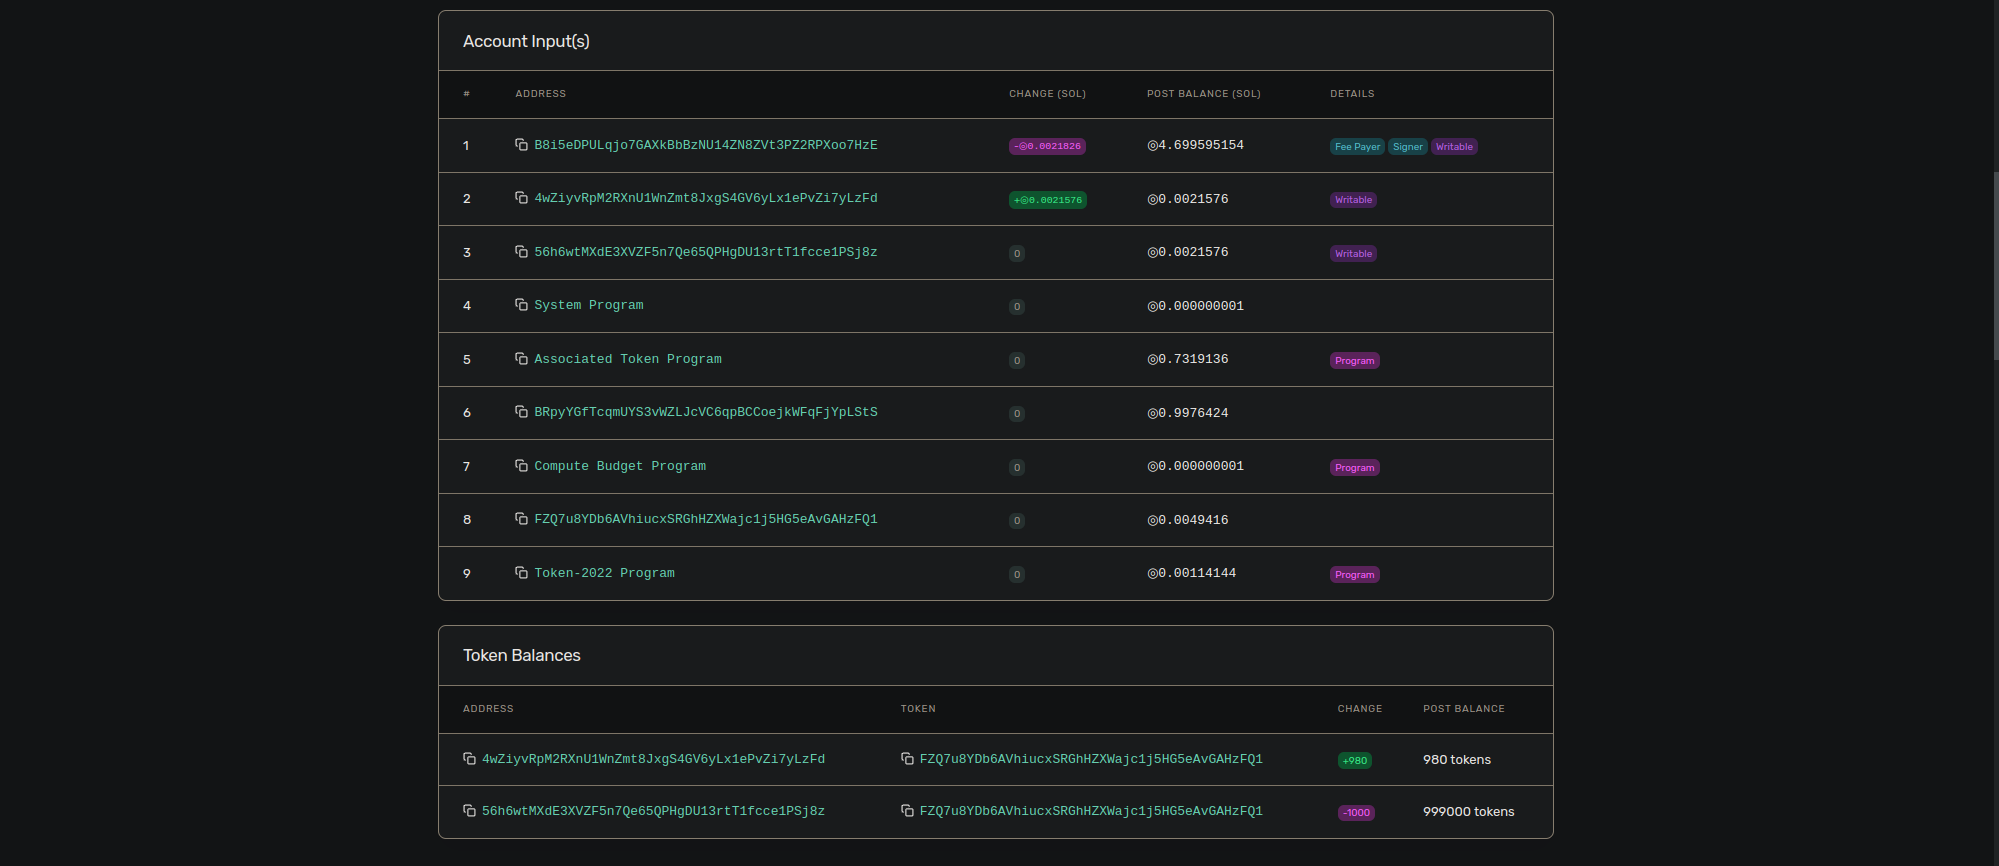
Let's open this transaction in Block Explorer to see the details. Scrolling down we can see the "Token balances" section. Here we can notice that one address is sending 1000 IST tokens and the other is receiving only 980 IST. This confirms that the 2% transfer tax is working correctly.
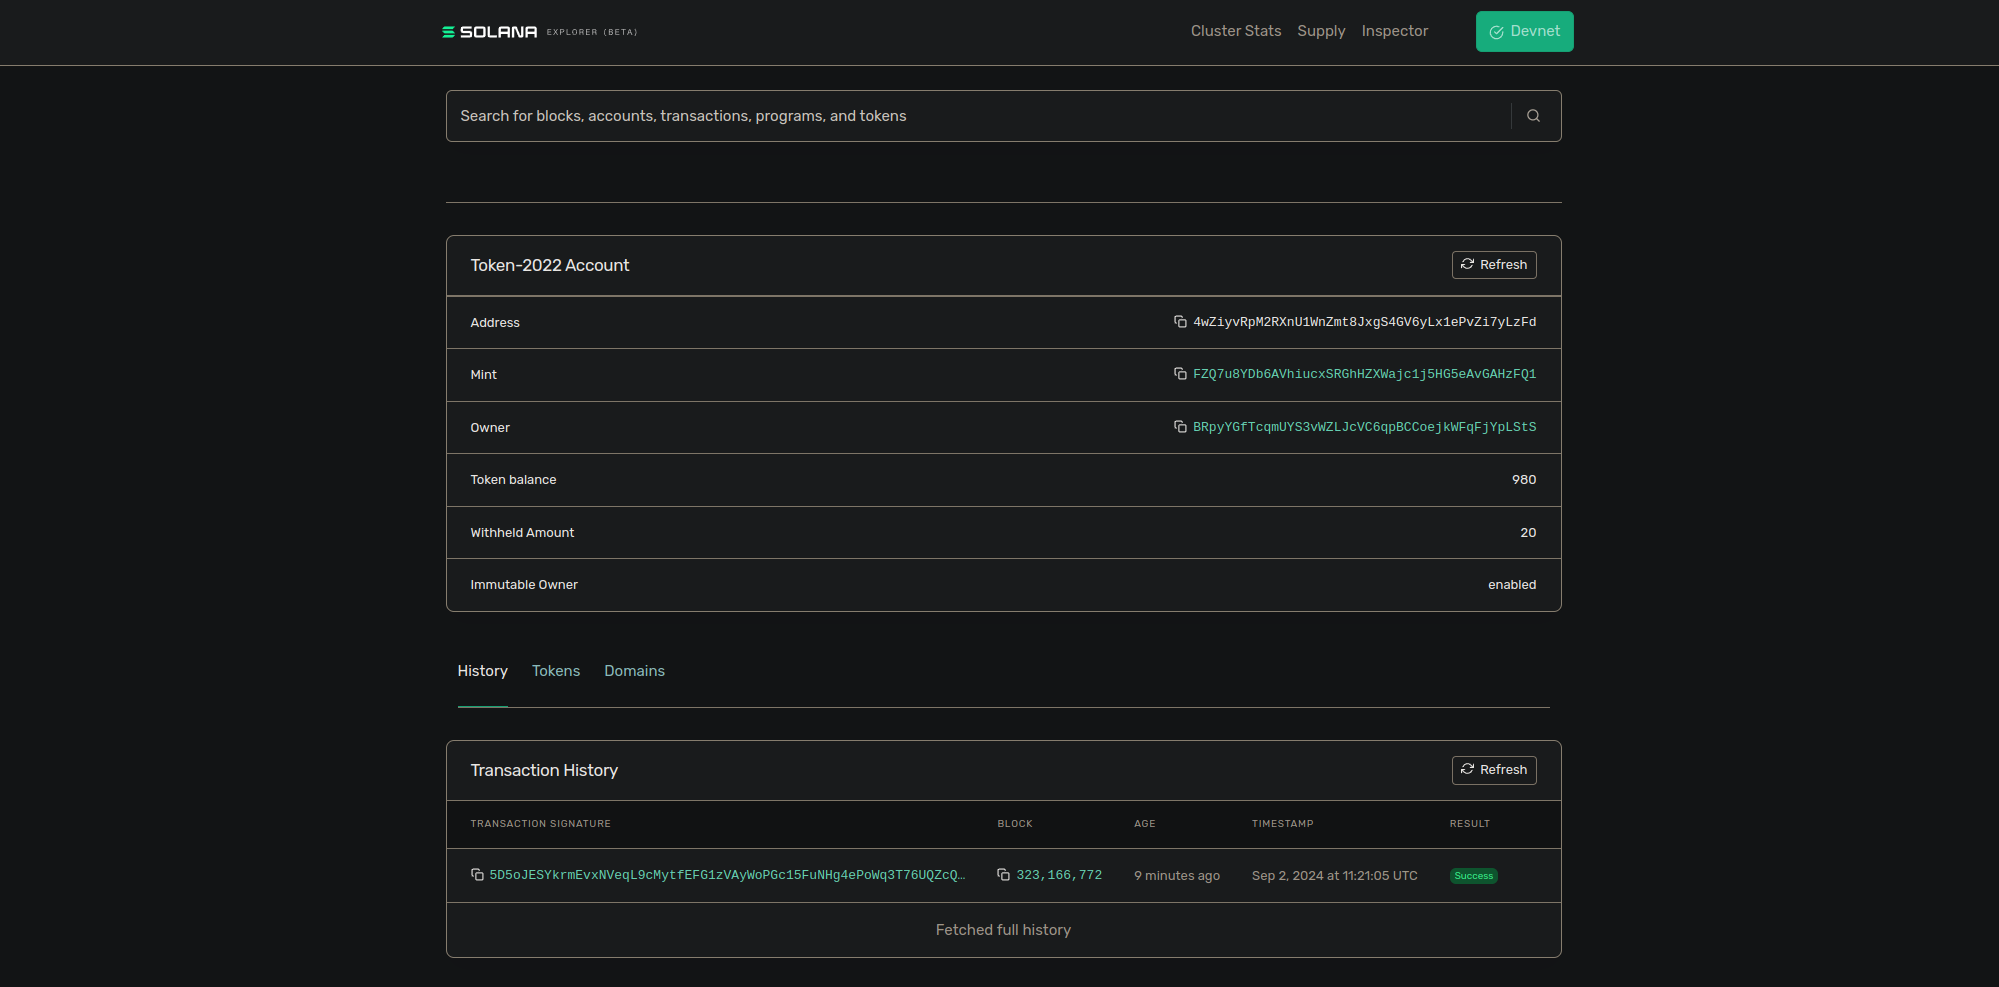
At this point, many might be wondering where exactly this fee is going? To check, let's click on the address that received 980 IST. In this block explorer page we can see the associated token account (ATA) for that particular address. Fee of 20 IST is now stored as a withheld amount and can be withdrawn anytime by wallet with withdraw authority.
As a next step, we can check how the maximum fee limit is enforced. To see this in action we need to make a huge transfer, in this case more than 500,000 IST to check the max possible fee of 10,000 IST.

Again, let's prepare a new token transfer, but this time with 700,000 IST. After confirming this transaction, let's check the Block Explorer page.
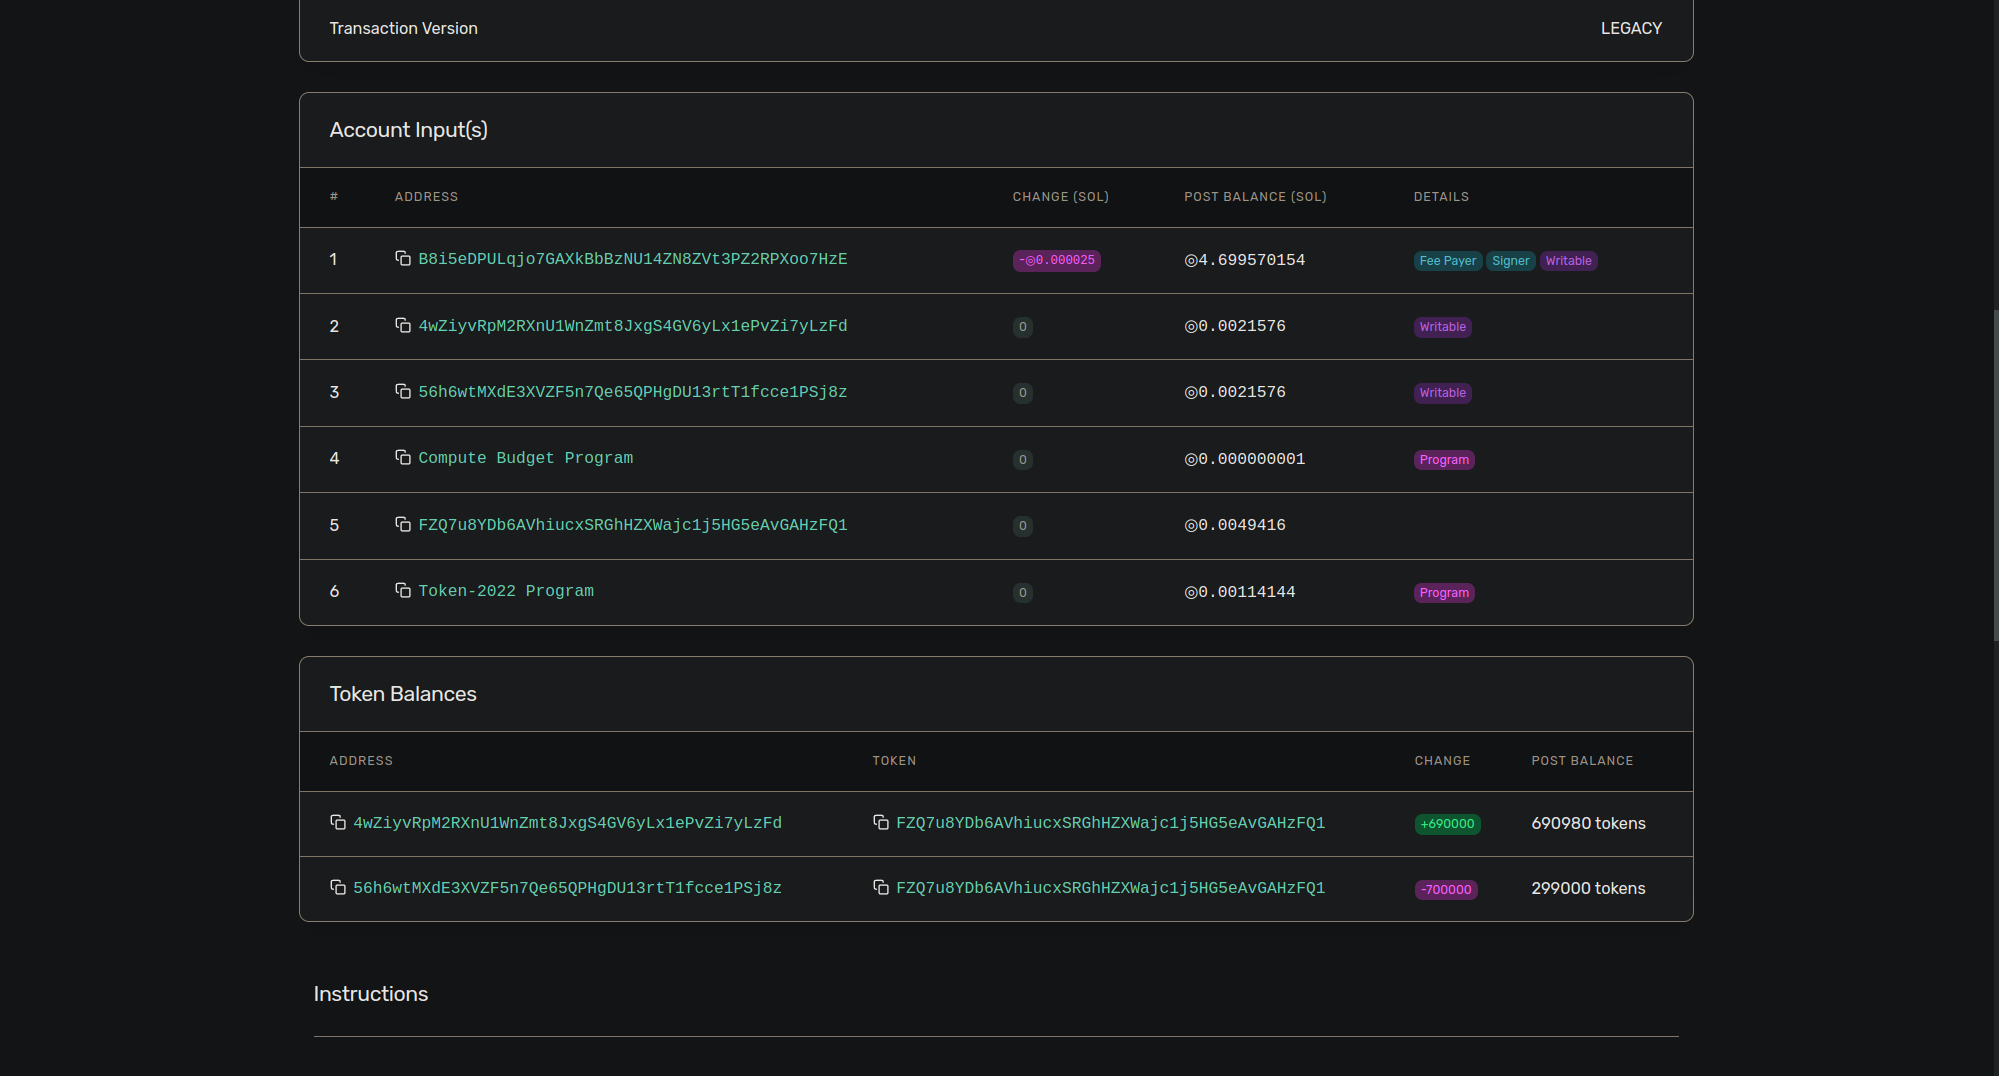
In the transaction receipt, we can see that 10,000 IST has been taken as tax, which shows that the maximum fee limit is working as predicted.
Withdrawing Withheld Fees
As the last part of this guide, let's calculate the fees ready for withdrawal and withdraw them to the predefined authority wallet. In the "Transfer Tax - Withdrawal" section, click on the "Calculate fees" button. This action will search all existing token accounts, so it may take more time if there are a lot of token holders. Once it is finished, we can see the result after sending the previous 2 transfers.
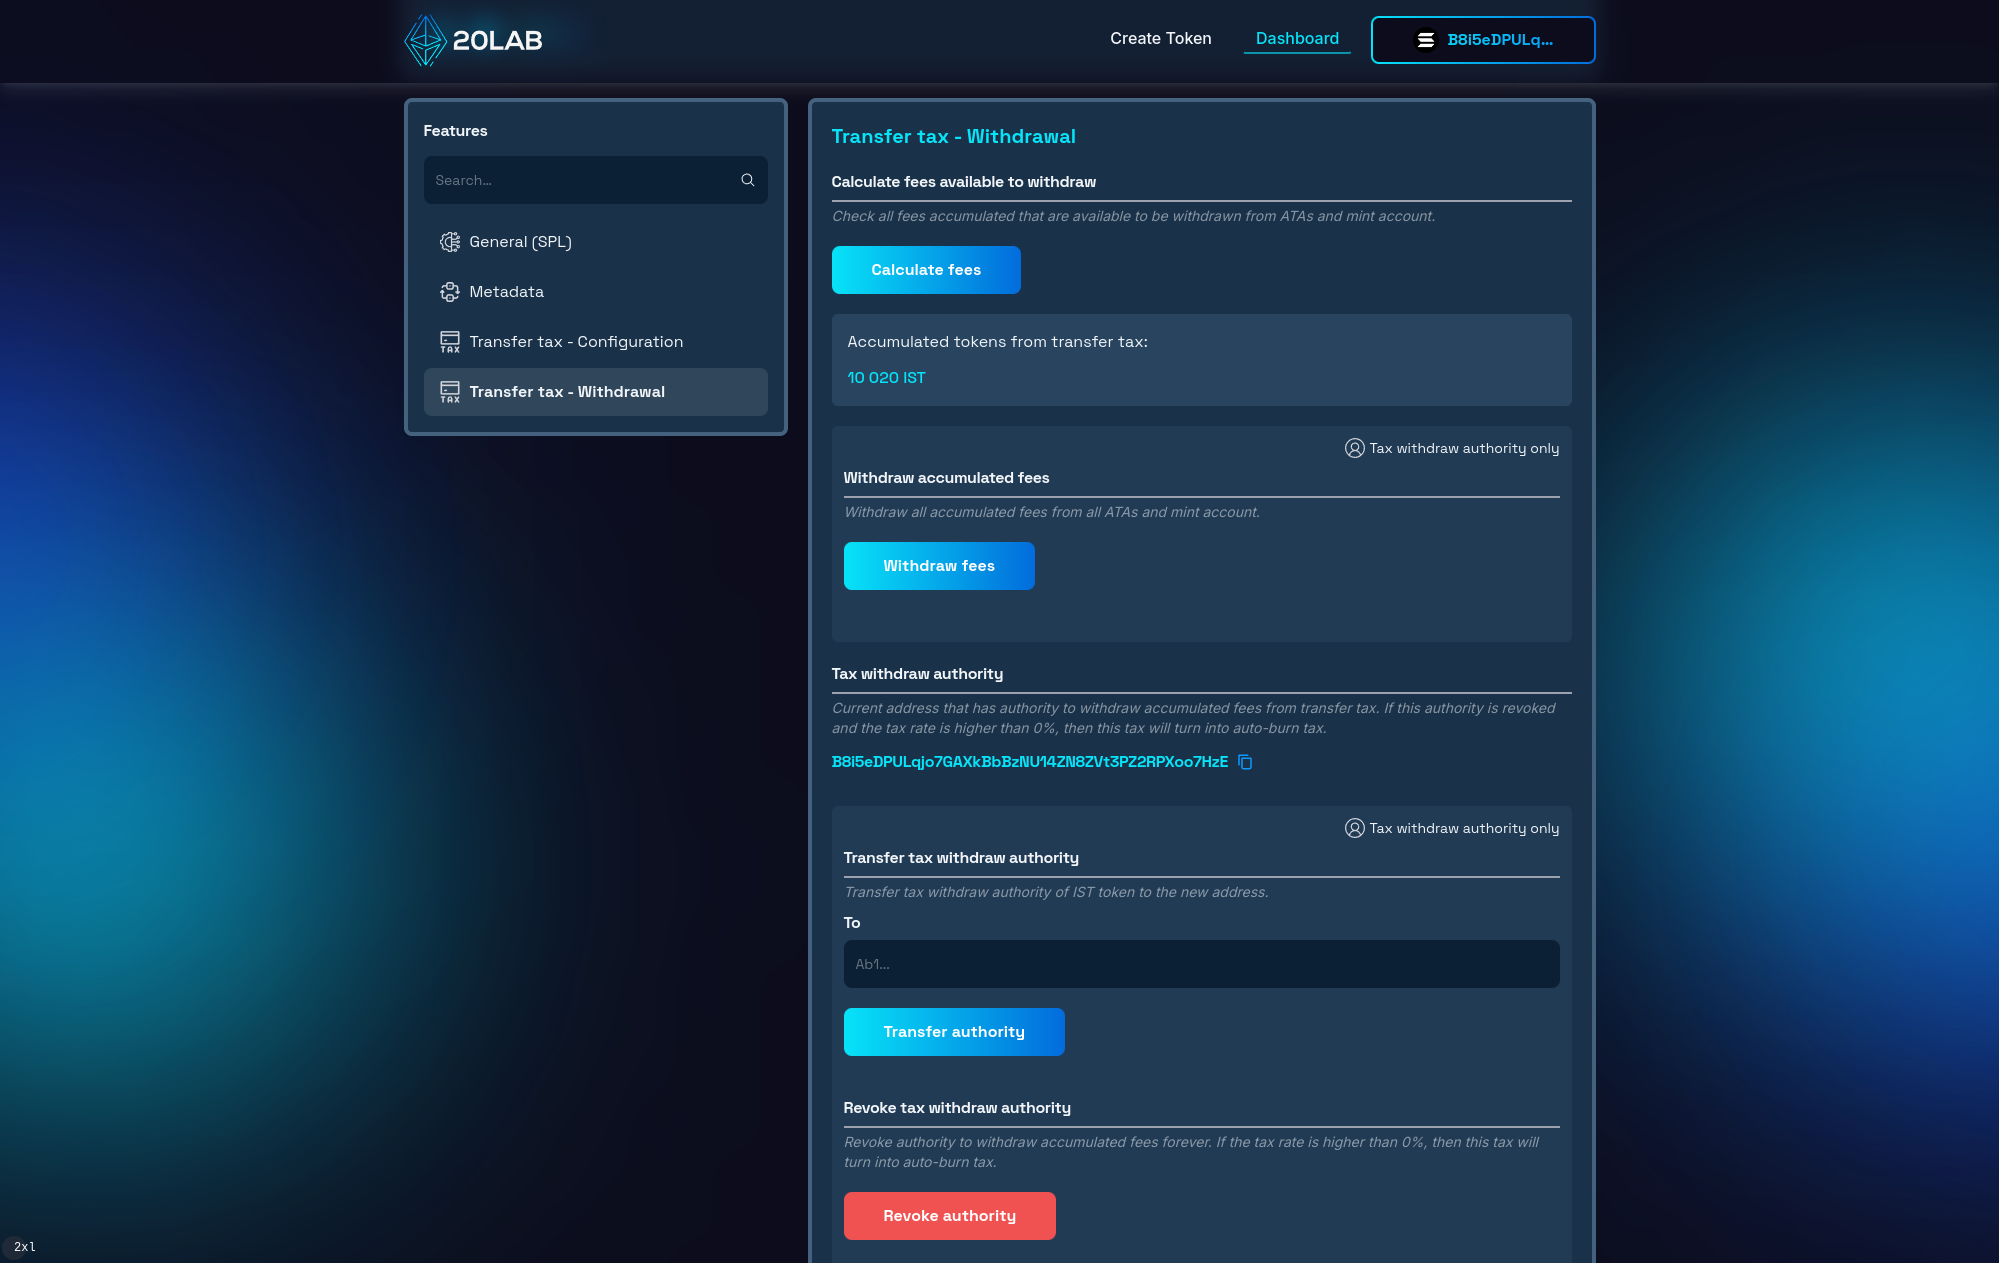
Now we can call the "Withdraw fees" function knowing exactly how many tokens we should receive. Many Solana wallets should show you this information in the confirmation window as well. Once this transaction is confirmed, the tokens will be immediately available on the withdraw authority wallet.
Conclusion
Creating a Solana token with a transfer tax opens up exciting possibilities for project economics and sustainable funding. In this guide, we've explored how to leverage 20lab's easy-to-use platform to bring this advanced tokenomics feature to life.
By implementing a transfer tax, you're not just creating a token - you're creating an ecosystem with built-in value capture. This feature can support ongoing development, community initiatives, or any other purpose that aligns with your project's goals. Also, by revoking withdraw authority, you can turn this tax into an auto-burn because no one will be able to withdraw it in the future.
With 20lab's platform, you have the power to create, deploy and manage sophisticated Solana tokens without deep technical expertise. Whether you're starting a new project or upgrading an existing one, the transfer tax feature provides a flexible way to implement innovative tokenomics.
If you have any questions about creating or managing your SPL token, don't hesitate to reach out to us via our Telegram channel.


