
Solana has become a powerhouse platform for developers and entrepreneurs. Known for its lightning-fast transaction speeds and low cost, Solana provides an ideal ecosystem for creating and deploying custom tokens. Among the various token types available, SPL (Solana Program Library) tokens stand out as a versatile and powerful option for project creators.
One particularly interesting feature of SPL tokens is their ability to be mintable. But what exactly does that mean and why is it important? Mintable tokens on Solana offer a dynamic approach to token supply management, allowing creators to maintain control over token issuance long after initial deployment.
In this ultimate guide, we'll take a deep dive into the process of creating mintable SPL tokens on Solana. Whether you're a seasoned blockchain developer or new to the space, you'll discover how to harness the full potential of Solana's token ecosystem. From understanding the basics of SPL tokens to mastering the intricacies of the minting process, this comprehensive tutorial will give you the knowledge and tools you need to bring your token project to life.
NOTE: If you already have an SPL token created, check out our guide on using the Solana Mint tool to easily mint additional tokens to your existing token.
What are Mintable Tokens?
Mintable tokens are digital assets that allow for the creation (or "minting") of new tokens after the initial token creation event. This is in contrast to fixed supply tokens, where the entire supply of tokens is created at launch and cannot be increased thereafter.
In the context of Solana and SPL tokens, mintability is a feature that can be enabled or disabled during token creation. When enabled, it allows the token's minting authority to create new tokens at will, increasing the total supply over time. Also, when minting power is no longer needed, the mint authority can be revoked at any time to prevent further tokens from being minted in the future.
How to Create Your Mintable Token on Solana
Creating a mintable SPL token on Solana has never been easier, thanks to 20lab's user-friendly SPL token generator. This powerful tool simplifies the process, allowing you to launch your own mintable token without extensive technical knowledge. Let's walk through the steps to create your mintable SPL token using 20lab.
Step 1: Choose Token Type and Connect Wallet
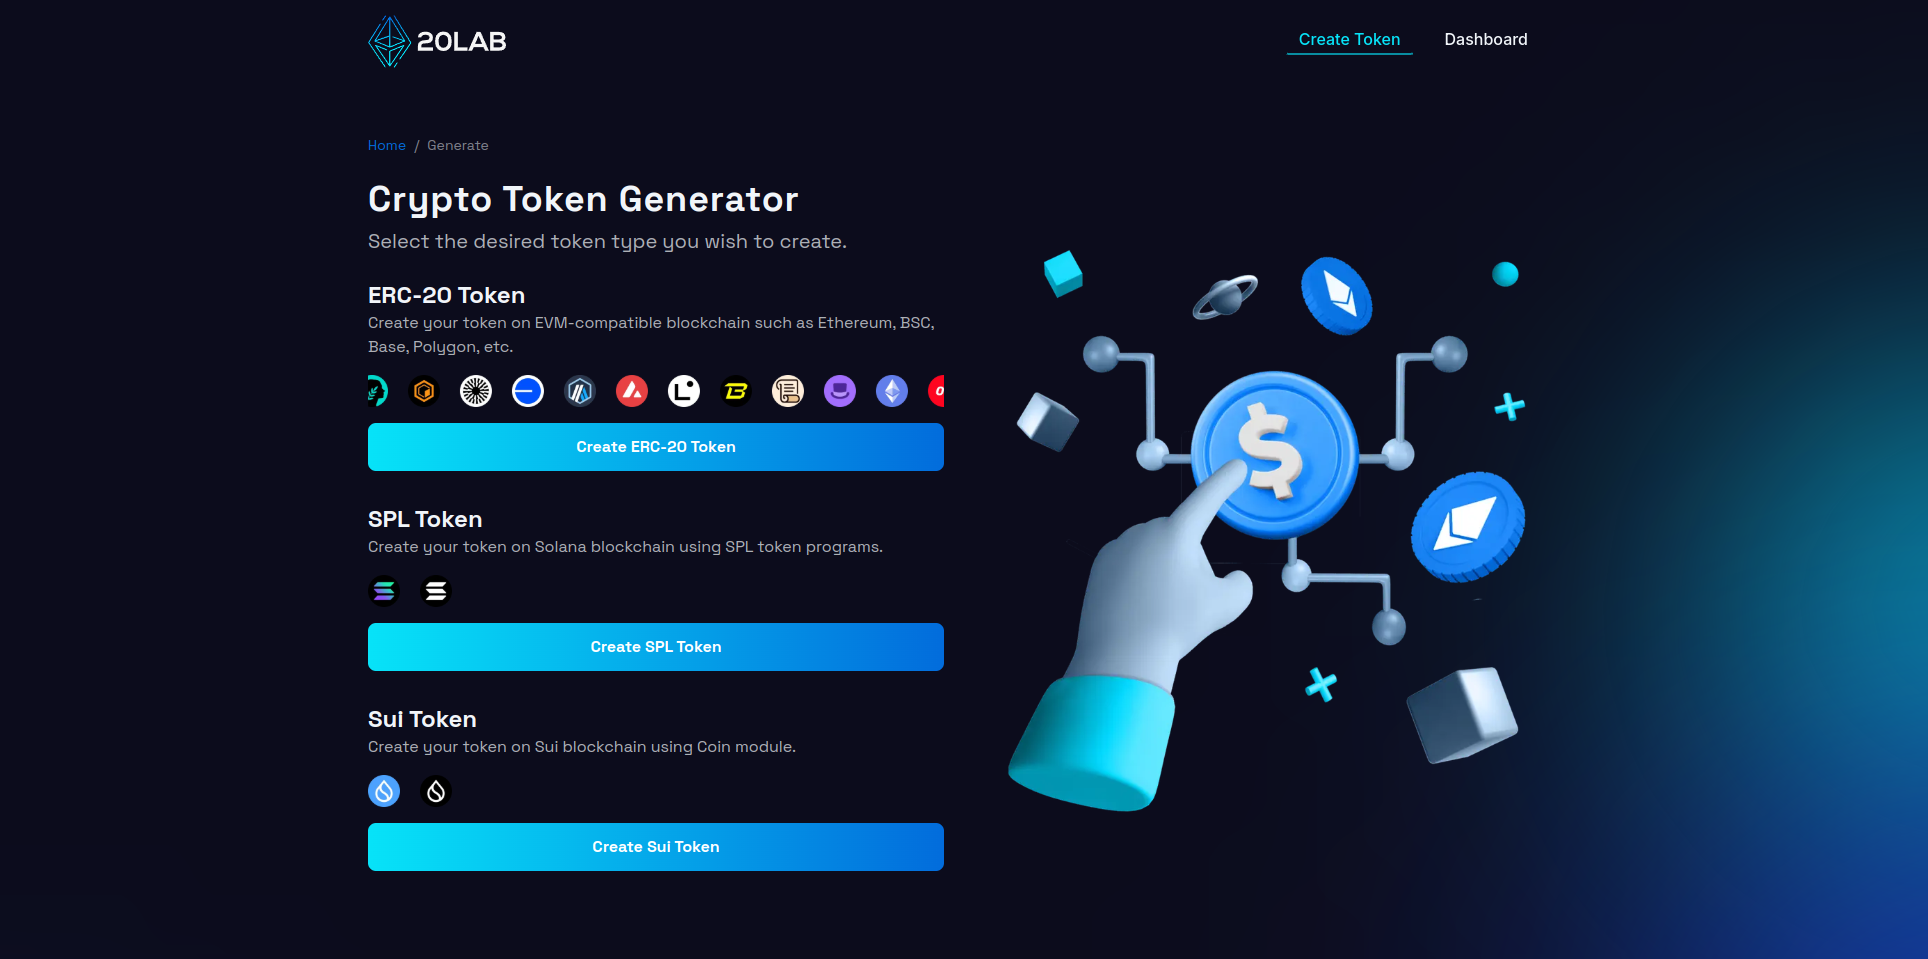
To begin creating your mintable SPL token, first visit 20lab.app in your web browser. Open the app and navigate to the "Create SPL Token" option, which will take you to the token generator page.
Once there, you'll need to connect your Solana wallet. Click on the "Connect Wallet" button and select your preferred wallet from the options provided, which include popular choices like Phantom, Solflare, or Backpack. Follow your wallet's instructions to authorize the connection. Once you've successfully connected, you'll see your wallet address in the top right corner of the page.
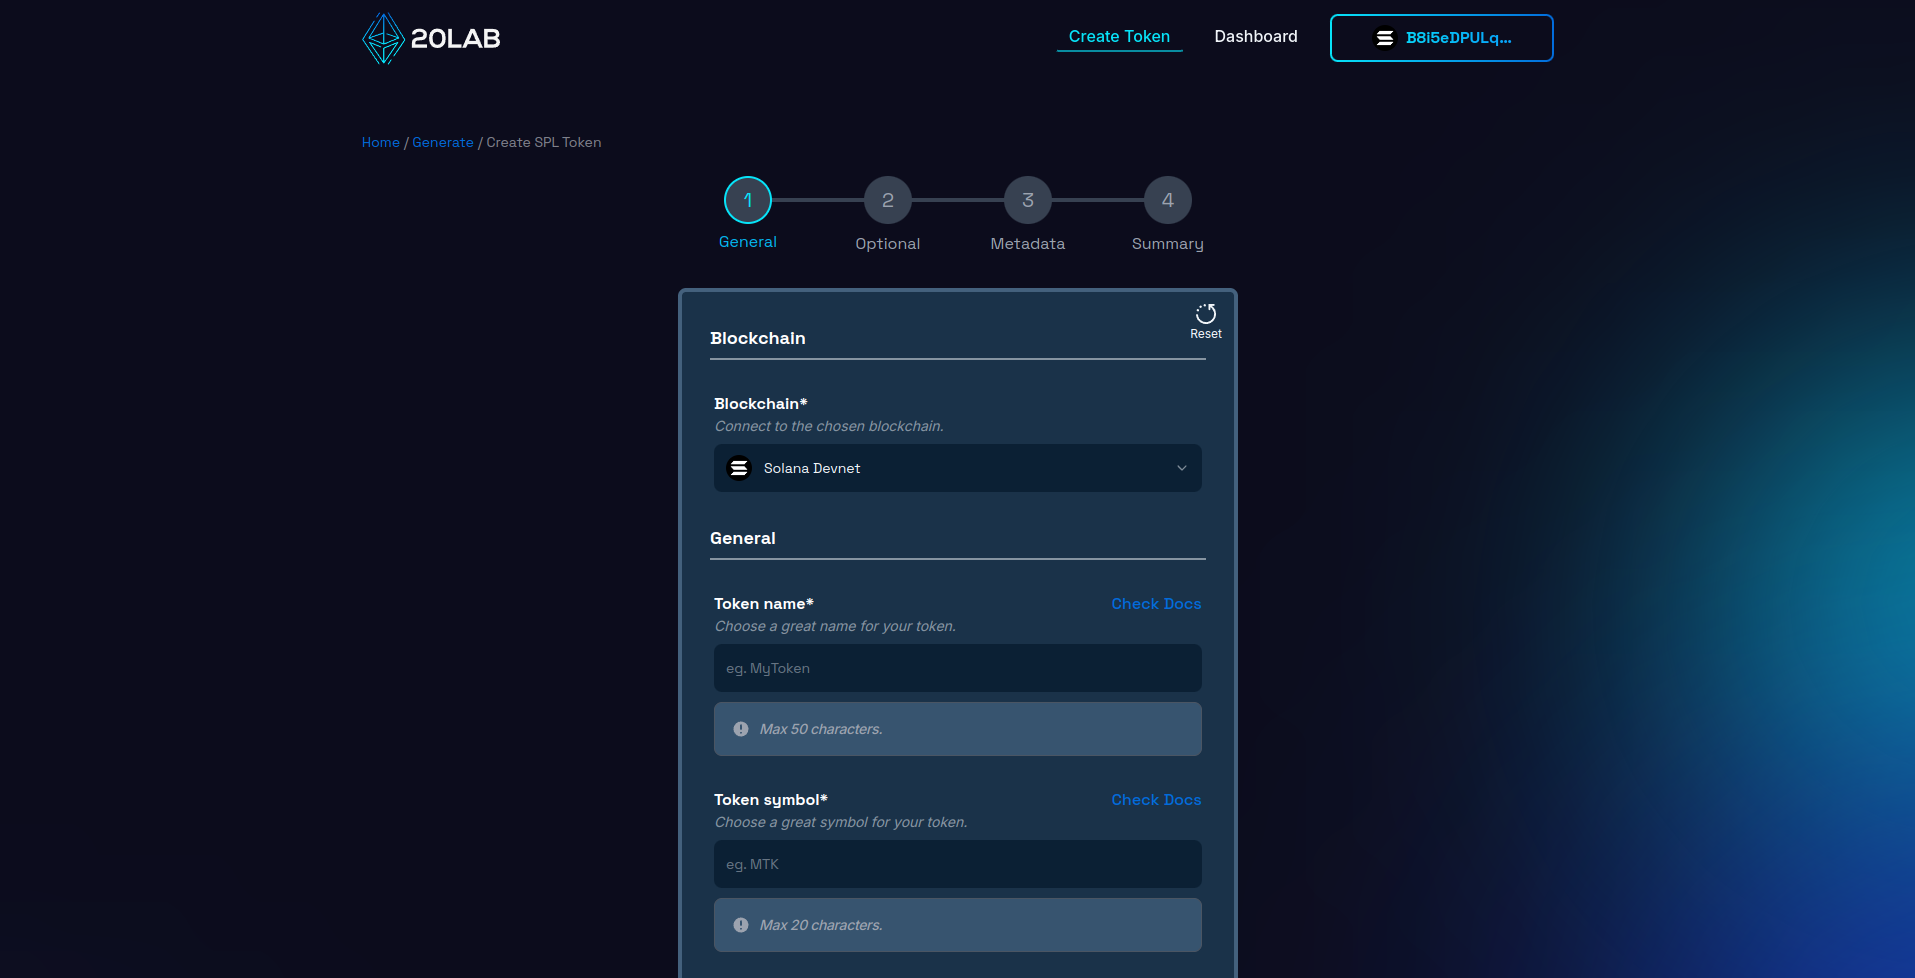
Next, make sure you're connected to the appropriate Solana network. You can choose between Mainnet, Testnet or Devnet, depending on the current stage of your project and your needs. Use Mainnet to launch your actual token, or Testnet/Devnet for testing and development purposes. Make sure that the blockchain in your wallet matches the one selected on the 20lab interface, as at the time of writing, many Solana wallets don't support this type of synchronization.
Step 2: Add General Token Information
Configuring your mintable SPL (Solana) token is a critical step in defining its core attributes. Start by entering a unique, descriptive name for your token and creating a short, memorable symbol. It's a good idea to research existing Solana tokens to ensure your choice is unique within the ecosystem.
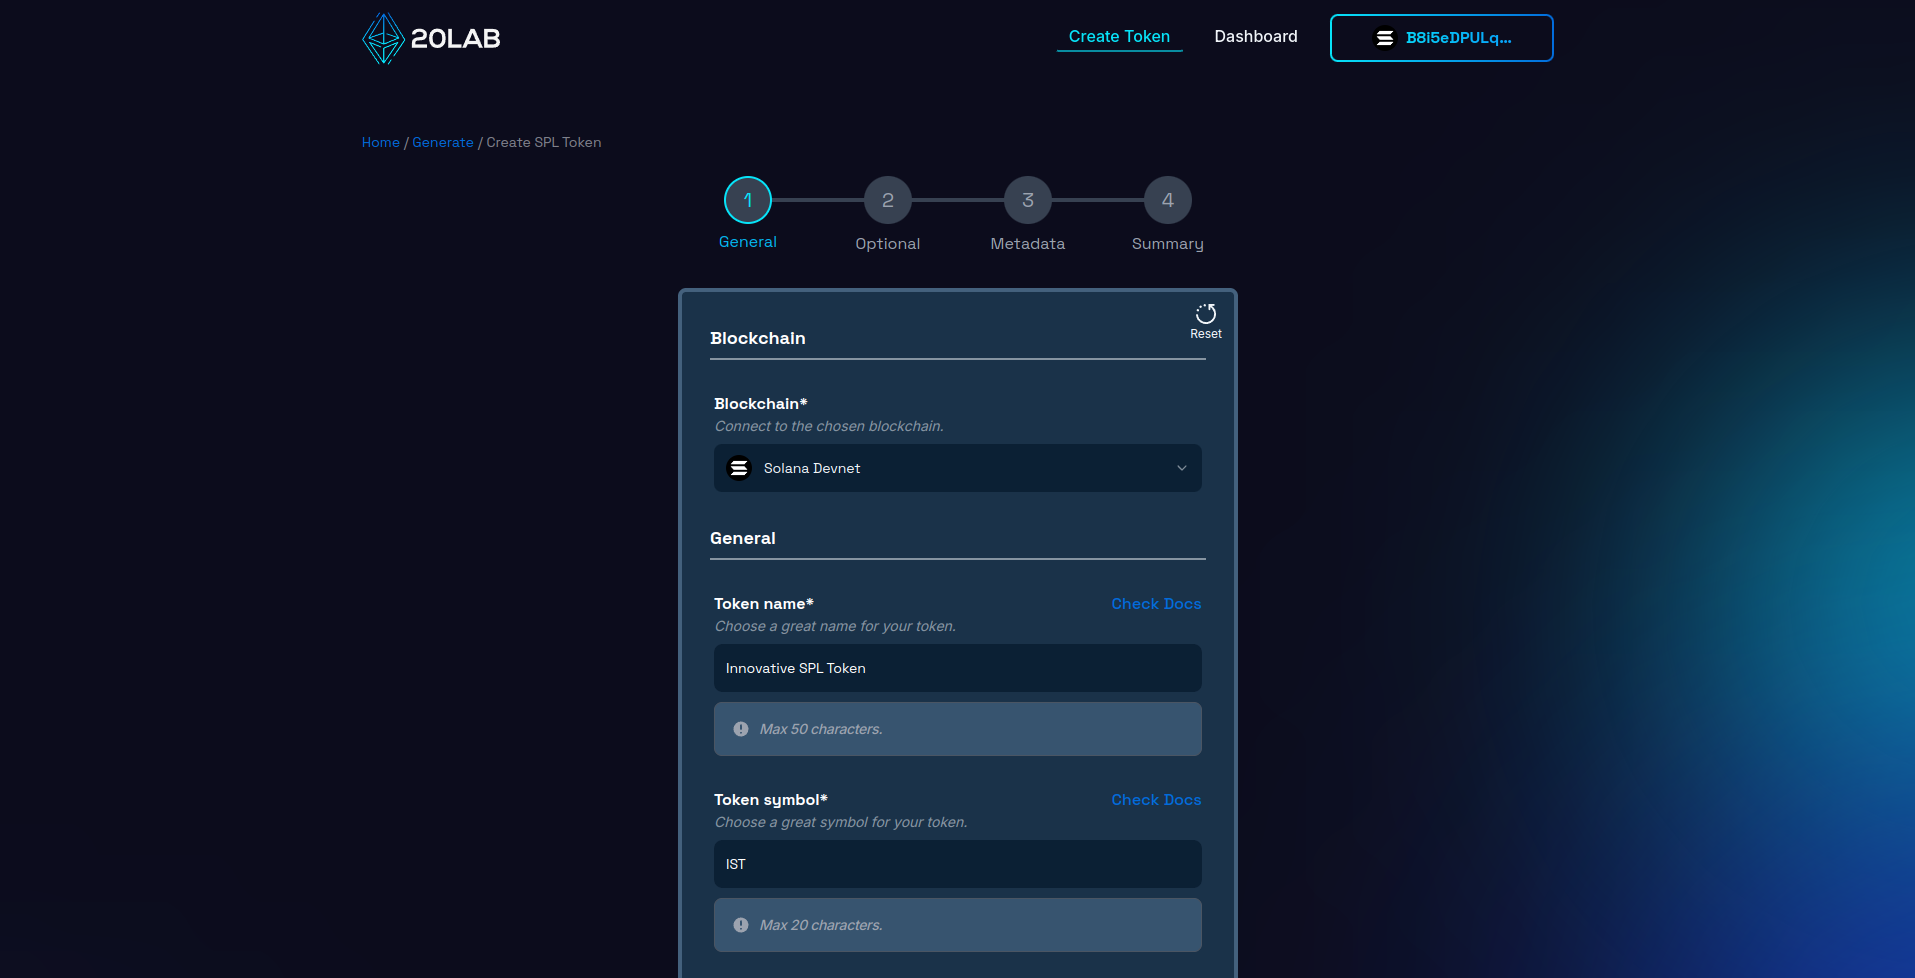
Next, determine the initial supply of your token. For mintable tokens, this doesn't have to be your final total supply, as you can increase it later. Consider starting with a smaller supply, such as 1,000,000 tokens, which you can expand as your project grows.
For decimals, SPL tokens typically use 6 or 9 decimal places, which is the divisibility of SOL. This allows for micro-transactions and precise token allocation, essential for various use cases within the Solana ecosystem. Since Solana uses a smaller variable size to store balance data, choosing a smaller decimal also allows for a larger total supply, whether important at launch or later when performing minting operations.
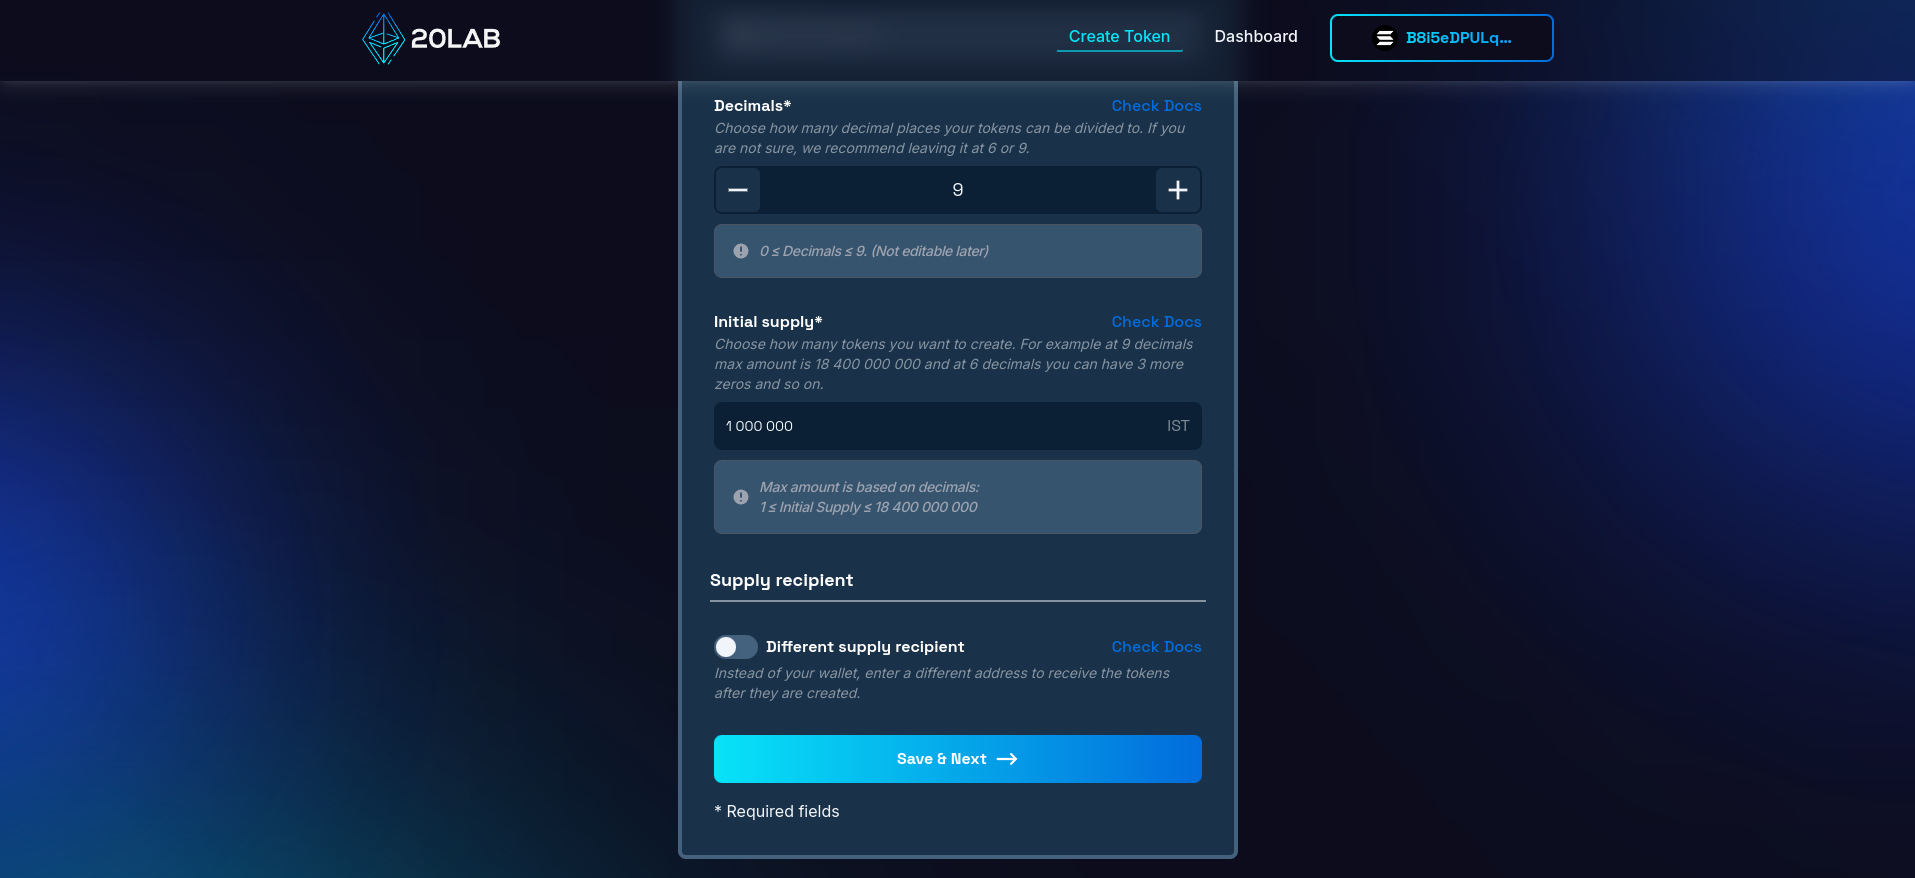
An important decision is choosing which wallet will receive the initial supply. This supply recipient will hold all tokens at launch, but will not have any other permissions unless directly assigned later. You can use your personal wallet or a dedicated project wallet.
Step 3: Enable Mintable Option
Setting up the mintable functionality is a critical step in creating your SPL token on 20lab. This feature determines whether new tokens can be created after the initial supply has been minted, and who has the authority to do so.
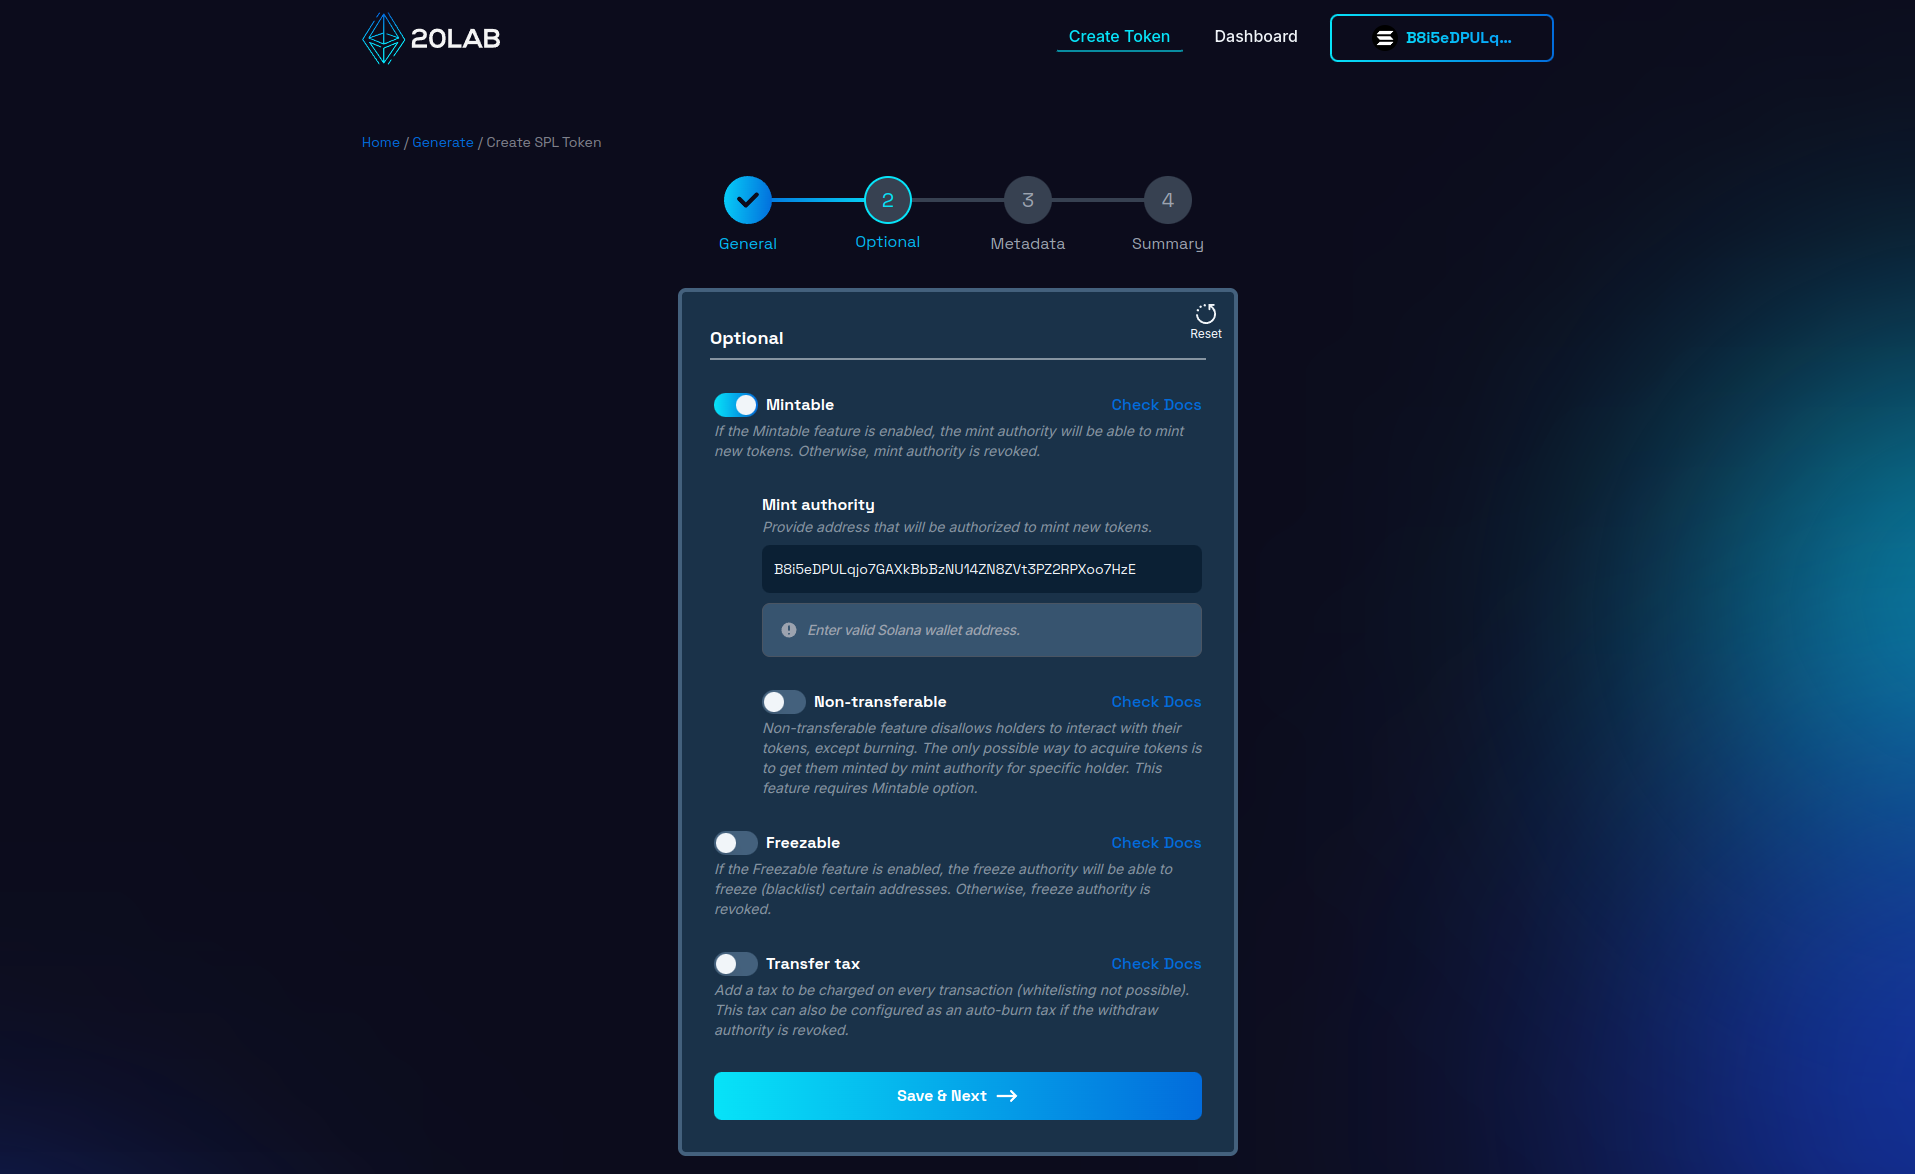
On the 20lab token creation form, go to the next section. There you'll find an option called "Mintable". This is a key setting for creating a flexible supply token:
- If you enable the "Mintable" option, you're creating a token that can have its supply increased in the future and will have minting authority assigned to a specific wallet.
- If you leave this option unchecked, your token will have a fixed supply after initial creation and the minting authority will be automatically revoked in the creation transaction.
Remember, the ability to mint new tokens is a powerful feature that should be used responsibly. Excessive minting can lead to inflation and potentially decrease the value of existing tokens. It's important to have a clear minting strategy and communicate it transparently to your token holders.
Step 4: Review and Deploy
As you reach the final step of creating your mintable SPL token, take a moment to carefully review all of the settings on the "Summary" page. This crucial step serves as your final checkpoint before deployment. Review each detail to ensure accuracy and alignment with your project goals.
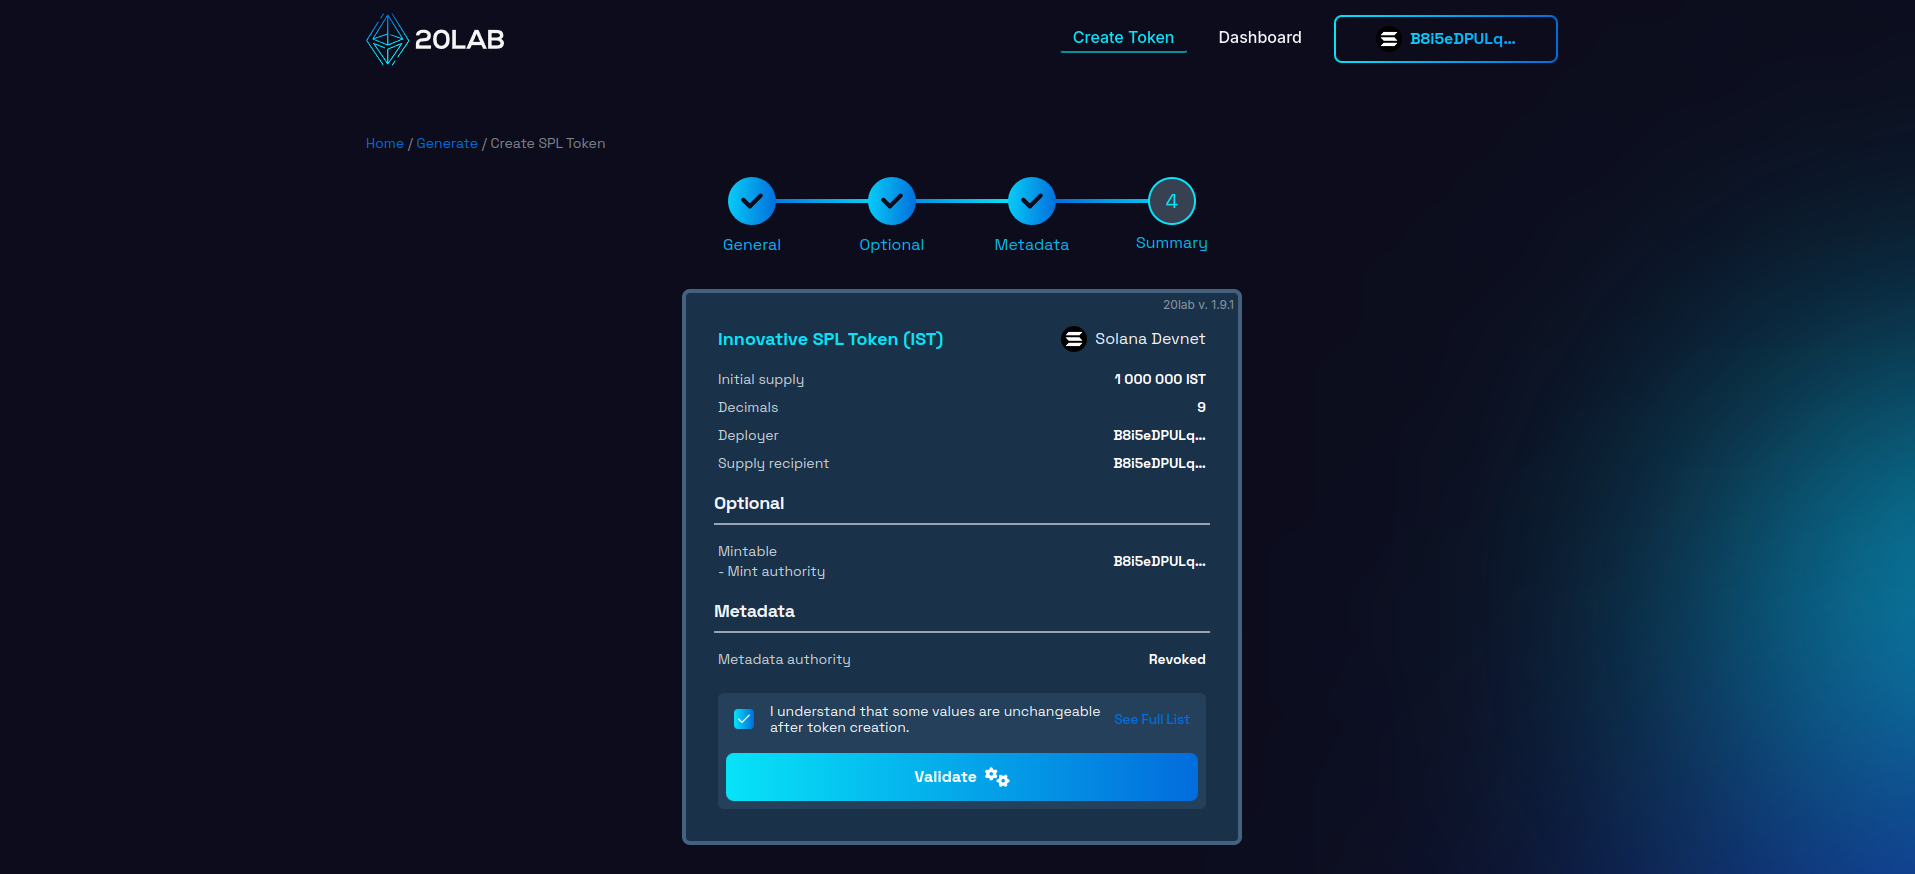
After completing a thorough review, click the "Validate" button to begin deployment. This action triggers a final validation, an important safeguard that can identify any technical issues before your token is committed to the Solana blockchain.
If everything is in order, you're ready to launch your token. Confirm the action and your connected Solana wallet will prompt you to approve the transaction. This approval is the final step in creating your mintable SPL token on the Solana blockchain.
Remember, once created, many of these parameters cannot be changed. Your careful attention during this review process will ensure that your token enters the Solana ecosystem exactly as you intended.
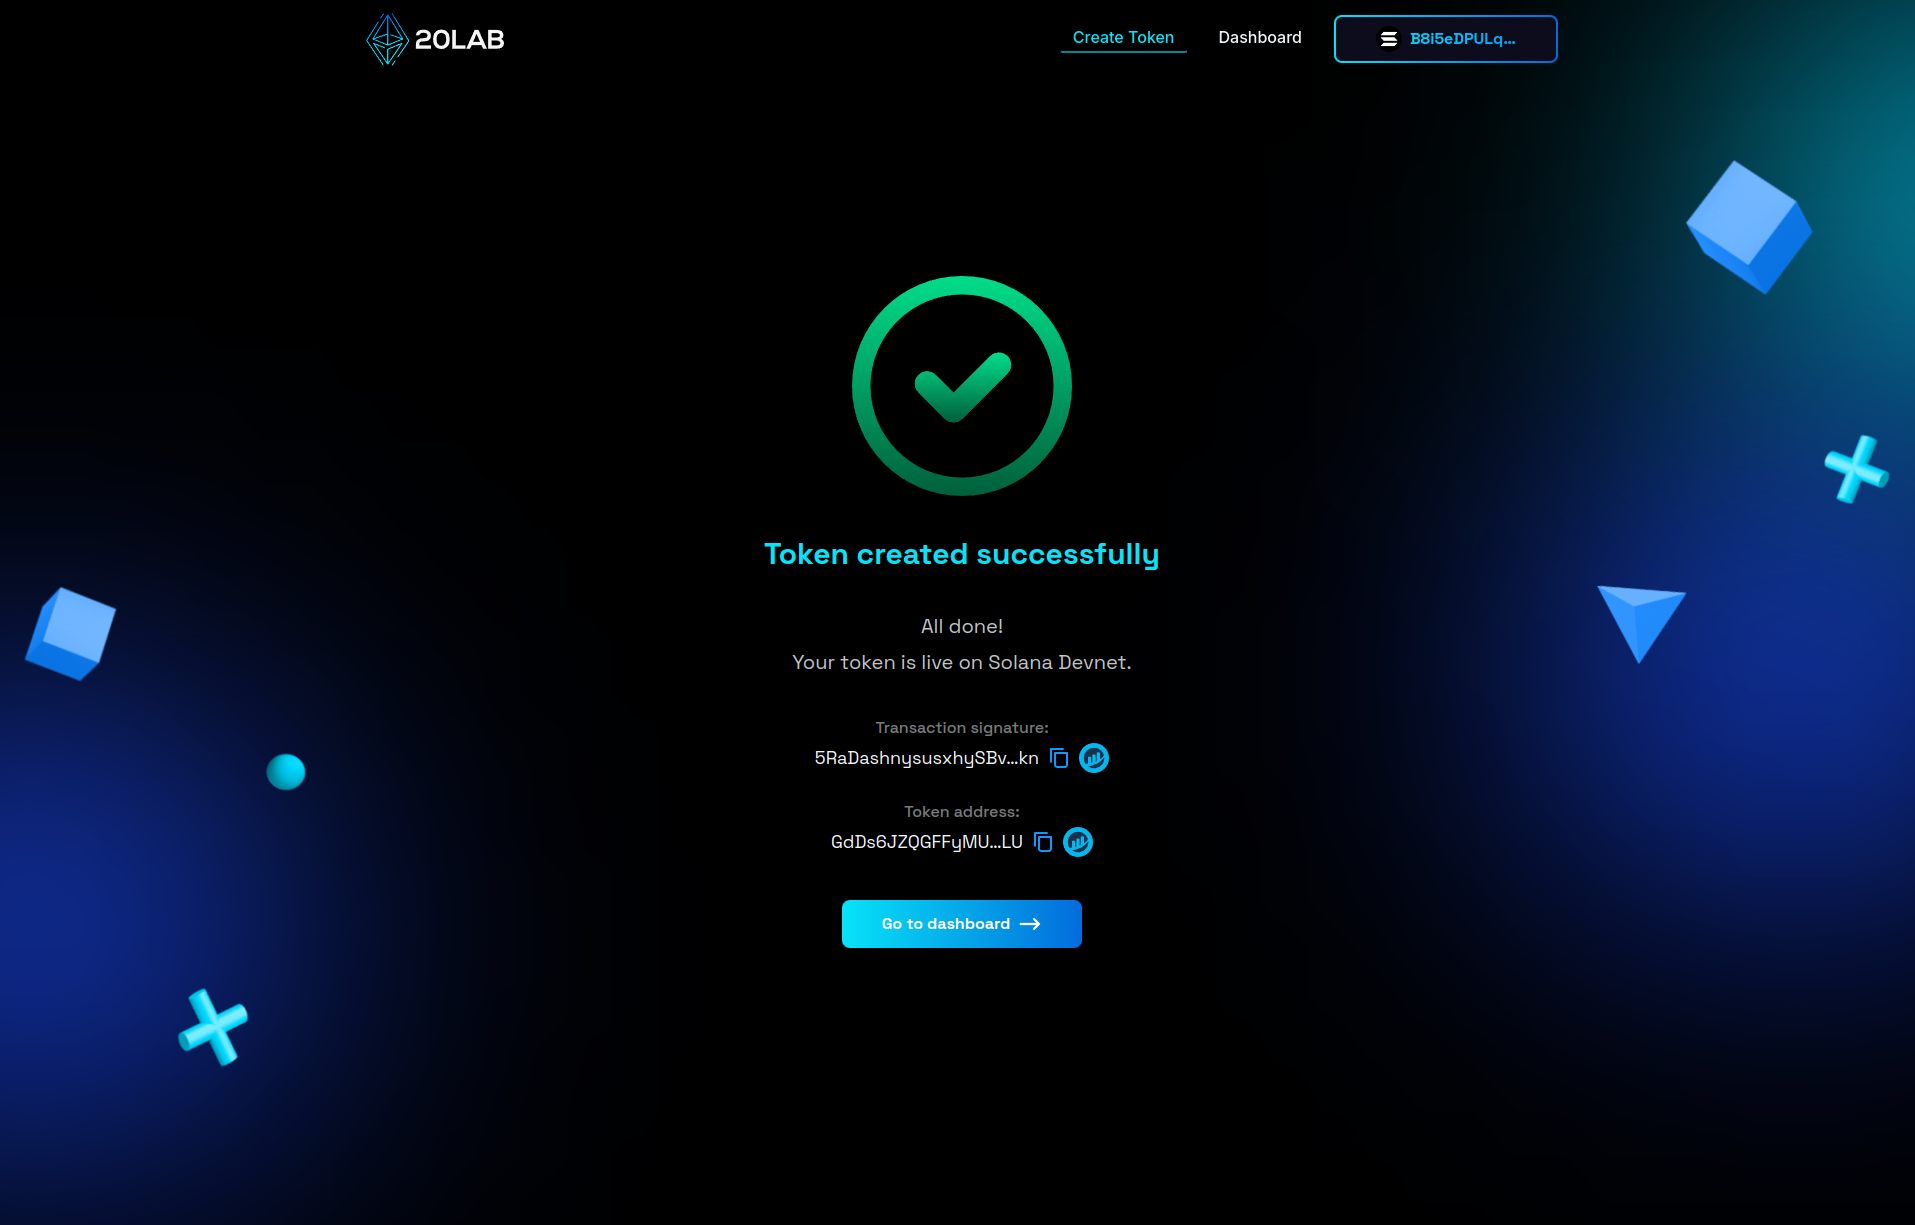
Dashboard Panel for Your Mintable Token
After creating your SPL token on 20lab, you'll have access to a comprehensive dashboard that allows you to manage and interact with your token. This dashboard provides a number of features to help you maintain and use your mintable token effectively.
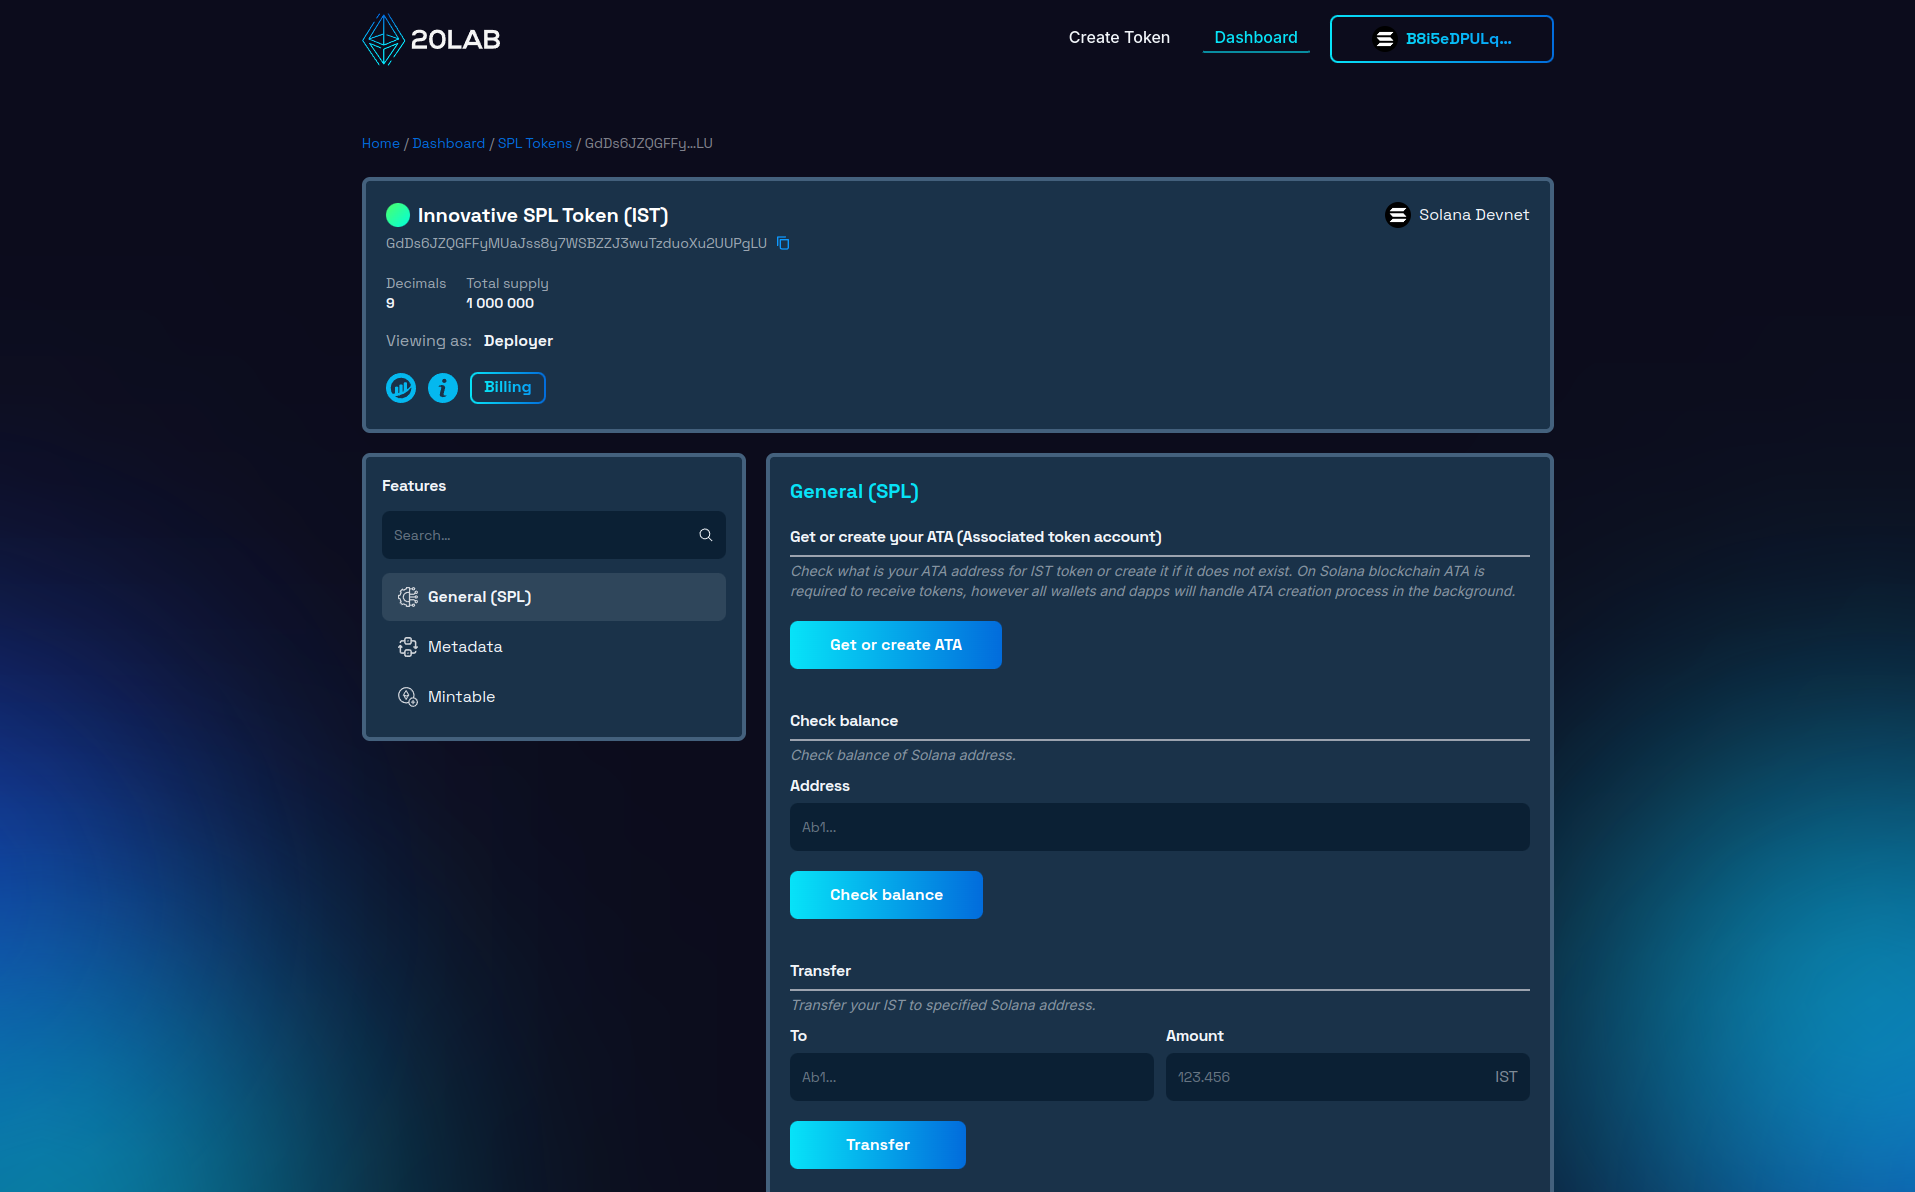
Token Overview
At the top of the dashboard, you'll find an overview of your token, including: token name and symbol, token address, decimal places, total supply, and network (Solana Devnet in the example).
General SPL Features
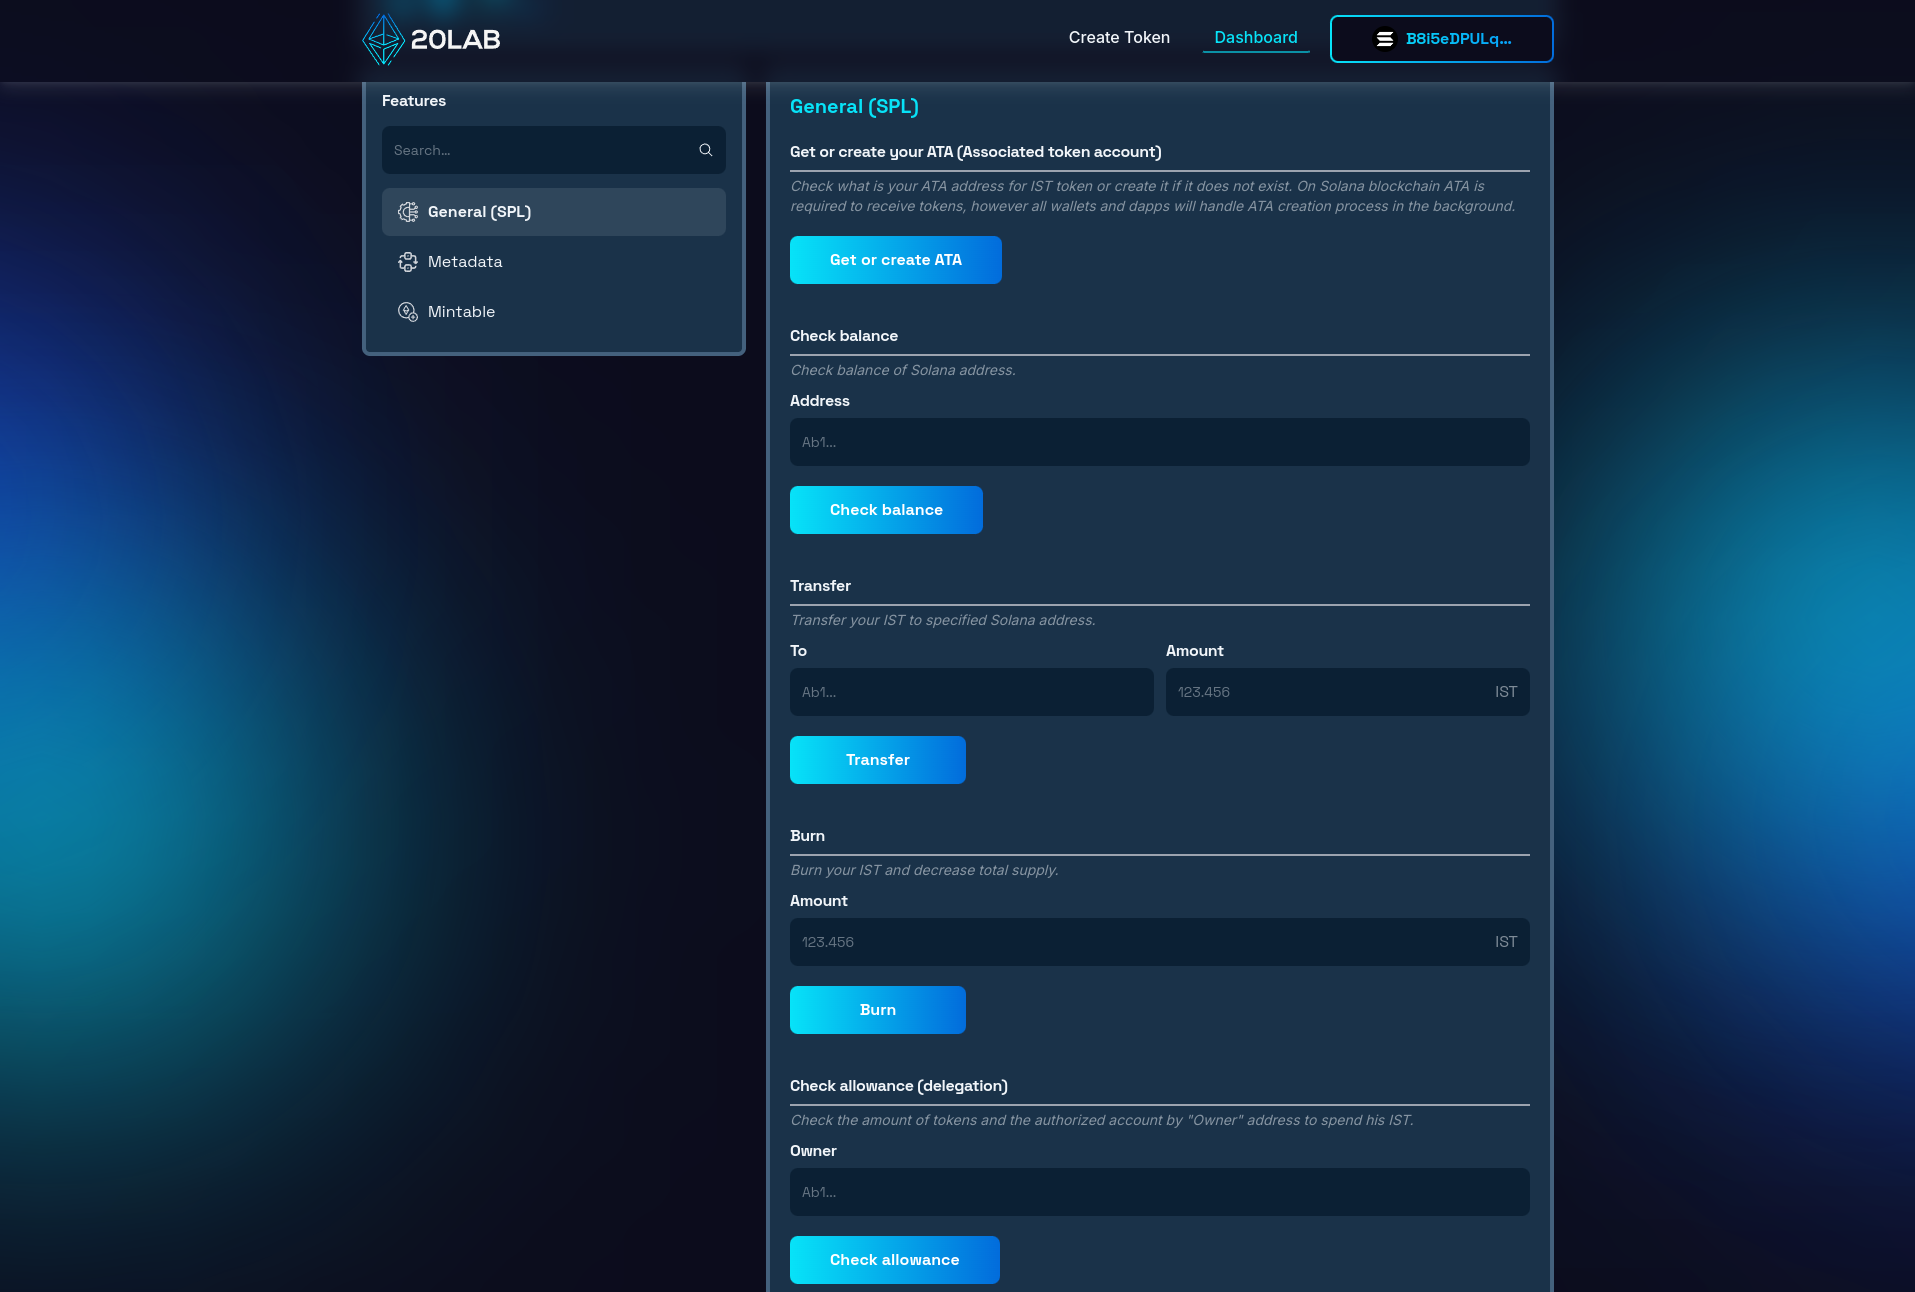
The General (SPL) section of the 20lab dashboard provides essential functions for managing your SPL token. Here you can get or create an Associated Token Account (ATA), check the balance of specific addresses, transfer tokens, burn and approve tokens.
Mintable Feature
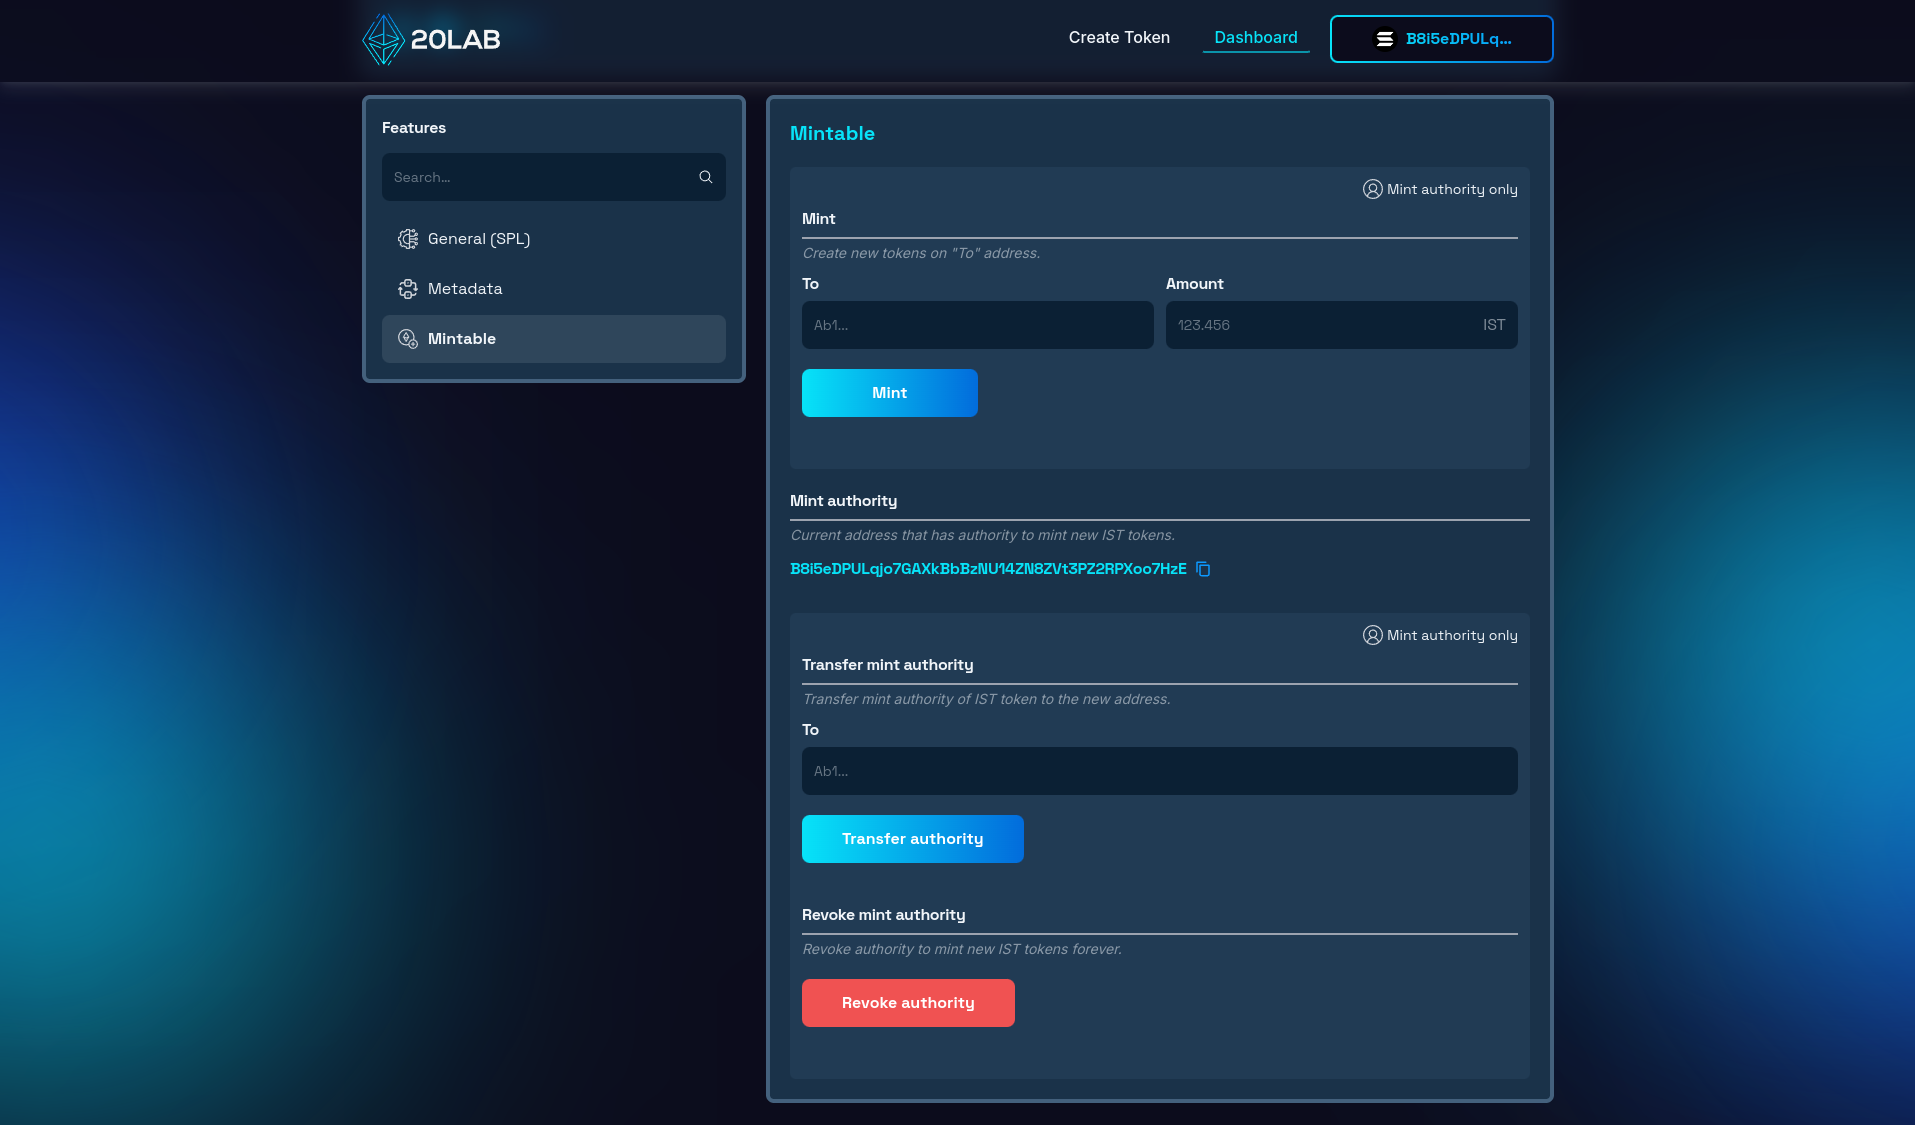
For mintable tokens, the dashboard provides specialized controls in the "Mintable" section, such as minting and mint authority management. These functions give you full control over the supply and distribution of your token.
Minting New Tokens
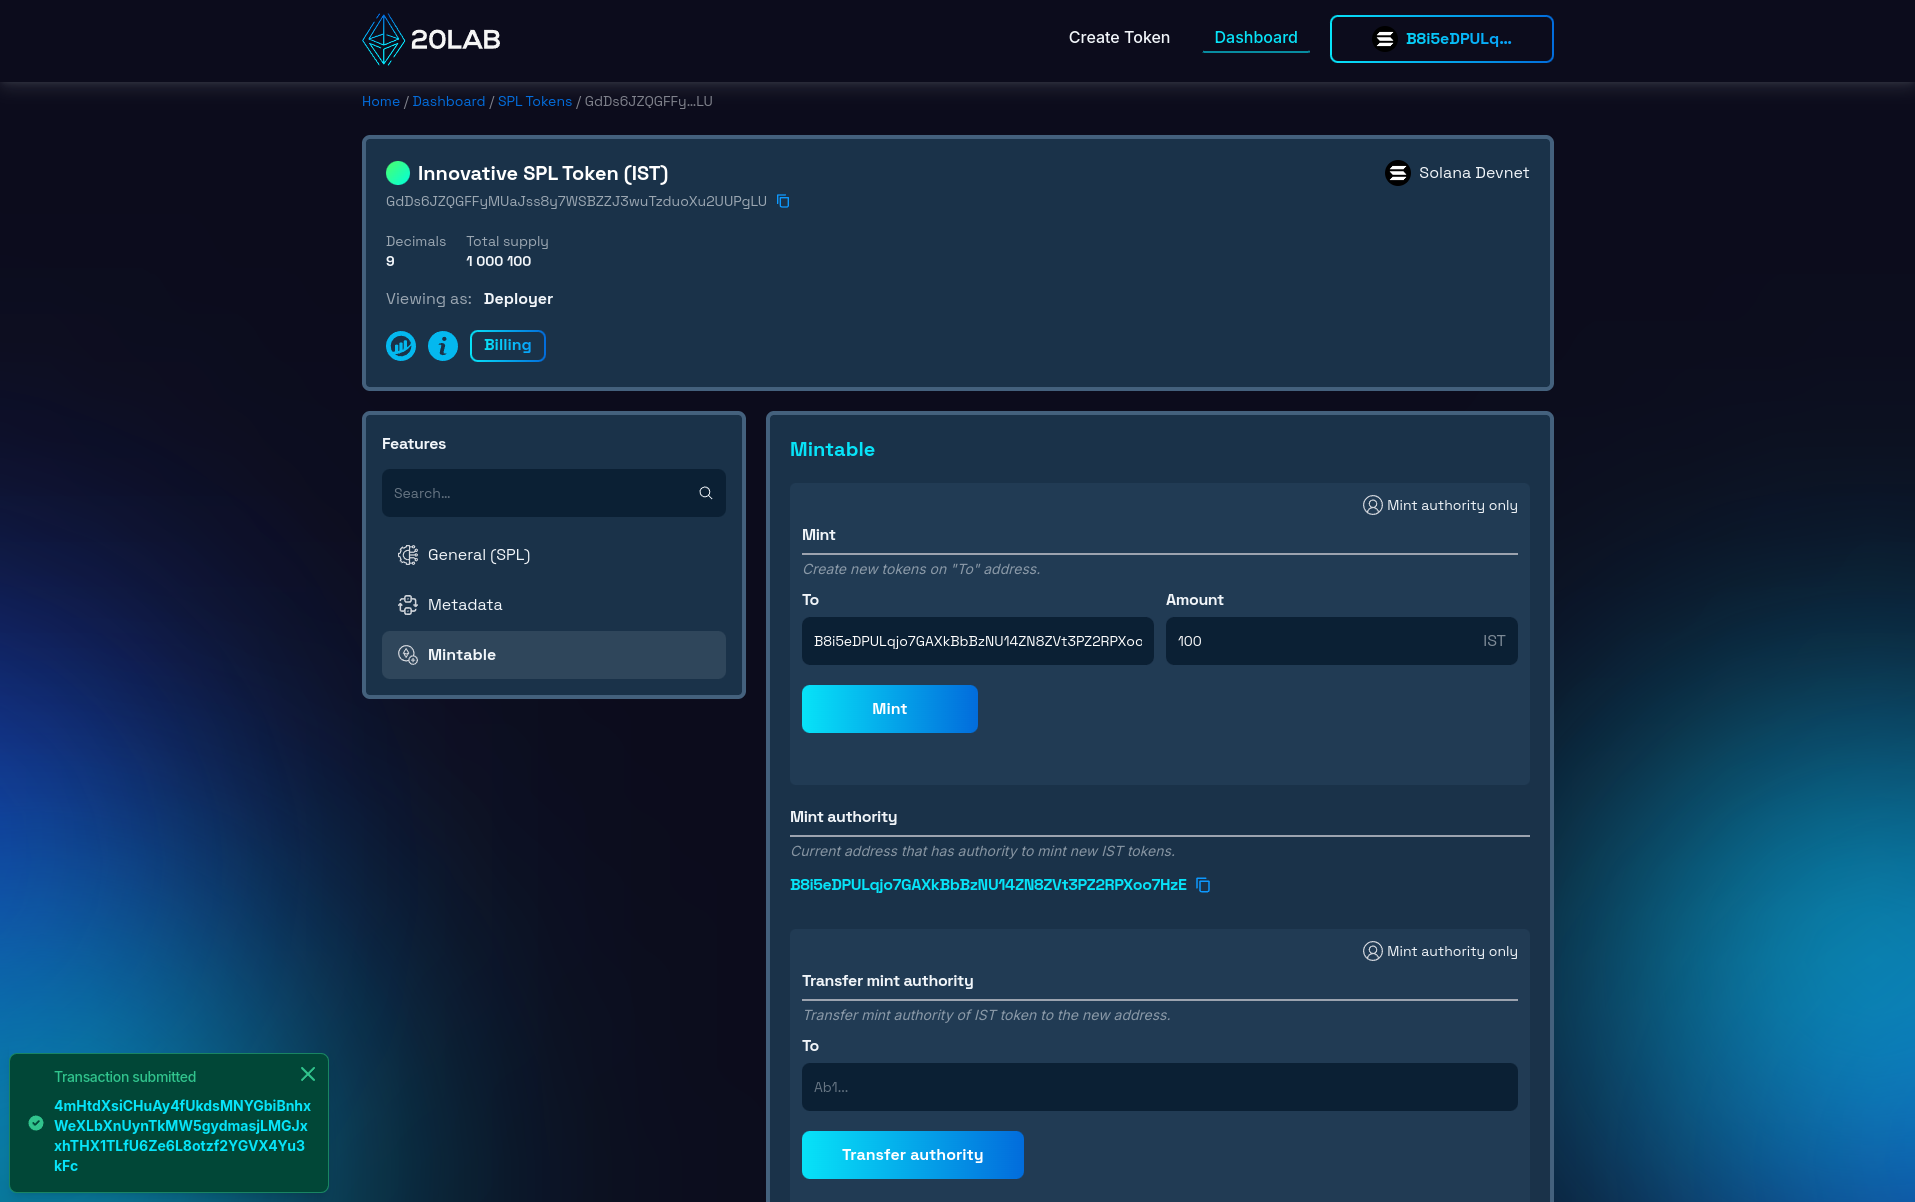
As a quick test, let's try minting some tokens. To do this, enter the address you want to receive the tokens and the amount you want to mint. When you are ready, click on the "Mint" button and confirm the transaction with the mint authority wallet.
After successful confirmation, you will see newly minted tokens at that address and the total supply will instantly increase.
Conclusion
As we've explored in this guide, the process is simple yet powerful, opening up a world of possibilities for developers, entrepreneurs and project creators in the Solana ecosystem.
Using 20lab's user-friendly interface, you can launch your own mintable token without extensive technical knowledge. From setting up the basic parameters of your token to enabling mintable functionality and managing your token after creation, 20lab provides all the tools you need in one comprehensive Solana token creator platform.
So why wait? Dive in, experiment on the Testnet or Devnet, and when you're ready, launch your token on the Solana Mainnet. The world of decentralized finance and blockchain applications is waiting for your innovative ideas. With 20lab and Solana, you have the platform and tools to bring your vision to life. Happy token creation!
If you have any questions about creating or managing your SPL token, don't hesitate to reach out to us via our Telegram channel.


