
The Solana blockchain is attracting more and more people every day, largely due to its low transaction fees and network speed. A particularly interesting aspect of the Solana ecosystem is the ability to create non-transferable SPL tokens. These unique tokens, made possible through the Token-2022 extension program, offer a fresh perspective on digital asset management and open up new possibilities for various applications.
For those interested in creating Solana tokens or using an SPL token generator, understanding non-transferable tokens is beneficial. Unlike standard tokens, which can be freely transferred between wallets, non-transferable tokens remain locked to their original recipient after being minted. This characteristic has significant implications for how we think about digital ownership, outcomes, and value representation on the blockchain.
What are Non-transferable Tokens?
Non-transferable tokens are a unique type of digital asset within the Solana blockchain ecosystem. As the name implies, these tokens cannot be transferred from one wallet to another after they are minted and distributed. This feature distinguishes them from standard SPL tokens, which can be freely transferred between users.
Key features of non-transferable tokens include:
- Immobility: Once minted and received, these tokens cannot be sent to another wallet address.
- Burning capability: While transfers are restricted, token holders retain the ability to burn (destroy) their own tokens.
- Mintable feature requirement: To make non-transferable tokens useful, the mintable feature must be enabled. This allows distribution to multiple users, rather than limiting ownership to one token creator.
- Irreversibility: Once the non-transferable feature is enabled for a token, it cannot be disabled. This permanent nature underscores the importance of carefully considering whether this feature is consistent with your project's goals before implementing it.
This unique feature opens up a range of applications, particularly in scenarios where the goal is to create persistent, non-tradable digital assets. From verifiable achievements and certifications to exclusive membership tokens, the non-transferable feature adds a new dimension to what's possible when creating Solana tokens.
How to Create Your Non-transferable Token on Solana
Creating a non-transferable SPL token on Solana may seem complex, but with the right tools it can be a straightforward process. Enter 20lab - our easy-to-use SPL token generator simplifies the creation of Solana tokens, including non-transferable ones. By leveraging 20lab's platform, you can easily navigate the intricacies of the Token-2022 extension program and create your custom non-transferable token without deep technical knowledge.
Let's go through the step-by-step process of using 20lab to create your token on Solana. This guide will help you harness the power of the Solana blockchain, while ensuring that your token meets the specific requirements for non-transferability.
Step 1: Choose Token Type and Connect Wallet
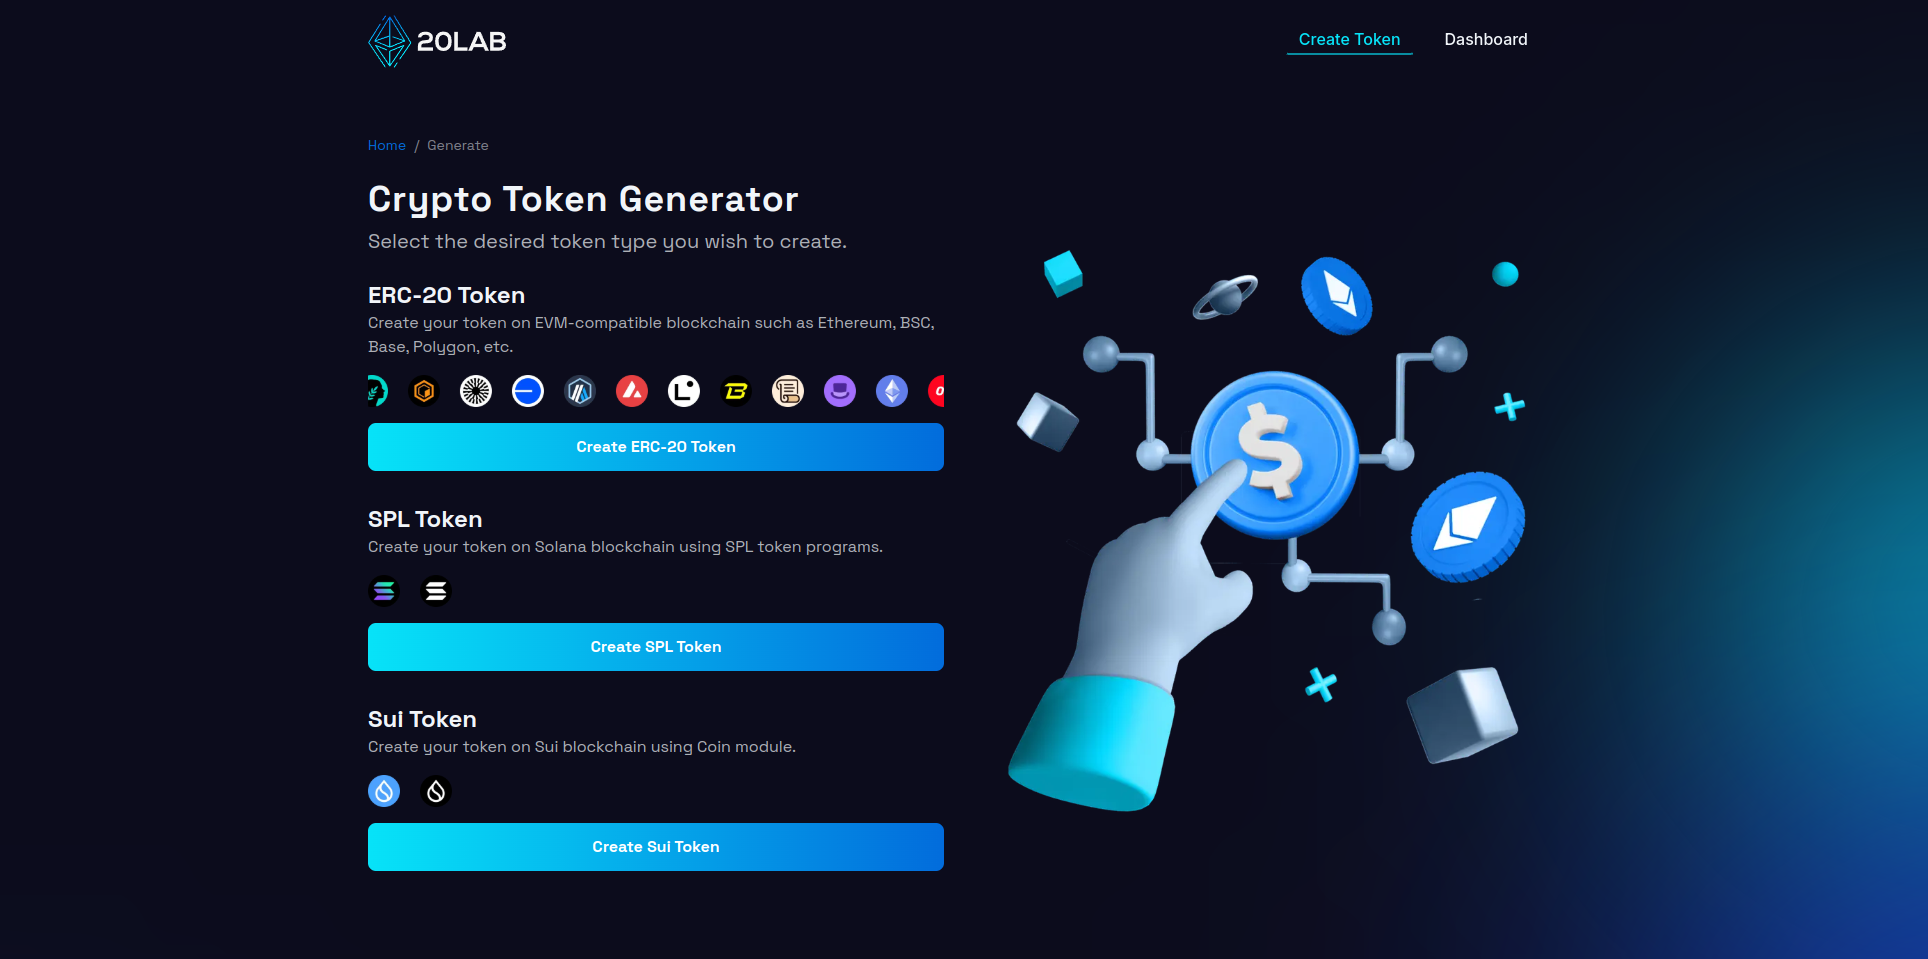
To begin creating your SPL token, first visit 20lab.app in your web browser. Open the app and navigate to the "Create SPL Token" option, which will take you to the token generator page.
Once there, you'll need to connect your Solana wallet. Click on the "Connect Wallet" button and select your preferred wallet from the options provided, which include popular choices like Phantom, Solflare, or Backpack. Follow your wallet's instructions to authorize the connection. Once you've successfully connected, you'll see your wallet address in the top right corner of the page.
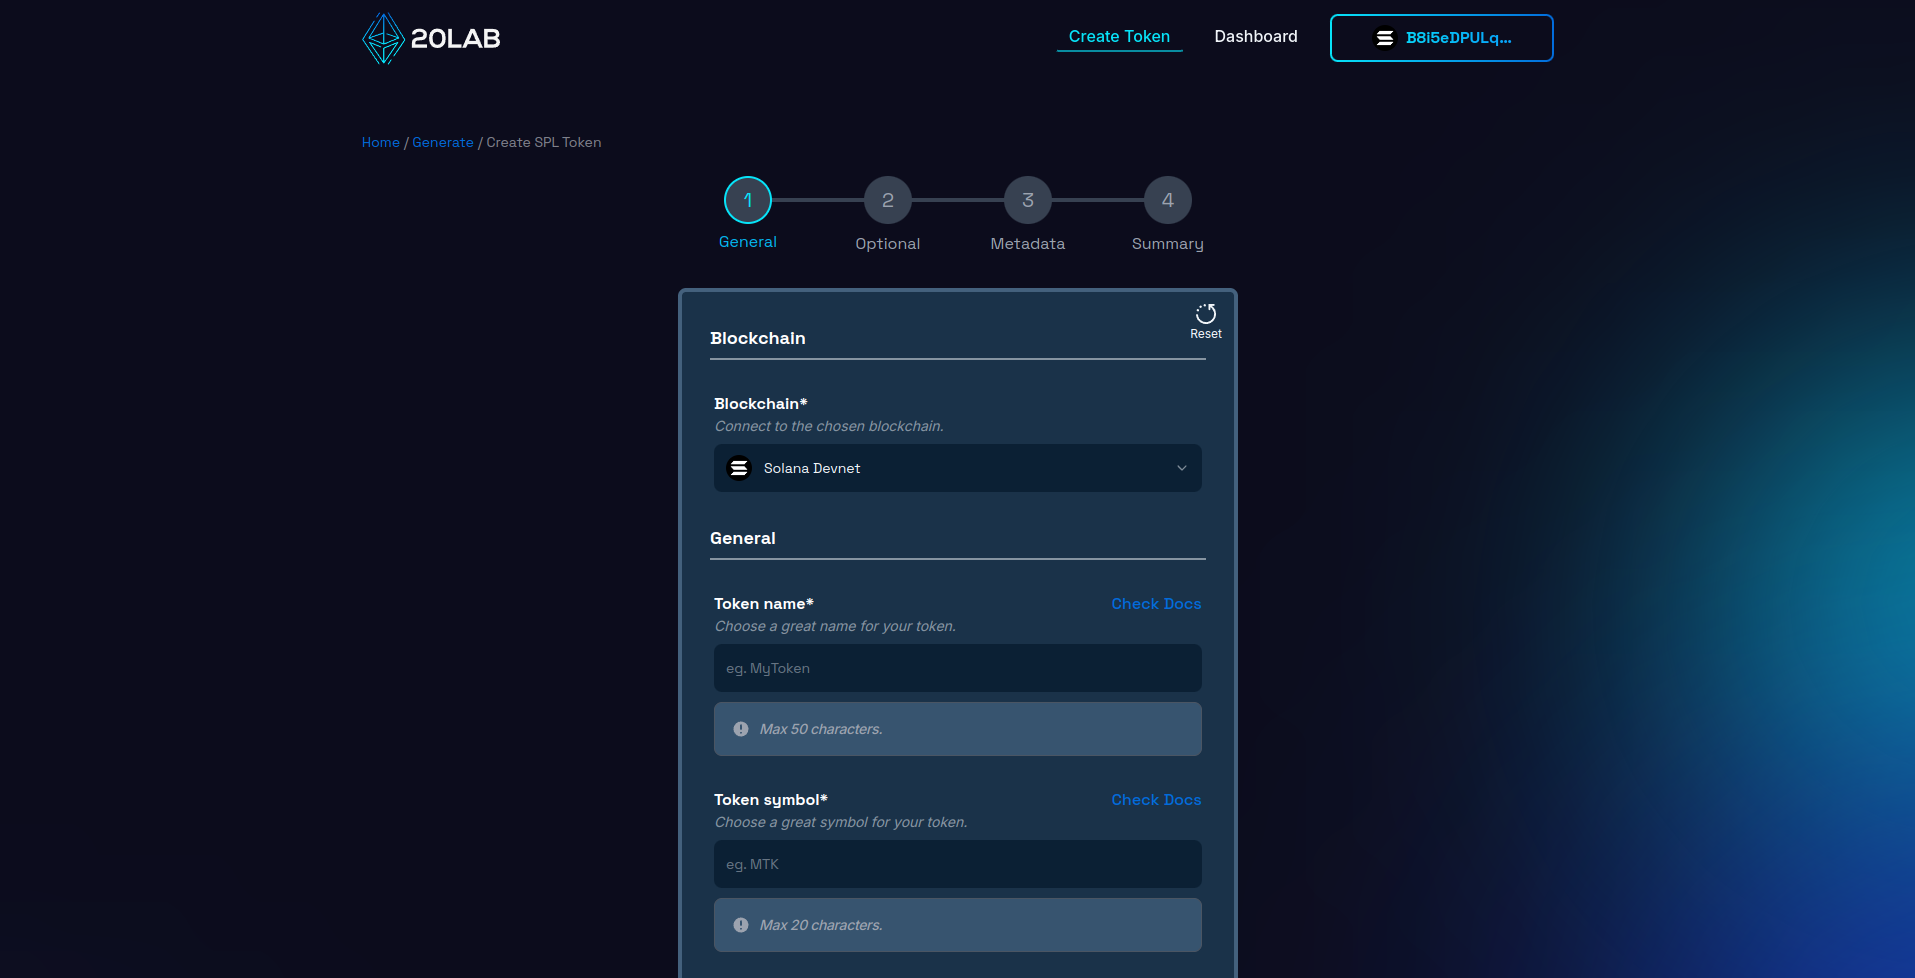
Next, make sure you're connected to the appropriate Solana network. You can choose between Mainnet, Testnet or Devnet, depending on the current stage of your project and your needs. Use Mainnet to launch your actual token, or Testnet/Devnet for testing and development purposes. Make sure that the blockchain in your wallet matches the one selected on the 20lab interface, as at the time of writing, many Solana wallets don't support this type of synchronization.
Step 2: Add General Token Information
Configuring your non-transferable SPL (Solana) token is a crucial step in defining its core attributes. Begin by entering a unique, descriptive name for your token and creating a short, memorable symbol. It's advisable to research existing Solana tokens to ensure your choice stands out within the ecosystem.
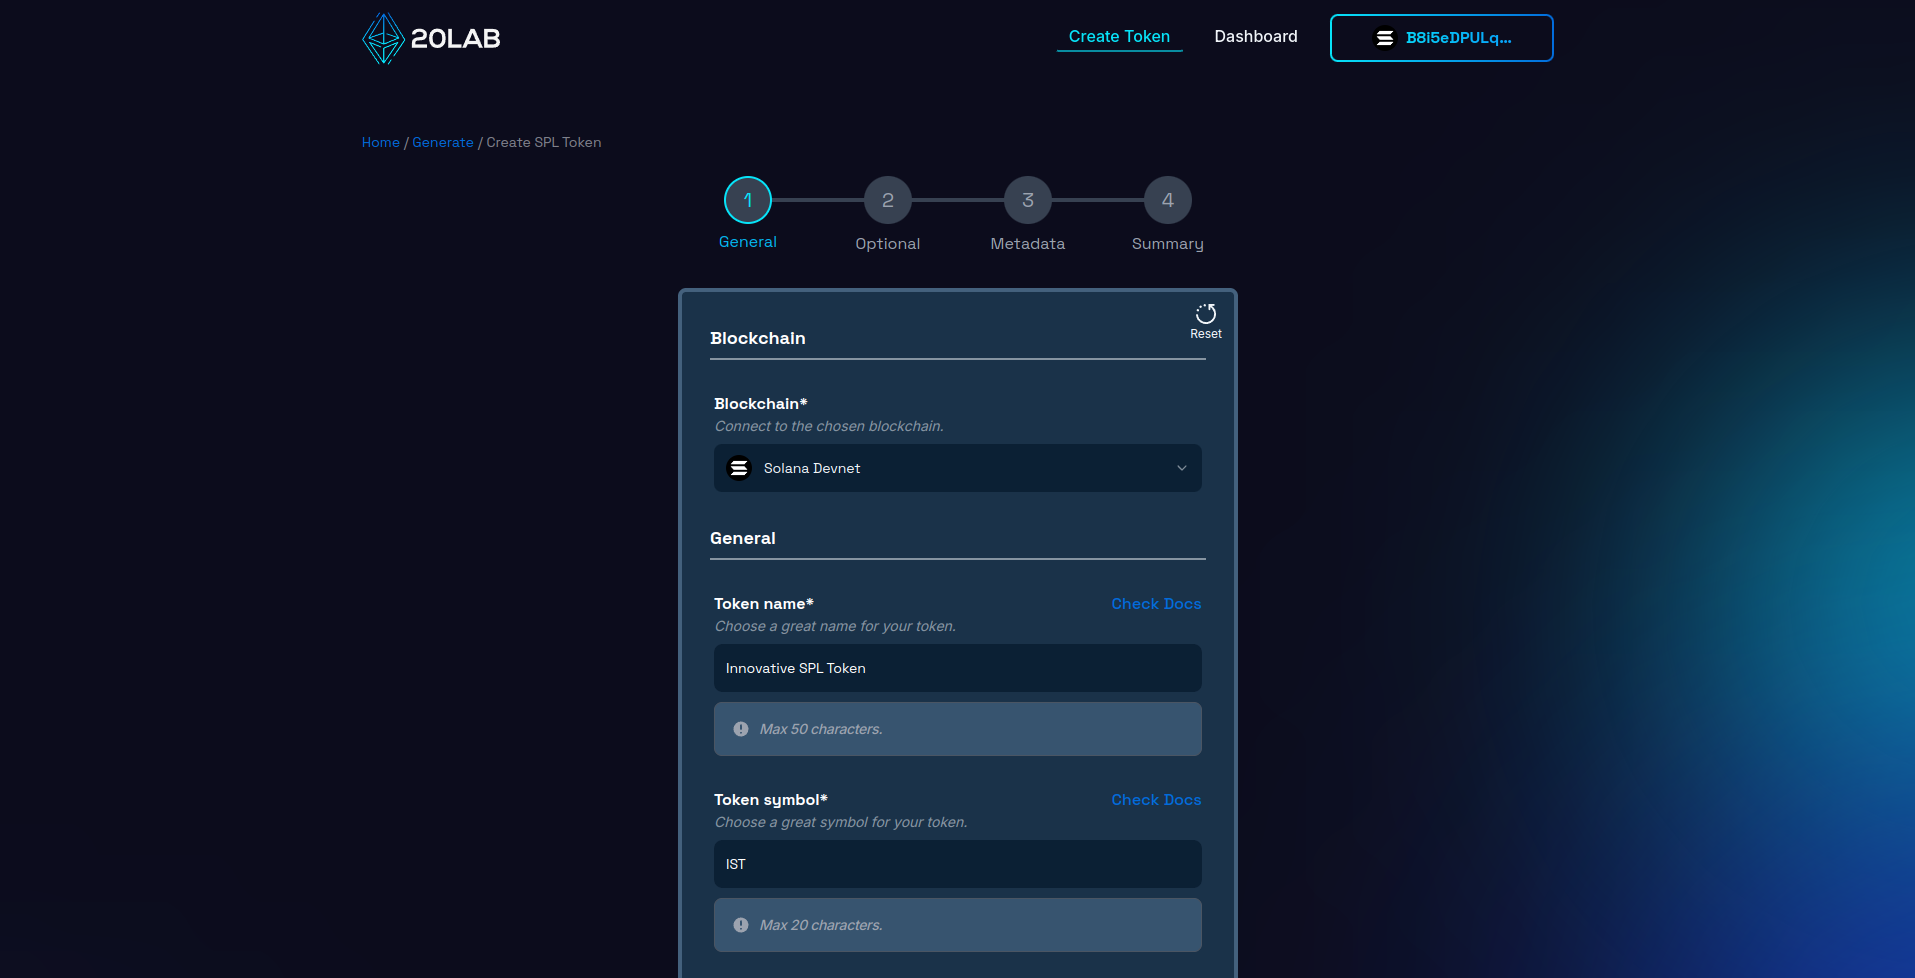
Next, determine the initial supply of your token. For non-transferable tokens, the mintable feature must be enabled, so it will be easy to increase the supply by minting new tokens later.
When it comes to decimals, SPL tokens typically use 6 or 9 decimal places, which matches the divisibility of SOL. This allows for micro-transactions and precise token allocation, which is essential for various use cases within the Solana ecosystem. Since Solana uses a smaller variable size to store balance data, choosing a smaller decimal also allows for a larger overall supply, which can be beneficial for your non-transferable token distribution strategy.
An important decision is choosing which wallet will receive the initial supply. This supply recipient will hold all tokens at launch, but will have no other permissions unless directly assigned later. You can use your personal wallet or a dedicated project wallet.
Step 3: Enable Non-transferable Option
On the 20lab token creation form, navigate to the next section. There you'll find an option called "Non-transferable" nested within the "Mintable" feature. This is an important setting for creating a token with unique ownership and distribution characteristics:
- When you enable the non-transferable option, you're creating a token that cannot be transferred between wallets after it's been minted and distributed. This feature is part of the Token-2022 extension program on Solana.
- If you leave this option unchecked, your token will function as a standard transferable SPL token.
It's required to enable the mintable feature along with the non-transferable option. This allows you to mint and distribute tokens to multiple recipients over time, which is essential to the practicality of non-transferable tokens.
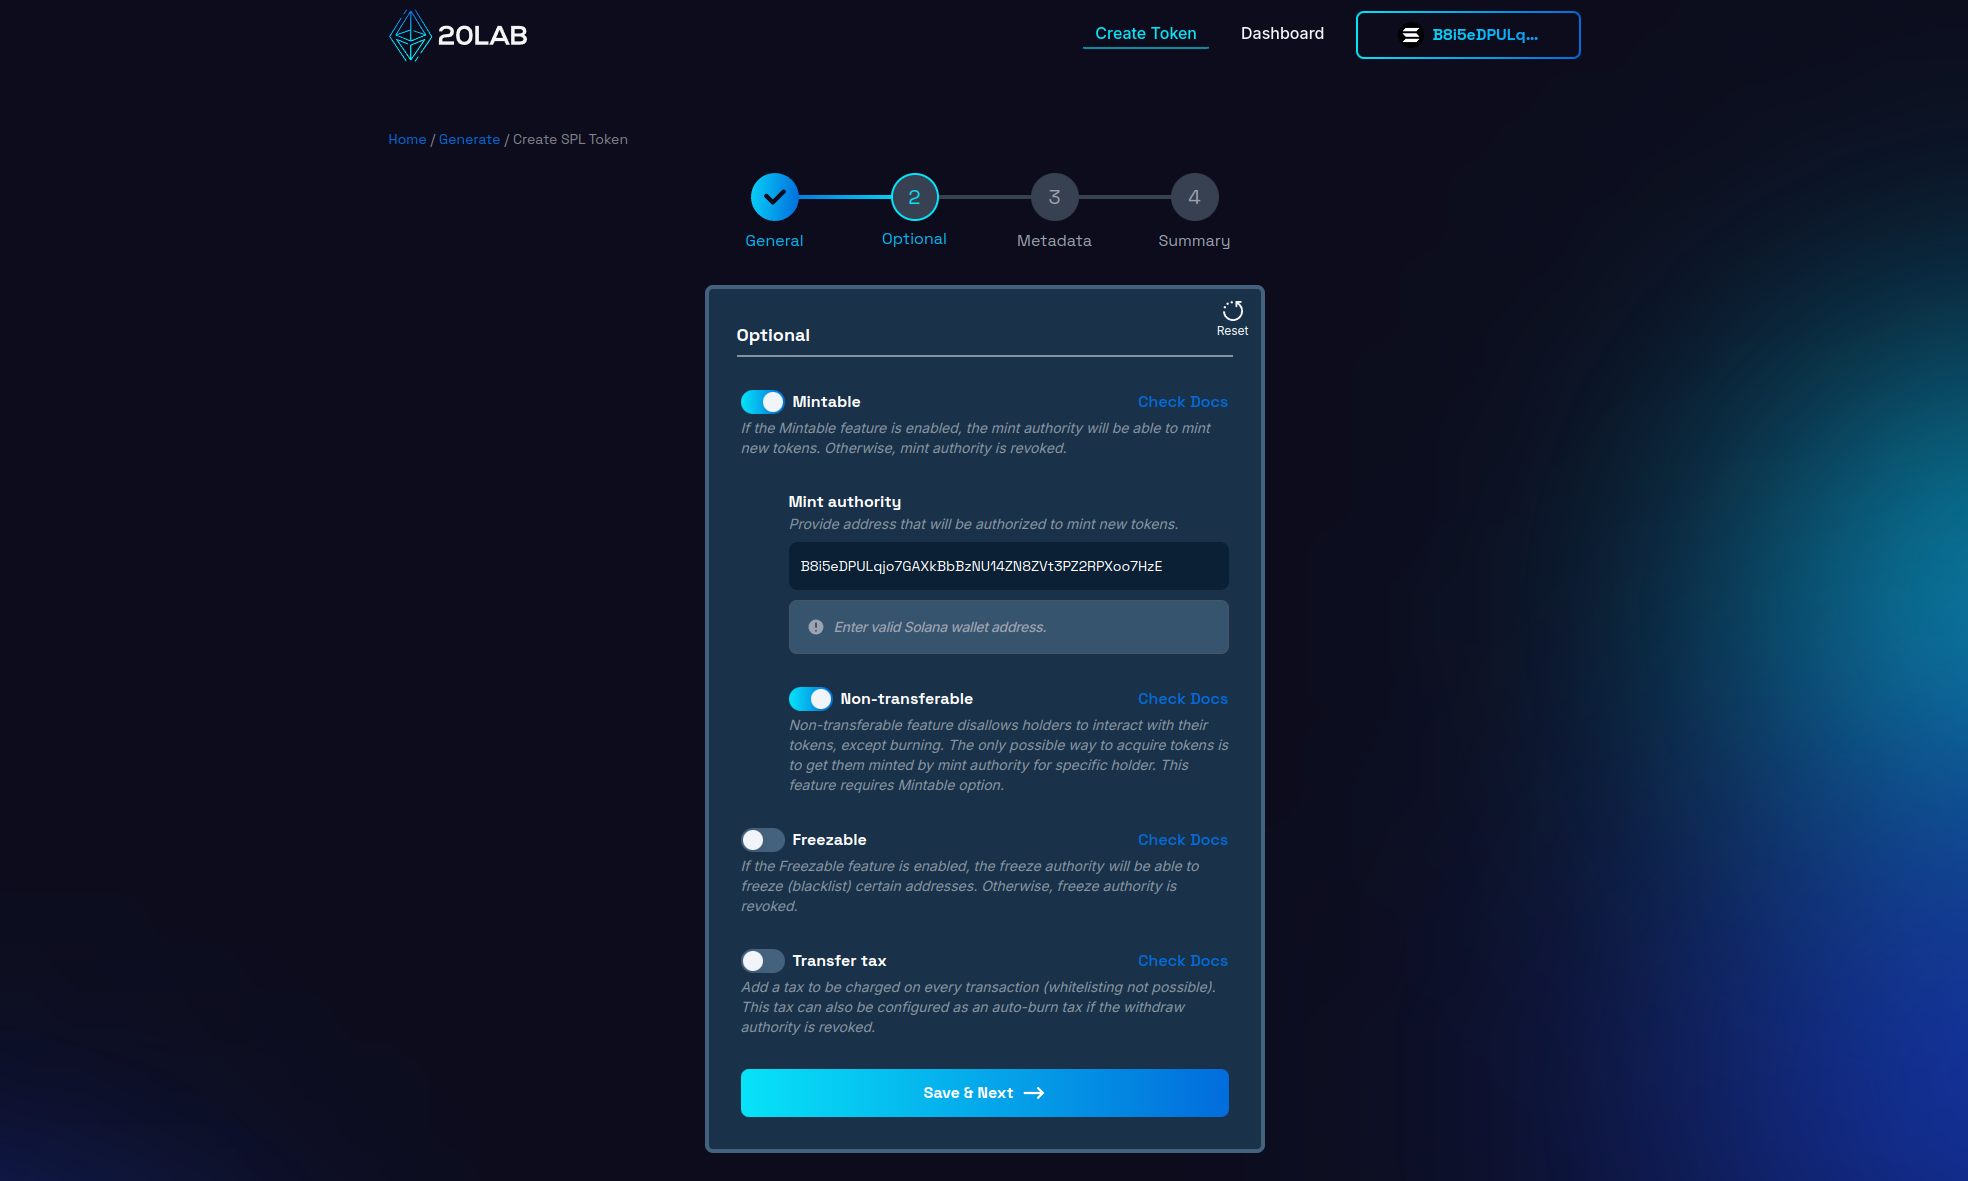
Before implementing this feature, carefully consider whether it fits with your project's goals. Communicate clearly with your community about the implications of non-transferable tokens, and make sure users understand that they won't be able to trade or transfer these tokens once they receive them.
Step 4: Review and Deploy
As you reach the final step of creating your non-transferable SPL token, take a moment to carefully review all of the settings on the "Summary" page. This crucial step serves as your final checkpoint before deployment. Review each detail to ensure accuracy and alignment with your project goals.
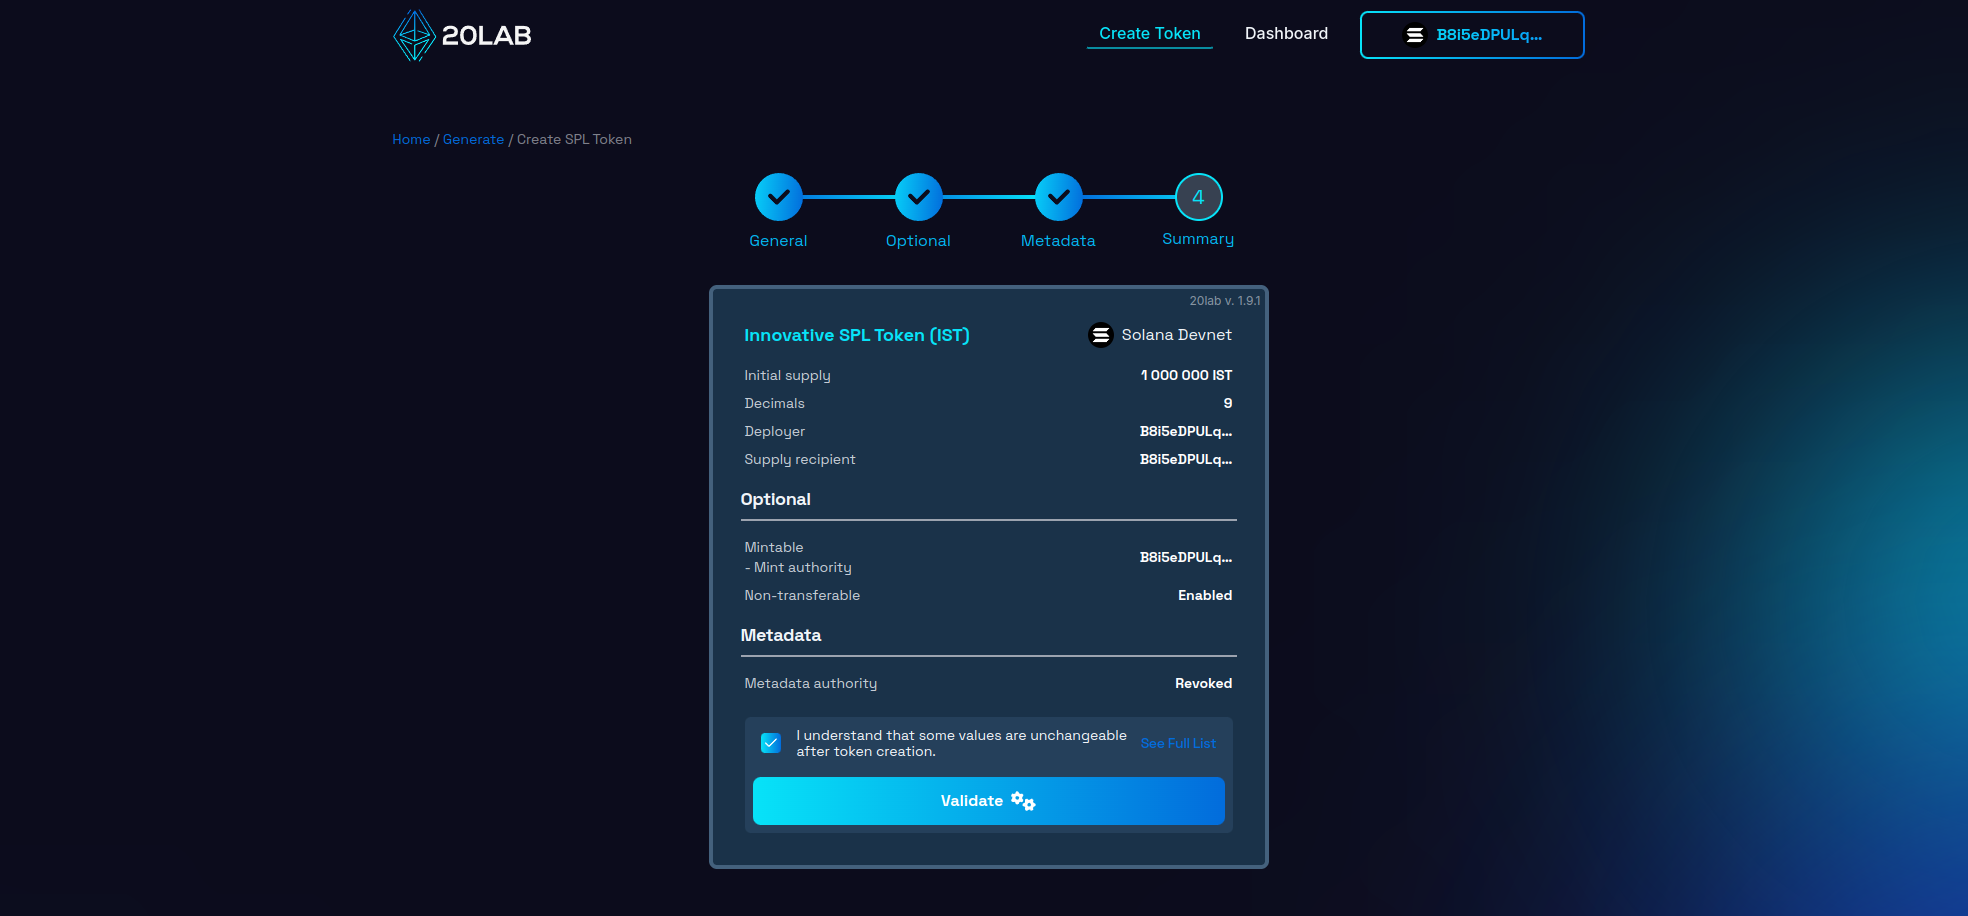
After completing a thorough review, click the "Validate" button to begin deployment. This action triggers a final validation, an important safeguard that can identify any technical issues before your token is committed to the Solana blockchain.
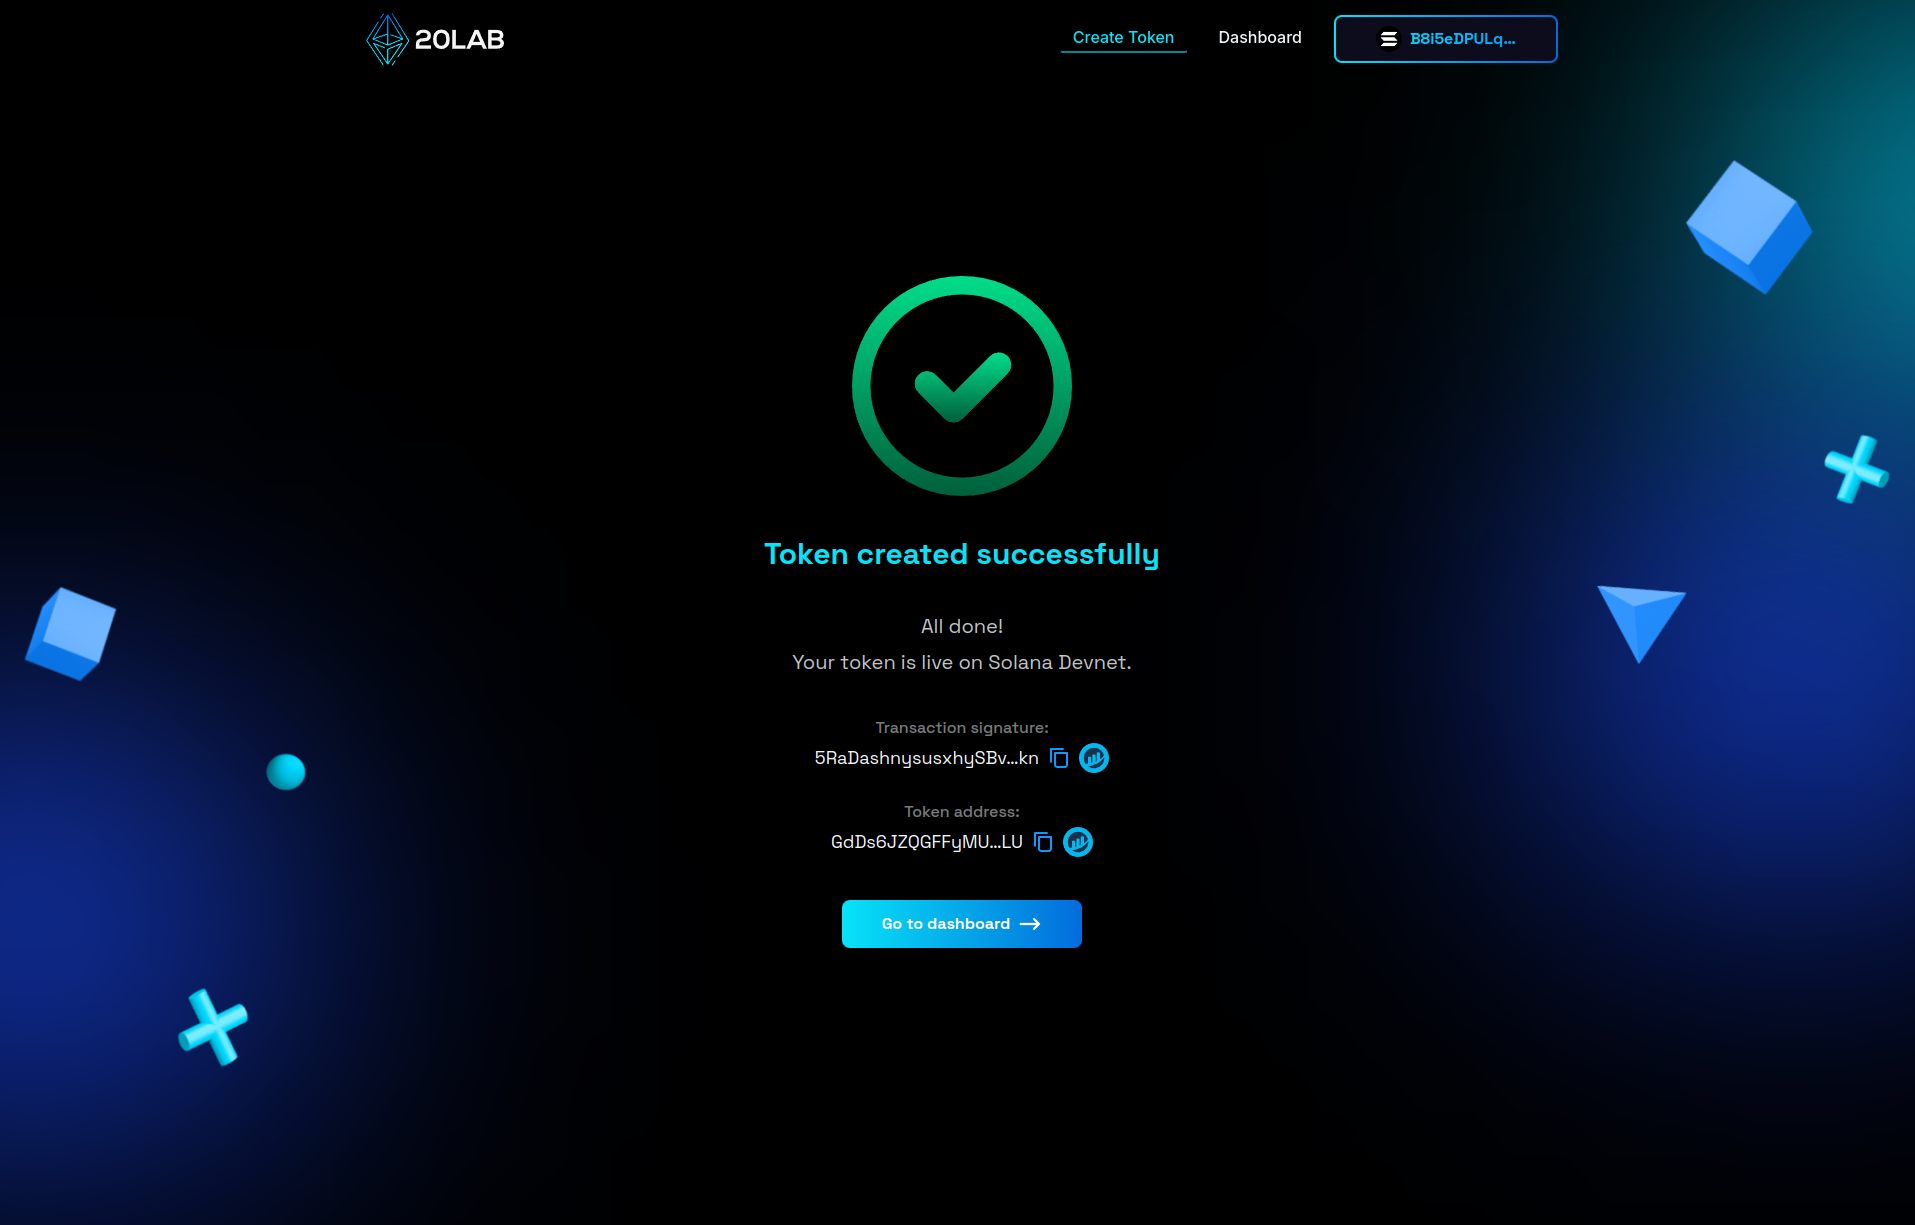
If everything is in order, you're ready to launch your token. Confirm the action and your connected Solana wallet will prompt you to approve the transaction. This approval is the final step in creating your SPL token on the Solana blockchain.
Remember, once created, many of these parameters cannot be changed. Your careful attention during this review process will ensure that your token enters the Solana ecosystem exactly as you intended.
Dashboard Panel for Your Non-transferable Token
After creating your SPL token on 20lab, you'll have access to a comprehensive dashboard that allows you to manage and interact with your token. This dashboard provides a number of features to help you maintain and use your non-transferable Solana token effectively.
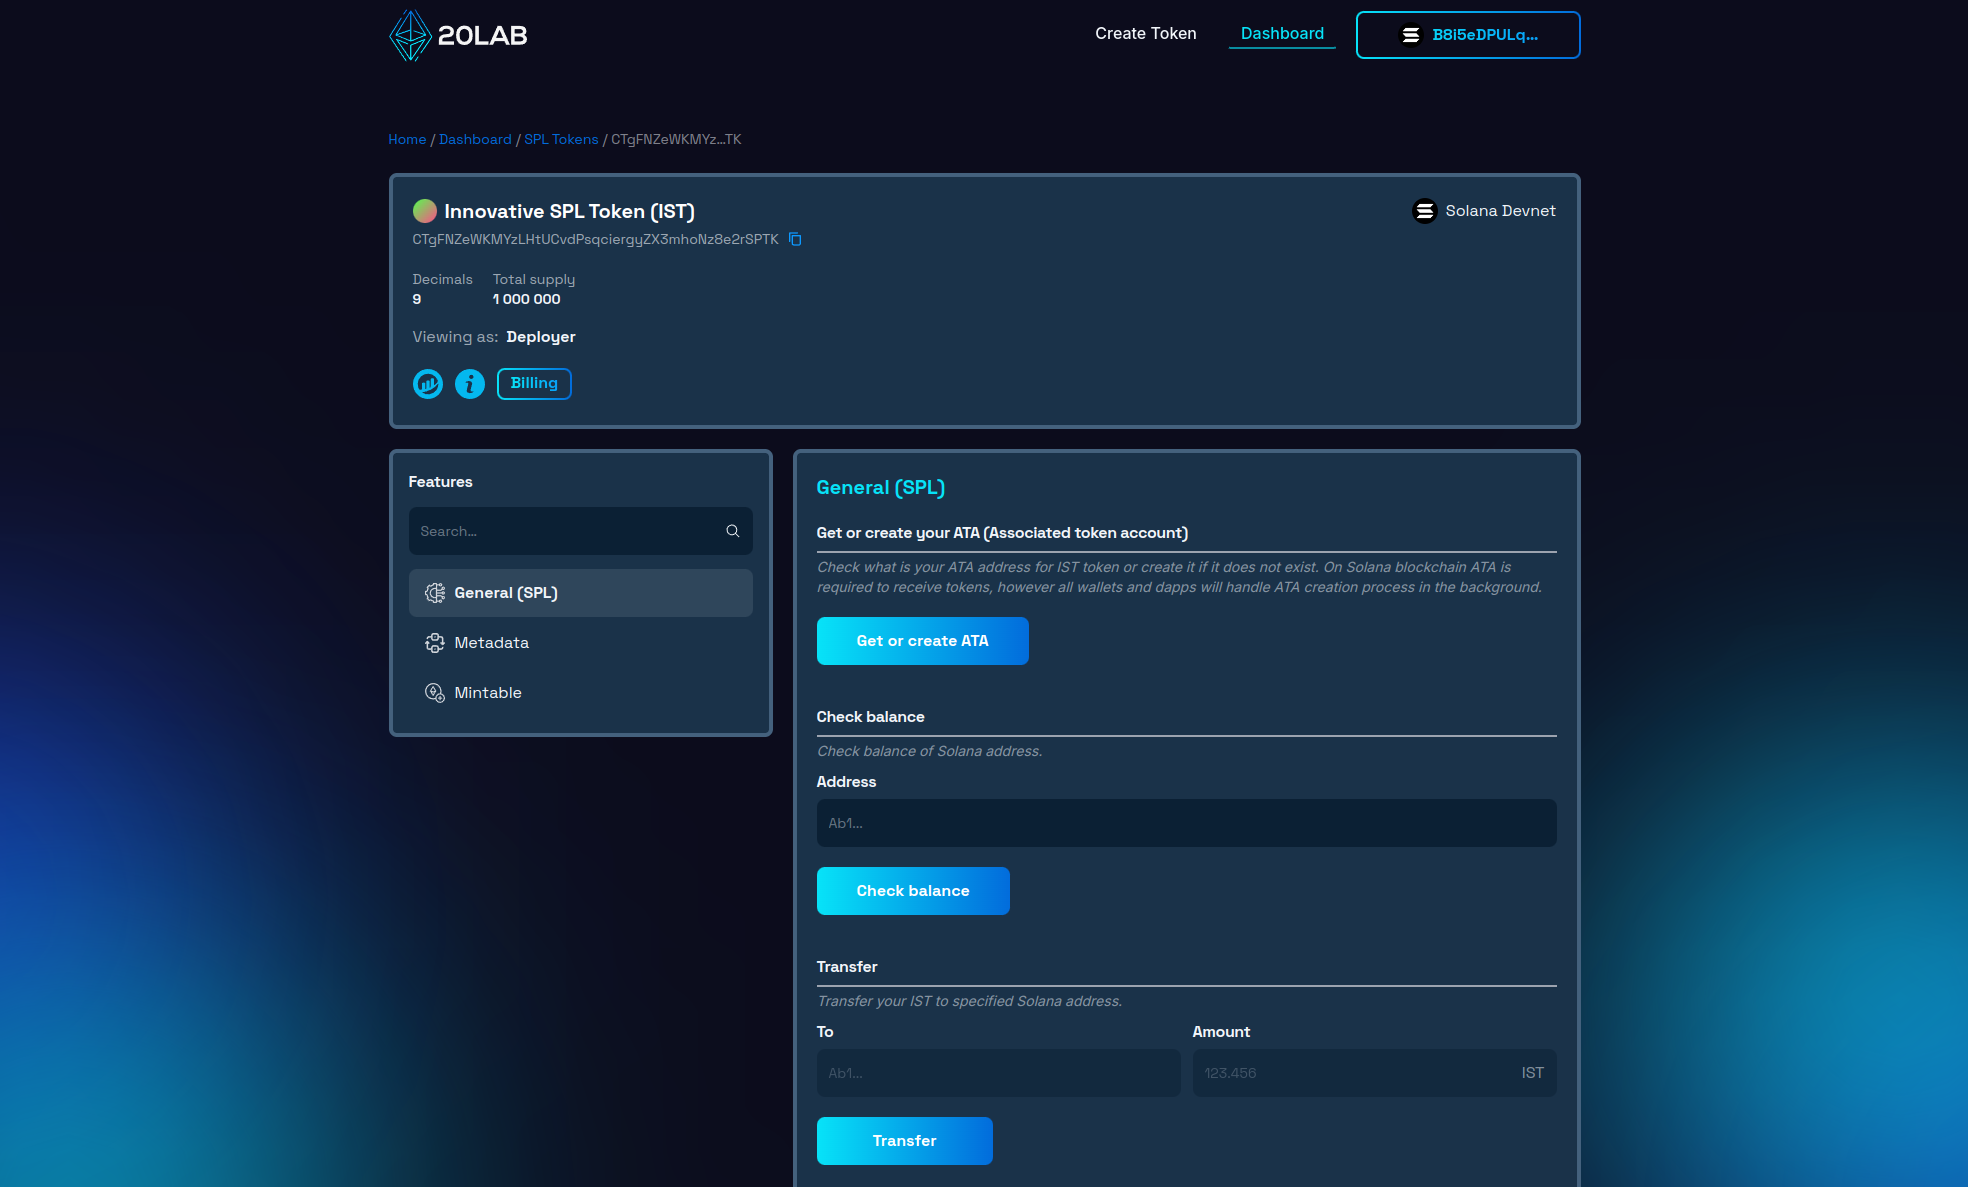
Token Overview
At the top of the dashboard, you'll find an overview of your token, including: token name and symbol, token address, decimal places, total supply, and network (Solana Devnet in the example).
General SPL Features
The General (SPL) section of the 20lab dashboard provides essential functions for managing your SPL token. Here you can get or create an Associated Token Account (ATA) and burn your tokens. Other features are automatically disabled for non-transferable tokens.
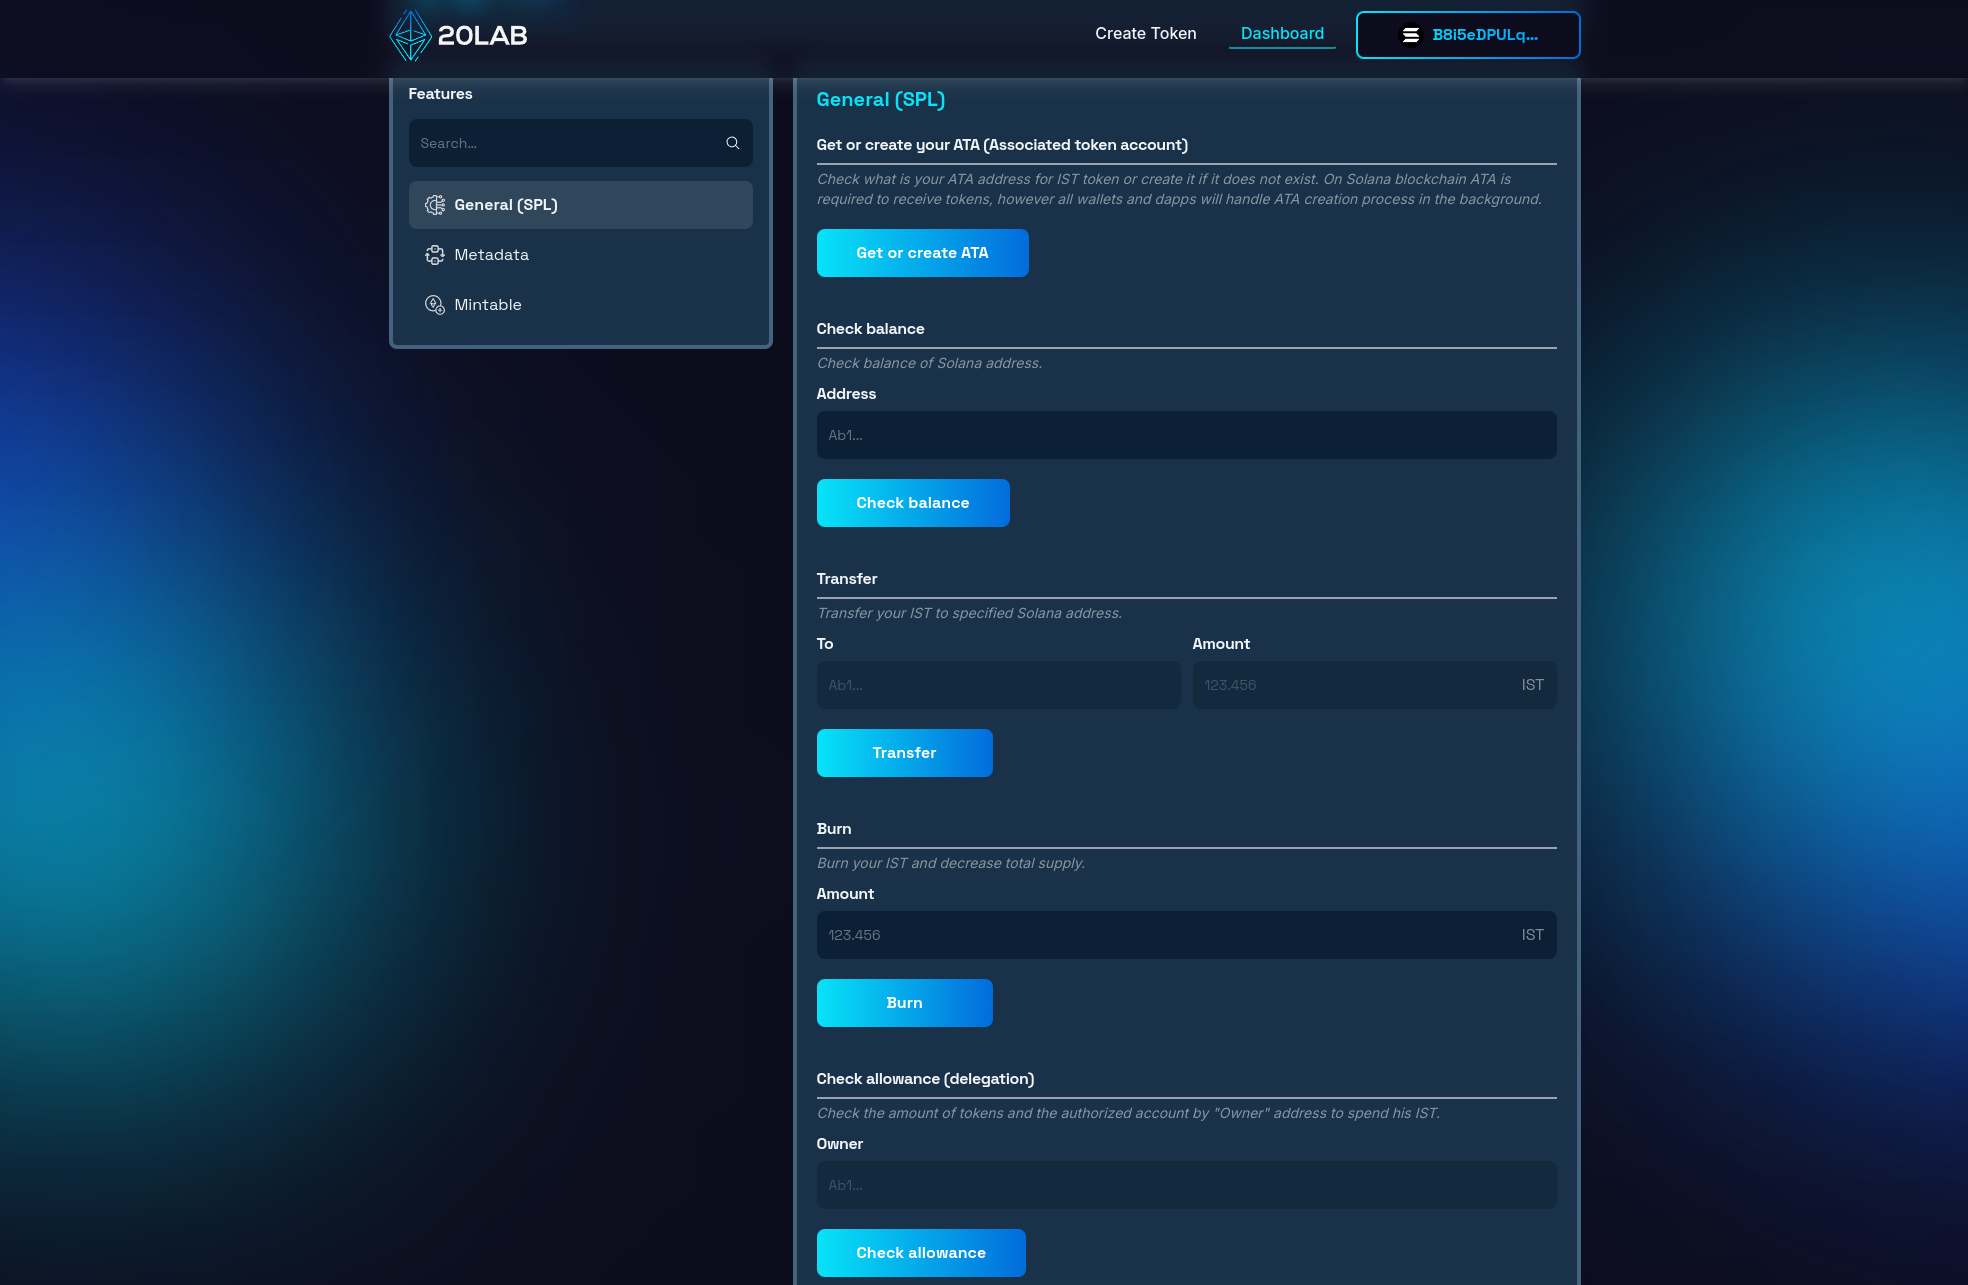
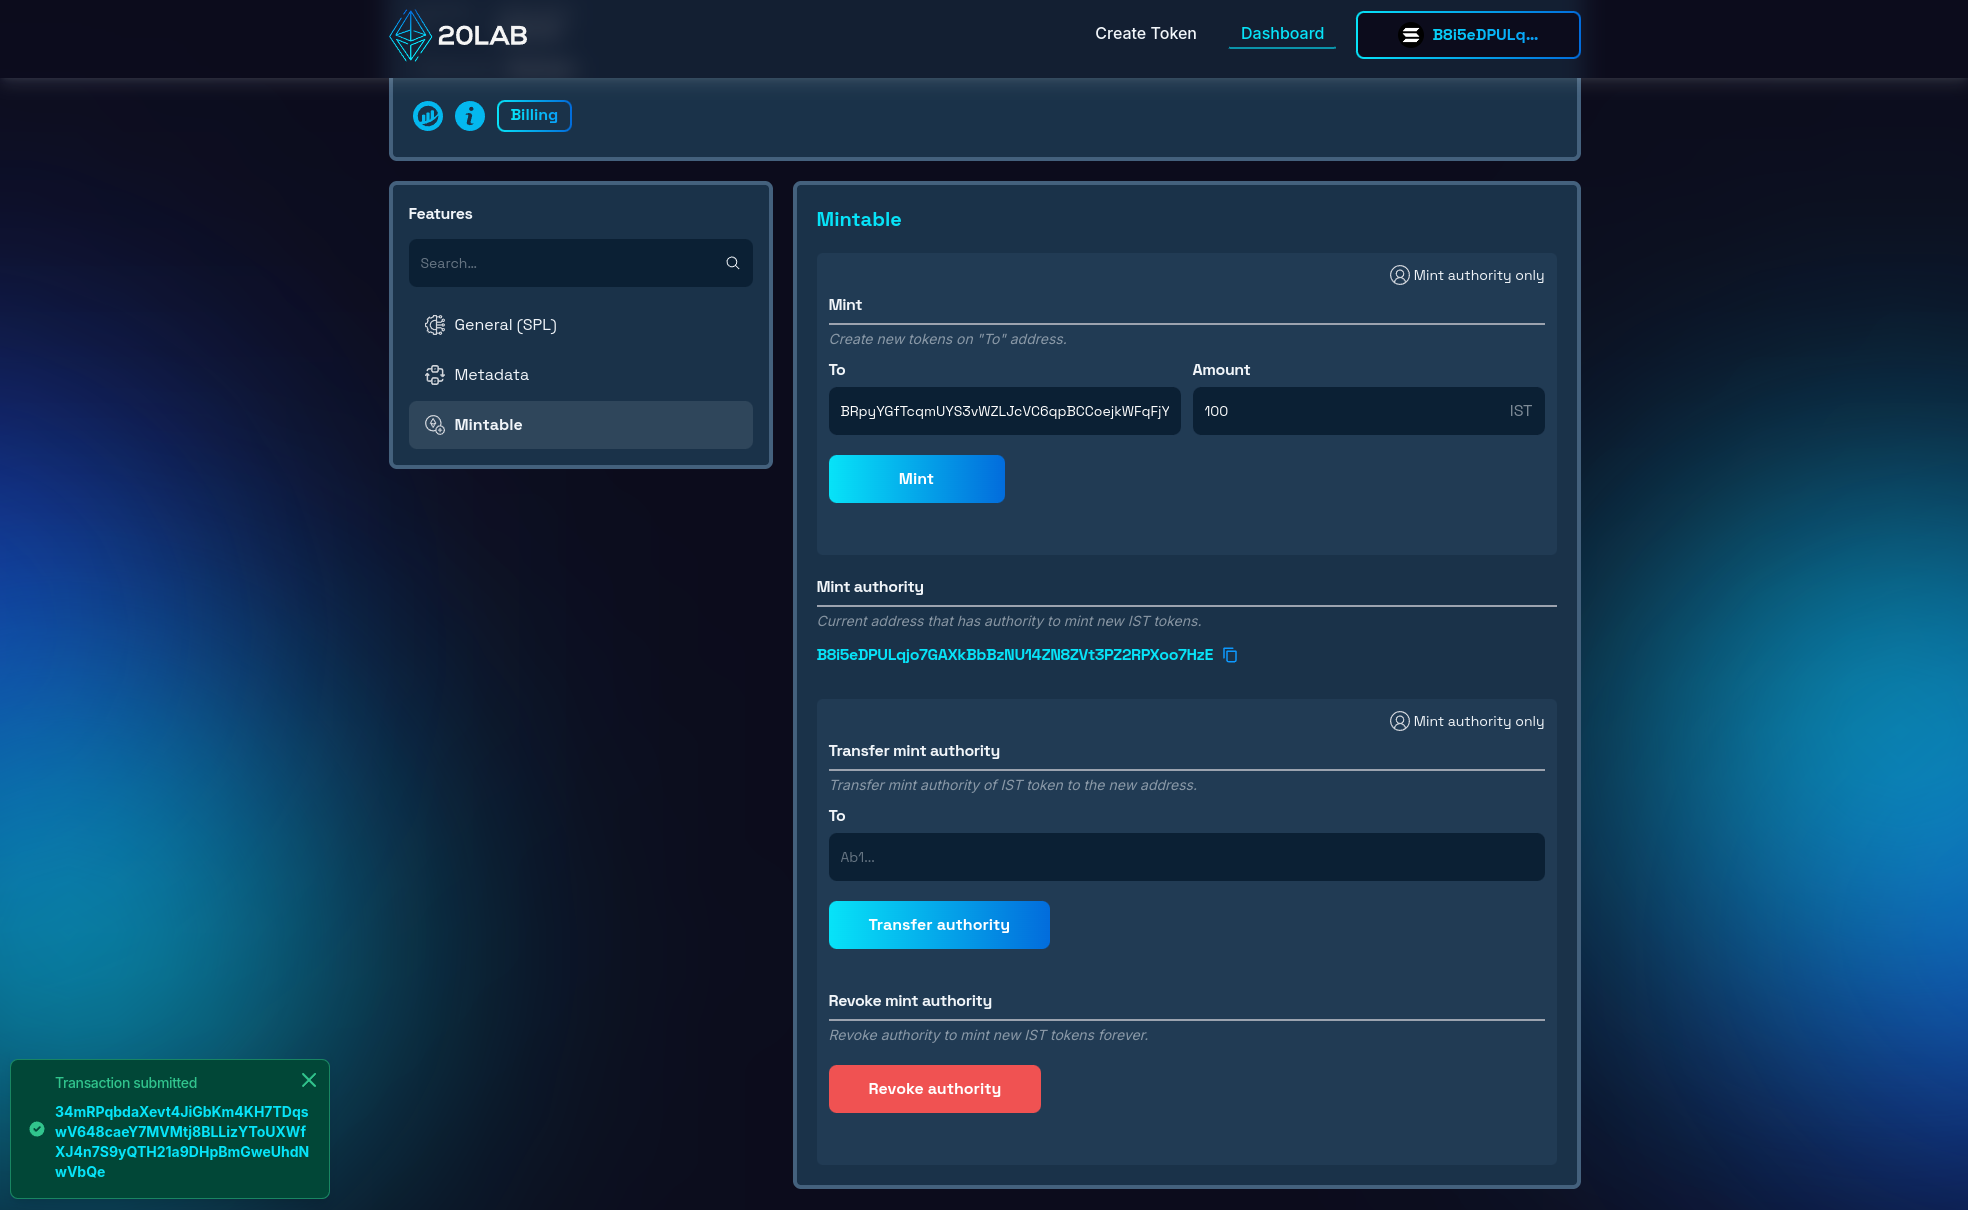
As you can see, there is no special section for managing the non-transferable properties of your token. That's simply because there is nothing to configure on top of what was implemented in the creation phase. However, a very important section is of course "Mintable", where you will create and assign a fixed amount of tokens to each holder. You can also check out our guide to mintable tokens, which covers everything related to this particular feature.
Testing Transferability
Once you've created your non-transferable token, it's important to verify that the non-transferable feature works as intended. Let's run a quick test to make sure the tokens can't be transferred between wallets:
- First, go to the "Mintable" section and mint some tokens to a different wallet address.
- Confirm the transaction with the wallet that has the minting authority.
- Check the balance of that wallet to make sure it has successfully received the tokens.
Let's try switching to the wallet that just received minted tokens, importing tokens into the wallet, and then trying to make a transfer.
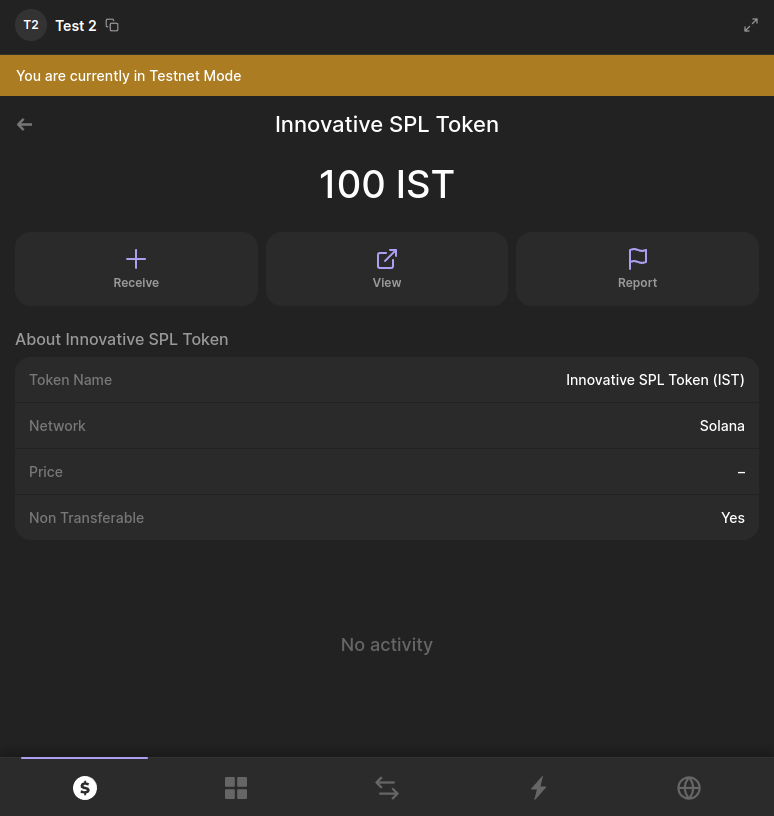
As you can see, the "Send" button is not available for this token because the wallet (in this case, the Phantom wallet) has correctly identified the token as non-transferable and has hidden this feature.
Conclusion
In this guide, we've explored the concept of non-transferable tokens, their key characteristics, and the step-by-step process of creating them using 20lab's easy-to-use SPL token generator. We've seen how these tokens differ from standard transferable tokens and the unique benefits they bring to projects that require immutable digital ownership.
The ability to create non-transferable tokens on Solana opens up exciting use cases across multiple industries. From verifiable achievements and certifications to exclusive memberships and digital collectibles, these tokens provide a way to represent value and ownership that cannot be traded or transferred, ensuring long-term exclusivity and authenticity.
So why wait? Dive in, experiment on the Testnet or Devnet, and when you're ready, launch your non-transferable token on the Solana Mainnet. The world of decentralized finance and blockchain applications is waiting for your innovative ideas. With 20lab and Solana, you have the platform and tools to safely and efficiently bring your vision to life.
If you have any questions about creating or managing your SPL token, don't hesitate to reach out to us via our Telegram channel.


