
You've created your Solana token. Without liquidity, your token is practically invisible - no one can buy it, no one can sell it, and no trading activity means no community growth. Adding liquidity is the single most important step you can take after token creation, and with 20lab, you can do it in minutes - no DEX documentation, no CLI commands, just a clean interface and a few clicks.
In this guide we'll walk you through exactly how to use 20lab's tool to add liquidity to your existing Solana liquidity pool and get it ready for bigger trading activity.
What is 20lab's Solana Add Liquidity Tool?
The Solana Add liquidity tool is a streamlined interface for depositing additional assets into an existing liquidity pool. With this tool, you can:
- Deepen an Existing Pool: Deposit more assets to reduce price impact for traders and improve market stability.
- Earn Trading Fees: Every swap through your pool generates fees - liquidity providers earn a proportional share automatically.
- Support Market Stability: More liquidity means lower slippage, which makes your token more attractive to buyers and traders.
- Increase Your LP Position: Add to a pool you already participate in and grow your proportional share of fee earnings.
The tool supports four of Solana's leading AMM protocols: Raydium Legacy AMM and CPMM, and Meteora DAMM V1 & V2 - giving you flexibility to work with whichever pool your project is built on.
Why 20lab's Solana Add Liquidity Tool Stands Out
- Multi-DEX Support in One Interface: Instead of navigating separate DEX UIs for Raydium and Meteora, 20lab consolidates everything into a single tool - just paste your pool ID and the right DEX will be auto-detected.
- Automatic Ratio Calculation: The tool calculates the correct deposit ratio of both tokens based on the current pool price. No manual math, no mismatch errors.
- Slippage Tolerance Control: You choose your slippage tolerance (0.1%, 0.5%, 1%, or custom) before confirming - so your transaction behaves exactly as expected even in volatile conditions.
Understanding How Solana Liquidity Pools Work
Before jumping into the steps, it helps to understand what adding liquidity actually does.
A liquidity pool holds two assets and allows anyone to trade between them automatically using an AMM (Automated Market Maker). The ratio of the two assets determines the price. Every trade shifts that ratio slightly, and the pool rebalances accordingly.
When you add liquidity, you deposit both tokens at the current pool ratio. In return, you receive LP (Liquidity Provider) tokens that represent your proportional share of the pool. These LP tokens are your claim on the pool's assets - and on any fees collected while your liquidity is in place.
DEX protocols always require both assets in the pair at the current ratio. If the pool contains SOL and your token, you provide both - the 20lab interface calculates the exact required amounts automatically once you enter one side.
As your token's price moves, the pool's AMM automatically rebalances:
- If your token's price rises, the pool gradually sells some of your token for the paired asset (e.g., SOL).
- If your token's price falls, the pool buys more of your token using the paired asset.
Your LP tokens are the only proof of your position in the pool. Without them, you cannot withdraw your liquidity. Many projects choose to lock or burn their LP tokens to signal long-term commitment to the community - but if you intend to withdraw later, store them securely.
Step-by-Step Guide: How to Add Liquidity on Solana with 20lab
Prerequisites
- An existing Solana liquidity pool for your token (if you haven't created one yet, use 20lab's Solana Create liquidity pool tool first), particularly its ID.
- Both tokens in your wallet (e.g. your token + SOL or USDC).
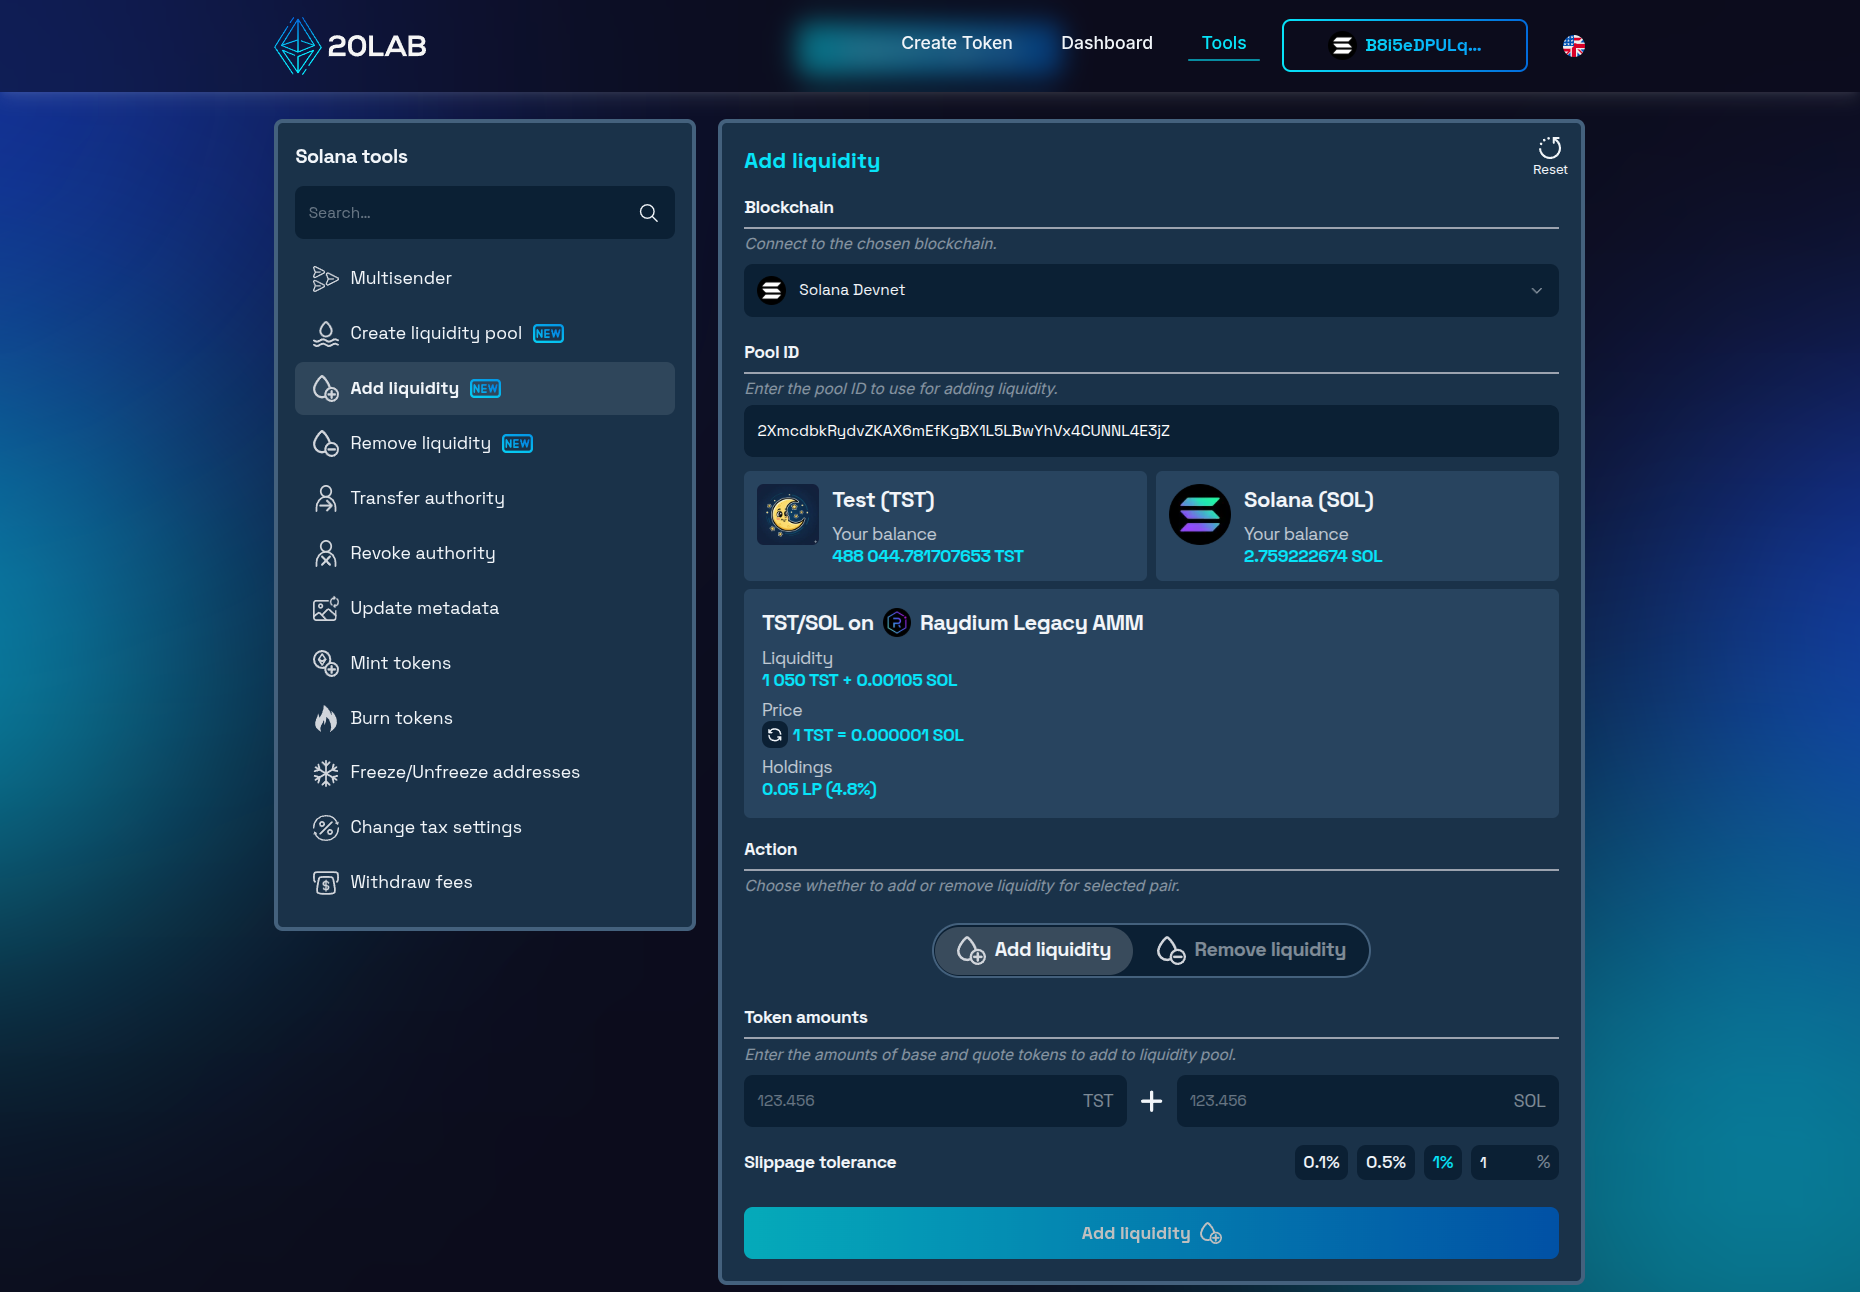
Step 1: Access the Solana Add Liquidity Tool
Visit 20lab's Solana Add liquidity tool page and connect your wallet - use the wallet that holds your token and your paired asset (confirm you're connected to the correct network Mainnet or Devnet for testing).
Step 2: Enter Your Pool ID
Paste your Pool ID into the Pool ID field. This is the on-chain address of the existing liquidity pool you want to add to. The tool auto-detects the protocol - whether it's Raydium Legacy AMM, Raydium CPMM, or Meteora DAMM - and adjusts the interface accordingly. Review the pool details that appear: token pair, current price, and total liquidity already in the pool.
Step 3: Set Token Amounts and Slippage
- Enter the amount of one token you want to deposit. The tool calculates the required amount of the second token automatically based on the current pool ratio.
- Adjust your slippage tolerance: Choose from 0.1%, 0.5%, or 1% - or enter a custom value. For stable pools, 0.5% is usually sufficient. For more volatile tokens, 1% gives your transaction more room to land.

Step 4: Confirm and Execute the Transaction
- Click "Add liquidity" to initiate the transaction. Review the transaction details shown on the transaction confirmation window and by your wallet extension.
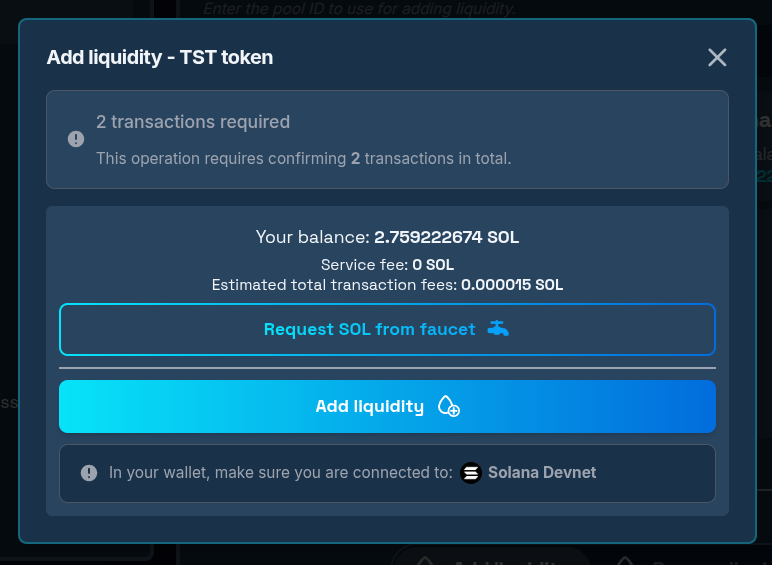
- Confirm and wait for transactions: Send all transactions required to complete the operation. The tool displays all transaction status with links to block explorer.
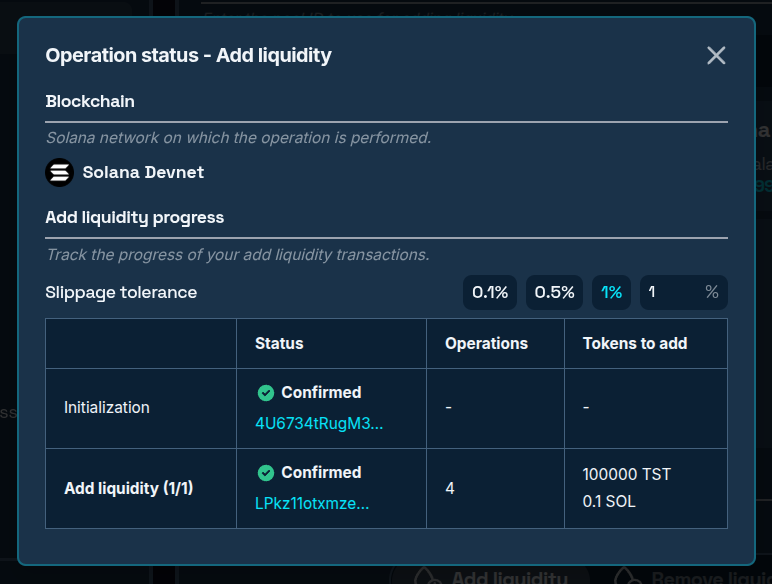
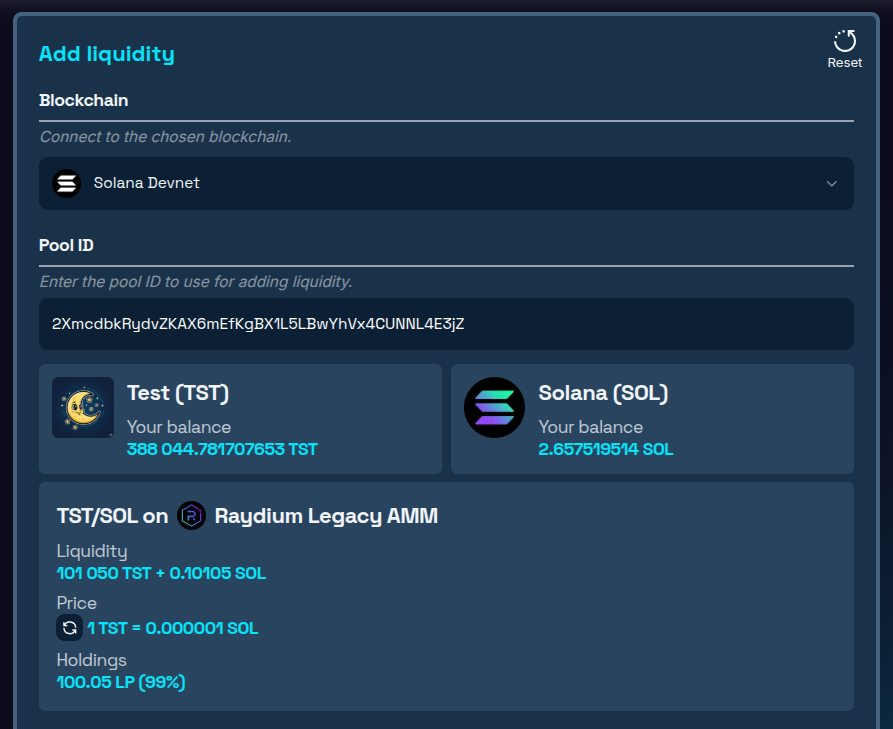
Step 5: Verify Added Liquidity
After the last transaction is confirmed, close the operation window and you will see pool info automatically updated. New liquidity amounts will be added to the pool while price remains unchanged and new LP tokens minted directly to your wallet.
Conclusion
Adding more liquidity to your existing Solana liquidity pool increases its depth. Without it, your token is prone to large volatility, which often disallows large buyers to safely purchase your token. At any time if you didn’t lock or burn your LP tokens, you can use 20lab’s Solana Remove liquidity tool to securely decrease your position.
Questions about adding liquidity? Join our Telegram channel for expert guidance and support from the 20lab team.


