
Token created. Metadata set. Authorities managed. And yet - nobody can buy it. That's the next step every project undertakes after launch: a token without a liquidity pool is like a shop without a door. Creating one is the moment your token stops being a private asset and becomes a publicly tradeable market. Choosing the right pool type, setting the opening price correctly, and picking the right DEX all matter more than people realize.
20lab's Create Solana liquidity pool tool handles the technical side. This guide covers everything else - so you go into it with a clear head and a well-priced pool.
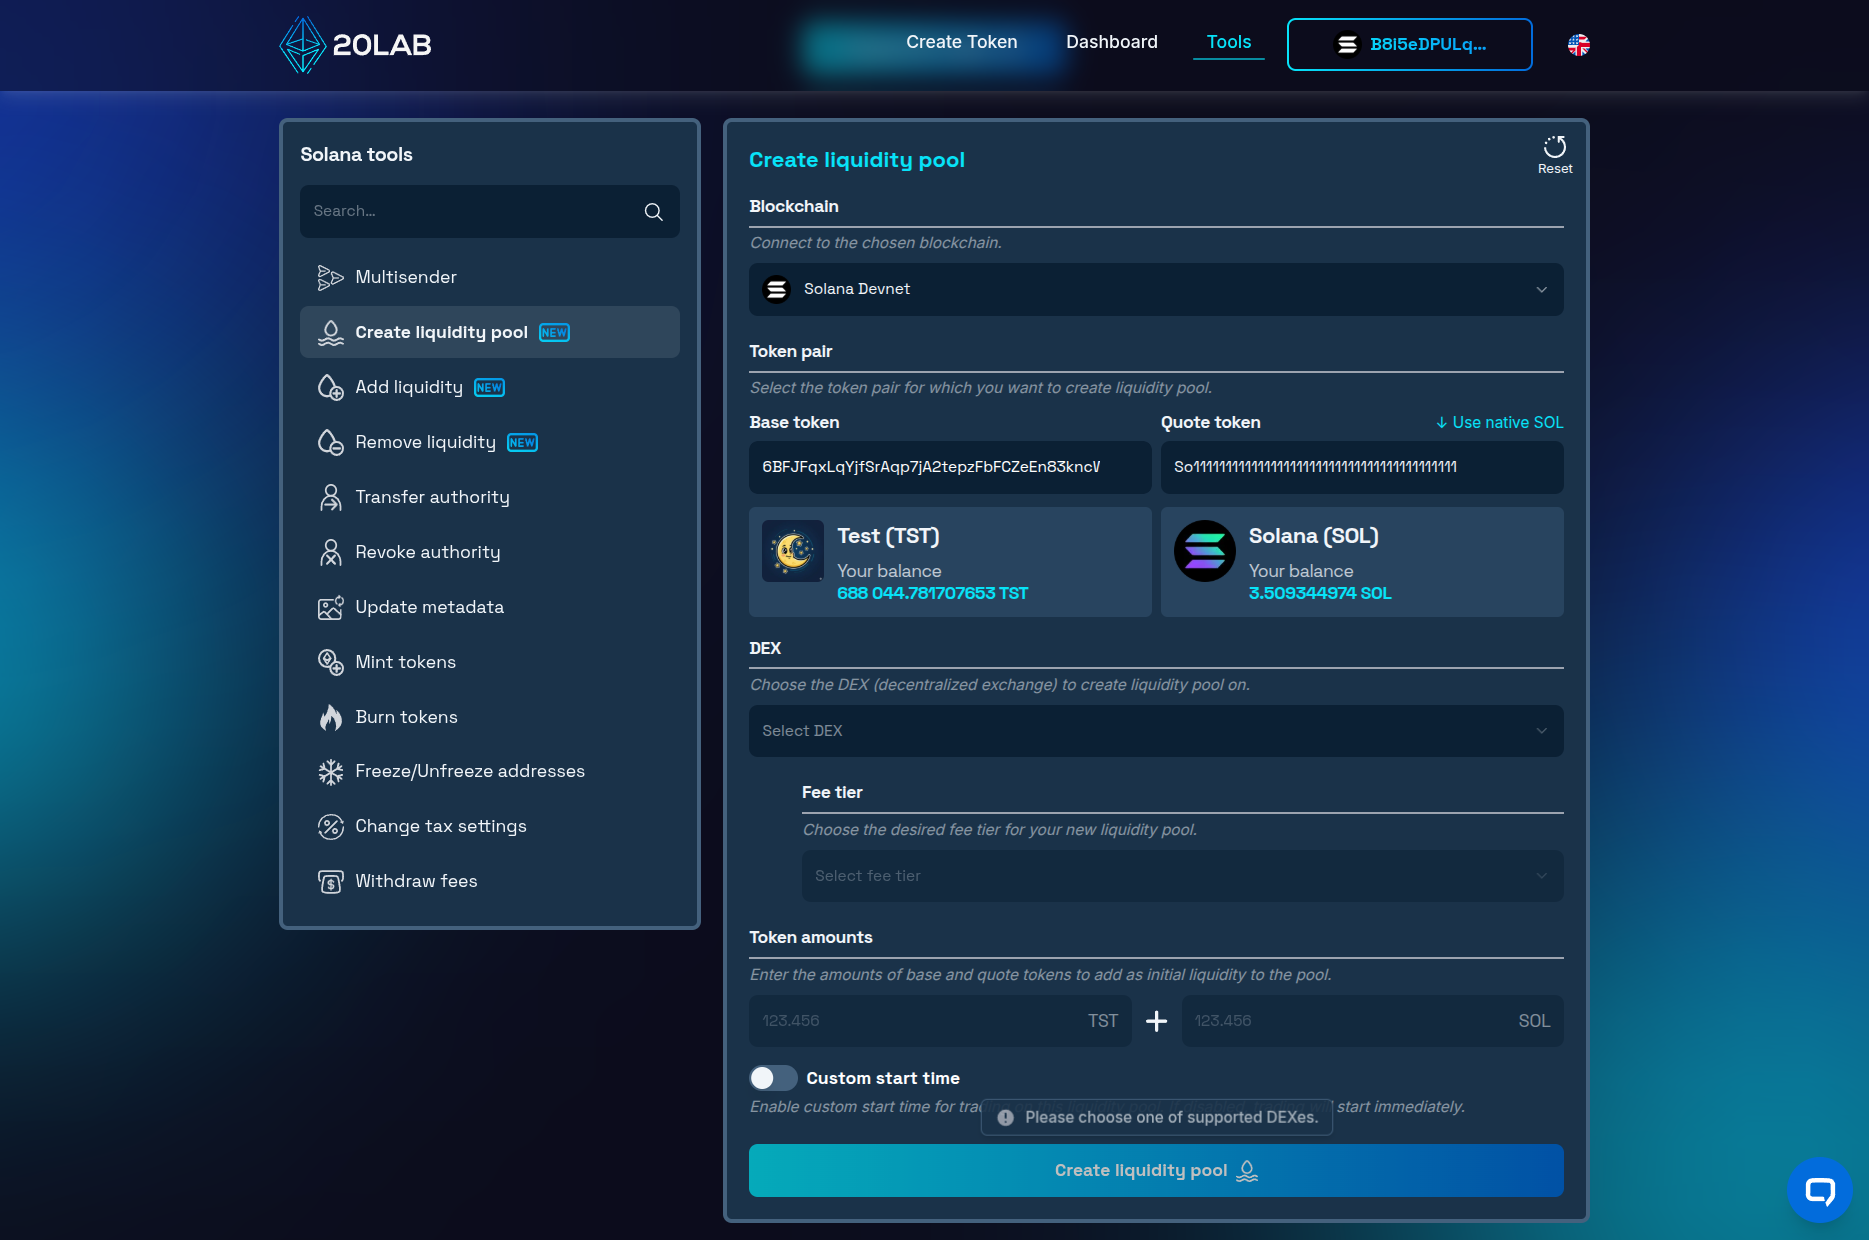
What is 20lab's Create Solana Liquidity Pool Tool?
Pool creation is, at its core, a DEX listing. No approval process, no third-party gatekeepers, no listing fees paid to anyone. Once your pool is live, your token is immediately tradeable on-chain and visible to aggregators, trading bots, and analytics platforms. This tool makes that happen through a guided interface that, at the time of writing, supports 4 distinct pool types across 2 of Solana's leading AMM protocols.
Choosing the Right Pool Type
Each protocol has a distinct architecture, cost profile, and feature set. Here's what actually matters for a new token launch:
Raydium CPMM, a pure constant product AMM - fast to deploy, lower creation cost (approx. 0.2 SOL in protocol fees), and compatible with Token-2022 tokens including those created with the 20lab token generator. No order book involvement, no extra setup. For the vast majority of new SPL token projects, CPMM is the right starting point.
Raydium Legacy AMM integrates with the OpenBook on-chain order book, which means your token also becomes accessible to limit order flow and OpenBook-compatible interfaces. 20lab automatically creates the required OpenBook market as part of the pool creation - you don't need to handle that separately. The trade-off is a higher upfront cost (approx. 0.45 SOL) and compatibility limited to standard SPL tokens only (no Token-2022 program support).
Meteora DAMM V1 is classic Meteora dynamic AMM. Simpler setup, no additional protocol fees, standard SPL tokens only. A solid option if you prefer Meteora's infrastructure but don't need the advanced features of V2.
Meteora DAMM V2 is a fully separate program from V1, not an upgrade. Key differences for token projects include: volatility-based dynamic fees that boost LP earnings during price swings, NFT-based LP positions with vested/locked liquidity tracking, full Token-2022 compatibility, and configurable fee modes (fees in both tokens, or quote token only). For launches where advanced controls and LP structure matter, V2 is the more capable option.
The Most Important Thing: Setting Your Opening Price
There is no price field in this tool. Your opening price is determined entirely by the ratio of the two assets you deposit. This is one of the most consequential decisions in your entire token launch.
Here's the math:
- Deposit 1 SOL + 1,000,000 tokens = opening price of 0.000001 SOL per token
- Deposit 10 SOL + 1,000,000 tokens = opening price of 0.00001 SOL per token
- Deposit 100 SOL + 1,000,000 tokens = opening price of 0.0001 SOL per token
Understanding Pool Creation Costs
Two distinct cost categories apply here, and they're worth separating:
Your initial deposit is not a fee. The tokens and SOL you seed the pool with remain yours. They stay in the pool as liquidity, earn trading fees over time, and can be withdrawn at any point via 20lab's Remove liquidity tool. Think of it as capital deployed, not capital spent.
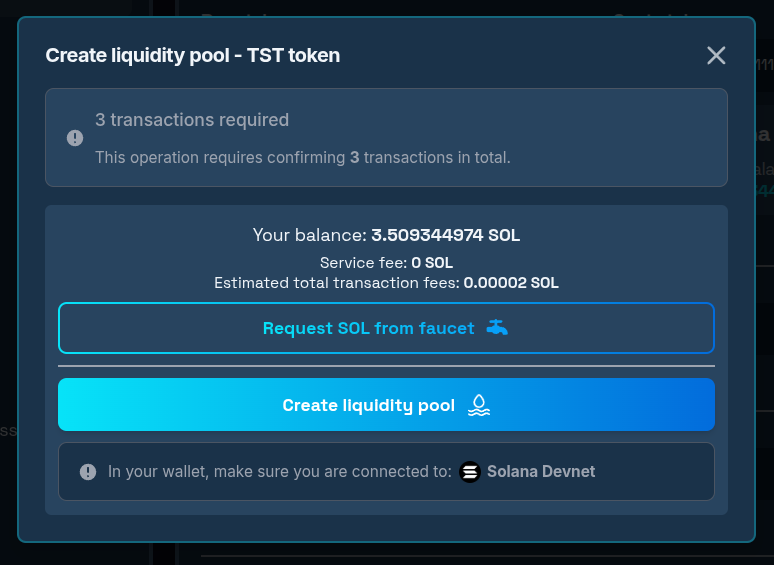
Protocol fees are actual costs. Raydium charges a one-time fee to deploy the pool on-chain - approximately 0.2 SOL for CPMM and 0.45 SOL for Legacy AMM. Meteora charges nothing beyond standard Solana network transaction fees. All costs are displayed clearly in the interface before you confirm, so there are no surprises at the point of signature.
Step-by-Step Guide: How to Create a Liquidity Pool with 20lab
What you’ll need:
- Your SPL token's mint address.
- A quote token in your wallet - typically SOL or USDC.
- Enough of both tokens to seed meaningful initial liquidity.
- SOL to cover network fees and any applicable protocol costs.
Step 1: Open the Tool and Connect
Head to 20lab's Create Solana liquidity pool tool and connect the wallet that holds your token and your quote asset.
Step 2: Configure the Token Pair
Pick your base token (your SPL token) and quote token (typically SOL or USDC).
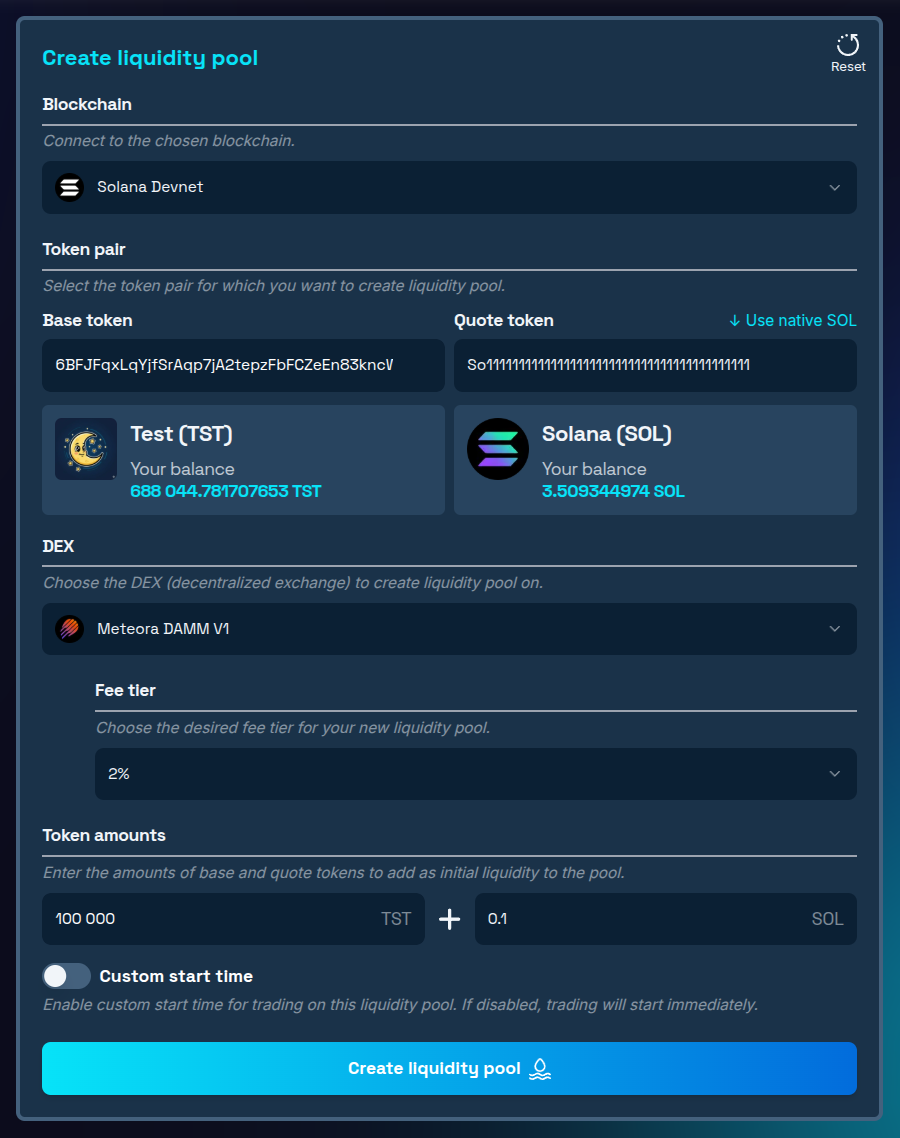
Step 3: Select DEX and Fee Tier
- Pick your DEX and pool type from the dropdown: Raydium CPMM, Raydium Legacy AMM, Meteora DAMM V1, or Meteora DAMM V2.
- Choose a fee tier. This is the percentage traders pay on each swap through your pool. Lower fees attract higher volume; higher fees mean more earnings per trade. Common tiers range from 0.25% to 1% - for new tokens, 0.25% or 0.3% is a reasonable starting point.
Step 4: Set Initial Liquidity Amounts
Enter the token amounts you want to add to the pool. The ratio of these two numbers becomes your opening price.
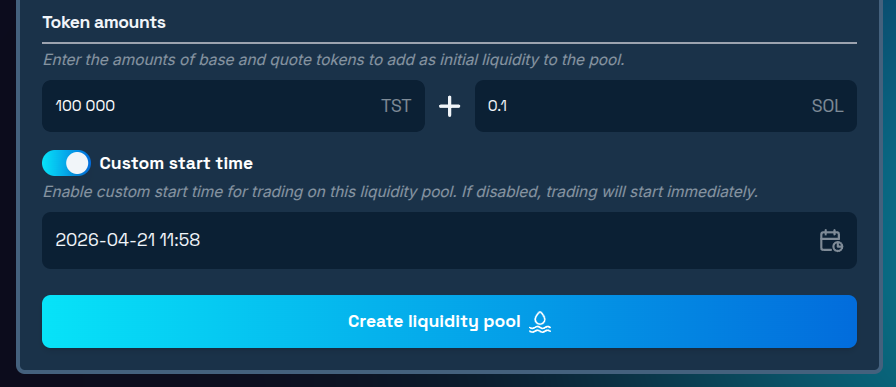
Step 5: Configure Start Time (Optional)
Optionally schedule when trading goes live, rather than activating the pool immediately on creation. This is particularly useful for coordinated launches where you want to announce the pool address publicly before trading opens.
Step 6: Confirm and Deploy
- Click "Create liquidity pool" to proceed to the transaction confirmation window. You will also see whether this operation requires confirming 1 or more than 1 transaction to be completed successfully.
- Approve all of them in your wallet and wait for confirmation(s).
Step 7: Verify the Live Pool
- Copy the pool ID from the operation window after all transactions have been confirmed on 20lab.
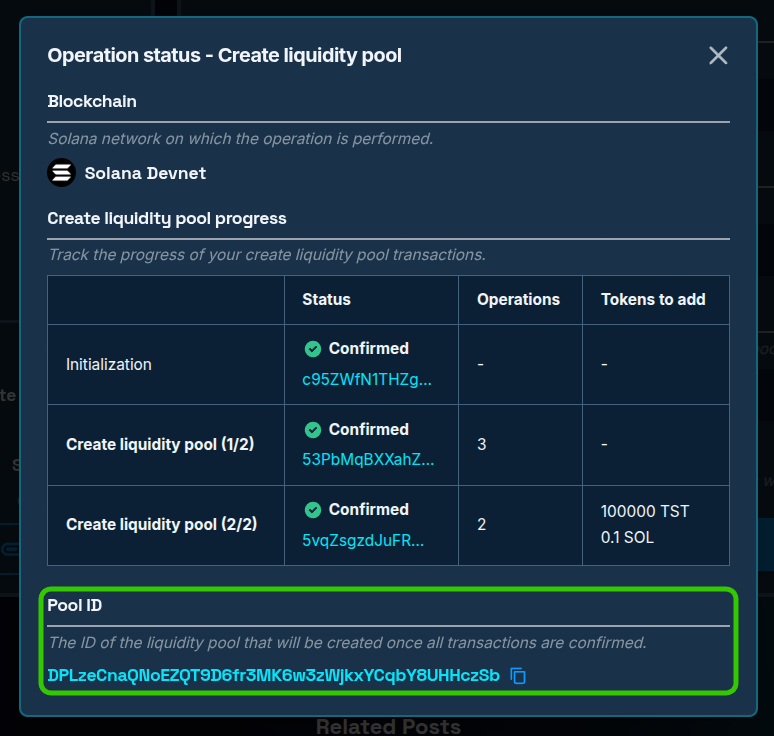
- You can switch to Solana Add liquidity tool or Solana Remove liquidity tool, paste the pool ID, and verify liquidity is added as intended. You will also see your connected wallet holding the correct amount of LP tokens or position NFT.
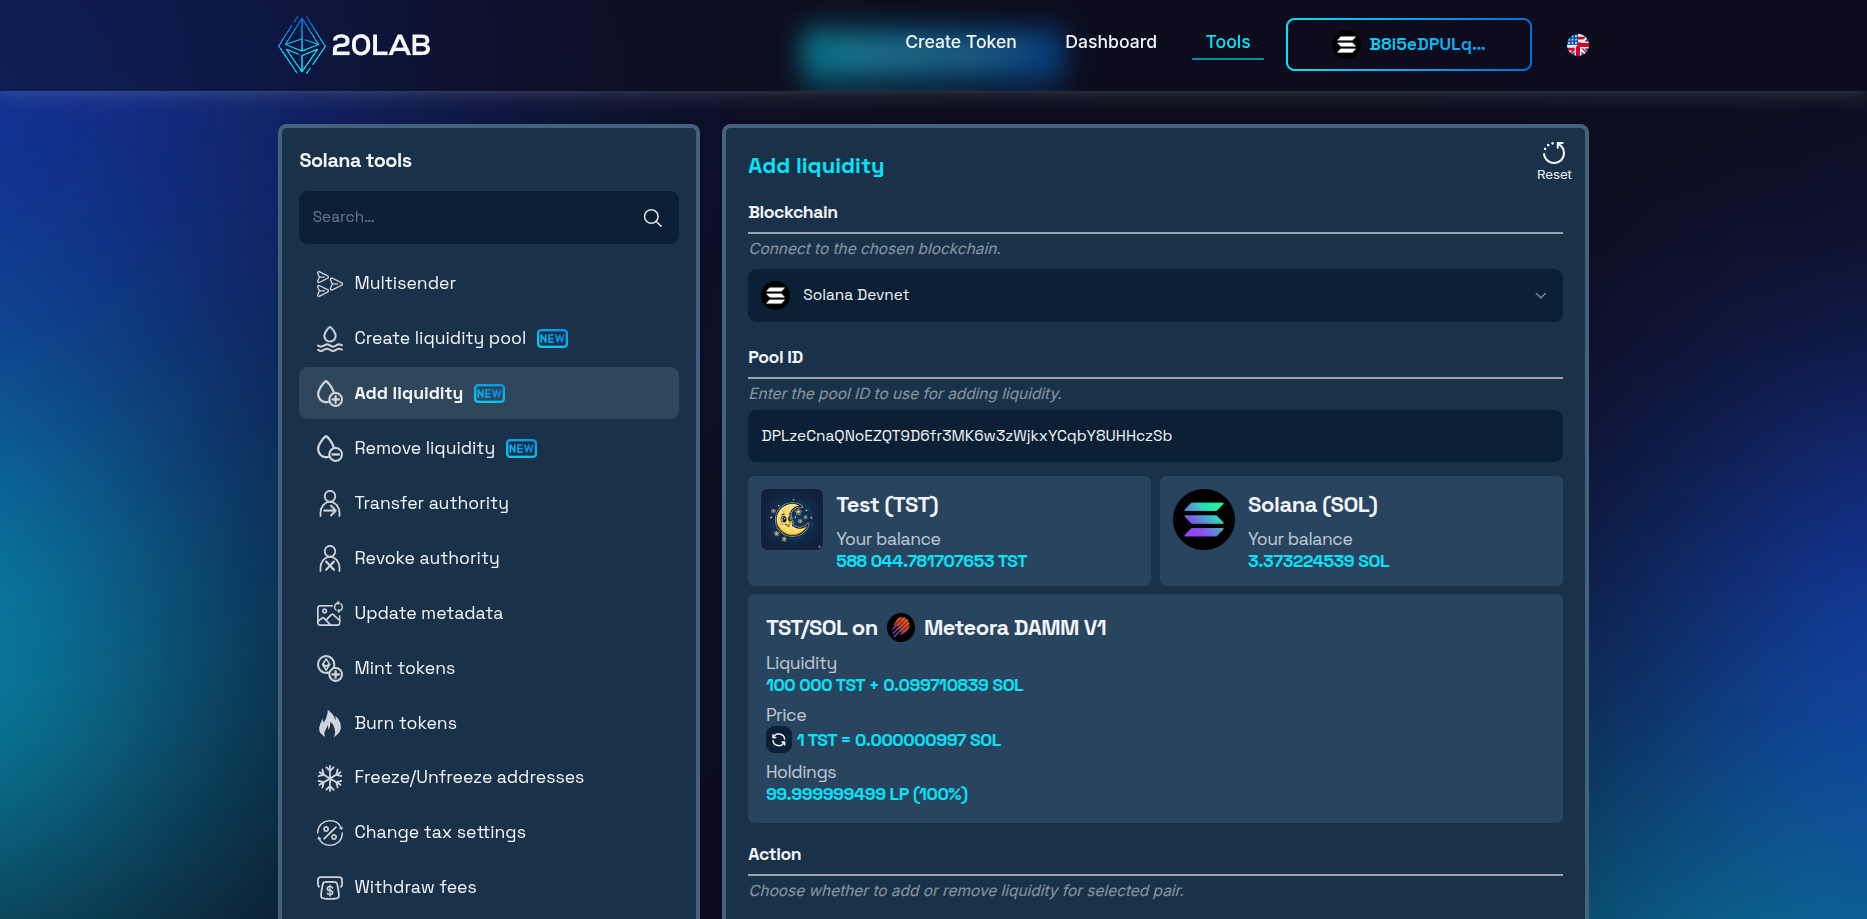
- Within minutes, your token should start appearing on Solana analytics and price tracking platforms.
Things Worth Getting Right Before You Launch
- Decide on start time in advance. If you're doing a coordinated launch with community announcements, use the custom start time feature. It lets you share the pool address publicly without exposing the pool to snipers before your community is ready.
- Review advanced DEX settings. Some DEX versions like Meteora DAMM v2 provide advanced settings to your new liquidity pool. Make sure to double-check the configuration if it is set as desired.
- Keep your LP tokens safe. Use token locker to protect access to your liquidity position or burn them forever to demonstrate your commitment. If your future plans include the power to modify existing liquidity, then LP tokens will be needed to withdraw it.
Conclusion
Pool creation isn't just a technical step - it's the public debut of your token as a tradeable asset. Everything before it was infrastructure. This is the moment the market forms an opinion.
Creating a Solana liquidity pool right, pricing the opening ratio carefully, and seeding with enough depth gives your token a credible start. 20lab's tool takes the DEX complexity off your plate so you can focus on those decisions rather than transaction mechanics. Once your pool is live, 20lab has everything you need to manage it going forward - Solana Add liquidity tool to deepen your position over time, and Solana Remove liquidity tool when it's time to reclaim your assets.
Have questions about which pool type fits your project? Drop into our Telegram channel - the 20lab team is there to help you make the right call.


