
Impact of Raydium on Your Token's Success
Creating a successful token on Solana requires establishing robust liquidity to ensure sustainable trading and long-term viability. Raydium, a cornerstone of the Solana DeFi ecosystem, offers a powerful infrastructure that has revolutionized token launches and trading dynamics.
As one of Solana's leading decentralized exchanges (DEX), Raydium uniquely combines automated market maker (AMM) functionality with a traditional order book system. This hybrid model provides token creators with powerful tools for establishing and maintaining market presence. This guide walks you through how to add liquidity to Raydium step by step, with a focus on security and best practices.
Understanding Raydium's Pool Types
Currently Raydium offers three distinct pool creation options, each serving different needs in the ecosystem:
Legacy AMM v4
- Traditional Model: Integrates with OpenBook program for enhanced liquidity.
- Creation Cost: High initial SOL requirement (approx. 0.45 SOL).
- Market Structure: Requires OpenBook market creation.
- Limited Compatibility: Supports only standard SPL tokens, not Token-2022.
Standard AMM (CPMM)
- Latest Technology: Implements Constant Product Market Maker algorithm.
- Fee Flexibility: Multiple fee tiers (e.g. 0.25%, 0.3%, 0.5%, 1%).
- Cost-Efficient: Lower creation costs due to simplified structure (approx. 0.2 SOL).
- Token Support: Full compatibility with classic SPL tokens and Token-2022 standard.
- Setup Process: Easy pool creation without OpenBook market ID requirement.
Concentrated Liquidity (CLMM)
- Advanced Features: Offers concentrated liquidity positions for higher capital efficiency.
- Largest Fee Flexibility: Huge selection of fee tiers possible.
- Complex Management: Requires active position management (very similar to Uniswap V3 pool or any concentrated pool).
- Target Use: Best suited for pairs with established trading patterns and active management.
Why Choose Standard AMM for Token Launch?
The new Standard AMM pool type has become the preferred choice for most token launches on Raydium and offers significant advantages for projects entering the Solana ecosystem. Its streamlined approach to liquidity provision eliminates the need to create an OpenBook Market ID, resulting in lower setup costs and faster deployment. This makes it particularly attractive to new projects looking to establish a market presence quickly and cost-effectively.
One of the most significant advantages of Standard AMM is its full compatibility with Solana's Token-2022 program. This advanced token standard opens new possibilities for token creators and supports new feature extensions. This compatibility ensures that projects can utilize advanced token features while maintaining seamless integration with Raydium's liquidity infrastructure.
For tokens created using 20lab's token generator, standard AMM compatibility is guaranteed as we ensure that your token contains only supported extensions - Transfer Fees, Metadata or Metadata Pointer. This means you can confidently create your pool using the Standard AMM option without any compatibility concerns.
However, it's important to note that if your token has freeze authority enabled, you should consider disabling it before creating your pool. Raydium will display a freeze authority warning to potential traders, which could impact your token's credibility and trading acceptance.
Step-by-Step Liquidity Addition Guide
Before you begin the pool creation process, you should gather these essential items:
- Your token address (token mint address)
- Tokens for initial liquidity and SOL for pool creation fees, and transaction costs
- Quote token (SOL or another token) to pair with your token in the pool
If you created your token on 20lab, you can easily copy the token mint address from the dashboard or access the Solana liquidity pool creation tool directly.
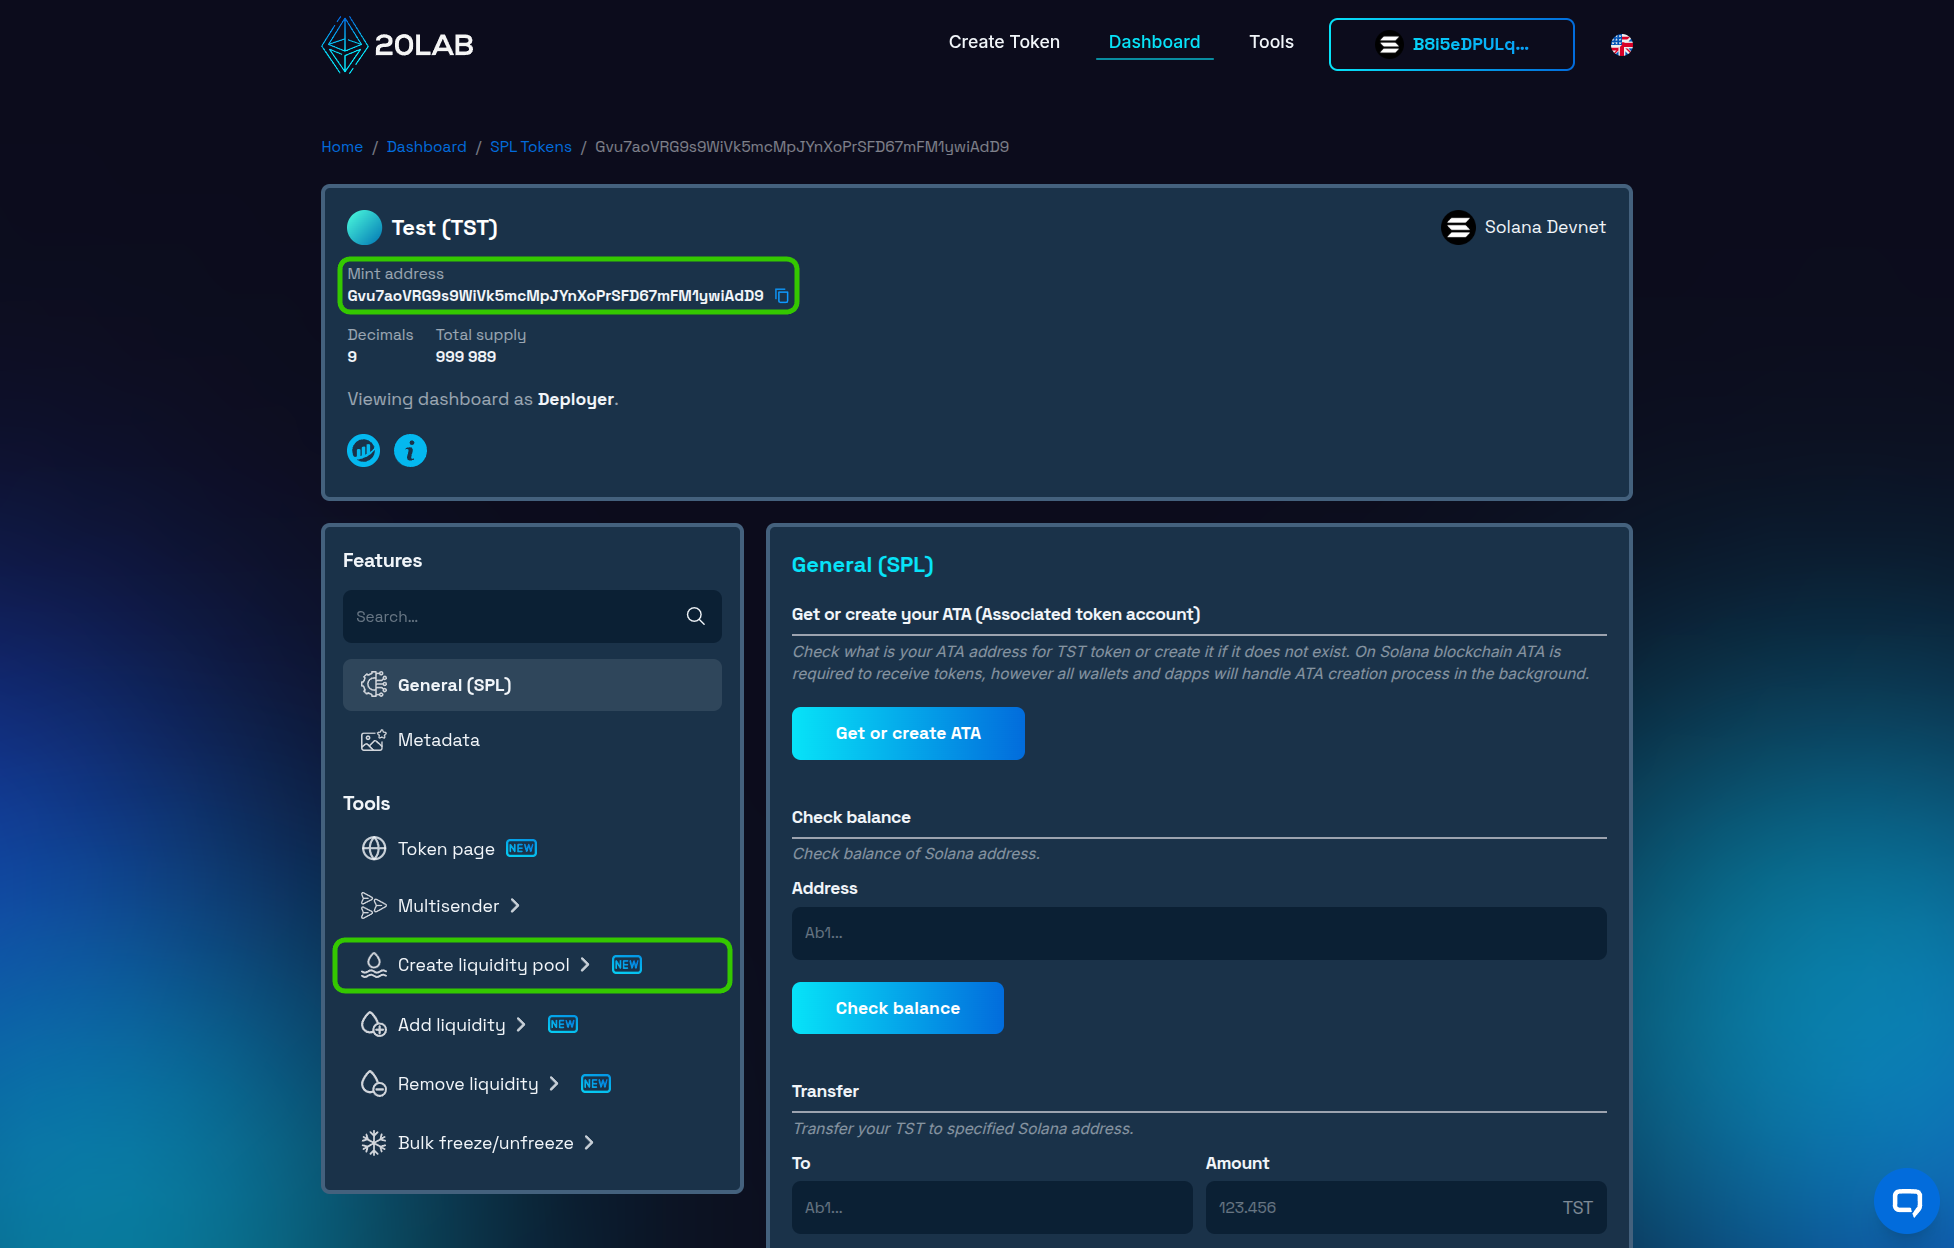
Once you have all of the above ready, here's how to add liquidity to Raydium:
- Navigate to the Solana liquidity pool creation tool.
- Paste your token mint address as the "Base token".
- Paste the quote token mint address or select native SOL.
- Choose one of the supported Raydium DEX types - in this case, Raydium CPMM.
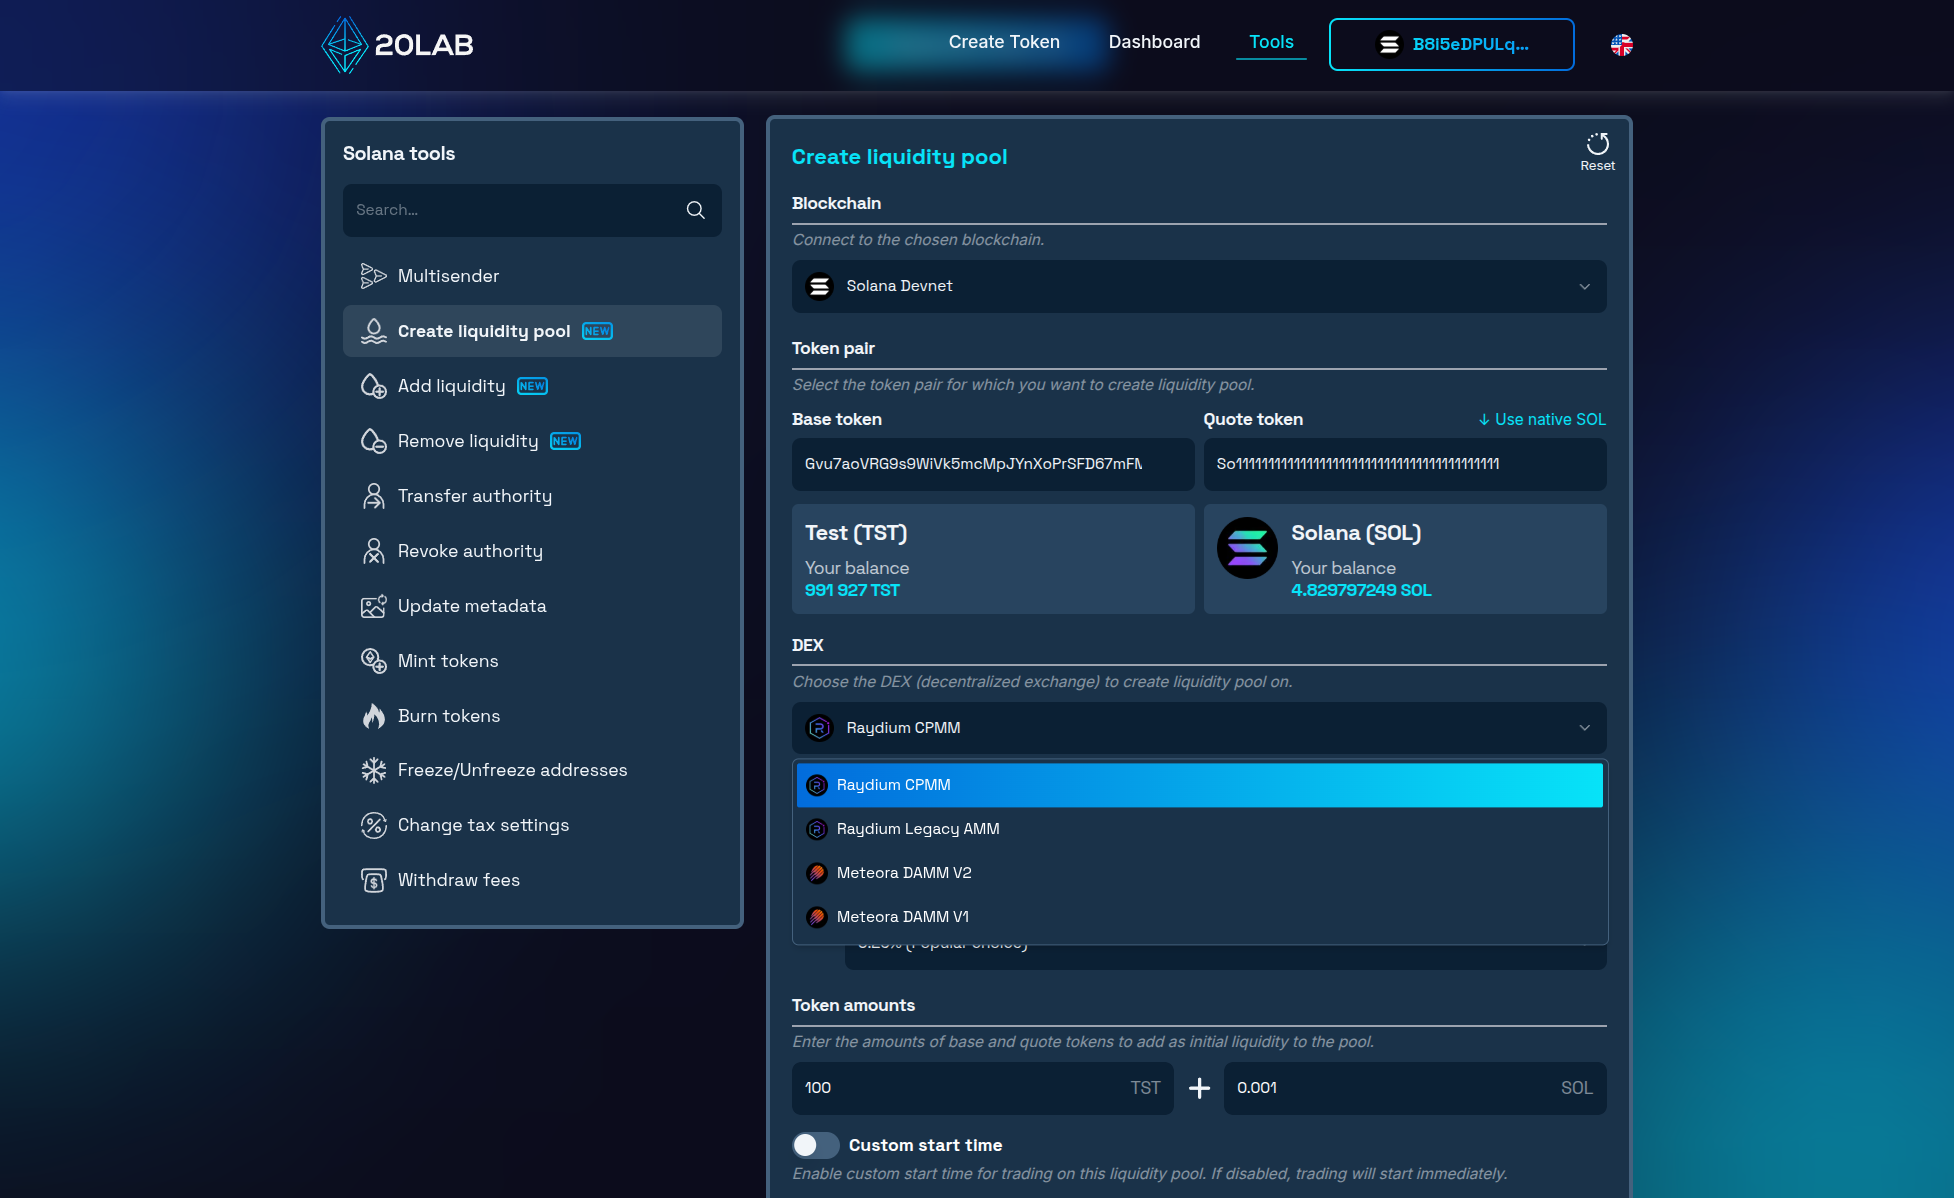
- Since the CPMM pool type was selected, choose your preferred fee tier. This determines the trading fee you'll earn whenever someone swaps tokens through this pool. Recommended rates are 0.25% for higher-volume pairs and 1% for lower-volume or newer tokens.
- Enter the amounts of base and quote tokens to add to the pool. The ratio between the two tokens determines the initial price of your token, so double-check this before proceeding.
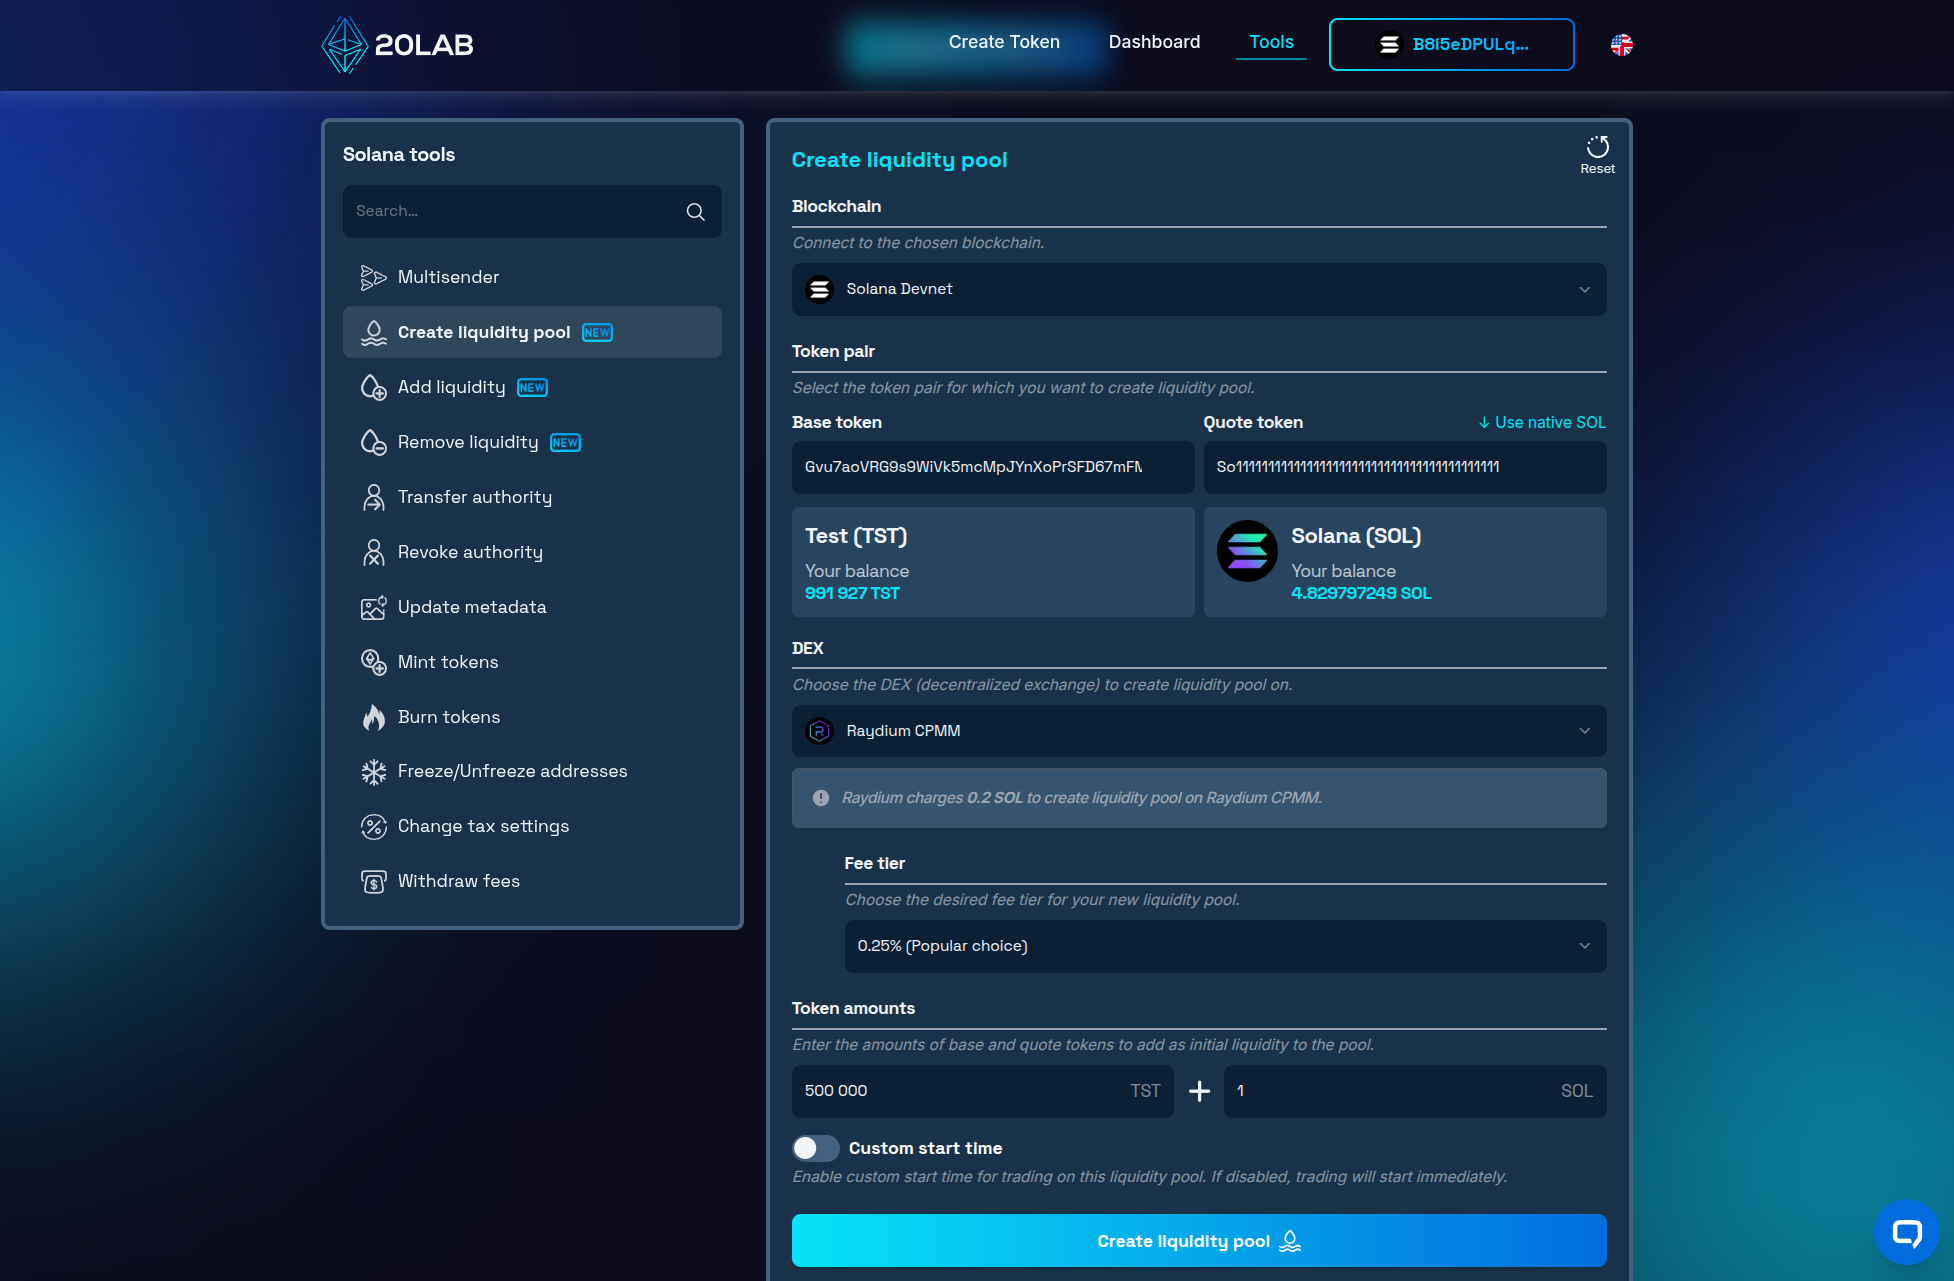
- Optionally, set a custom start time for the pool or launch it immediately after adding liquidity. This gives you control over when trading becomes active - useful if you want to coordinate the launch with an announcement or community event.
Take your time to carefully review all parameters before confirming. Make sure your wallet has sufficient funds to cover both the liquidity amounts and the pool creation fee, then confirm the transactions.
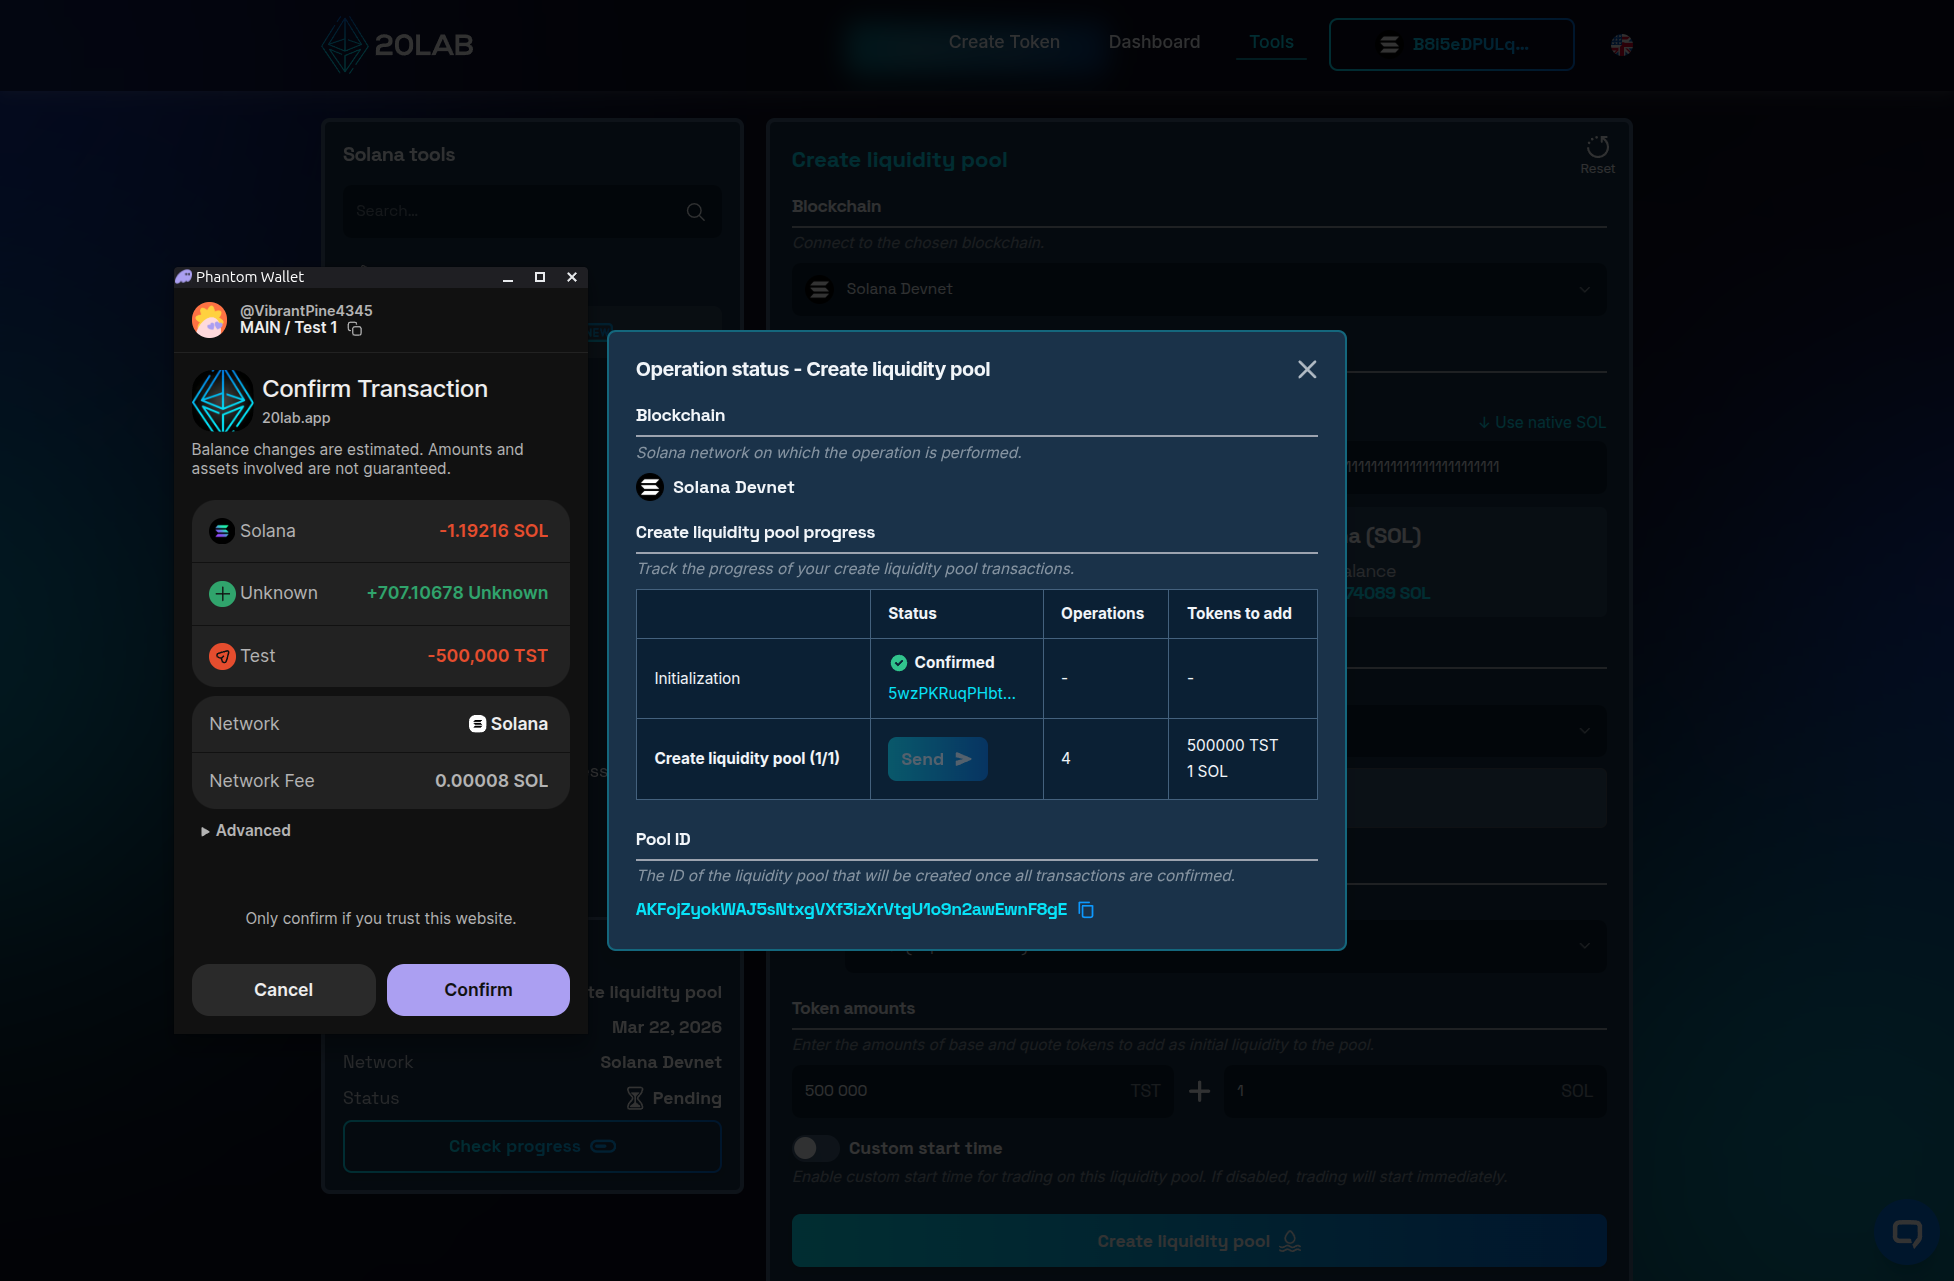
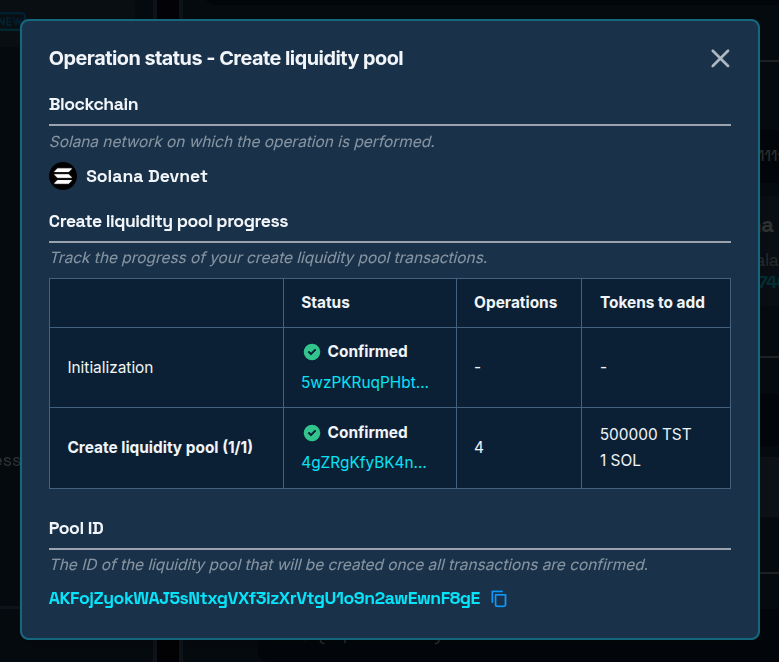
Once all transactions are confirmed, your pool will be live and accessible under its automatically assigned pool ID, which you can copy directly from the operation status window.
Launch Management and Security
Once your pool is live, 20lab gives you everything you need to manage your liquidity directly - no need to navigate multiple platforms. This section walks you through adding and removing liquidity, monitoring your pool's performance, and securing your LP tokens for the long term.
Adding Liquidity to Raydium
As your project grows, you may want to deepen your pool's liquidity to support higher trading volumes and reduce price impact for traders. You can do this at any time using Solana add liquidity tool.
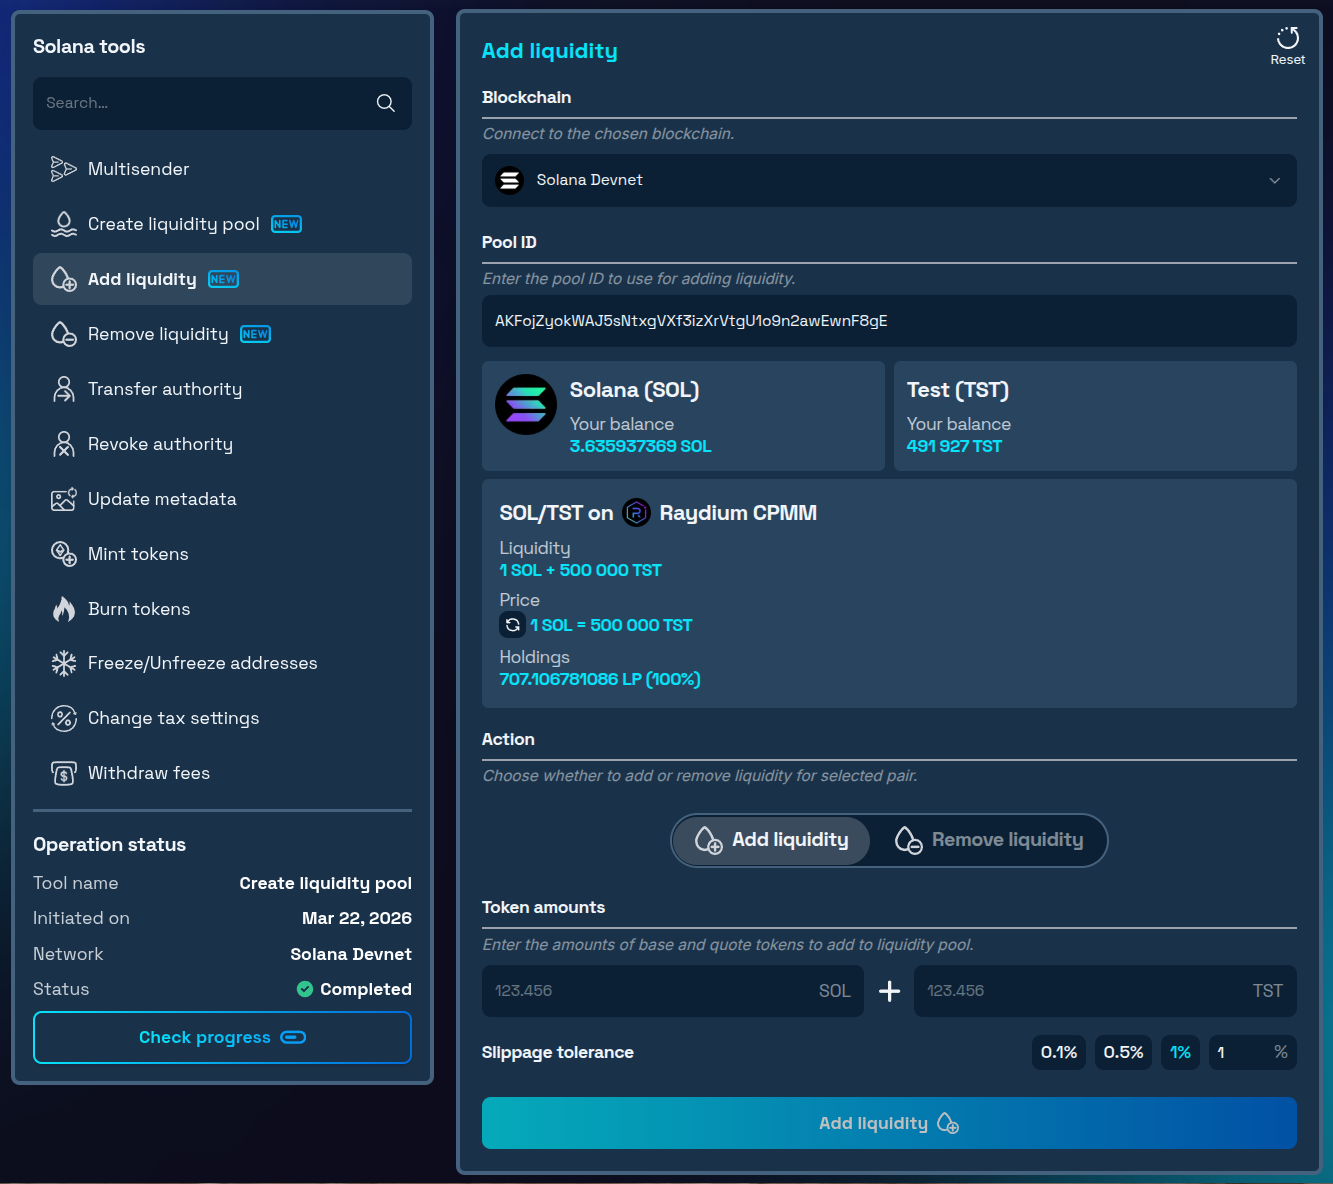
Simply paste your pool ID, enter the amounts you want to add, and confirm transactions. The tool handles the rest, keeping you in full control of your position without leaving the platform.
Removing Liquidity
If you need to withdraw a portion of your liquidity - for example, to rebalance or adjust your strategy - you can do so using Solana remove liquidity tool.
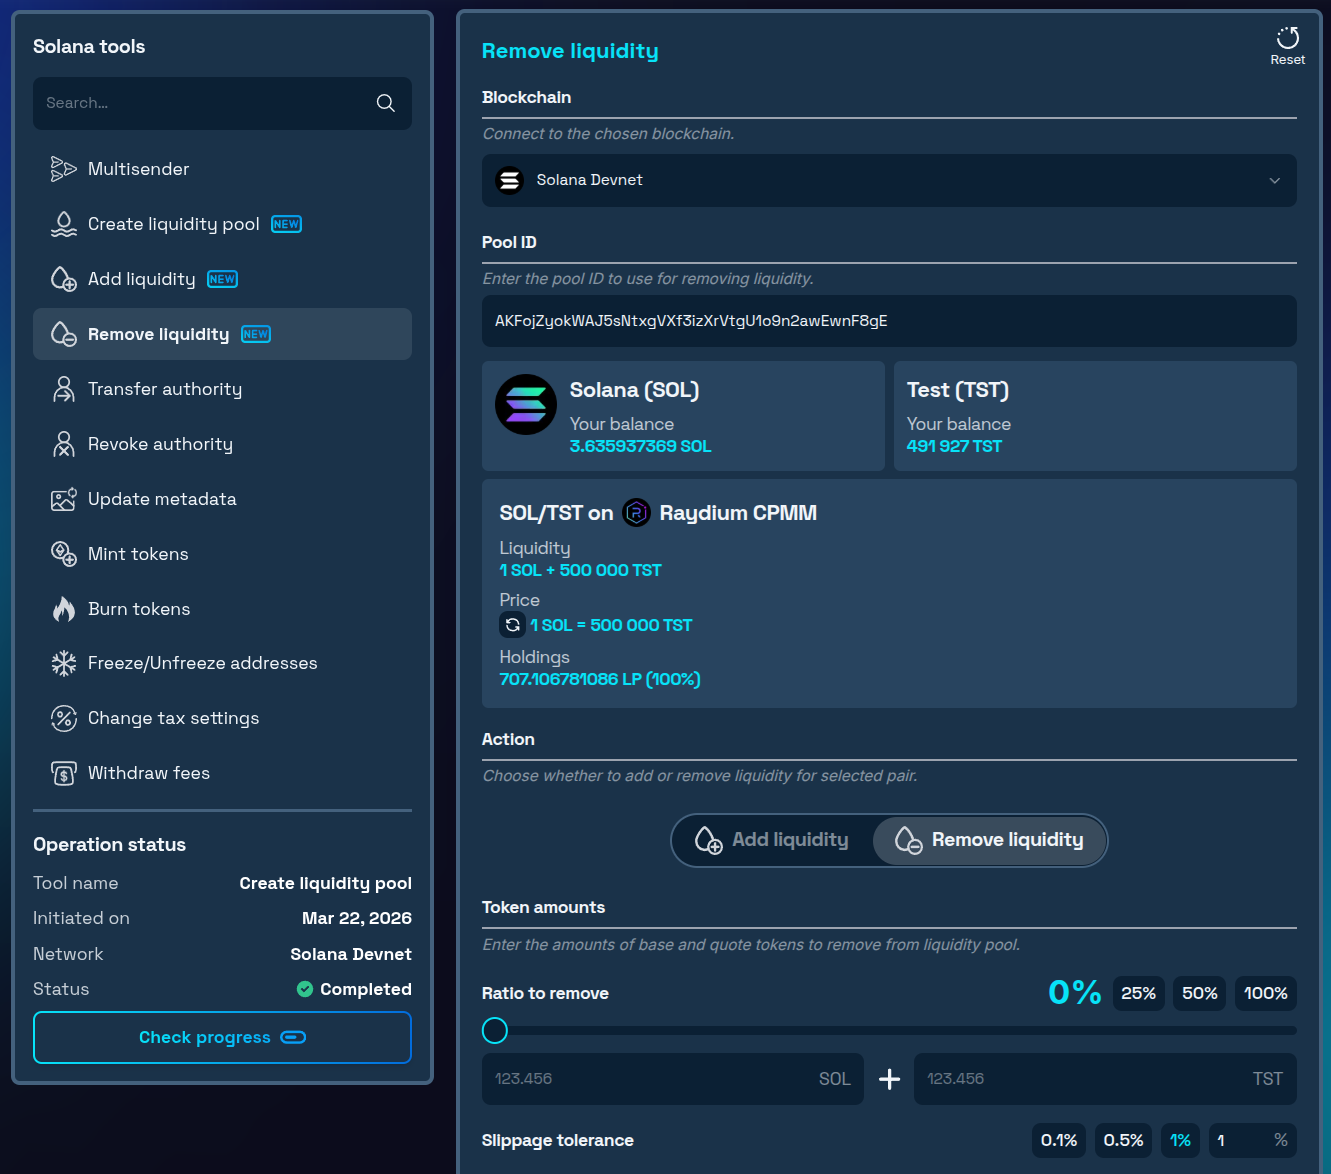
Keep in mind that you can only remove liquidity that has not been locked or burned. Any secured portion will remain in the pool as intended.
Post-Launch Monitoring
Alongside managing your liquidity, it's important to keep a close eye on how your pool is performing. Raydium's interface displays all active liquidity positions tied to your wallet, giving you a clear view of key metrics:
- Trading volumes and fees earned
- Price movements over time
- Liquidity utilization (particularly relevant for concentrated liquidity pools)
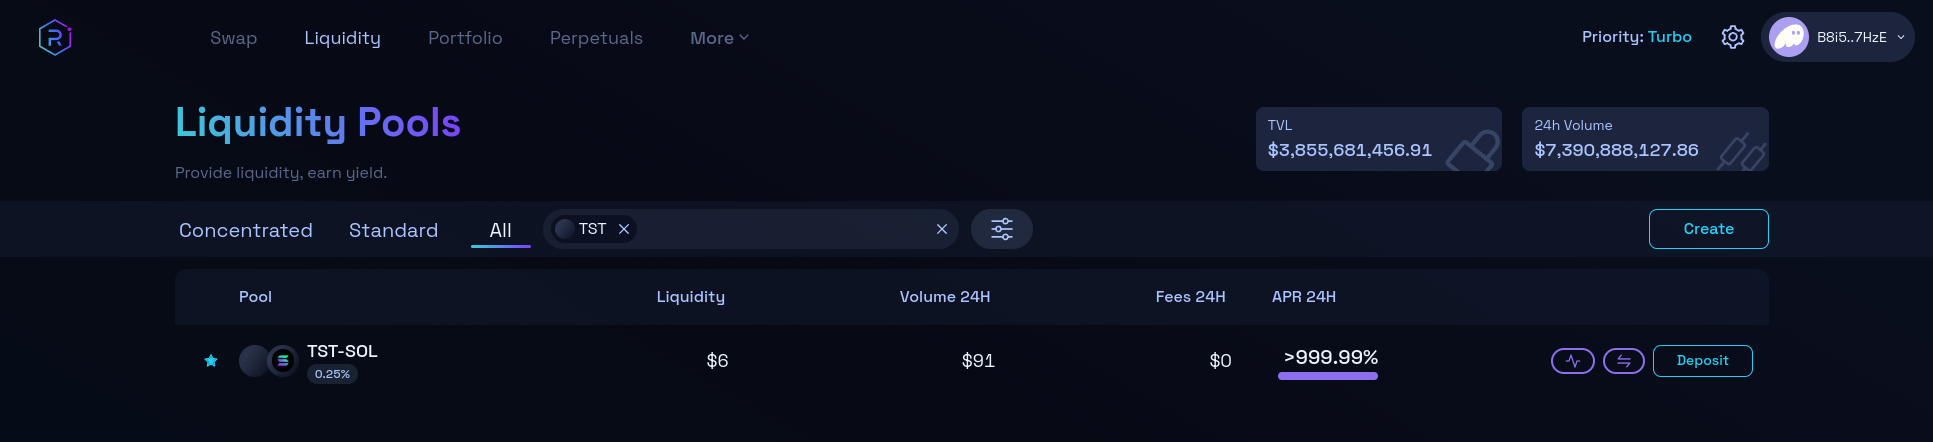
Paying attention to your pool's health and responding to trading activity early is key to maintaining a stable and attractive market for your token.
Burning LP Tokens
Burning your LP tokens represents the highest level of commitment you can demonstrate to your community. By burning your liquidity, you make it permanently inaccessible - no one, including you, can ever withdraw it. At the same time, you continue earning trading fees generated by the pool.
To burn your LP tokens, go to the Raydium liquidity burn page.
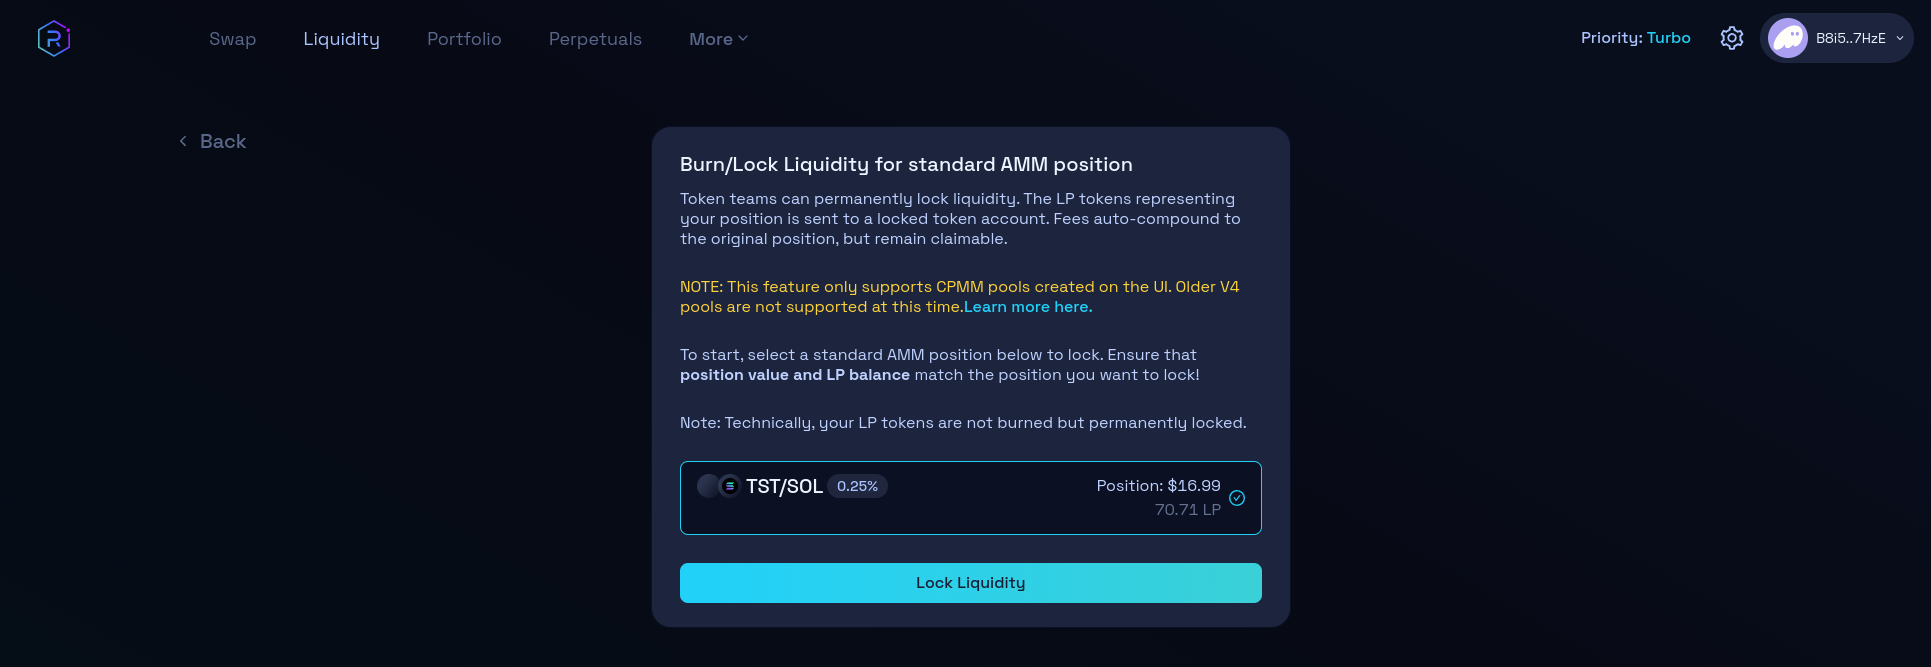
This approach:
- Provides the strongest security guarantee for investors
- Demonstrates long-term confidence in the project
- Continues to accumulate trading fees from your pool even after burning
Note: Burning is irreversible. Once confirmed, there is no way to recover the LP tokens or withdraw the underlying liquidity. Make sure this aligns with your long-term plans before proceeding.
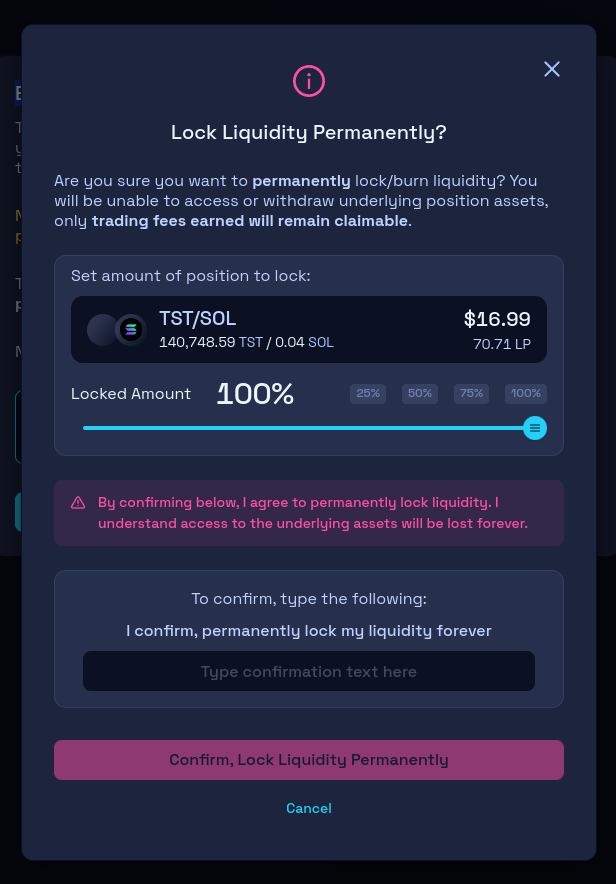
Locking LP Tokens
If you want to retain the option to manage your liquidity in the future, locking is a flexible alternative. Rather than permanently burning your LP tokens, you lock them for a fixed period - we recommend a minimum of 6 months - using a trusted third-party locker. The lock is verifiable on-chain, so anyone can confirm your liquidity is secured.
A reliable option for this on Solana is Streamflow, which supports LP token locking with customizable lock durations and on-chain verification.
This approach provides:
- Flexibility for future liquidity management once the lock expires
- Time-locked security that can be independently verified on-chain
- Ability to adjust your strategy as your project grows and evolves
When choosing between burning and locking, consider your project's long-term roadmap. Burning sends the strongest possible trust signal to investors, while locking is more appropriate if you anticipate needing to revisit your liquidity strategy down the line.
Conclusion
When you add liquidity to Raydium, the process is straightforward with the right tools behind you. By using Solana liquidity pool creation tool, you can go from token creation to an active trading pool in just a few steps - without needing to navigate multiple platforms or deal with complex setup requirements.
The Standard AMM pools offer an efficient and cost-effective path for new projects, and by following the security practices in this guide - burning or locking your LP tokens and monitoring your pool's performance - you'll be well positioned for a sustainable, credible launch.
For more support with token creation and liquidity pools on Solana, join our Telegram channel. Our team is here to help you succeed.


