
Creating tokens on the Sui blockchain opens up exciting possibilities in Web3, but the true power of your token lies in its metadata - the rich layer of information that brings your token to life. As the Sui ecosystem continues to expand, well-implemented metadata has become essential for token visibility and credibility.
Token metadata on Sui goes beyond basic parameters like name and symbol. It's a comprehensive framework that allows you to embed detailed information about your token directly on-chain, making it easily accessible to wallets, marketplaces and other applications in the Sui ecosystem.
In this comprehensive guide, you'll learn how to add professional metadata to your Sui tokens using 20lab's advanced token generator. This tutorial will equip you with the knowledge to implement metadata that truly represents your project's vision!
Creating Tokens with Metadata on Sui
The Sui blockchain offers powerful features for token creation, and with 20lab's intuitive token generator, you can now leverage these features to create tokens with rich metadata structures that truly represent your project. Our platform simplifies the complexities of Sui's Move-based token implementation, allowing you to focus on designing meaningful metadata that enhances the utility and appeal of your token.
Building on Sui's unique object-centric model, 20lab's generator streamlines the token creation process while maintaining full compatibility with Sui's native features. Whether you're starting a new project or expanding an existing one, our platform ensures that your tokens are created with proper metadata structures from day one, following Sui's best practices and standards.
Step 1: Choose Token Type and Connect Wallet
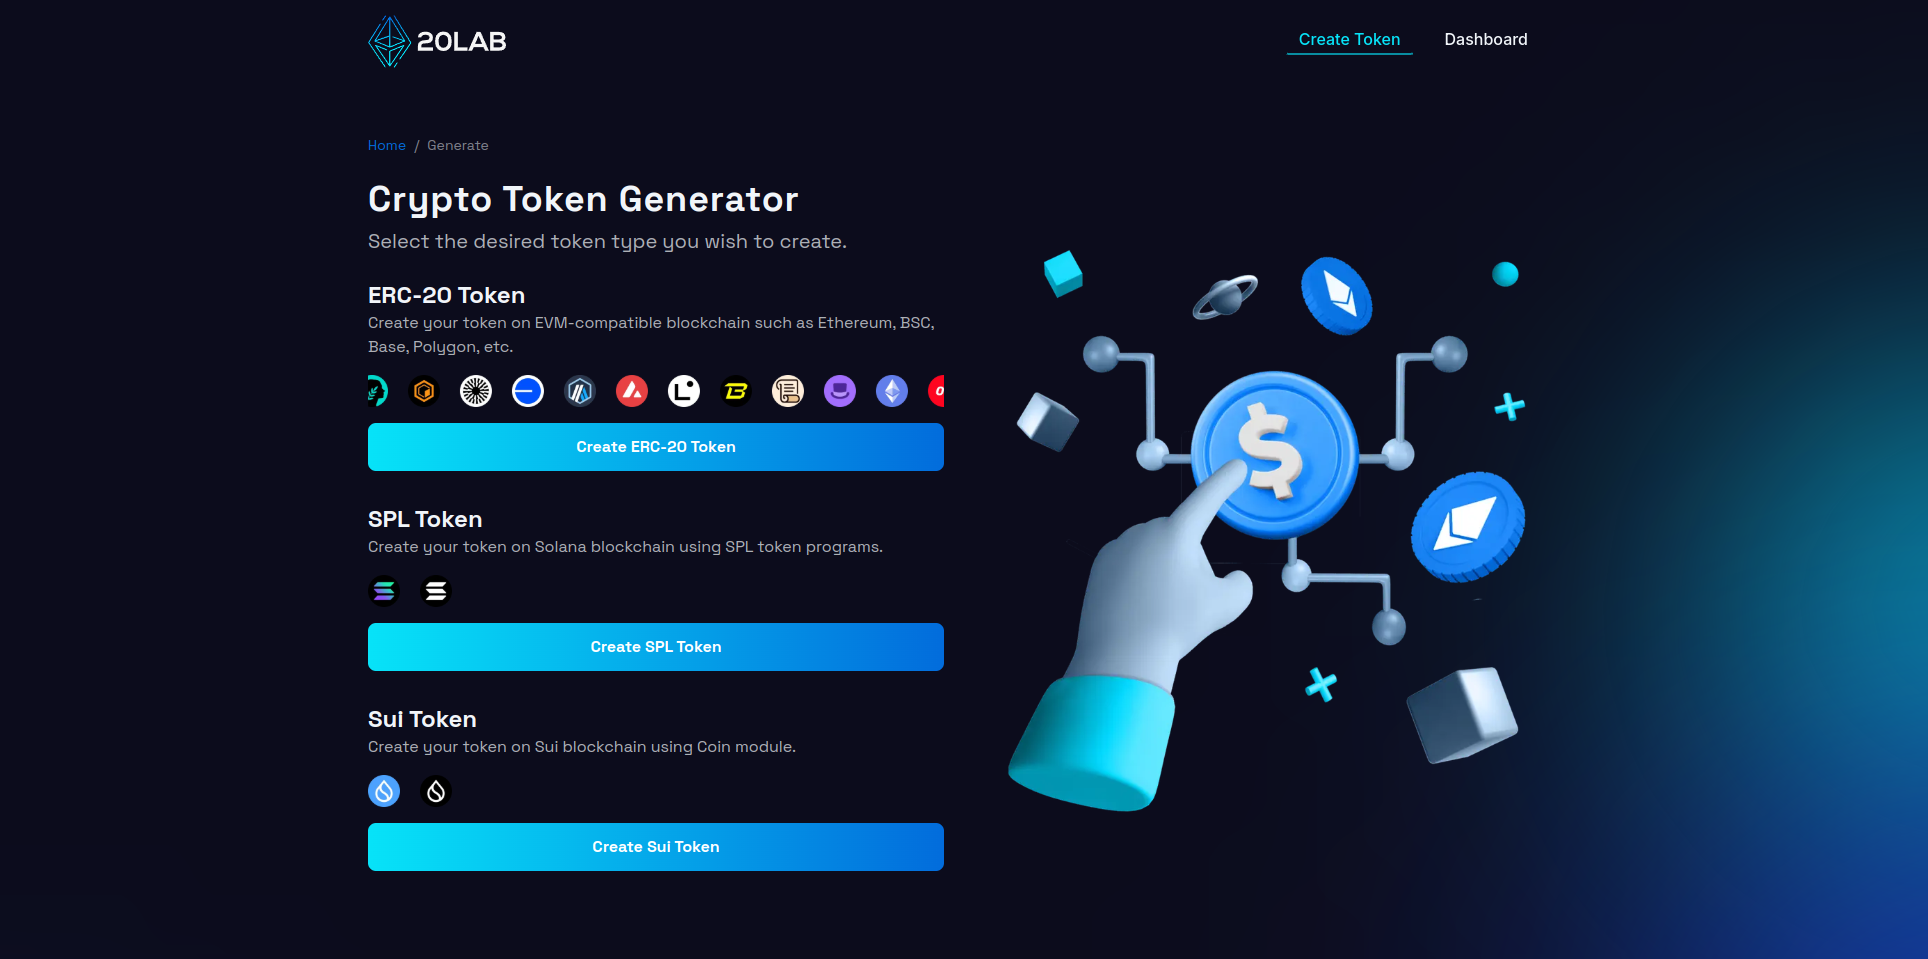
To begin creating your Sui token, first visit 20lab.app in your web browser. Open the app and navigate to the "Create Sui Token" option, which will take you to the token generator page.
The next step is to connect your Sui wallet (e.g. Suiet wallet, Sui wallet or Stashed) to the platform. After successful connection you will automatically see your wallet address in the top right corner.

Make sure you're connected to the Sui Mainnet (or Sui Testnet if you're experimenting with your token). If you're using 20lab's token generator, you'll find the Sui network option among other blockchain choices in the platform. While 20lab supports multiple blockchains, for the purposes of this guide, we'll focus specifically on creating a token on the Sui network.
Step 2: Add General Token Information
When launching a token on Sui, the initial configuration sets the foundation for your entire project. Let's explore how to optimize these crucial parameters using 20lab's Sui token generator.
Your token's digital identity starts with two fundamental elements: the name and symbol. The name provides an identification of your token, while the symbol acts as its shorthand reference. A unique advantage of building on Sui is the flexibility to modify both these elements post-deployment, provided you retain treasury cap and metadata authority.
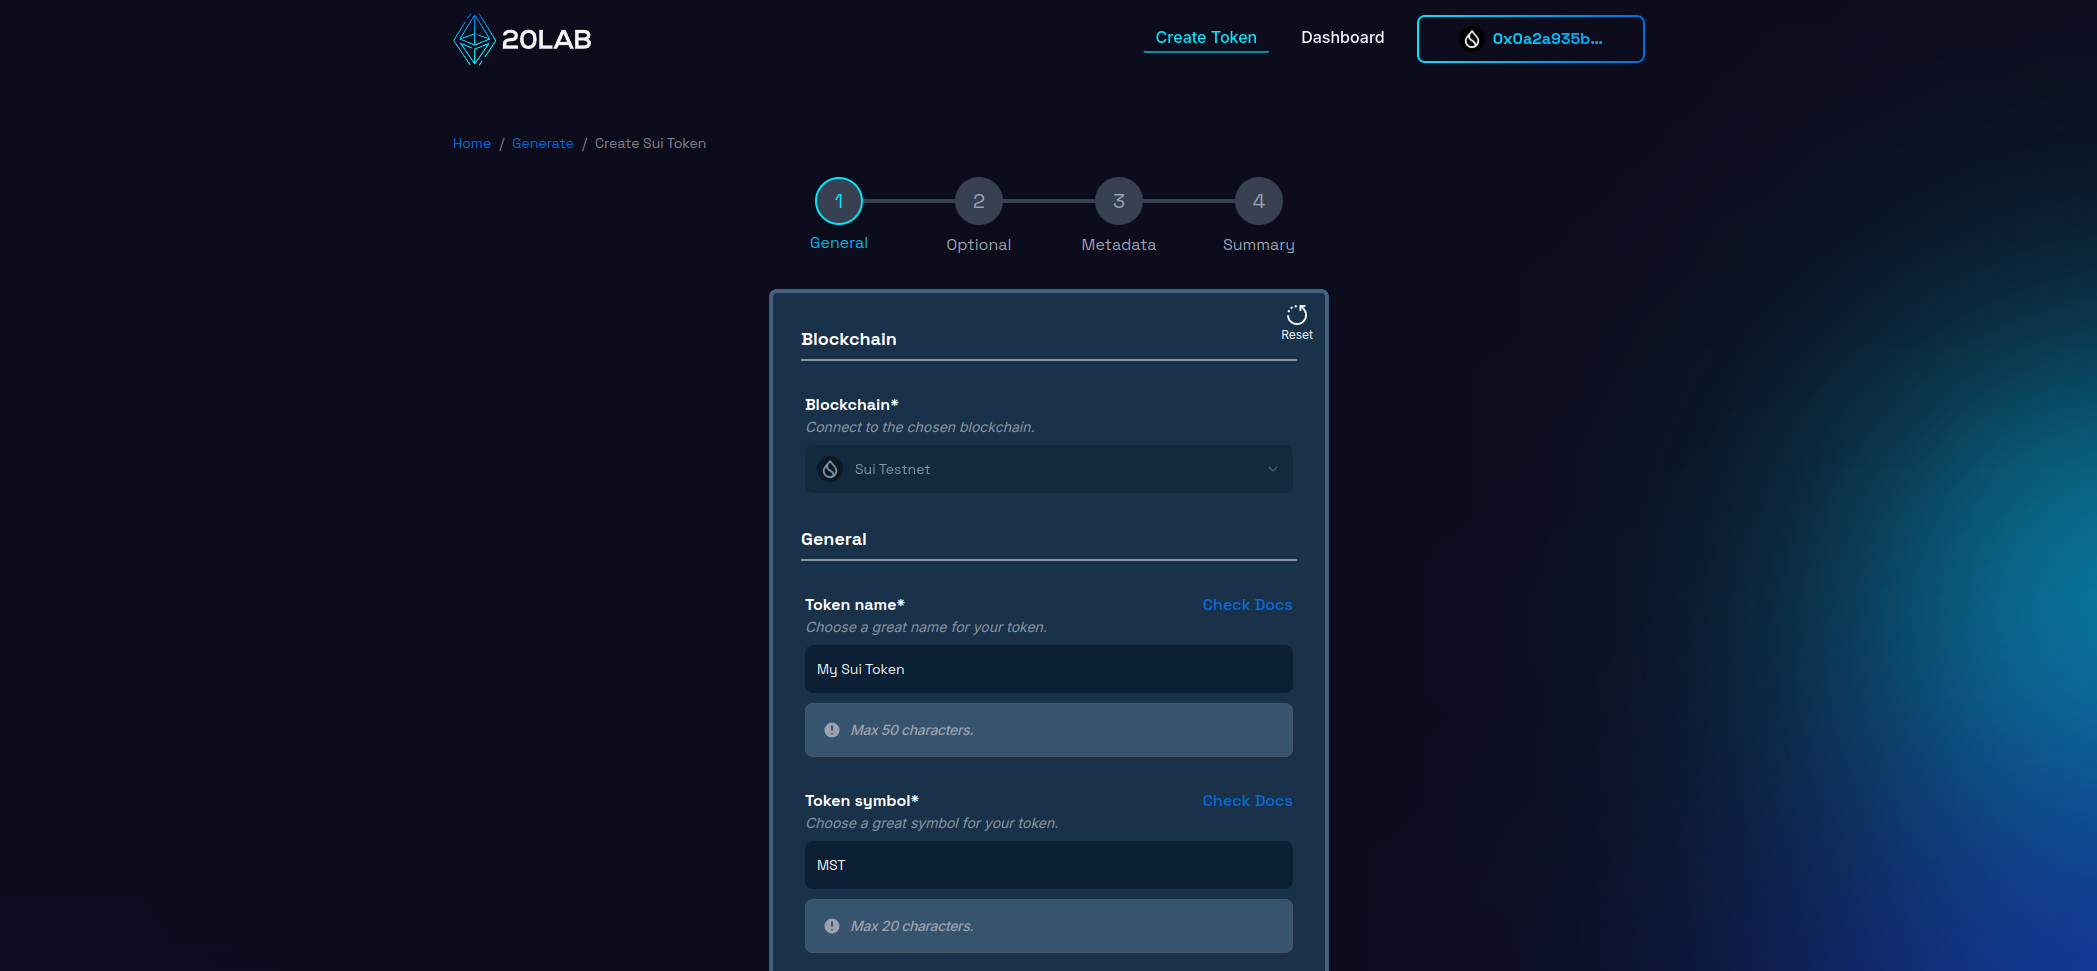
The module name serves as your token's unique identifier within the Sui ecosystem, appearing in your token address (coin type). While customizable, it must adhere to specific guidelines:
- Begins with a lowercase letter and is limited to lowercase letters, numbers, and underscores.
- Permanent after deployment.
- Can be auto-generated by 20lab based on your token name for convenience.
Decimal places define the divisibility of your token, ranging from 0 to 9:
- Industry standard is typically between 6 and 9 decimals.
- Higher precision (more decimal places) will affect the maximum supply capacity.
- This setting becomes immutable after deployment.
The initial supply determines how many tokens are created at launch. When setting this value, keep the following in mind:
- The maximum initial supply depends on the number of decimal places you choose.
- Lower decimal places allow for higher initial supply values.
- Without the mintable feature, this becomes your permanent total supply.
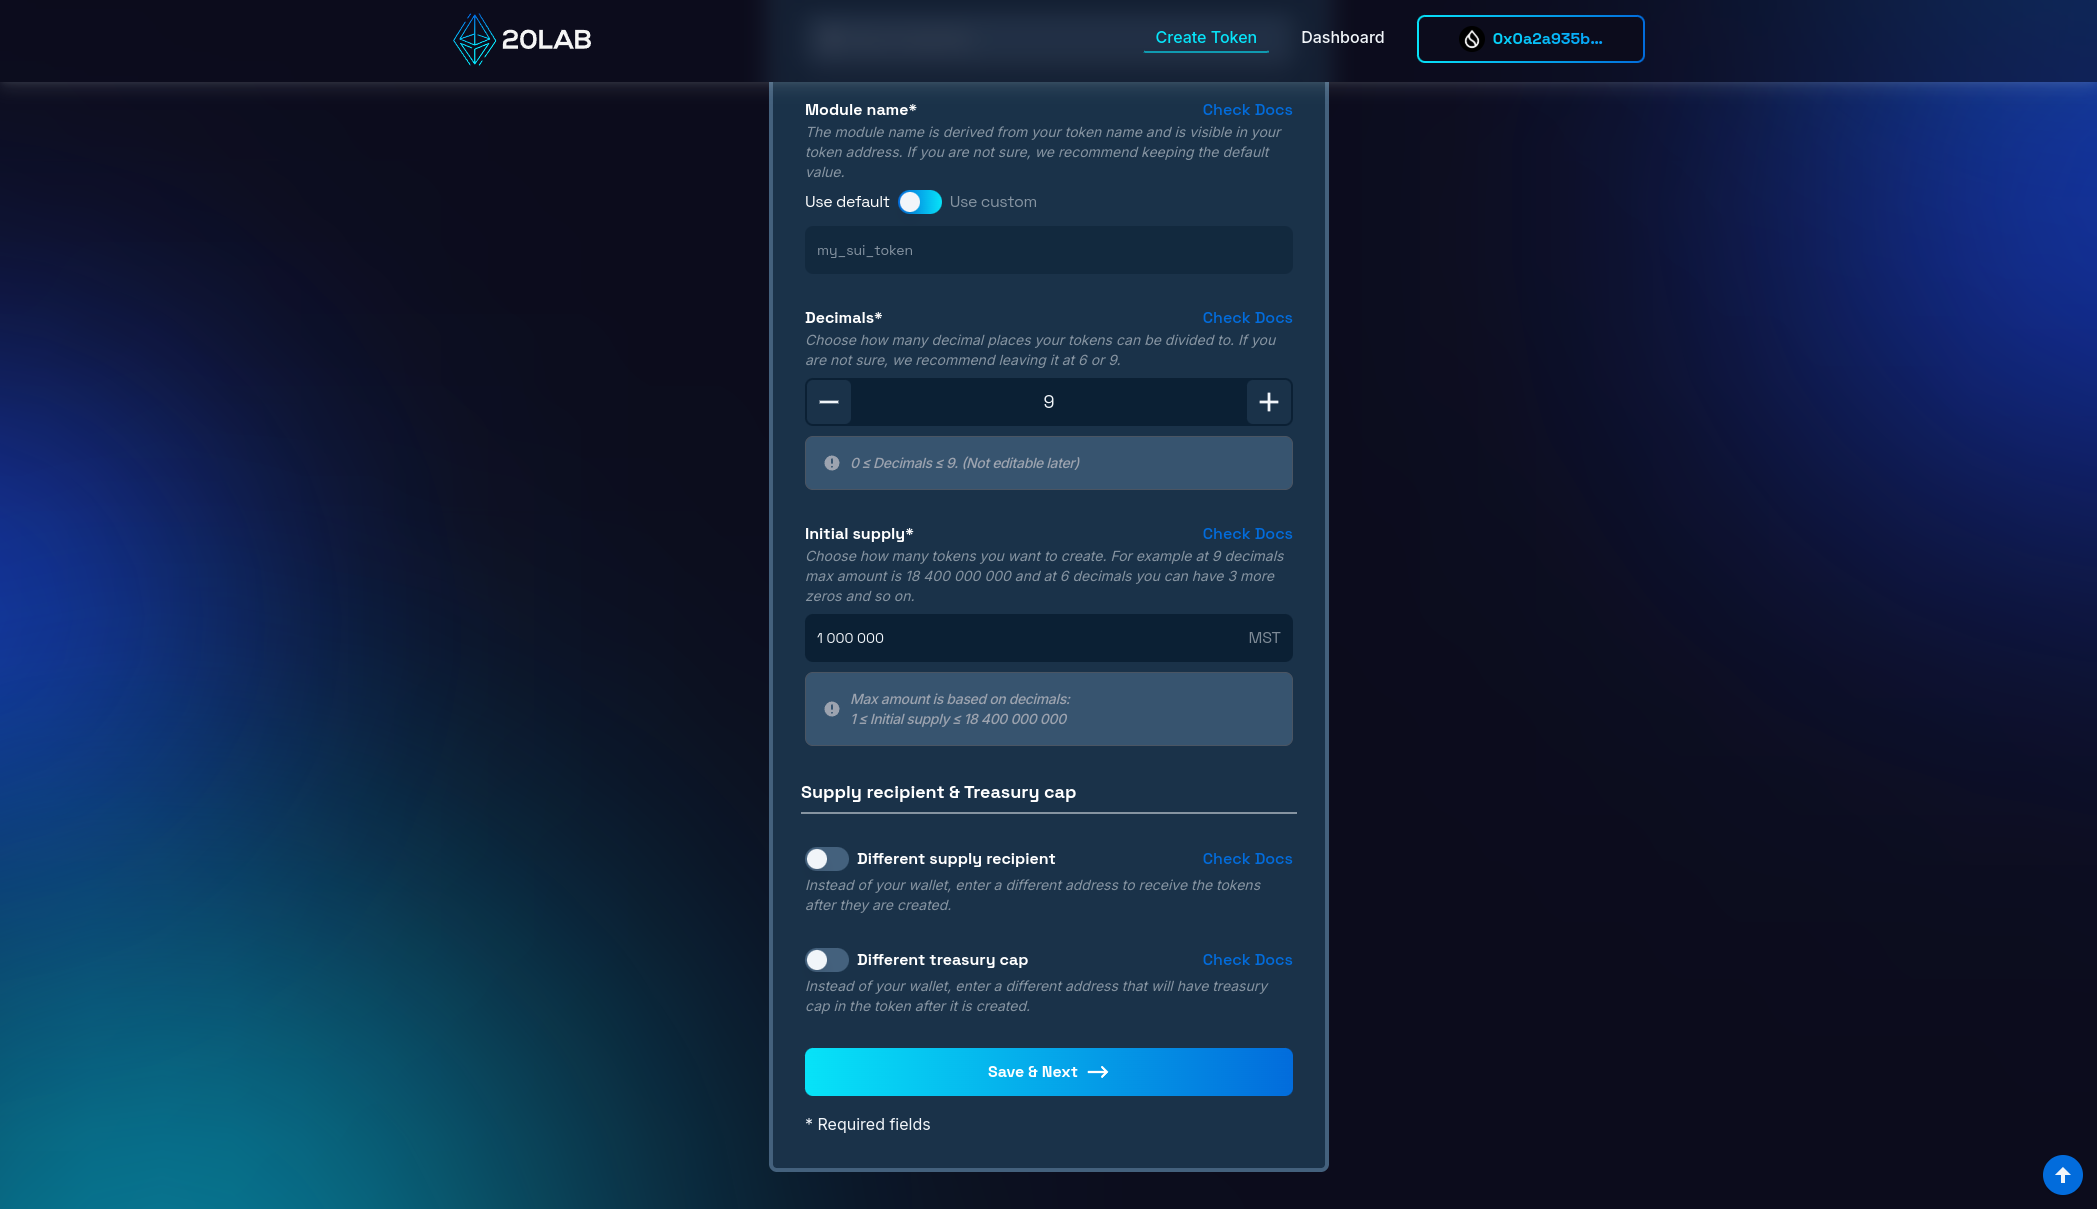
When you create your Sui token, you'll need to specify two important wallet addresses that will control different aspects of your token. The first is the supply recipient address, which will receive all tokens minted during the initial creation. By default, this is set to your currently connected wallet address. However, if you want these tokens to go to a different wallet, you can enable the "Different supply recipient" option and specify an alternative address.
The second important address is the treasury cap, which holds administrative control over your token's restricted functions. Like the supply recipient, this defaults to your connected wallet, but you can designate a different address by enabling the "Different treasury cap" option. This address is particularly important as it will maintain control over your token's administrative functions after deployment, so choose this address carefully based on your project's governance needs.
Step 3: Configure Metadata
Metadata transforms your Sui token from a basic digital asset into a rich, informative project representation. Let's explore how to configure metadata using 20lab's Sui token generator, leveraging Sui's native metadata capabilities.
First, navigate to the metadata configuration section in the generator interface.
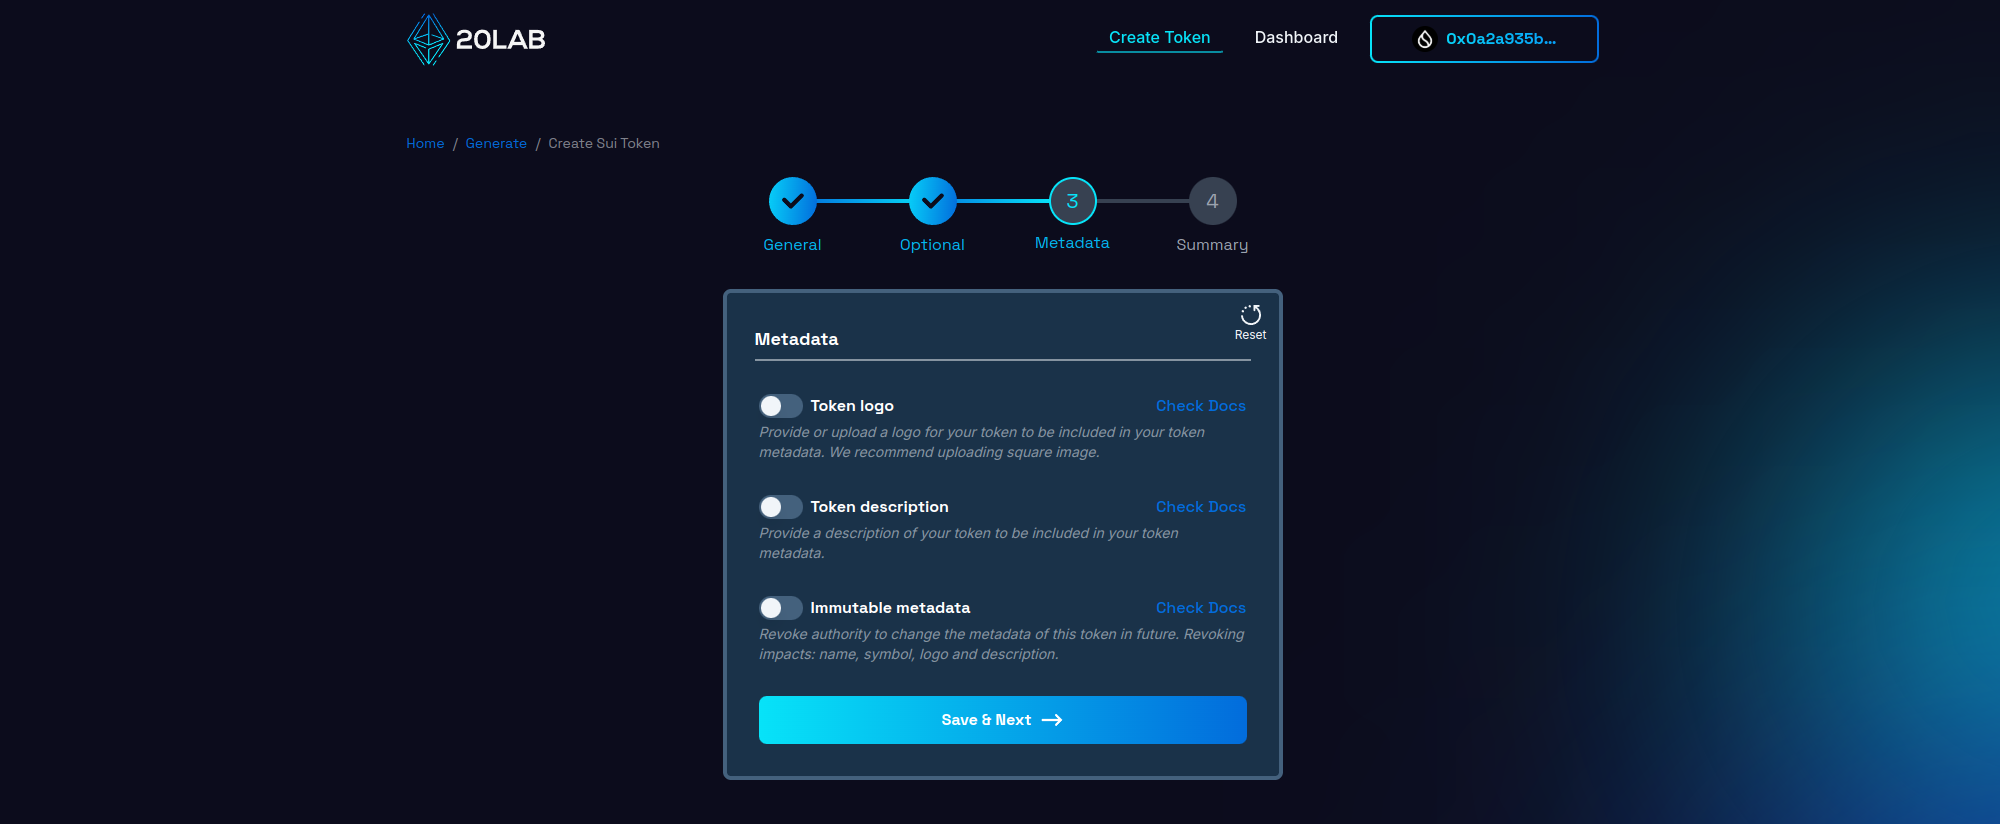
Token Logo
Your token's logo serves as its visual anchor throughout the Sui ecosystem. Check out these technical specifications:
- Upload a high quality image in PNG, JPG or WEBP format.
- Aim for a 1:1 aspect ratio (square) for optimal display across platforms.
- The image is securely stored on IPFS, ensuring its permanence and accessibility.
Token Description
The description field is your opportunity to communicate your token's value proposition:
- Write a clear, concise overview of your token's purpose and features.
- Include key details about your project's goals and vision.
- Consider mentioning any unique attributes or use cases for your token.

Metadata Authority
By default, 20lab assigns the metadata authority to your deployer address. This allows you to change the metadata later if necessary. However, you have two options:
- Mutable metadata: Retain the update privilege and allow future changes to the metadata.
- Immutable metadata: Revoke the update privilege, making the metadata permanent and unchangeable.
Consider your metadata authority strategy carefully - while mutability provides flexibility for future updates, immutability can increase trust by demonstrating long-term commitment to your initial configuration. Remember that in Sui, metadata authority also governs changes to token name and symbol.
Step 4: Review and Deploy
Before deploying your token on the Sui network, take the time to carefully review all of the configured settings on the "Summary" page. This final check is critical to ensure that your token will work as intended once deployed.
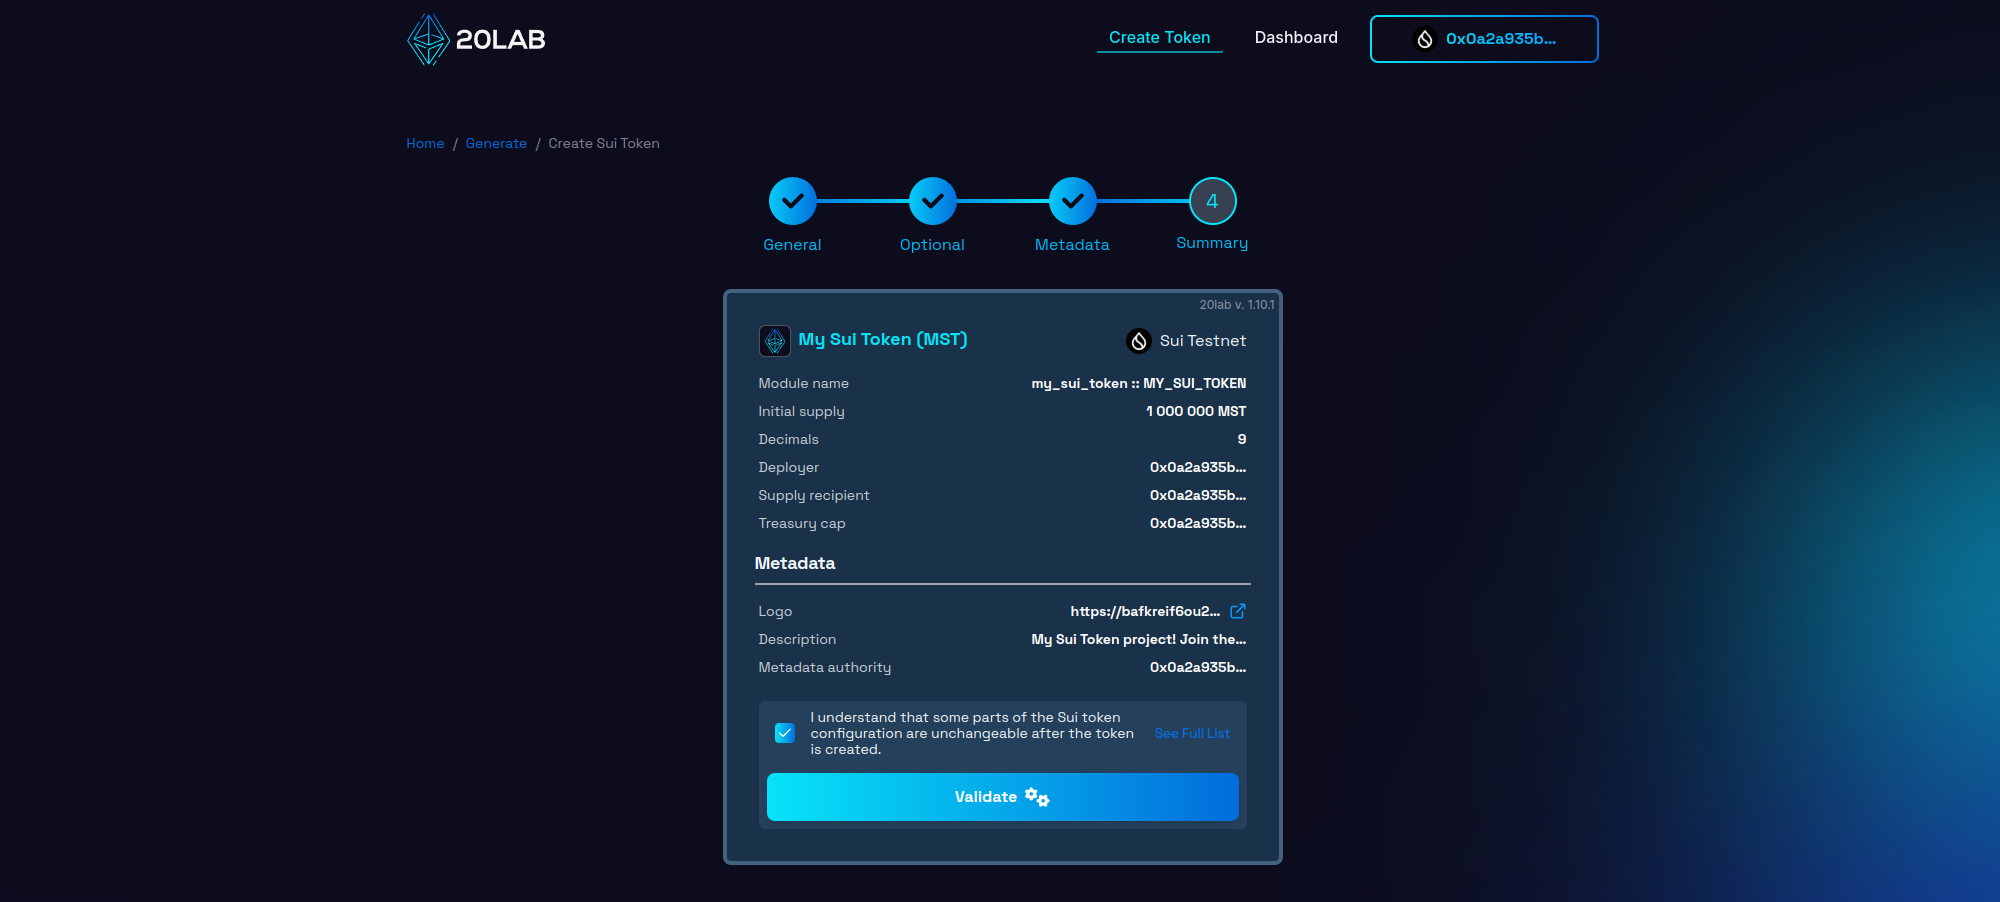
On this page you'll see all your chosen configurations:
- Token name and symbol,
- Module name,
- Initial supply and decimals,
- Supply recipient address,
- Treasury cap address,
- Metadata logo, description and mutability.
Click the "Validate" button to perform a technical review of your token configuration. This step ensures that all parameters meet Sui requirements and can help identify any potential issues prior to deployment.
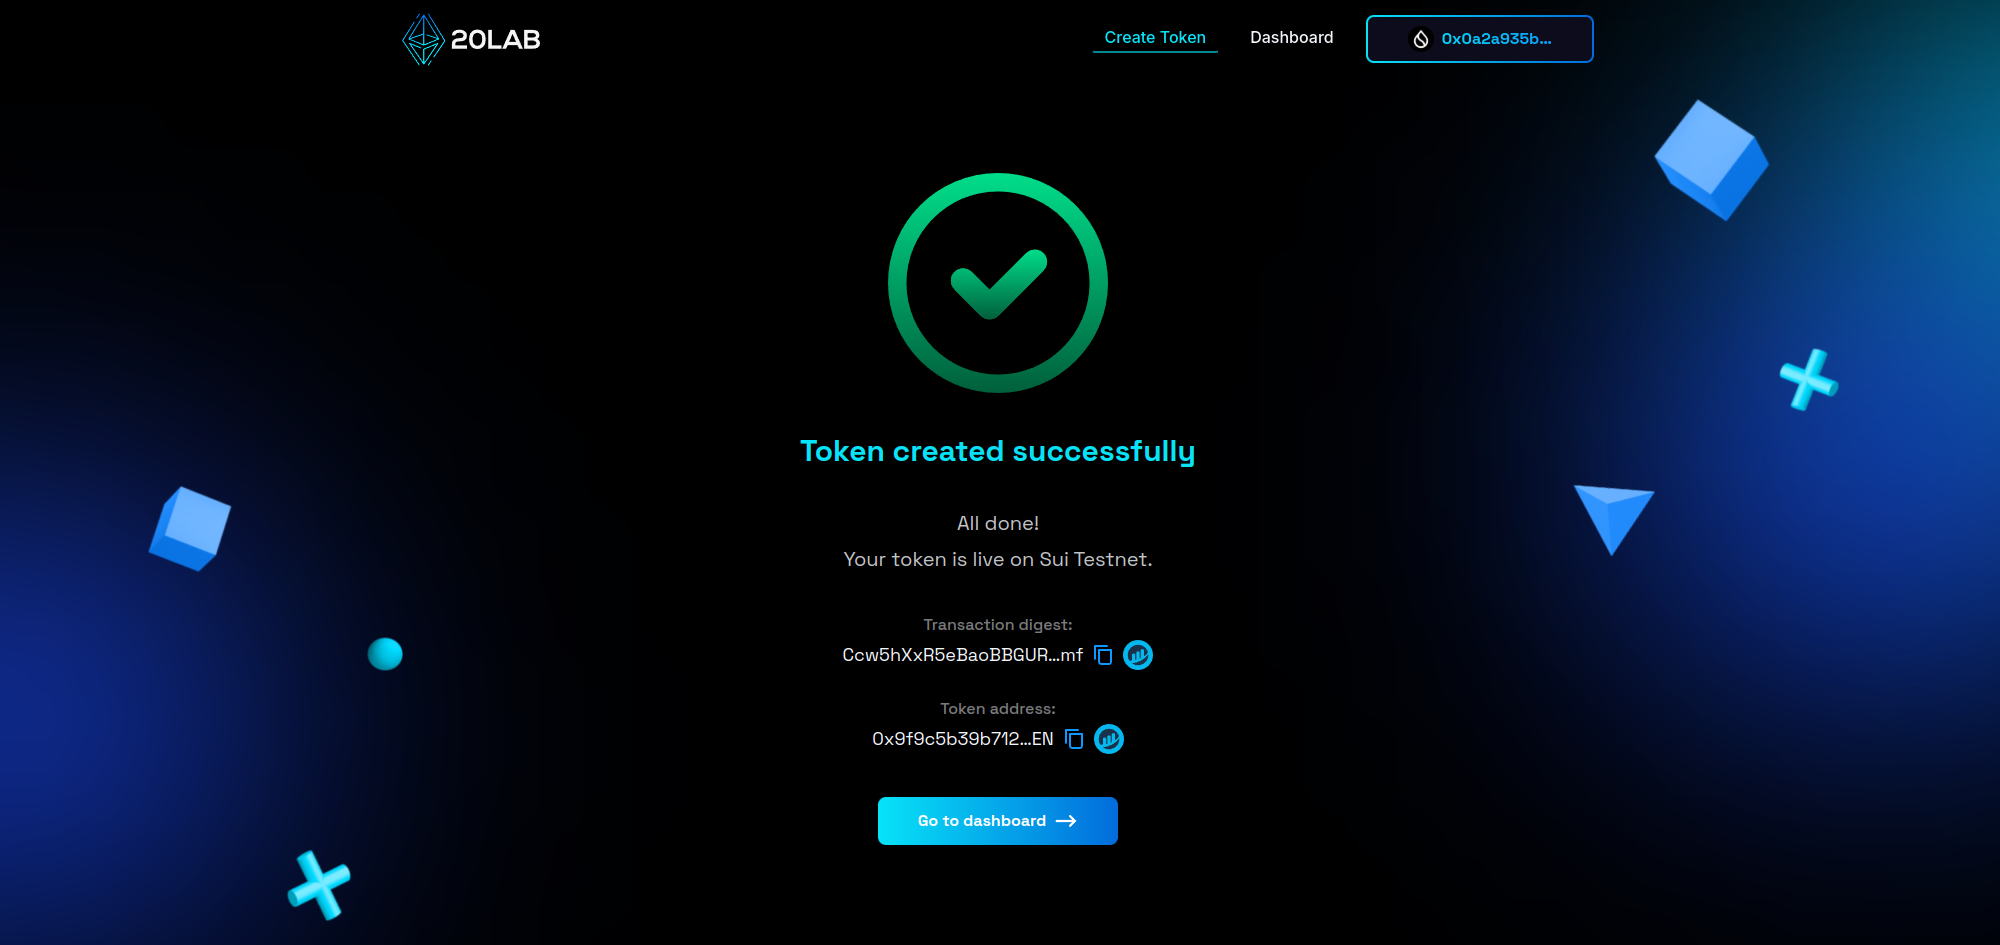
If validation is successful, click "Deploy" to create your token on the Sui network. Your connected wallet will prompt you to authorize the transaction and cover the necessary gas fees. After confirming the transaction, your token will be deployed on the Sui blockchain with all specified parameters and metadata!
Managing Your Sui Token with Metadata
After deploying your token on Sui through 20lab, you gain access to a comprehensive management interface designed specifically for the Sui ecosystem. This dashboard serves as your central hub for token administration, metadata management, and operational functions.
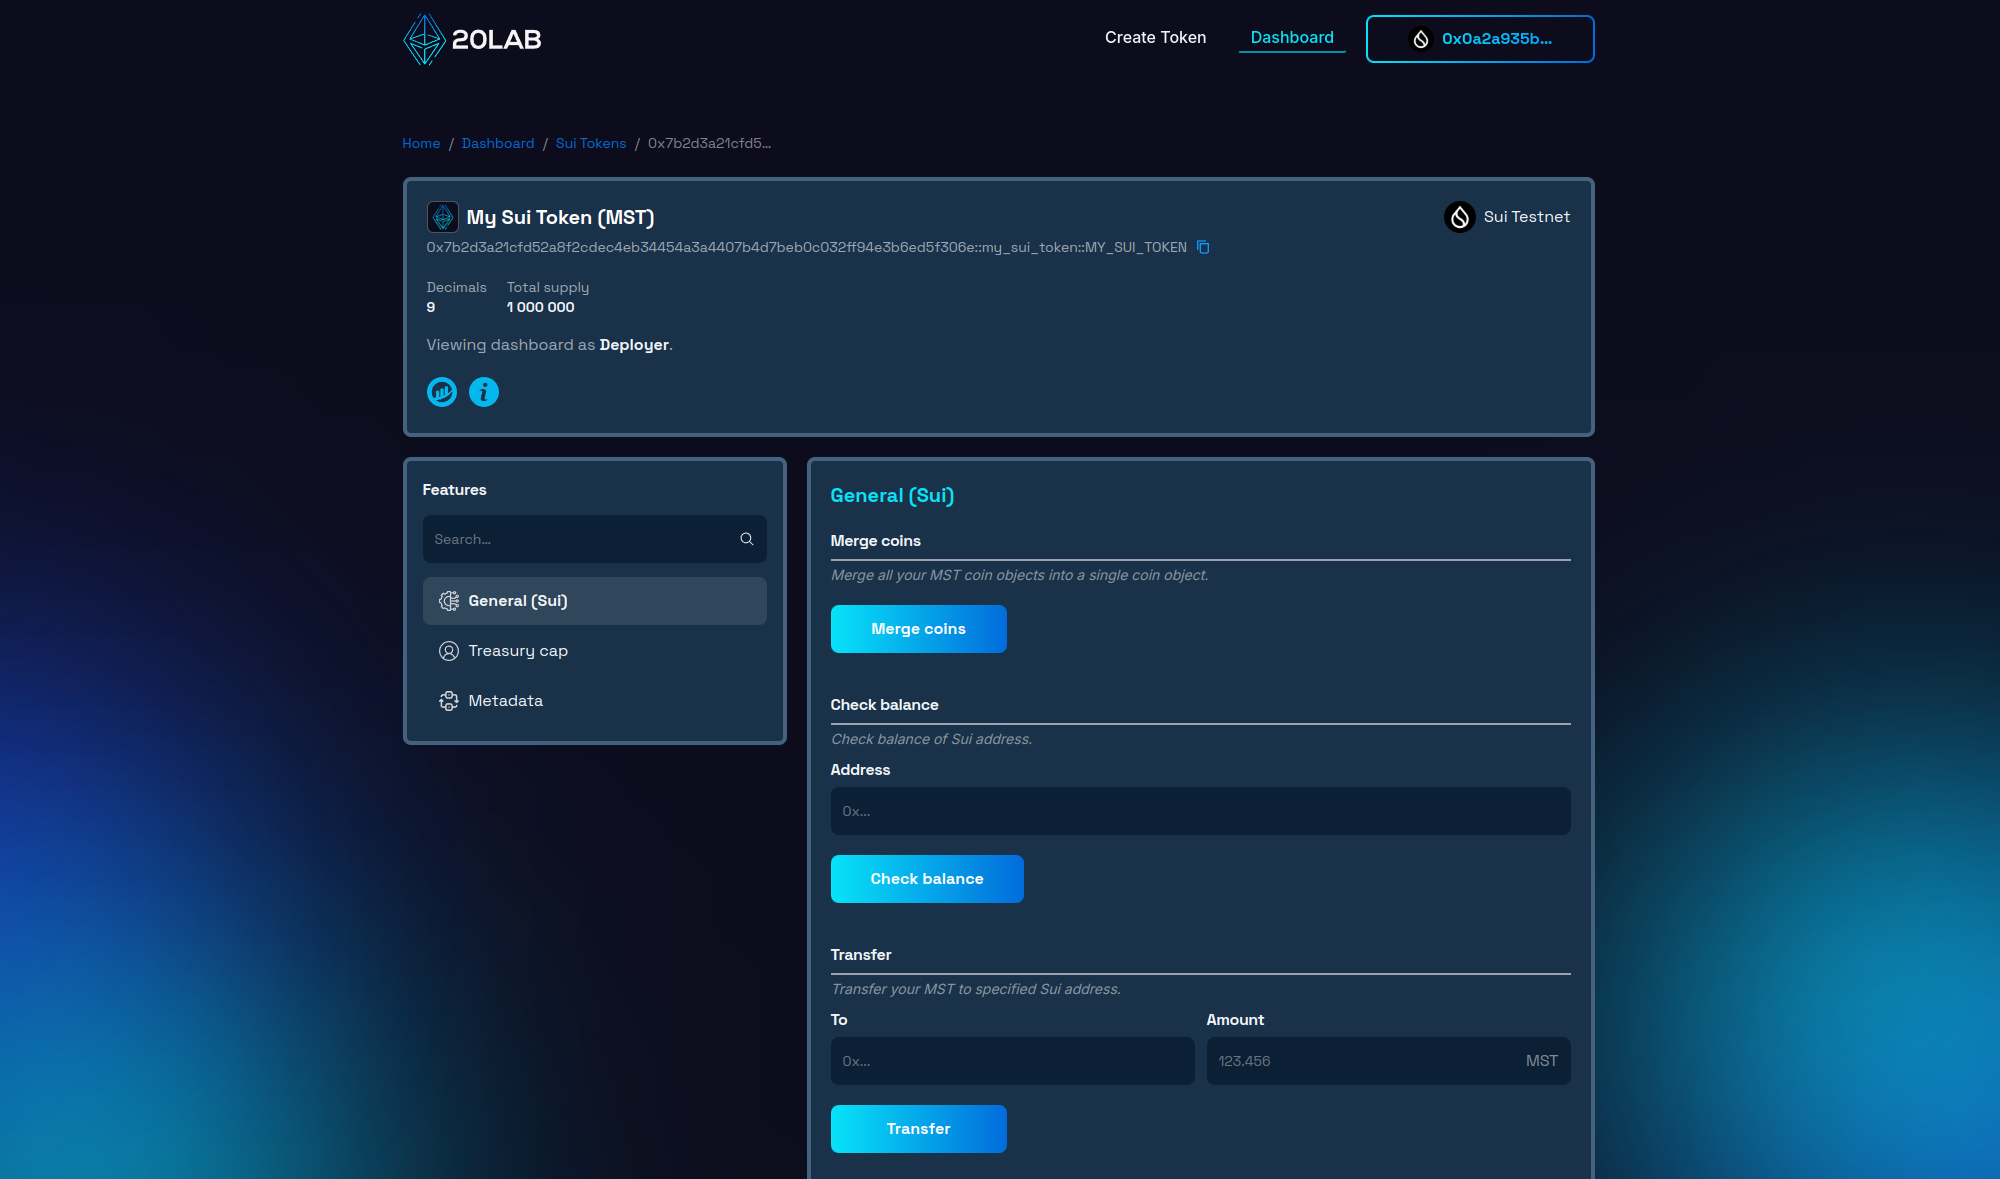
The dashboard displays essential token information, including your token's coin type (address), current supply, token name, symbol, and decimal places. You can also review other configured parameters such as the module name (displayed at the end of your token's address) and treasury cap holder.
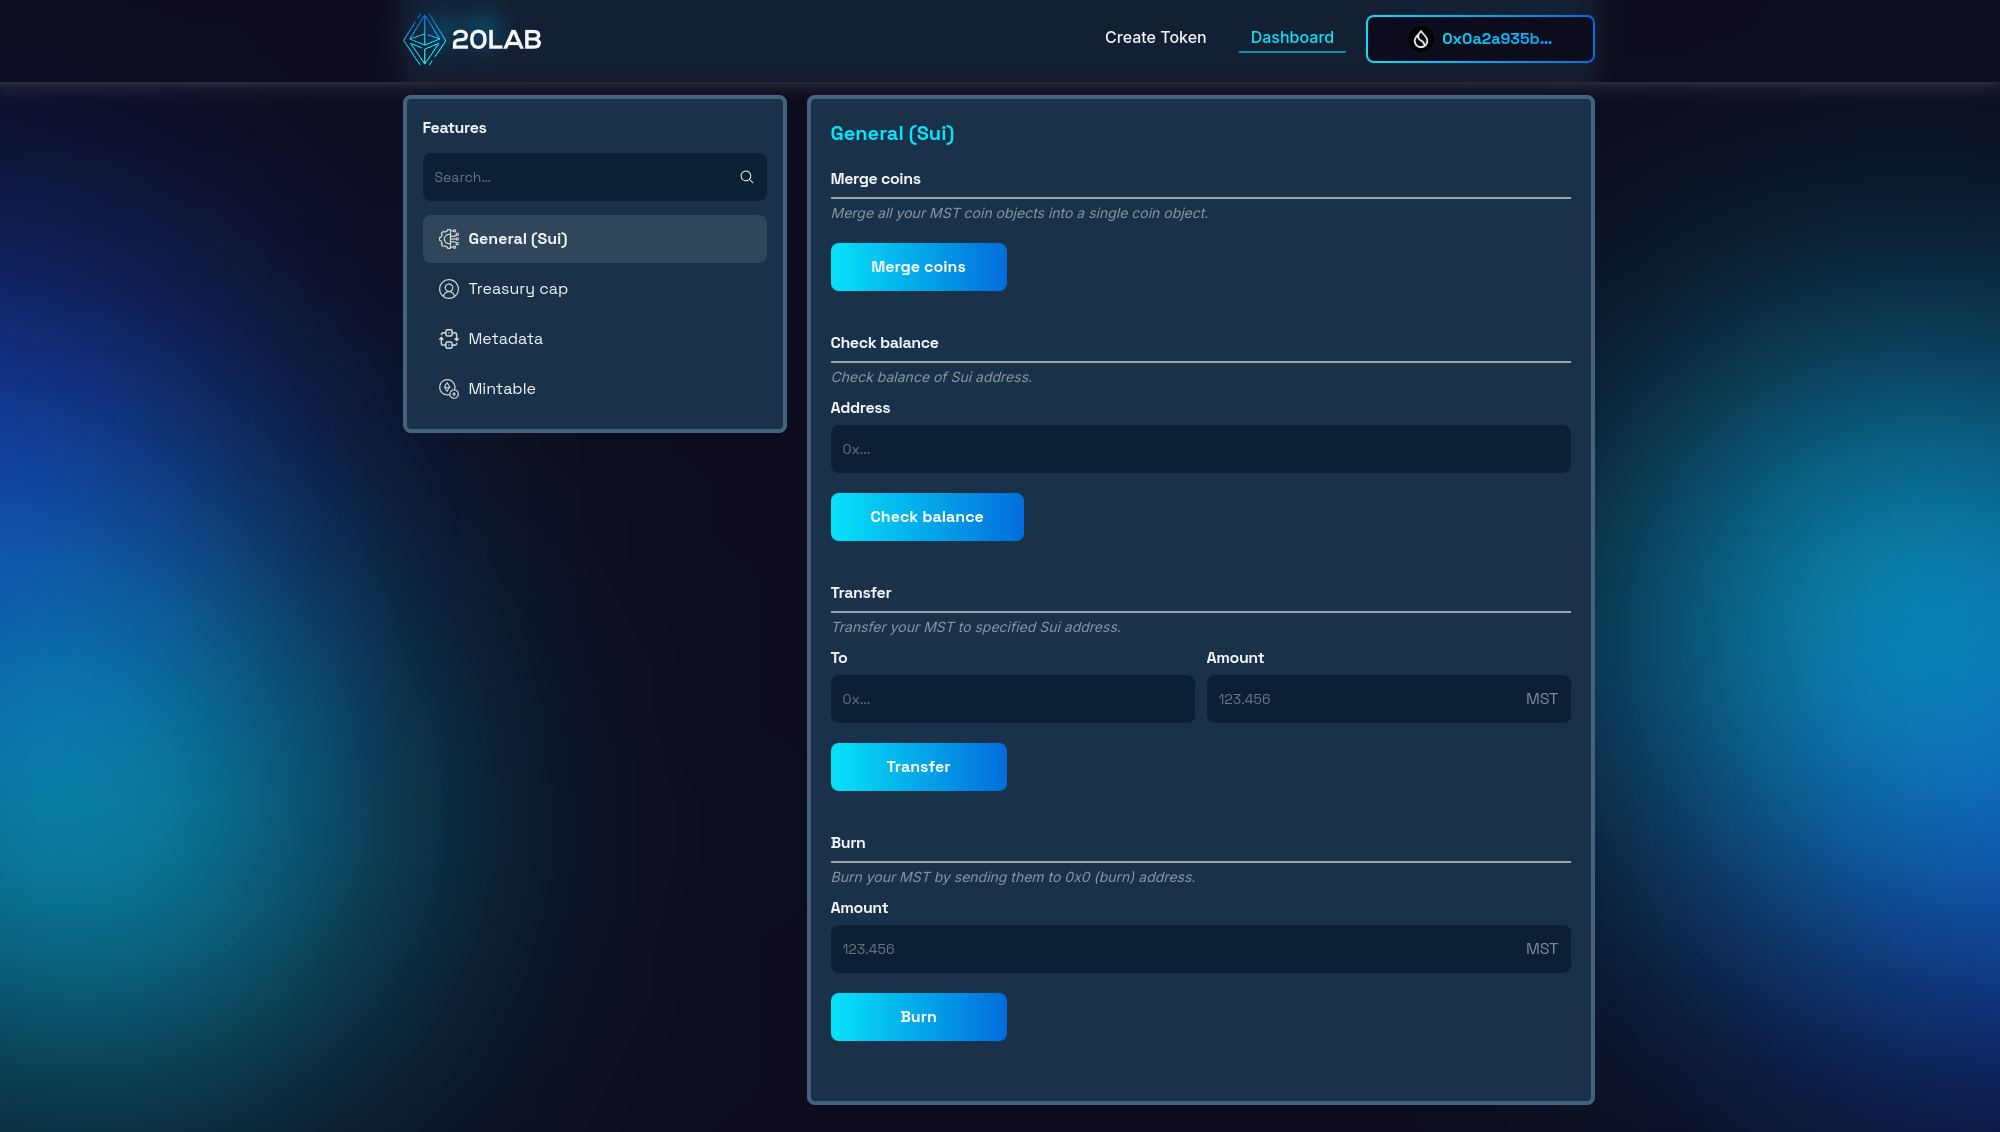
The "General (Sui)" section of the 20lab dashboard provides essential functions for managing your Sui token. Here you can merge your coin objects into a single one, check the balance of specific addresses, transfer and burn tokens.
Metadata Management
"Metadata" section displays all the metadata currently associated with your token:
- Token name and symbol,
- Logo (displayed as an image),
- Description.
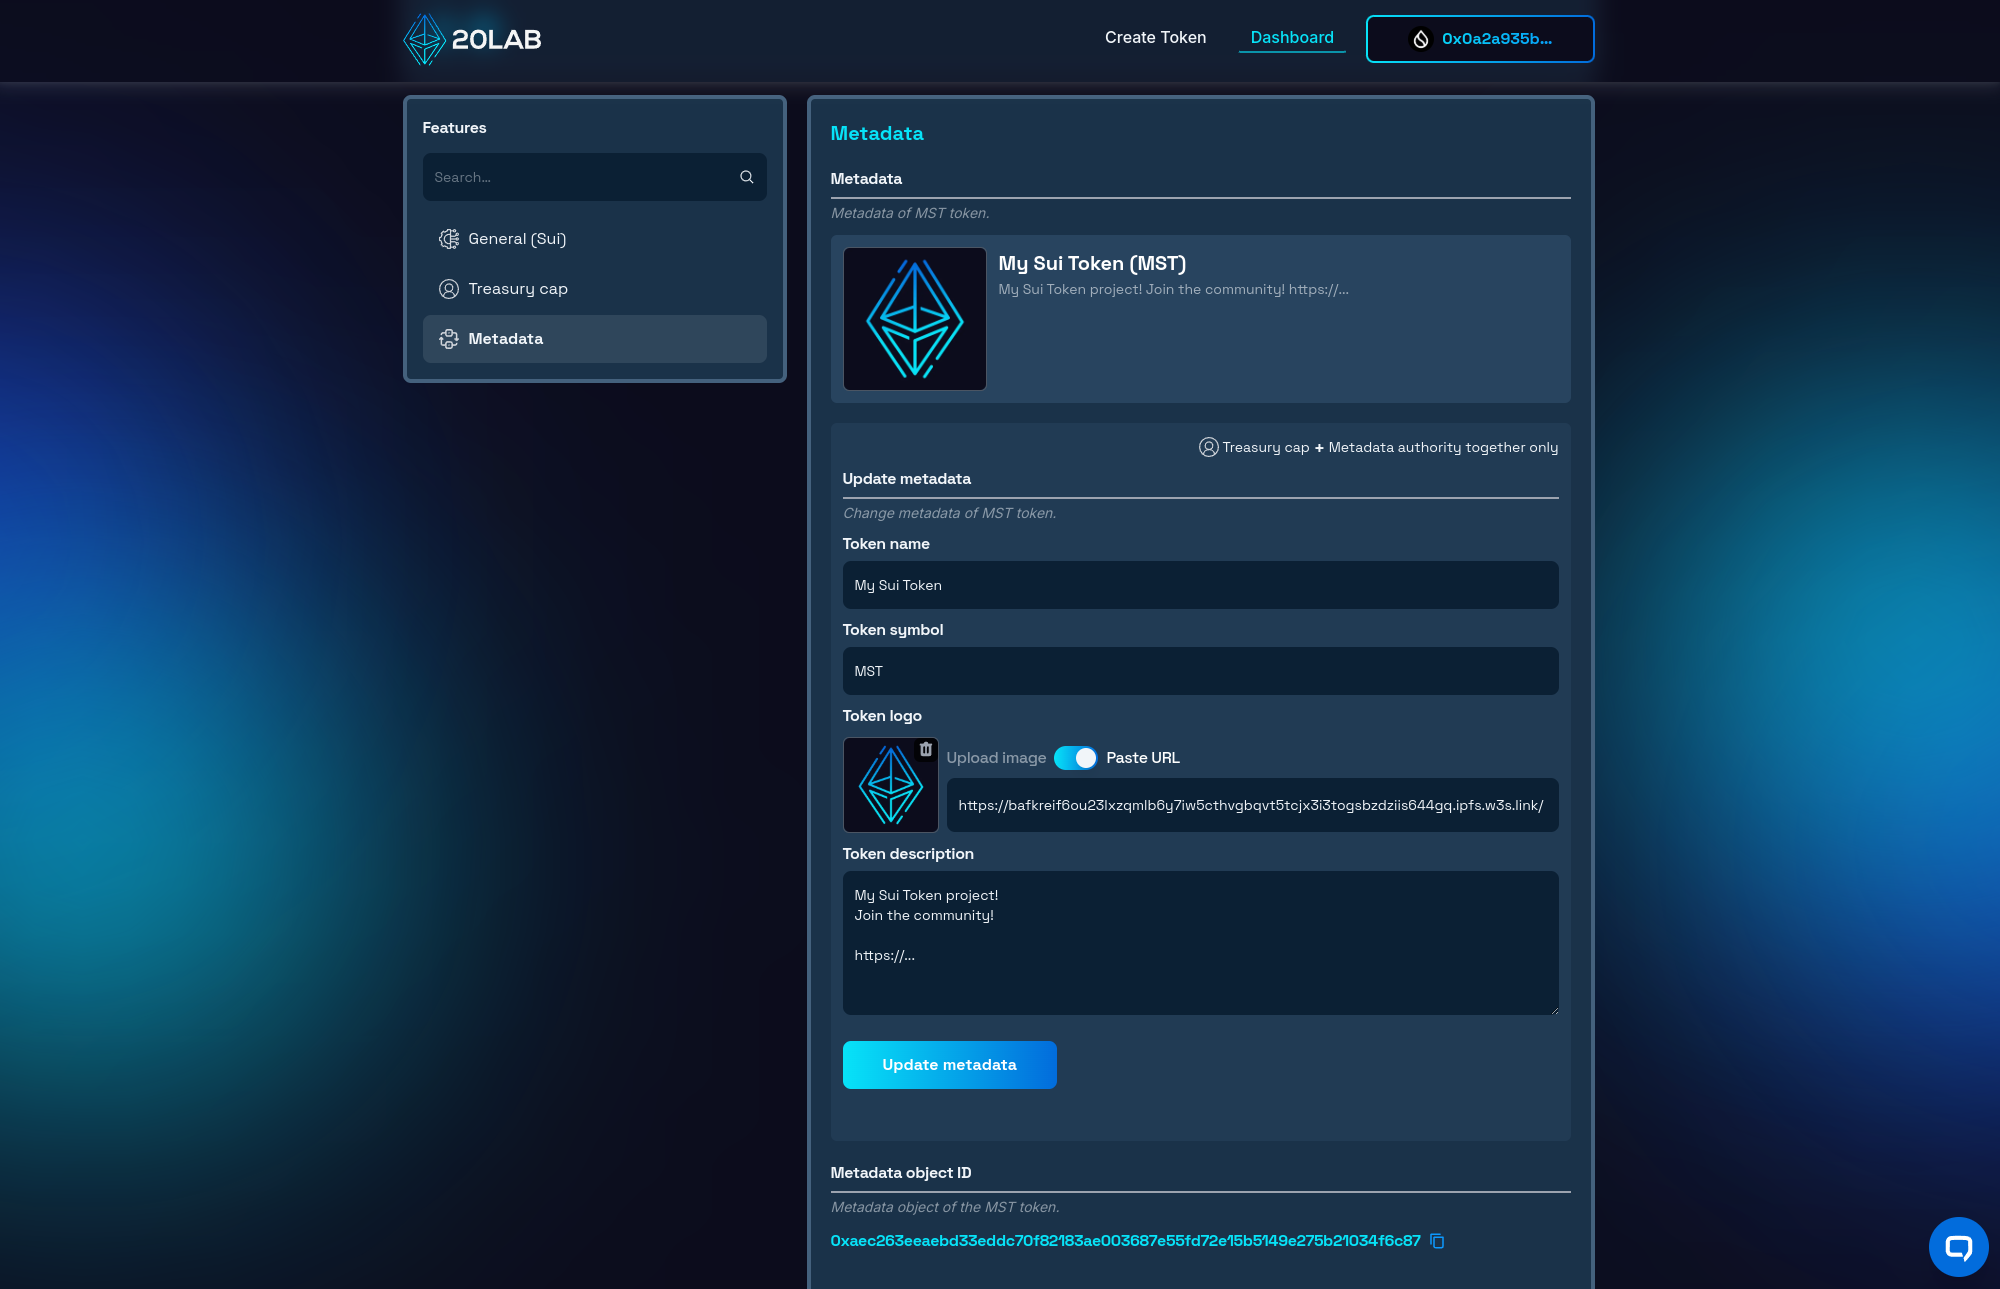
This will give you a quick overview of how your token will appear to other people in the Sui ecosystem.
Updating Metadata
The Sui blockchain's flexible metadata system, combined with 20lab's intuitive interface, allows for dynamic metadata management when you retain both metadata authority and the treasury cap. This capability is essential for maintaining up-to-date token information and adapting as your project evolves.
The update process is simple: modify the desired metadata fields with your new information, then perform the update using the "Update metadata" button. The transaction requires authorization from the wallet that has both of the above permissions.
Testing Metadata Visibility
After configuring your token's metadata on 20lab, it's crucial to verify its correct representation on the Sui blockchain. This verification ensures your token's information is properly displayed across the Sui ecosystem. Let's explore how to confirm your metadata implementation using Sui Explorer.
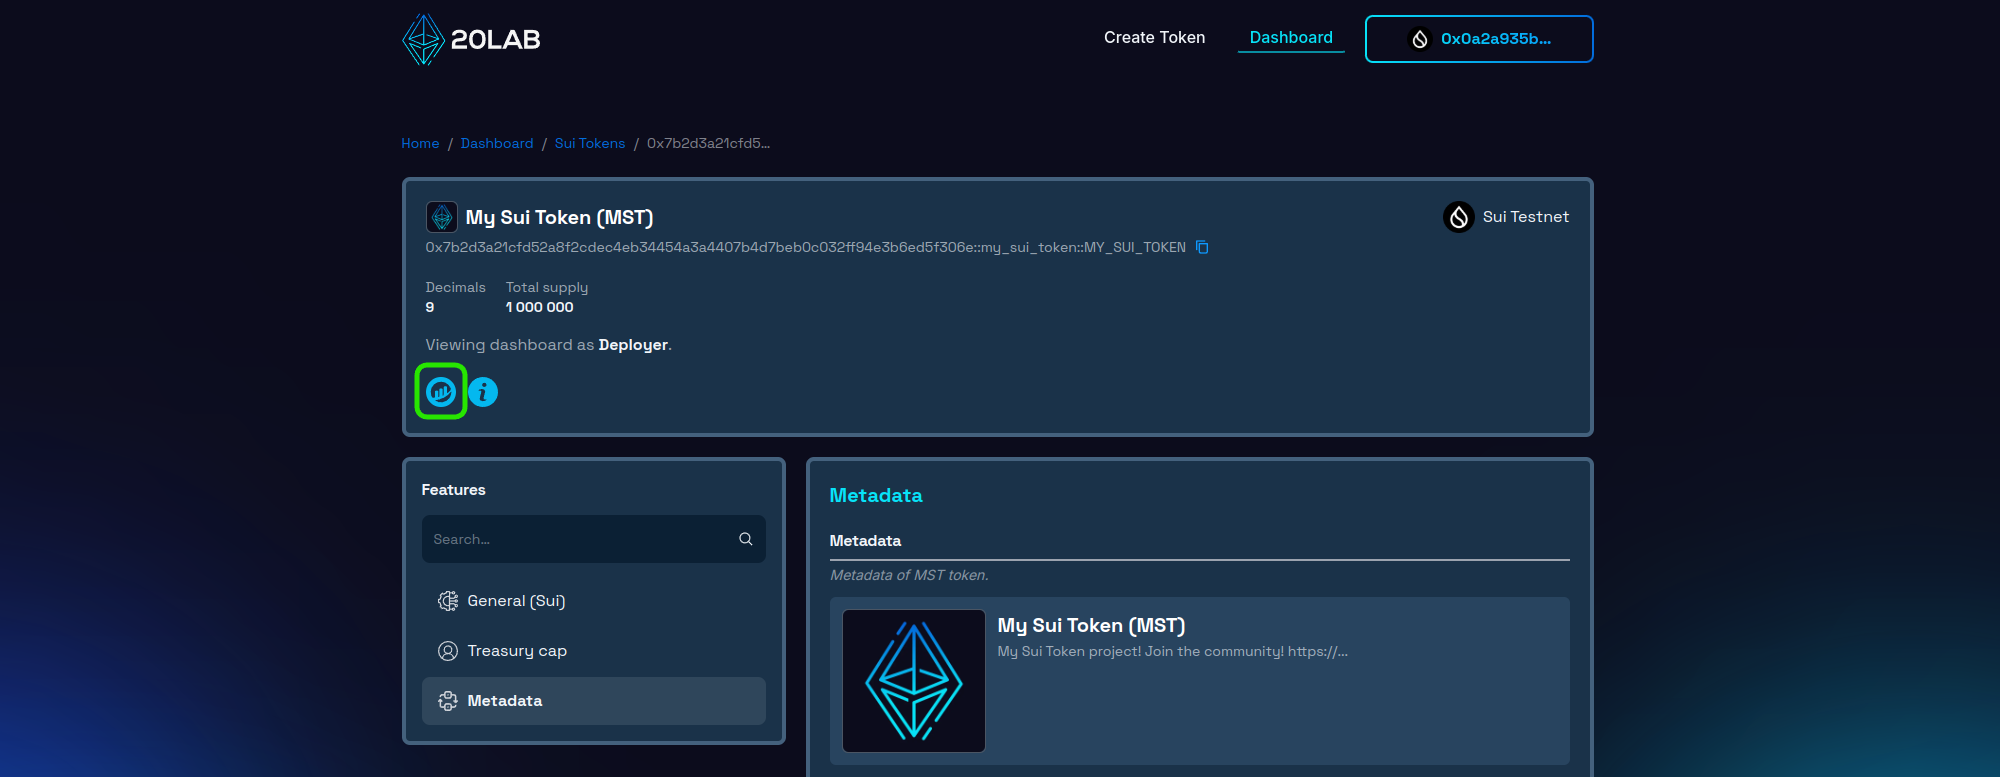
From your 20lab dashboard, locate and click the Block Explorer icon for direct access to your token's explorer page. This automatically navigates you to the corresponding Sui Explorer entry, where you can examine your token's on-chain presence.
In the token information section you can see all parts of the metadata such as: name, symbol, description and logo.
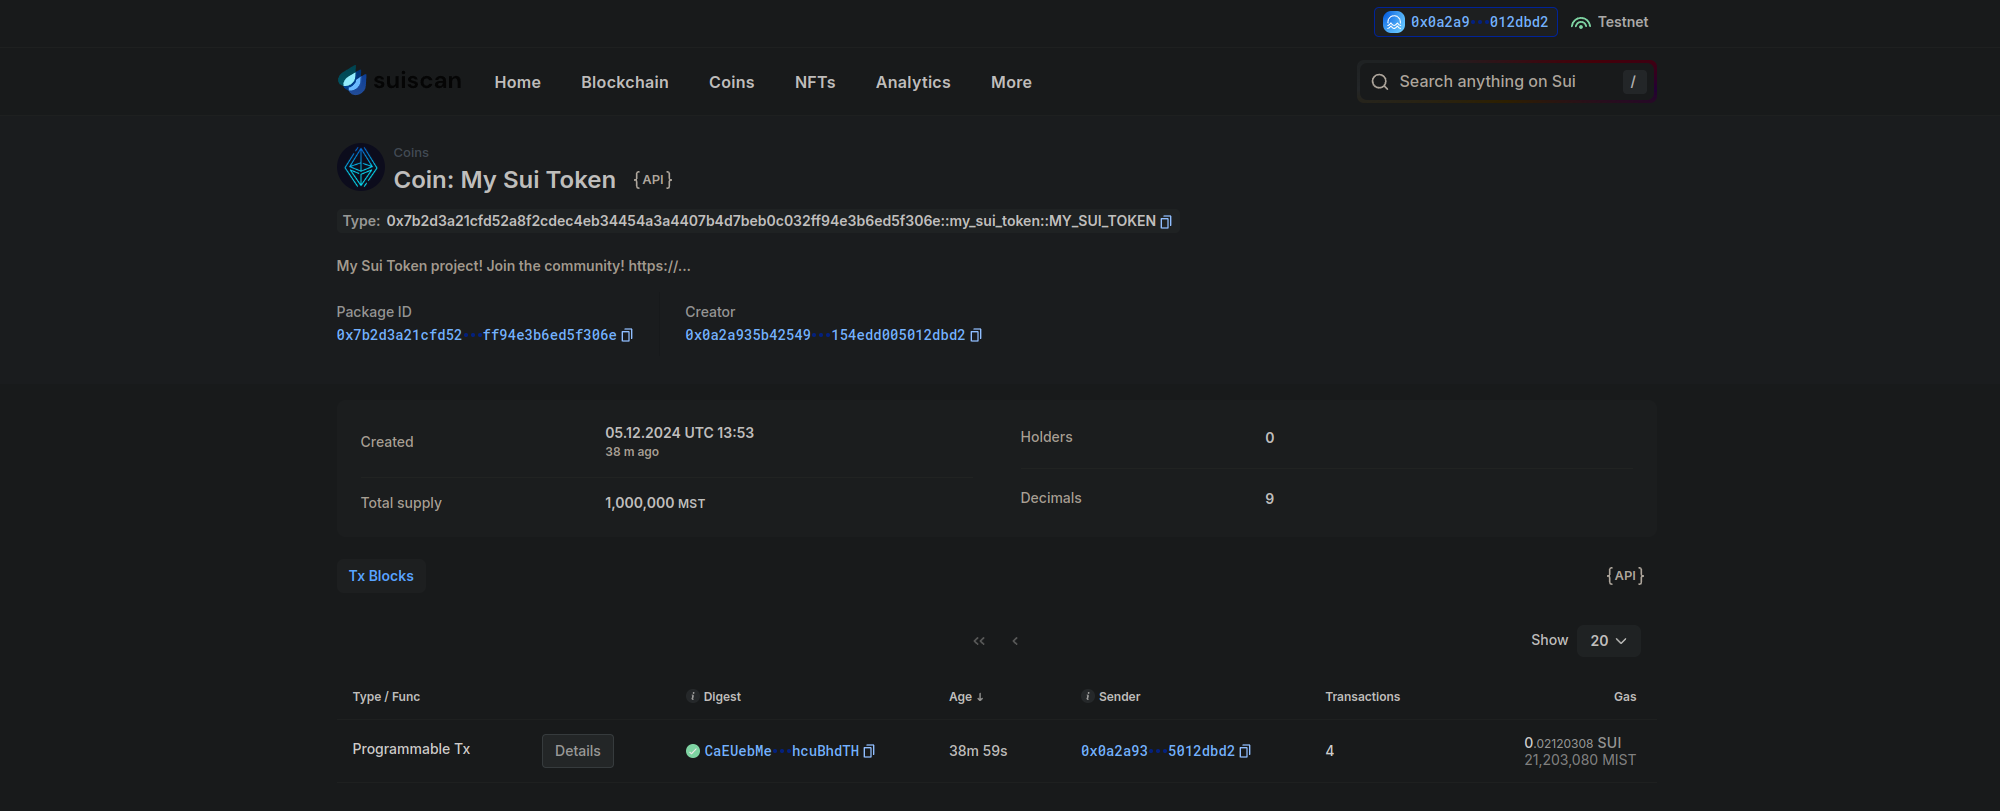
Of course, this is not the only place you can see how your metadata is being used - many other sites display it in an even more convenient format. However, Block Explorer is a good way to check its integrity, as it usually updates instantly and reflects any changes immediately.
Conclusion
Throughout this guide, we've explored how token creation on Sui goes beyond simple deployment through the strategic use of metadata. The Sui blockchain's unique object-centric model, combined with 20lab's comprehensive tools, allows you to create tokens that are both functionally robust and rich in context.
Metadata on Sui serves as your token's digital identity card, communicating your project's vision and credibility to the broader ecosystem. From customizable visual elements to detailed project information, each metadata component plays a critical role in establishing your token's presence in the Sui landscape.
With 20lab's intuitive platform and Sui's powerful infrastructure, you have everything you need to safely and efficiently bring your token vision to life.
If you have any questions about creating or managing your Sui token, don't hesitate to reach out to us via our Telegram channel.


