
Understanding Uniswap for Your Token Launch
Adding liquidity on Uniswap is essential for any ERC-20 token launch. It allows traders to buy and sell your token, creating a market and generating trading volume. As a liquidity provider (LP), you also earn fees from these transactions. While Uniswap offers two versions - V2 and V3 - many token creators choose V2 for its simplicity, compatibility with tokens that have transfer fees (taxes), and easier liquidity management.
Thanks to Layer 2 solutions, Uniswap now operates beyond Ethereum on many other networks such as Arbitrum, Optimism, Polygon, Base and many more, giving creators more flexibility in where they launch their tokens while maintaining the same familiar interface and functionality.
This guide focuses specifically on providing liquidity on Uniswap V2, walking you through creating and adding to liquidity pools. We'll cover the step-by-step process and key considerations for token creators and LPs. Whether you're launching a new token or expanding your project's trading options, this guide provides the best practices for adding liquidity on Uniswap V2.
V2 vs. V3 pools
Uniswap offers two main versions for creating liquidity pools, each with distinct characteristics:
- Uniswap V2: Uses a simple constant product formula
(x * y = k)to determine token prices. Liquidity is distributed evenly across the entire price spectrum, making it easy to understand and manage. Crucially, V2 supports tokens with transfer fees (taxes), a common feature in many tokens. - Uniswap V3: Introduces "concentrated liquidity", allowing LPs to specify a price range for their liquidity. This can lead to greater capital efficiency and higher fee earnings if the price stays within the chosen range. However, it adds complexity: if the price moves outside the range, LPs stop earning fees until they adjust their position. Furthermore, if no liquidity is provided within a specific price range, no trades can occur at those prices and the token cannot be bought or sold until someone provides liquidity. In addition, V3 does not support tokens with transfer fees.
Interface Fee Updates
In 2024, Uniswap introduced a new "interface fee" on trades conducted through their website to support operational costs. This 0.25% fee is automatically applied to most trading pairs, in addition to the standard liquidity provider fees.
20lab stands out as the only token generator platform that proactively addresses this update: for tokens created on 20lab with Uniswap set as the default exchange, you'll simply need to add Uniswap's new contracts to your token's AMM list. This will ensure proper transaction recognition and maintain full functionality of all features.
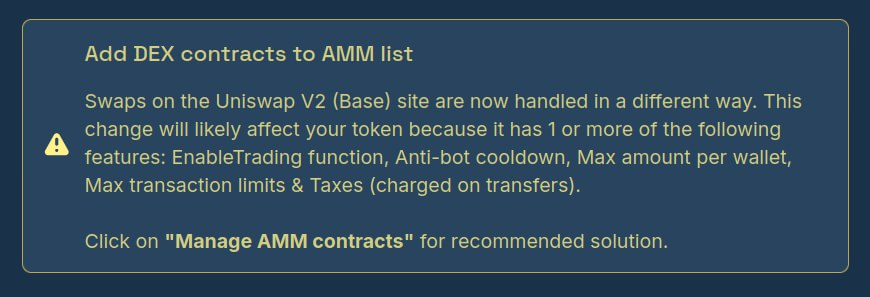
The update will be clearly indicated in your dashboard when any action is required, making 20lab the best solution for managing Uniswap interface fee integration.
Getting Started with Uniswap V2 Liquidity
Before adding liquidity to Uniswap V2, you'll need to ensure you have everything prepared. The process requires:
- Your ERC-20 token contract address and enough amount of this token in your wallet
- Collateral in ETH or another token to pair with your token inside liquidity pool
- Enough funds to cover gas fees
If you've created your token using 20lab's token generator, you'll have two possible scenarios:
- Uniswap V2 Pre-configured: If you selected Uniswap as your default exchange when you created your token, some preparations have already been made, such as creating an empty liquidity pool and connecting it to your token so that it will be recognized correctly. We'll show you how to verify this and go directly to adding liquidity.
- Manual Setup Required: If you didn't select Uniswap when creating your token, created a token outside of 20lab, or want to add additional liquidity, you will likely need to create a new liquidity pool or add to an existing one on the Uniswap interface. Here you can also choose between V2 or V3 liquidity pools, assuming your token does not have a tax feature.
Adding liquidity with 20lab default exchange feature
If you created your token on 20lab and selected Uniswap V2 as your default exchange, you have all the foundational setup already in place.
This includes an empty liquidity pool created and properly connected to your token contract. To get started, follow these steps:
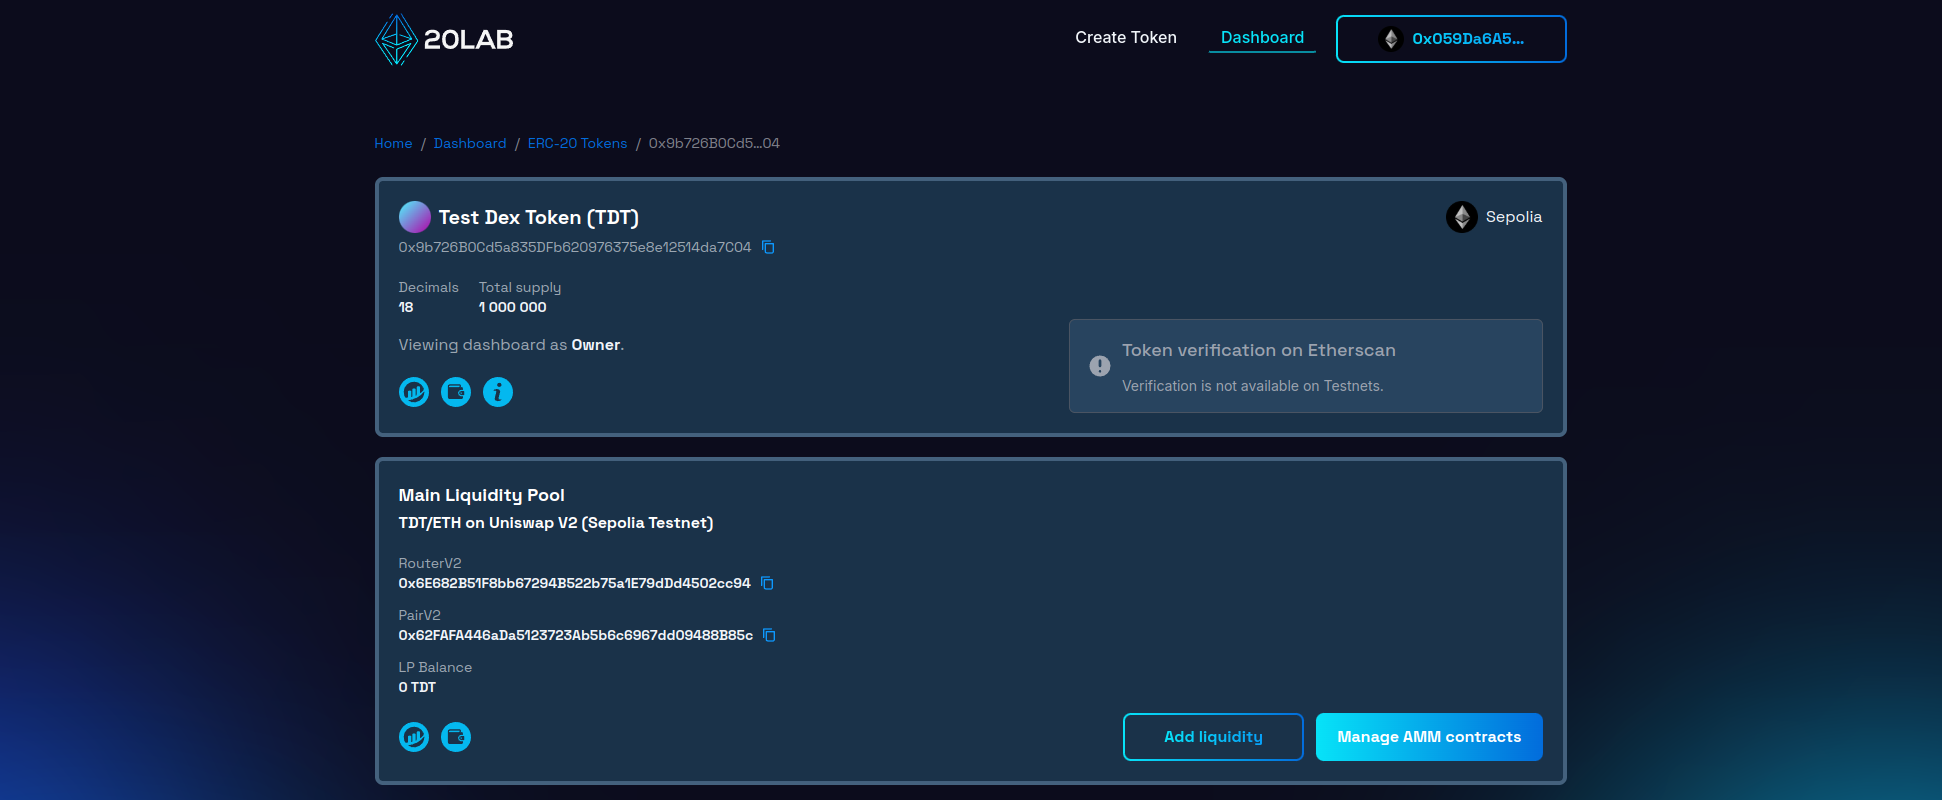
- Log into your 20lab owner dashboard
- Find your token in the list of created tokens
- Look for the "Main Liquidity Pool" section - it should show your liquidity pool symbol and "Uniswap V2"
- Locate the "Add liquidity" button - it will automatically redirect you to the correct Uniswap page, where you can provide liquidity directly to your main pool.
Manual liquidity addition on Uniswap
If you didn't select Uniswap as your default exchange, created your token elsewhere, or want to add liquidity to another pool, you will need to use the Uniswap interface directly.
Here's how to do it:
- Visit Uniswap's official interface
- Connect your Web3 wallet
- Navigate to the "Pool" section
- Click on "+ New" and select your preferred pool type e.g. V2
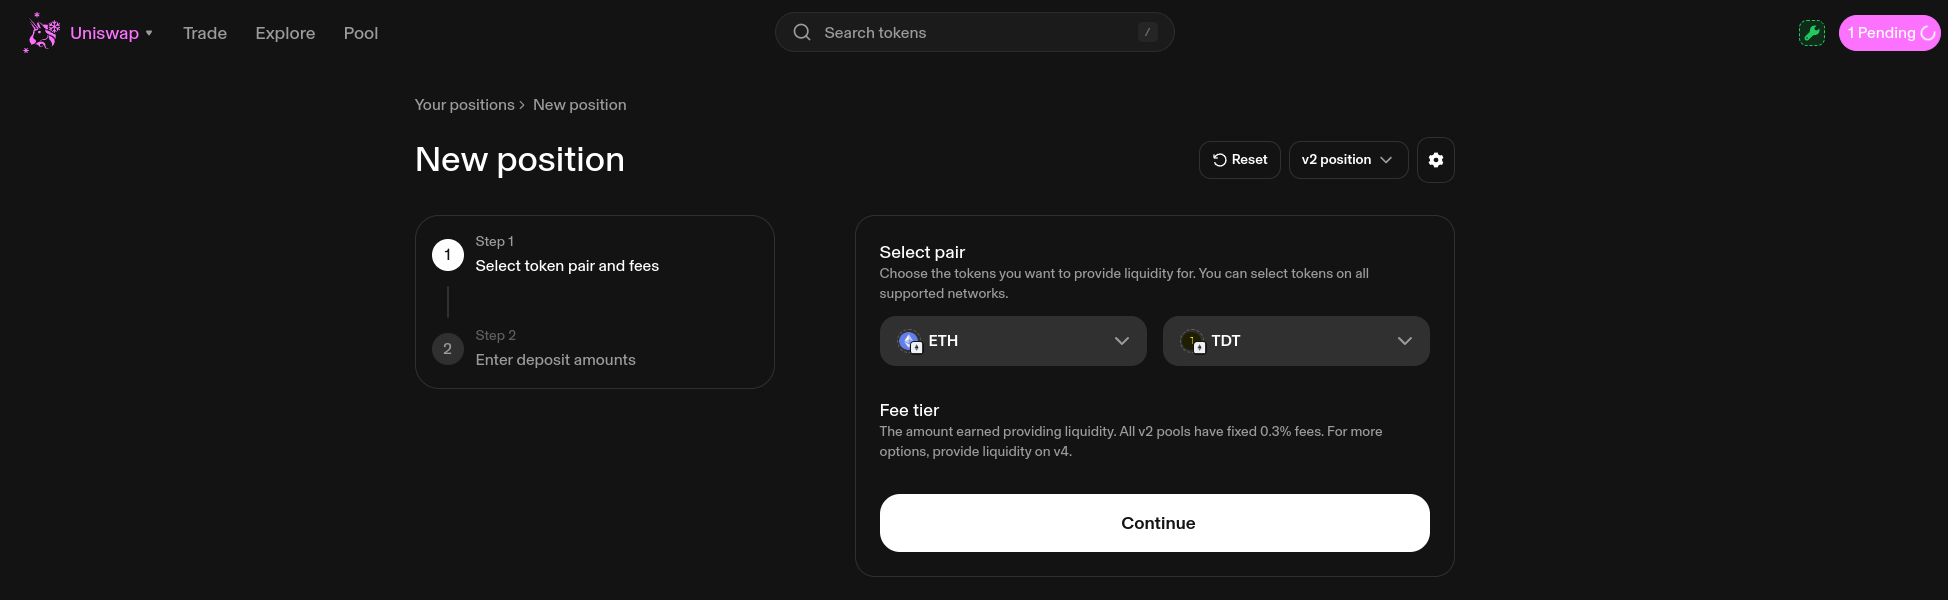
Next, in the token selection interface, choose a collateral token (or coin) such as ETH. As a second token, paste your token’s contract address.
Note: When you add your token for the first time, Uniswap will display a warning about unknown tokens. This is normal - just make sure you're using the correct contract address for your token.
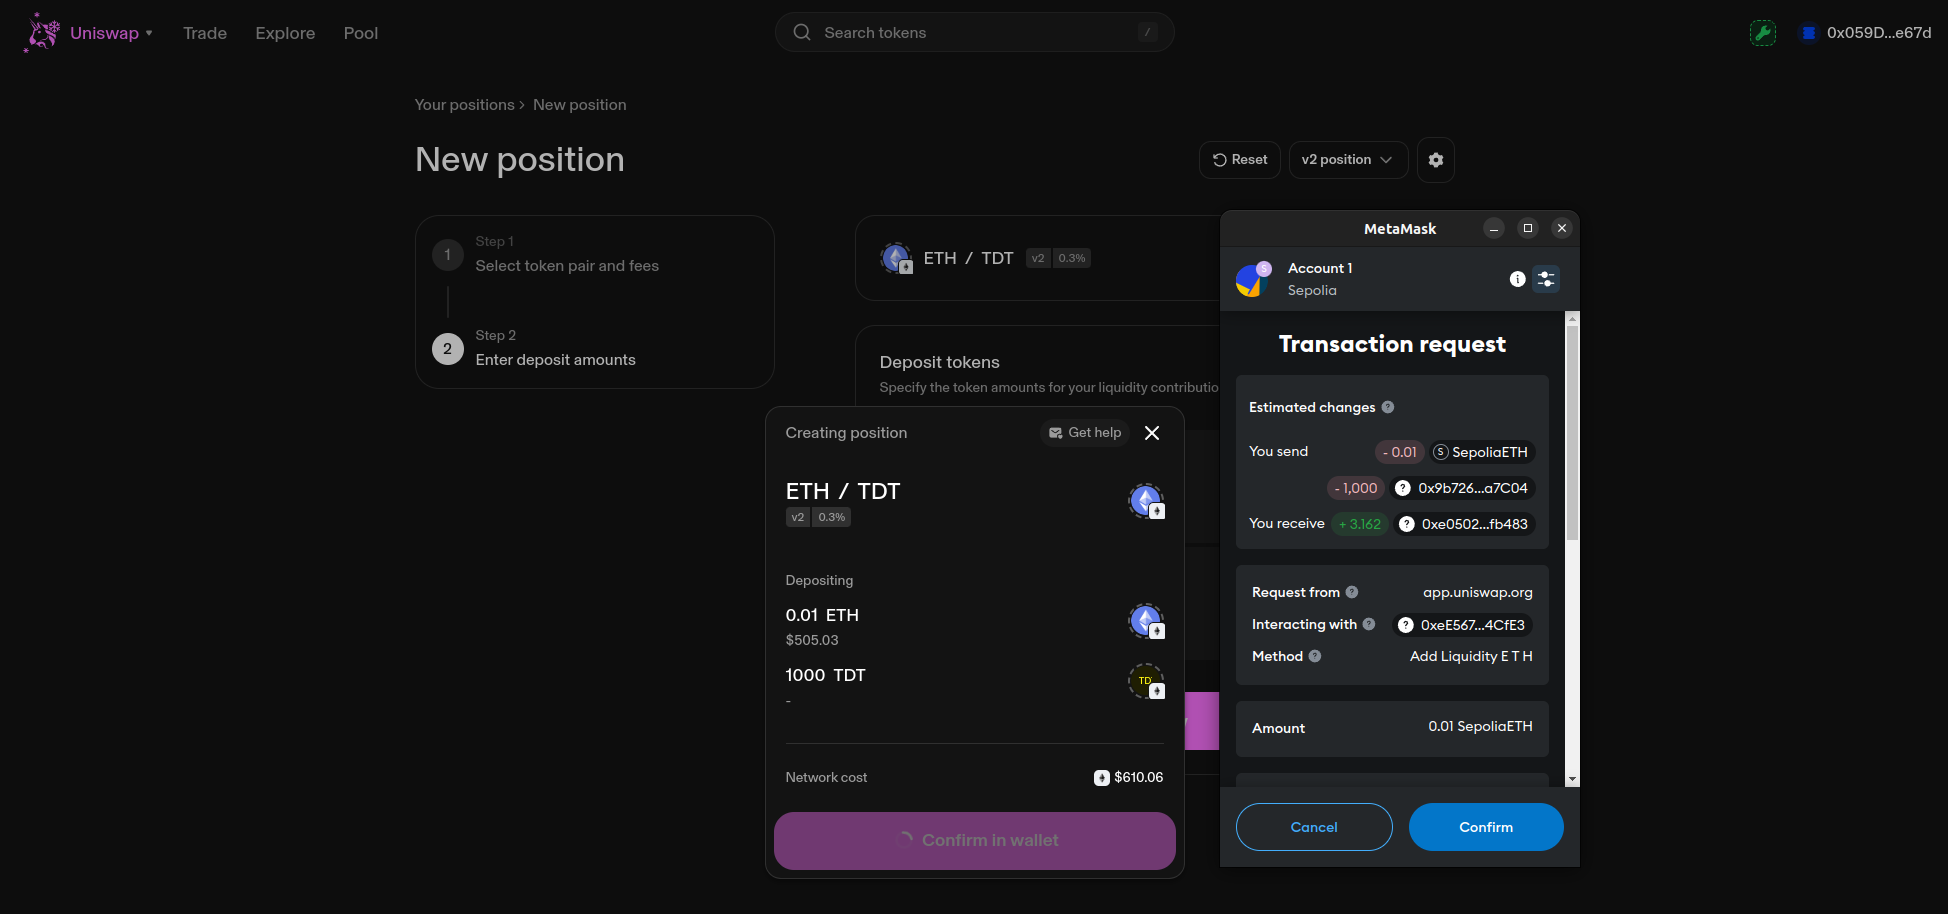
Finalizing Deposit of Liquidity
The next step is to set the initial price for your token, and based on this ratio, you will need to deposit appropriate amounts of your token and collateral to pair your token with.
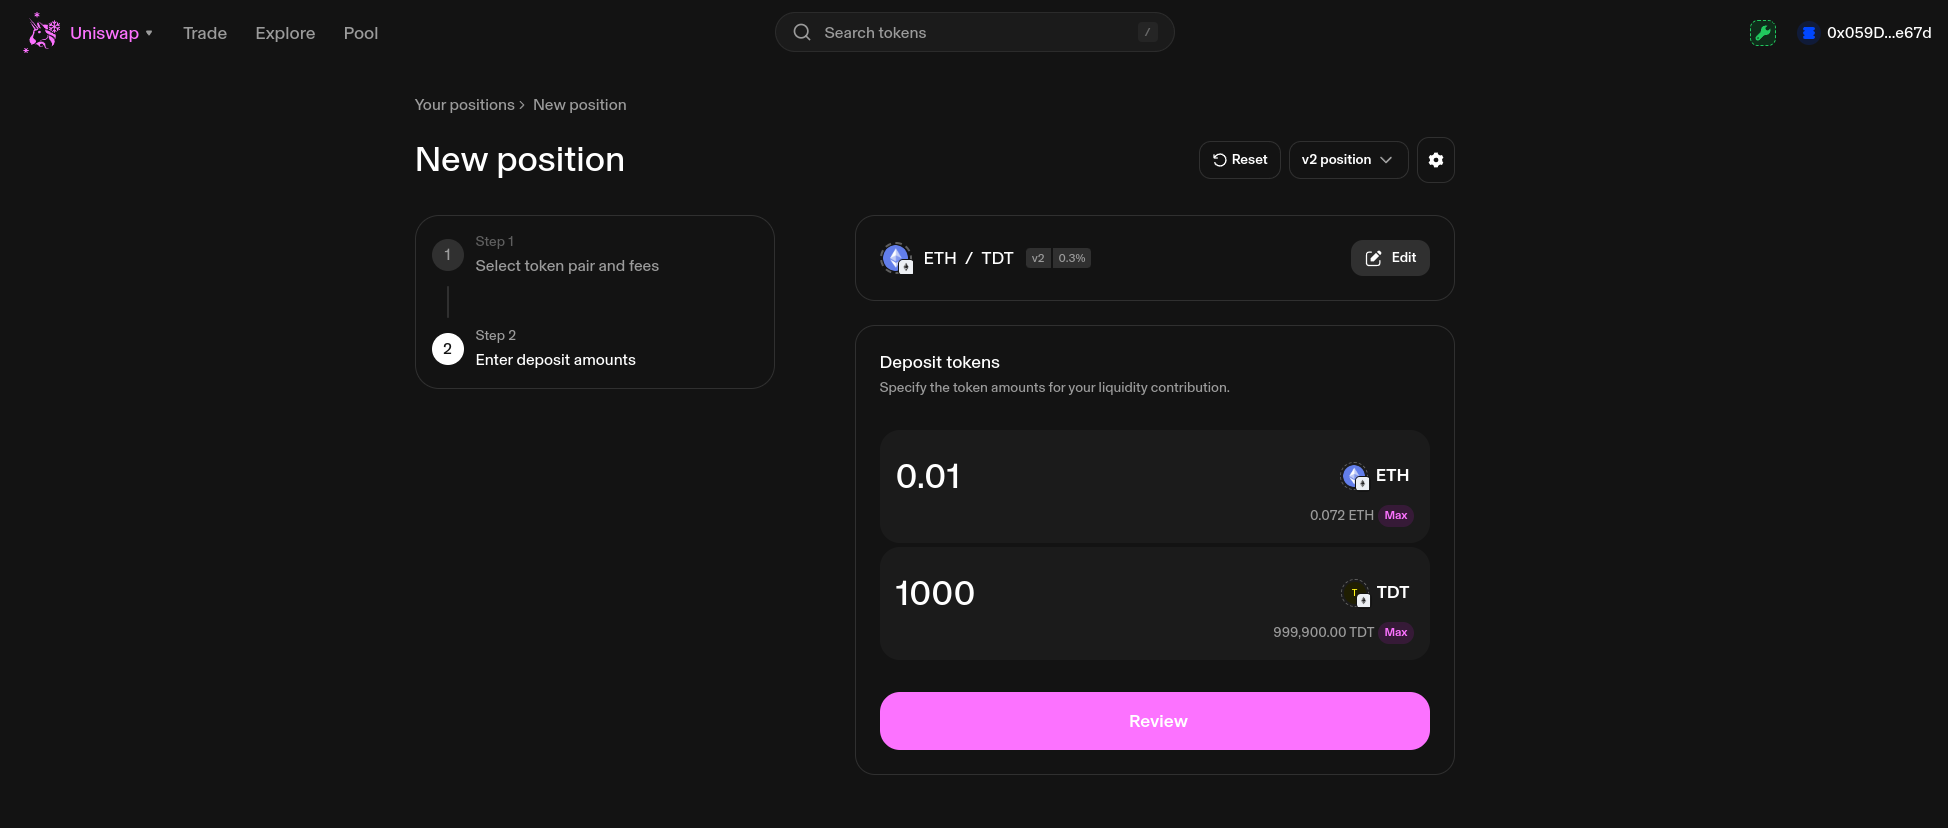
The final step is to approve tokens to be deposited into your wallet and finally add liquidity to the pool.
After the transactions have been approved, you can view all your liquidity pool positions in the "Pool" section of the Uniswap interface.
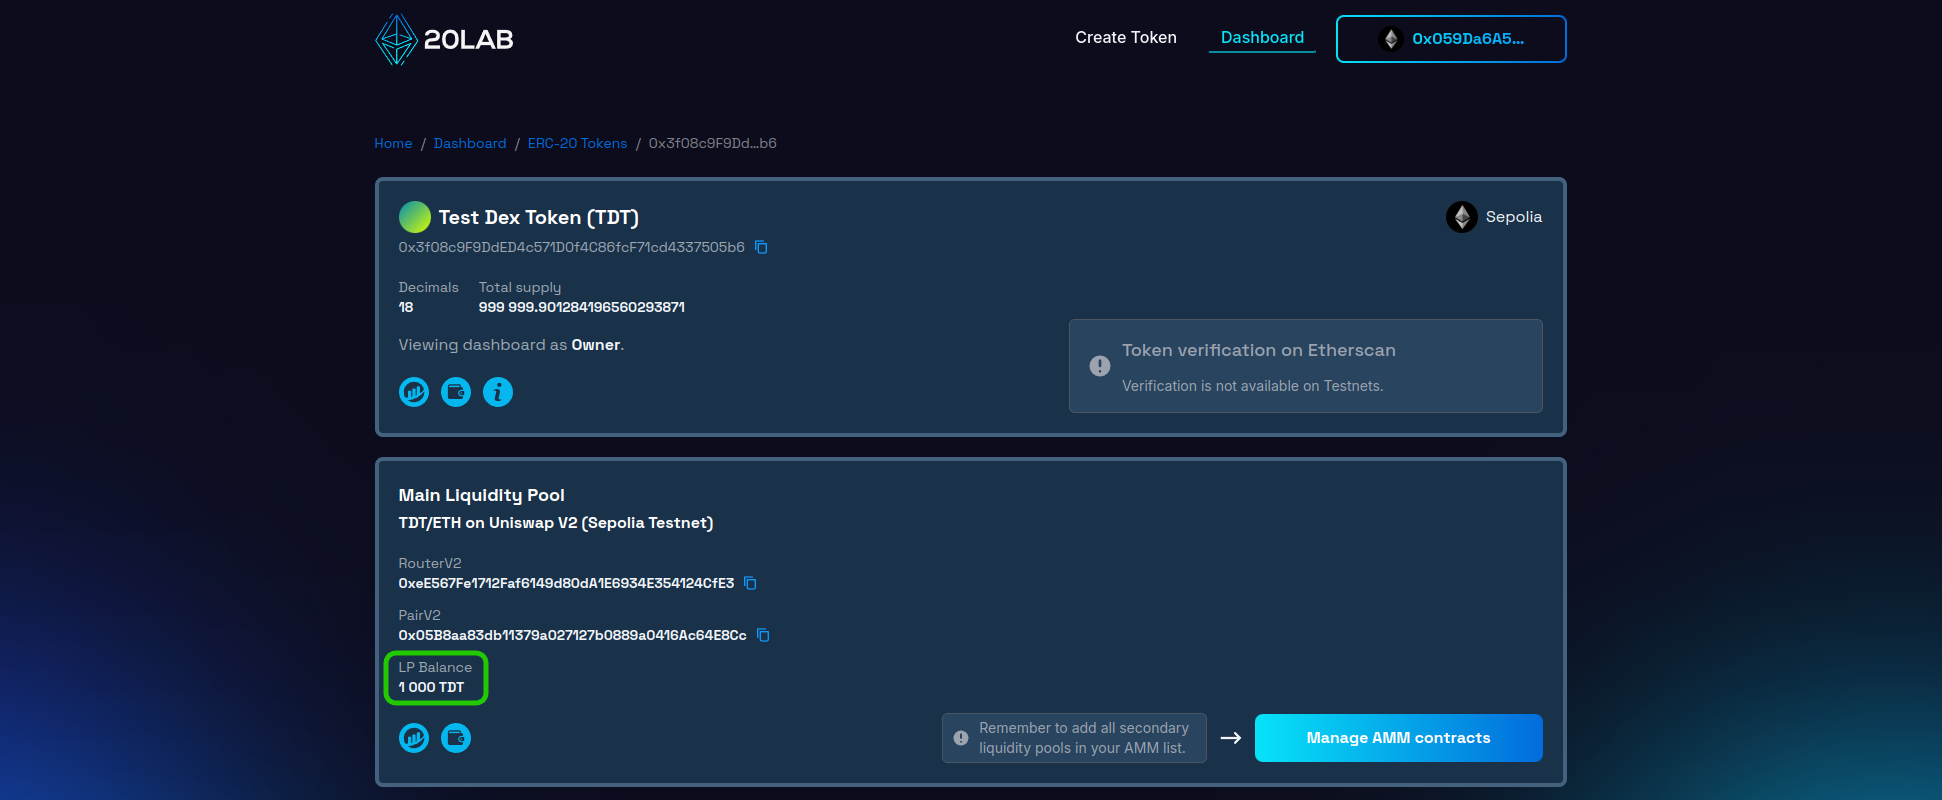
If you have a default exchange feature in your token created on 20lab, you can also view the amount of tokens in the "Main Liquidity Pool" section of the dashboard as "LP Balance", which is updated in real time.
In almost all cases, immediately after liquidity is added to your token, everyone will be able to trade - buy or sell your token on Uniswap. If you want to delay the start of trading and don't want to depend on the moment when liquidity is added, you can consider adding the EnableTrading feature. This feature adds an owner-restricted function to control when trading should start.
Conclusion
Congratulations! You've now learned how to add liquidity to your ERC-20 token on Uniswap V2. This enables trading and allows you to earn fees. Providing liquidity is the key to a healthy token market.
Uniswap V2 is a great choice, especially for tokens with transfer fees, due to its simplicity and broad compatibility. Understanding how to provide liquidity allows you to effectively manage the trading of your token.
For more support with 20lab's token creation and liquidity pools, join our Telegram channel. Our team is here to help you succeed.


