
Why Your Token Needs a Default Exchange Connection
Decentralized exchanges (DEXes) have revolutionized token trading on all major blockchain networks. Whether you're launching a token on Ethereum, BNB Chain, Polygon or other compatible chains, integrating with DEXes isn't just about enabling trading - it's about laying the foundation for advanced token functionality. By establishing a default exchange connection, token projects can implement sophisticated features such as anti-bot mechanisms, trading controls and automated market maker (AMM) interactions.
When launching a new token, one of the most important decisions is choosing which DEX will serve as your token's primary trading venue. This choice affects not only where your token can be traded, but also how your smart contract interacts with the broader DeFi ecosystem. Primarily, the default exchange connection is used to enable features that require a main liquidity pool to function properly, ensuring that your token can take advantage of advanced trading mechanics and protections.
How Default Exchange Integration Works with 20lab
Using 20lab's token generator, you can select your preferred DEX from a list of available options specific to your chosen blockchain. During the token generation phase, after connecting your wallet, you'll see the supported DEXes for your network, allowing you to choose the one that best suits your project's needs. The most popular DEXes that are available on many blockchains are Uniswap, PancakeSwap or SushiSwap.
The default exchange connection will automatically configure your token's smart contract to recognize specific AMM contracts:
- Adds the selected DEX's RouterV2 contract to your token's AMM list.
- Creates an empty liquidity pool (PairV2) contract and also adds it to the AMM list by default.
This integration is critical because it enables your token to properly identify different types of transactions - distinguishing between buys, sells and regular transfers. These contracts are automatically excluded from limits and dividends (if applicable), ensuring the smooth operation of your token's advanced features, and cannot be removed from the AMM list, even by the token owner.
Most importantly, setting up a default exchange unlocks access to powerful token features within 20lab's token generator. For example, if you want to implement anti-bot measures, the default exchange connection allows your token to track buy and sell activity per address, enabling cooldown periods and other protections. This foundation is essential for implementing features such as EnableTrading functionality and managing internal DEX transfers between recognized AMM contracts.
How to Choose Default Exchange and Create ERC-20 Token
Creating a token with default exchange functionality is simple with 20lab's token generator. This easy-to-use ERC-20 token generator streamlines the process so that even those with minimal or no coding experience can launch their own tokens in minutes. Here's a quick guide to get you started:
Step 1: Choose Token Type and Connect Wallet
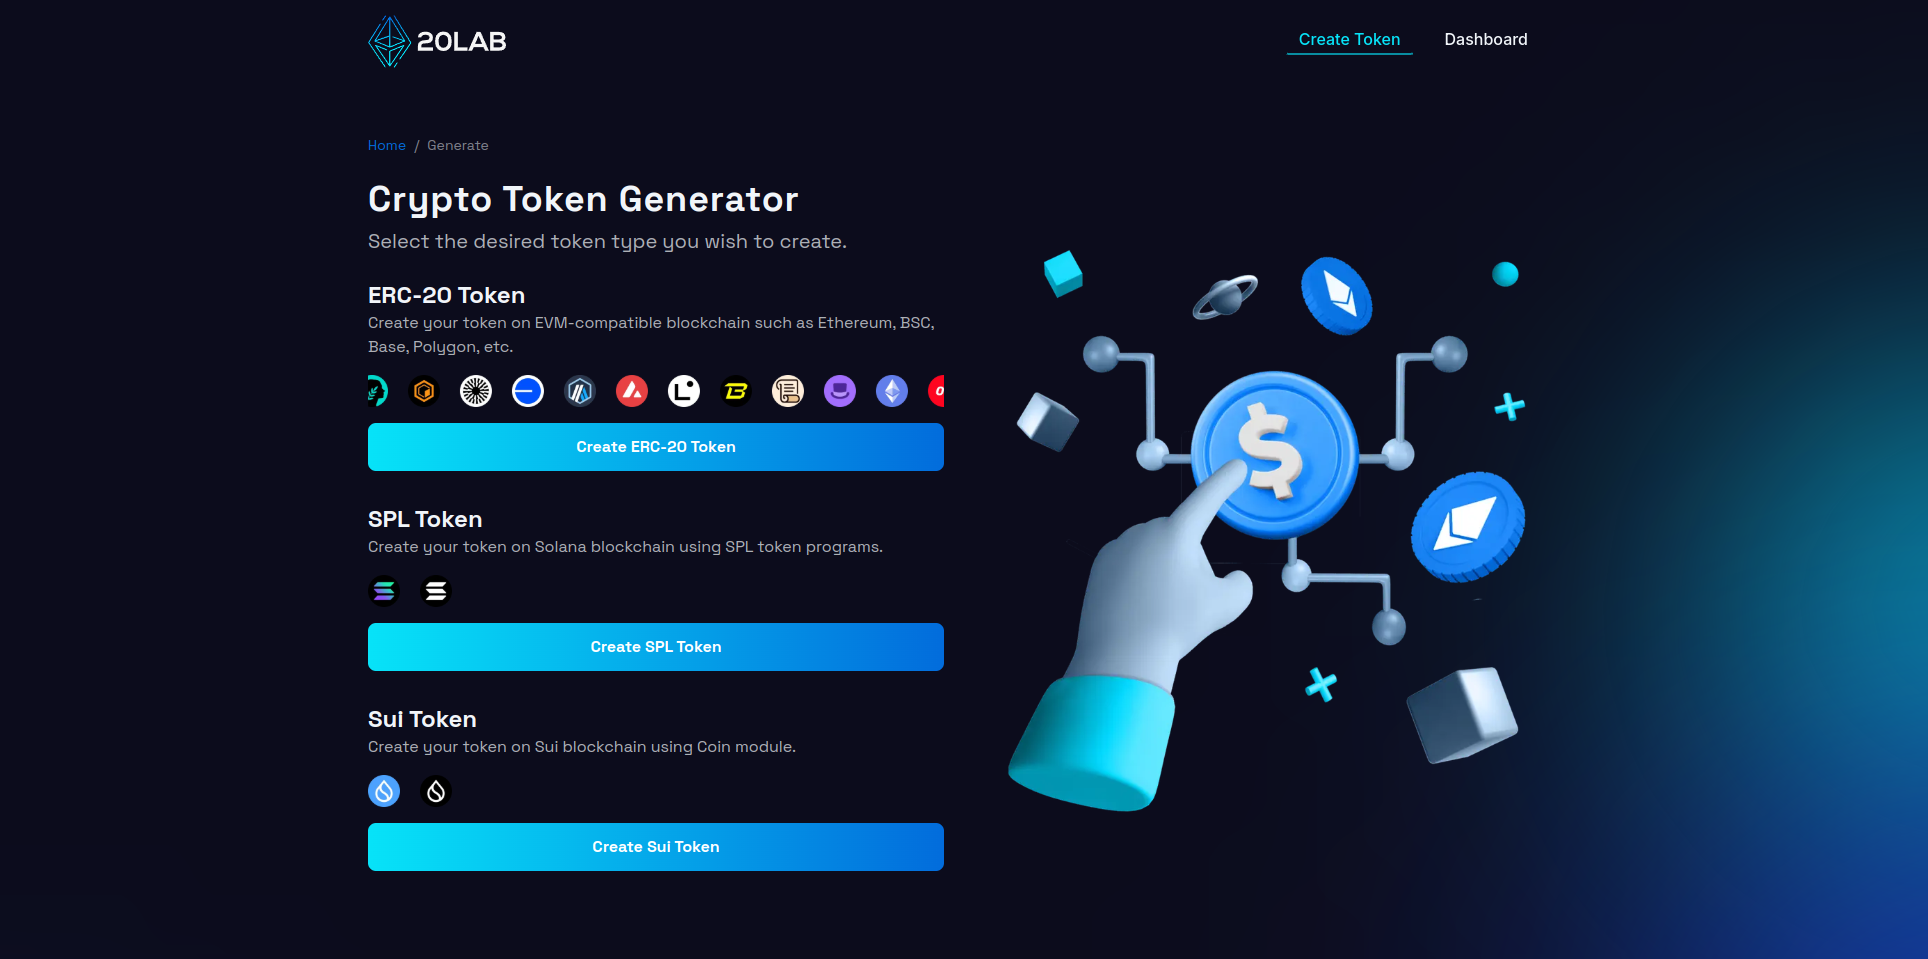
Launch your token creation journey on 20lab's token generator, where your first decision awaits - selecting the blockchain ecosystem for your project. While 20lab supports multiple token standards including SPL (Solana) and Sui tokens, the default exchange functionality is specifically designed for ERC-20 tokens. Click on "Create ERC-20 Token" to access this powerful feature and begin building your token.
With your token type selected, connect your preferred Web3 wallet - whether it's MetaMask, Coinbase Wallet, or Trust Wallet. 20lab's broad wallet support ensures a seamless connection process.
Choose your deployment network carefully: select a testnet if you're experimenting, or a mainnet when you're ready for production. The platform supports various EVM-compatible networks, allowing you to launch your token exactly where your community needs it.
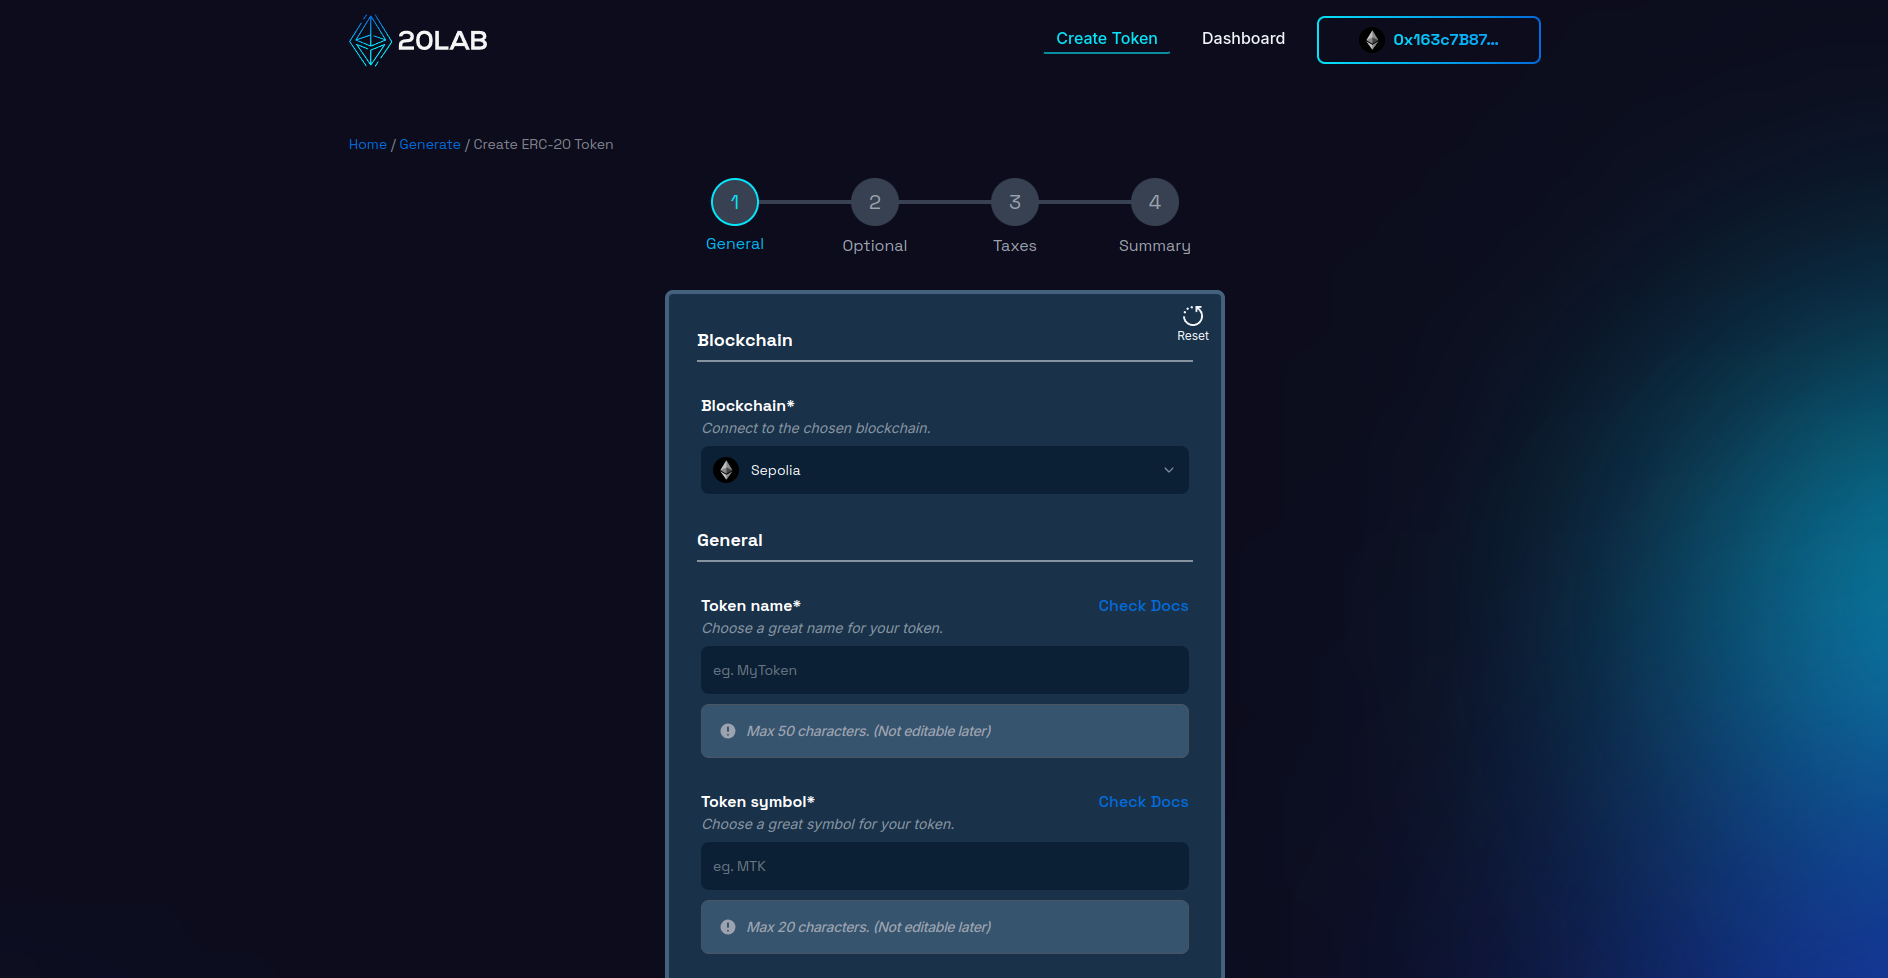
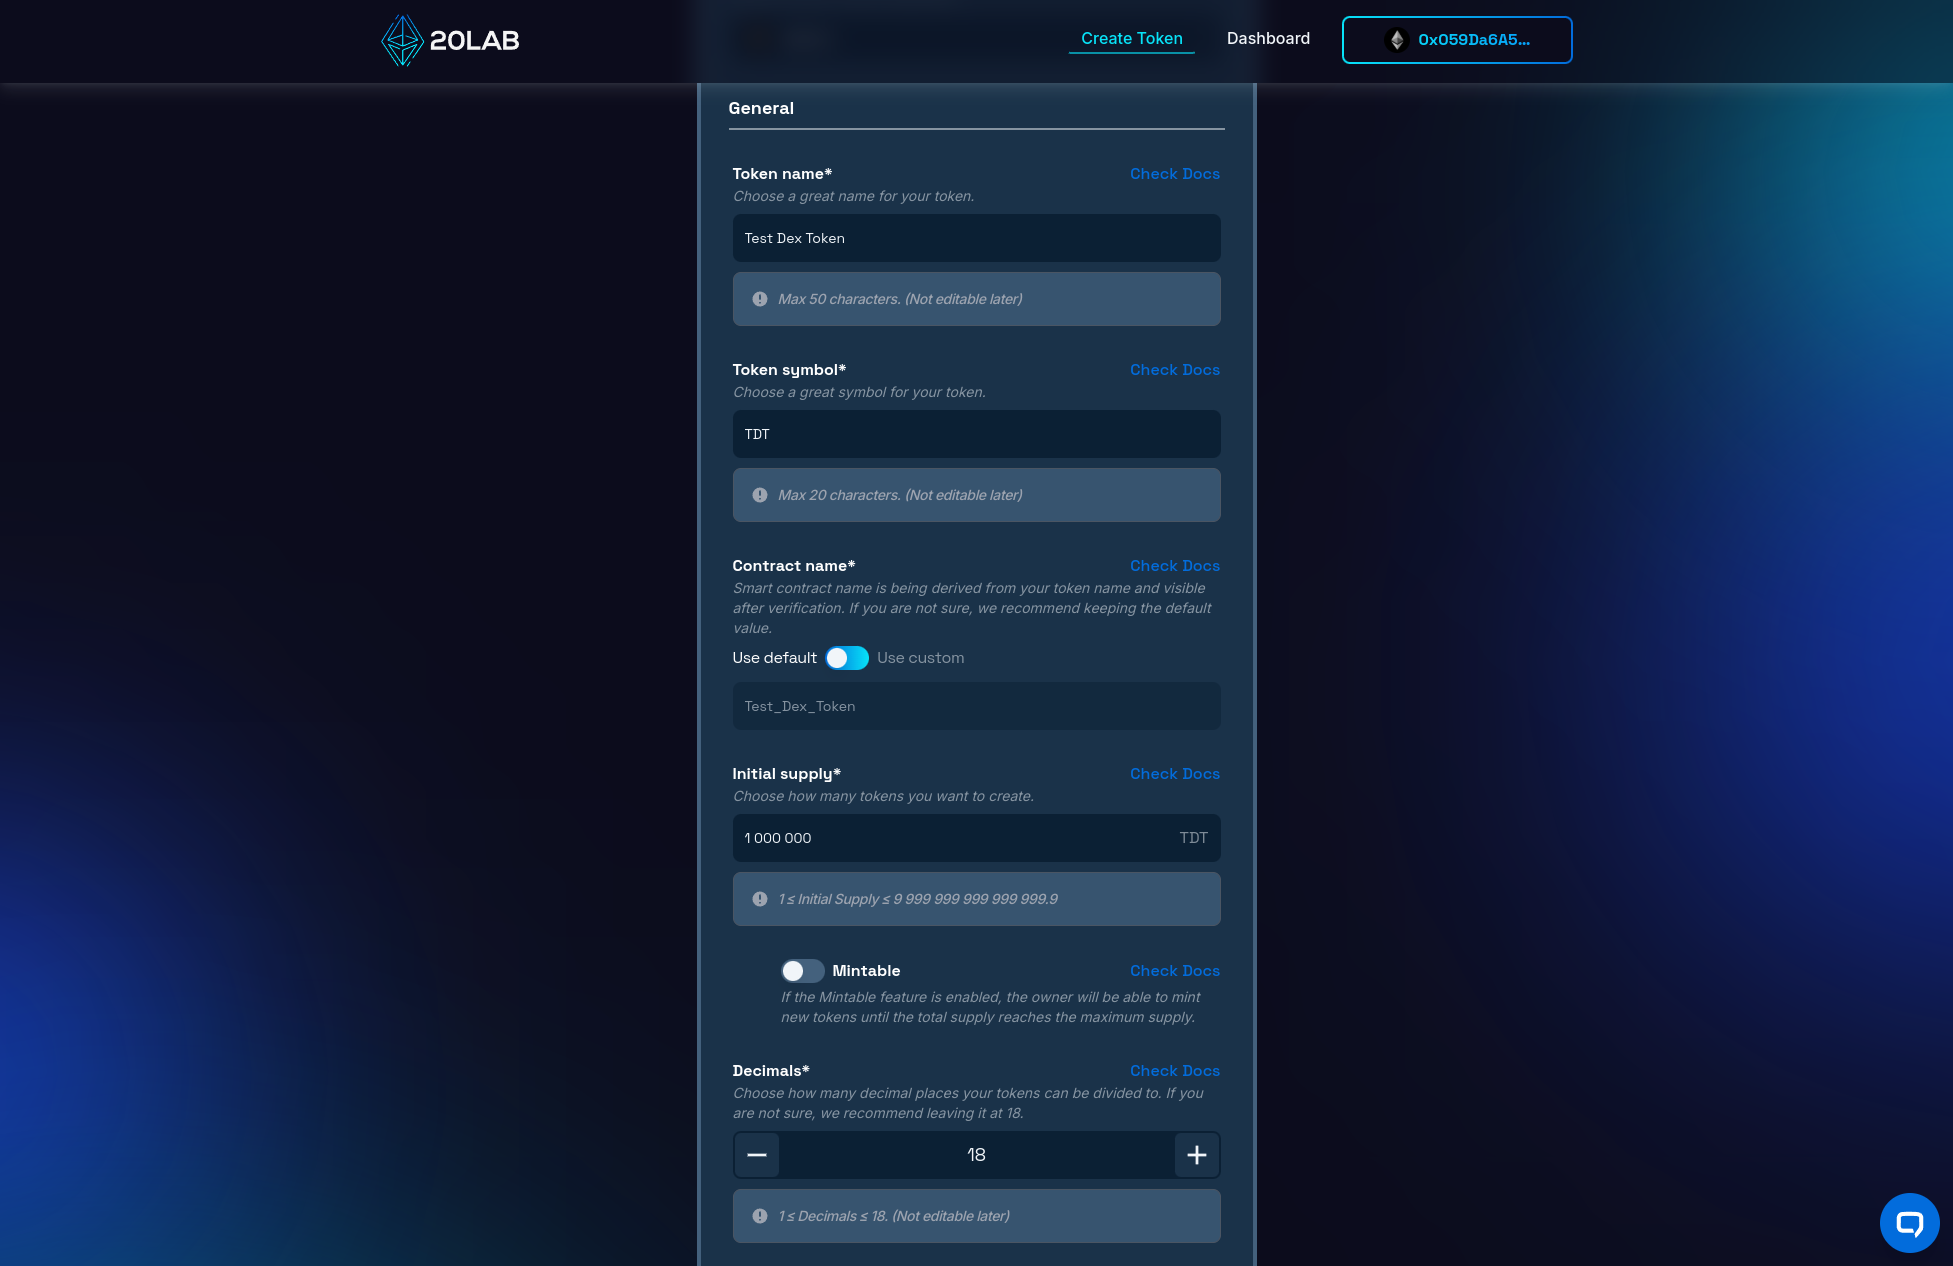
Step 2: Add General Token Information
Your token's identity and economic parameters are the foundation of your project. Start with the basics:
- Choose a unique and memorable token name and symbol that reflects your project's identity.
- Determine your initial token supply based on your token economics and distribution strategy.
- Configure decimal places - the default setting of 18 decimal places matches major blockchain currencies and is recommended for most projects.
Next, configure your token management structure by setting up two essential wallet addresses:
- Supply recipient: The wallet address that will receive and hold your initial supply of tokens.
- Token owner: The wallet address that will have administrative control over the functions of your smart contract.
For better organization, you can customize your contract name - this will help identify your token on blockchain explorers after verification. Consider using a descriptive name that matches your project's branding.
Step 3: Enable and Select Default Exchange
Navigate to the "Optional" section of the token generator, where you'll find the "Default exchange" option at the top. This critical feature comes pre-enabled, as it serves as the foundation for many advanced token functionalities. Here you can select the primary DEX where your token's liquidity pool will be created.
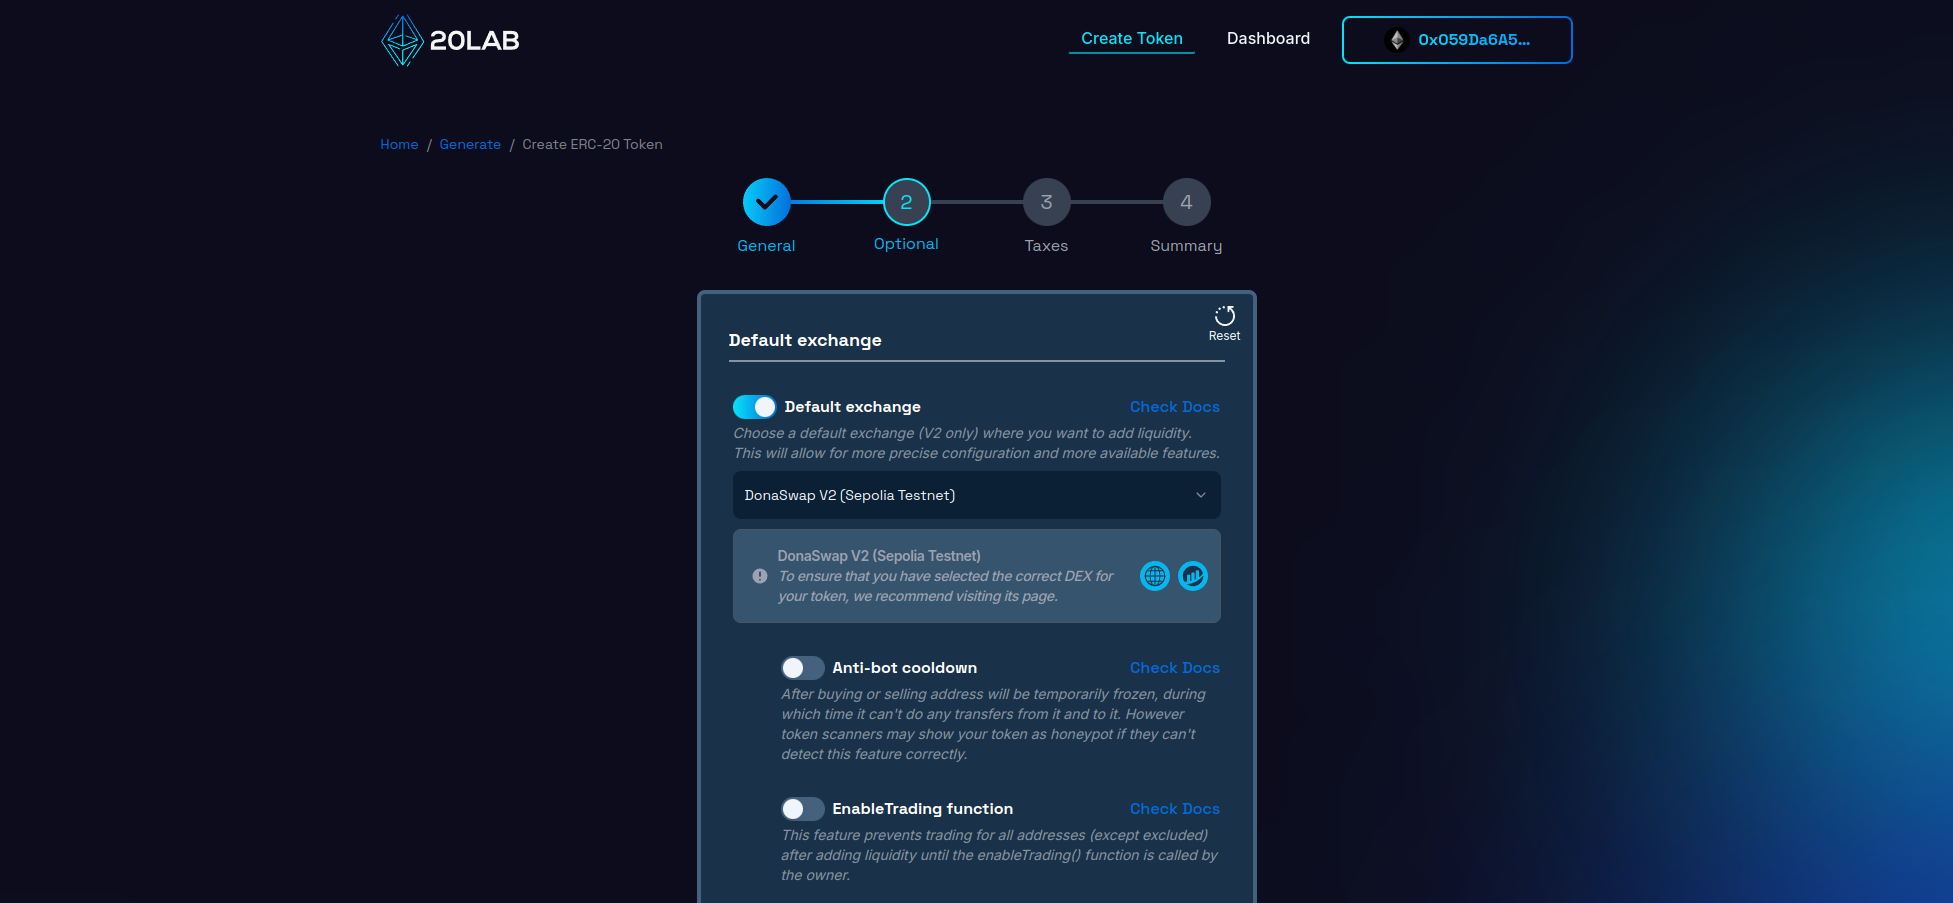
The default exchange connection provides access to many powerful token features:
- Anti-bot cooldown,
- EnableTrading function,
- Extended max transaction limits (buys, sells, transfers),
- Dividend tax,
- Liquidity tax,
- Extended auto-burn and wallet taxes.
If you enable this feature, additional options will appear in the generator panel. These advanced features rely on the default exchange connection to function properly, as they interact directly with the RouterV2 and PairV2 contracts of your chosen DEX. This integration allows your token to monitor and control trading activity while maintaining security and efficiency.
To demonstrate how the AMM list affects token functionality, we'll also enable the auto-burn tax feature from the "Taxes" section.

Step 4: Review and Deploy
Before deploying your token, take advantage of 20lab's comprehensive "Summary" page to review all configurations. This final checkpoint displays your token's parameters, features, and settings in one clear view, helping you catch any potential issues before they become permanent on the blockchain.
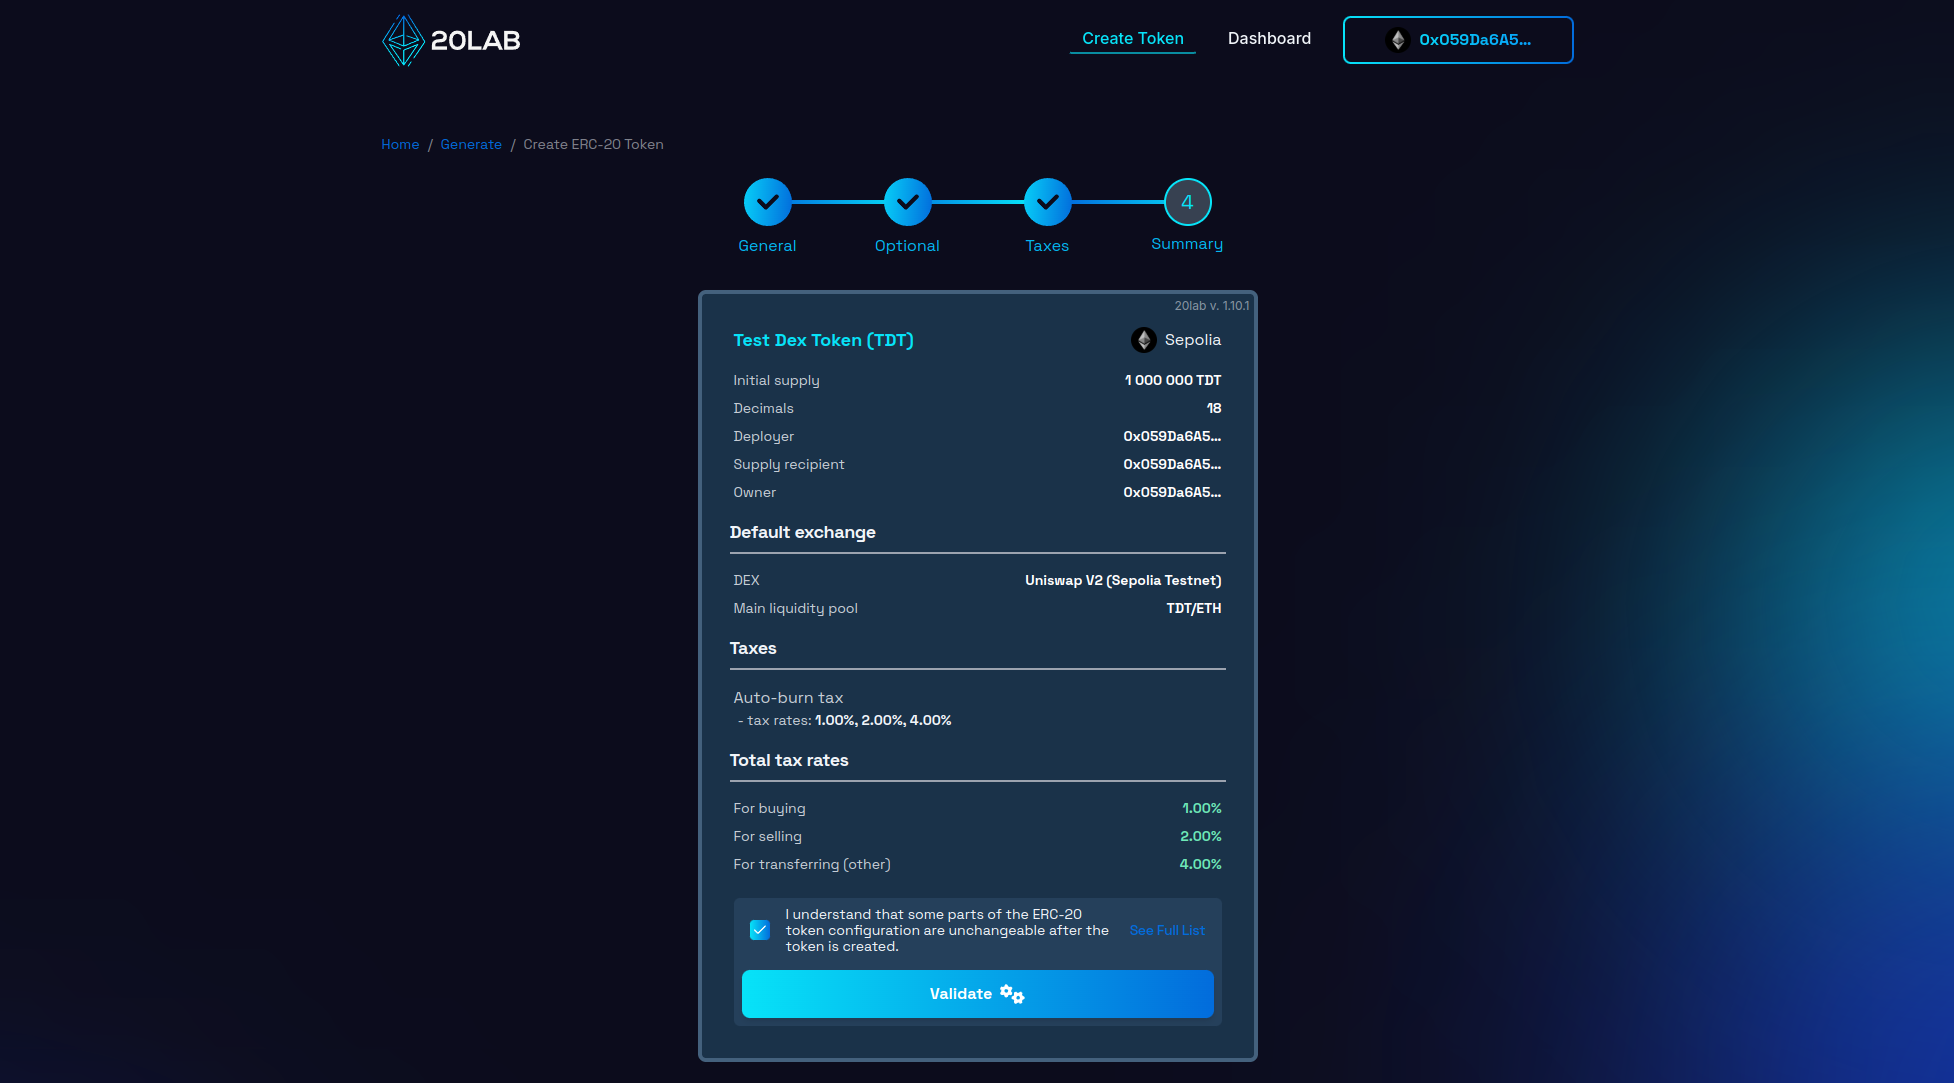
The deployment process involves two key steps:
- Click "Validate" to run a technical check of your token's configuration.
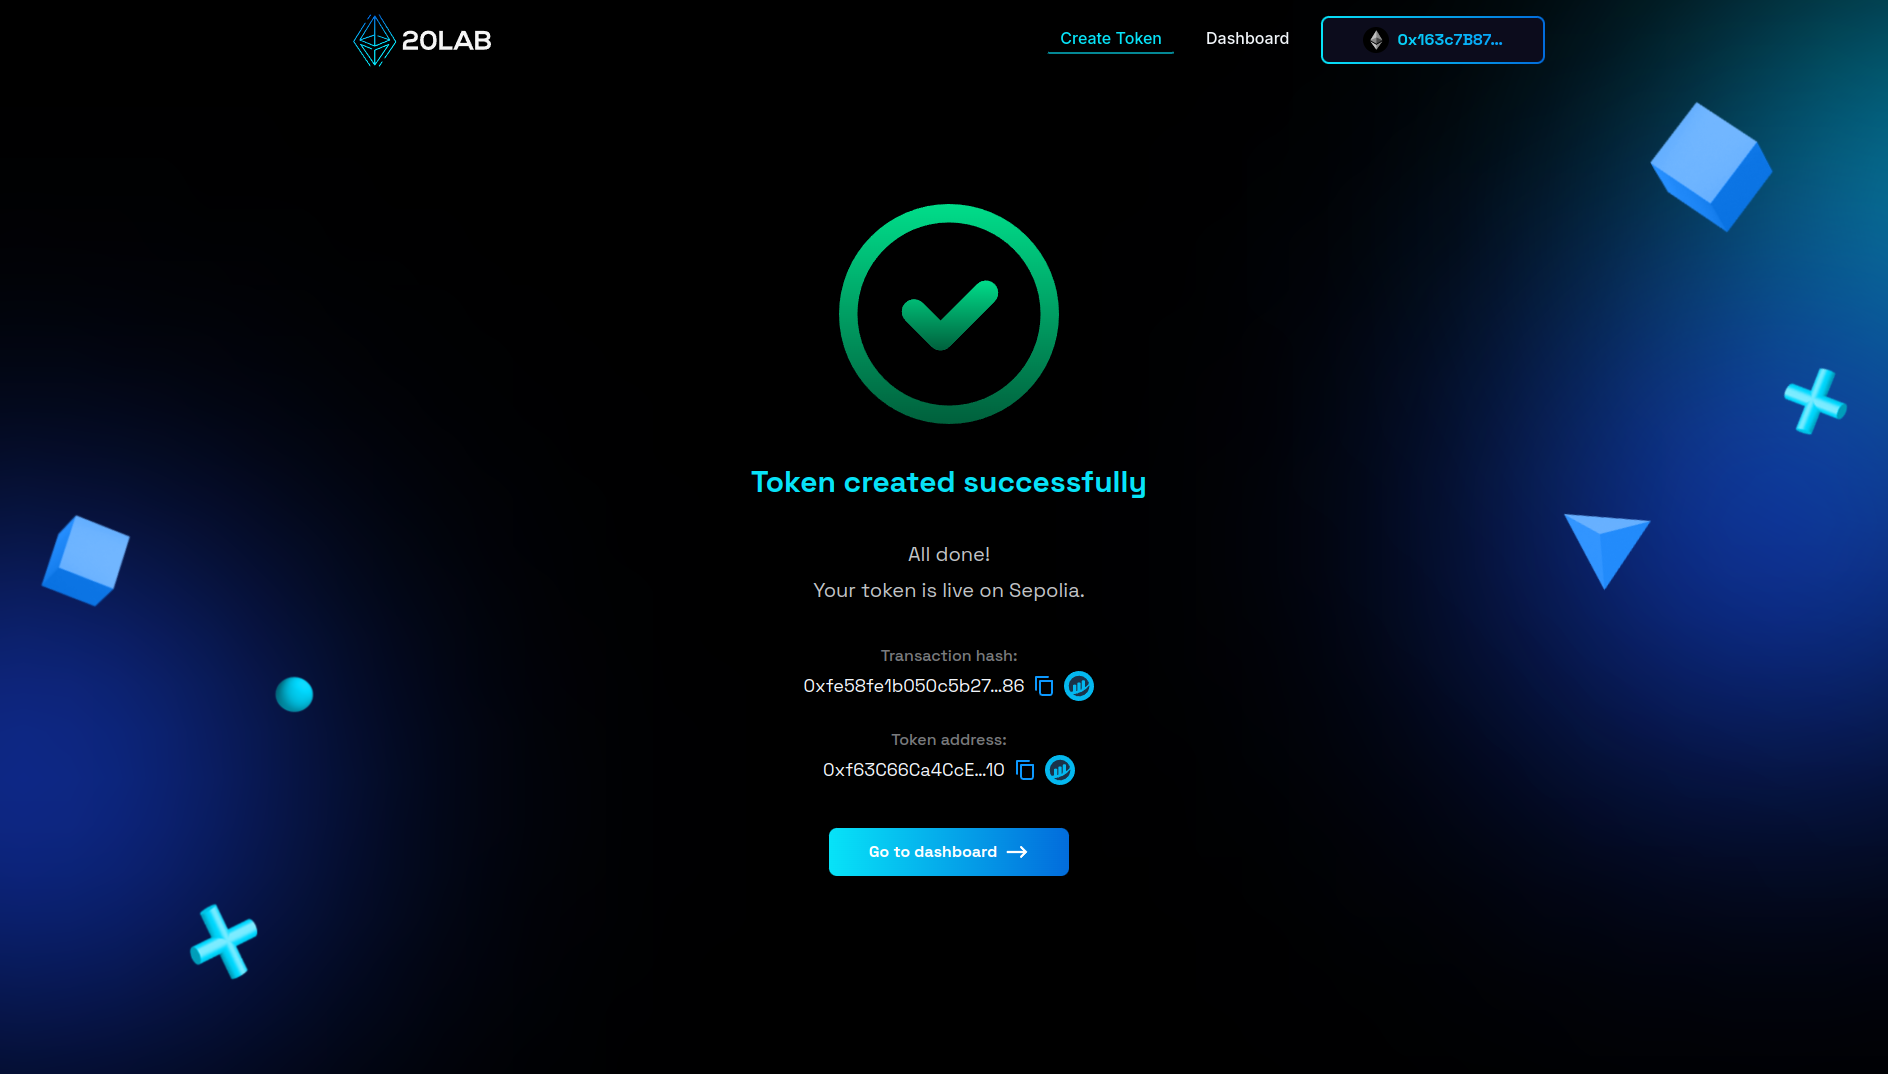
- Hit "Deploy" to create your token, then confirm the transaction in your Web3 wallet.
Note: The platform offers a token address pattern customization option during deployment - a unique feature that allows you to personalize your token's blockchain address for better brand recognition.
Managing Your ERC-20 with Default Exchange
Once deployed, 20lab provides a comprehensive dashboard to monitor and manage your token. This interface gives you complete control over your token's operations and the features enabled during creation.
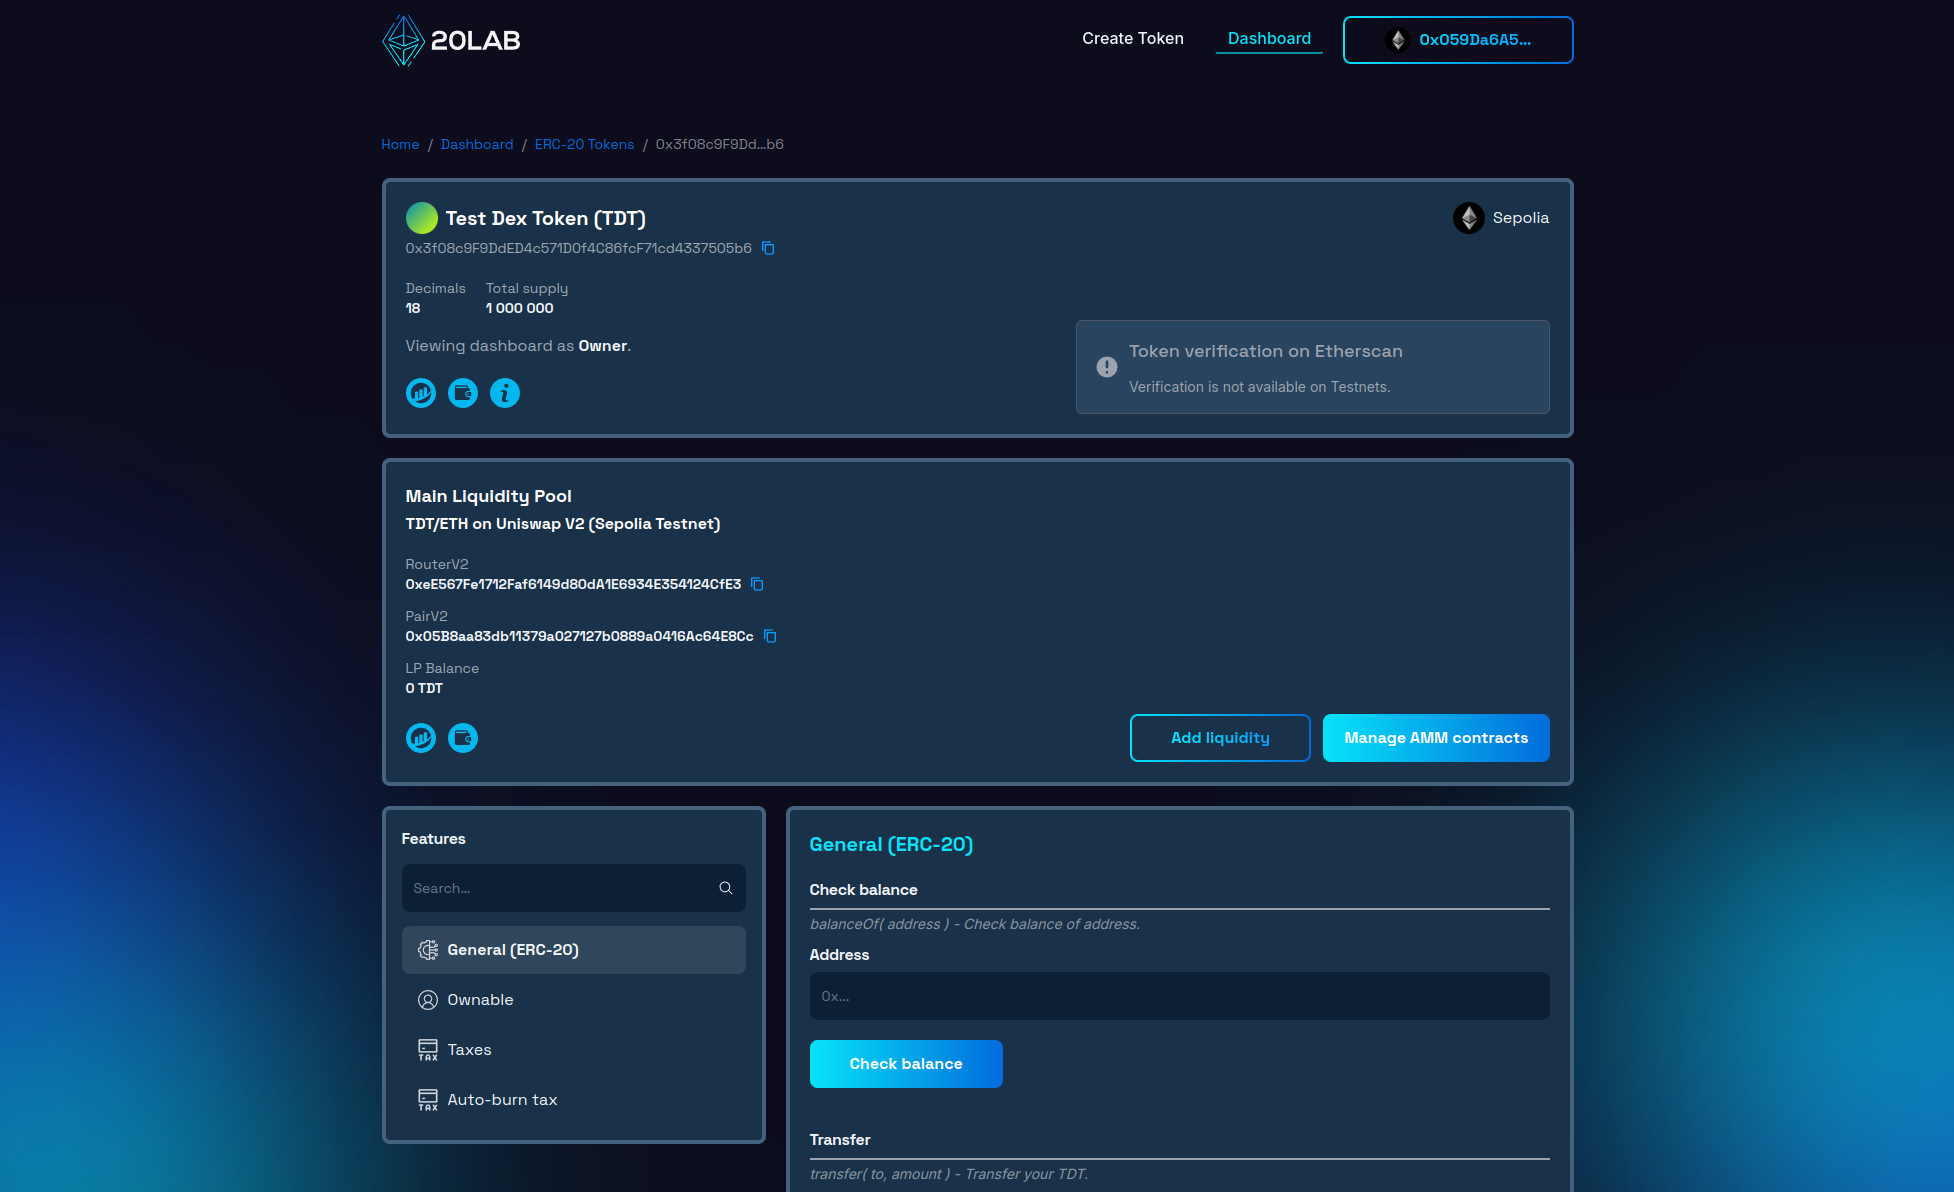
Token Overview and Management
At the top, the dashboard displays key information about your token:
- Contract address and verification status,
- Total supply,
- Token parameters (name, symbol, decimals),
- Ownership controls and permissions in the "Ownable" section.
Default Exchange Section
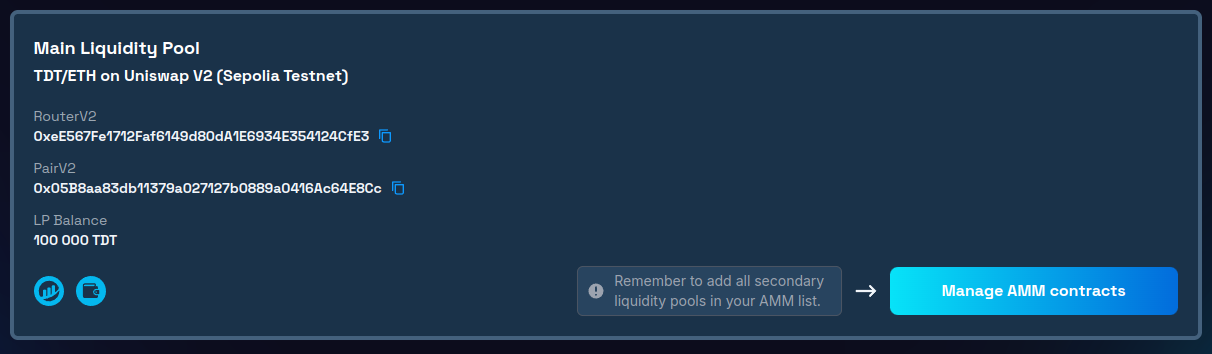
The "Main Liquidity Pool" section of your dashboard provides essential information about your token's default exchange integration:
- RouterV2 contract address,
- PairV2 liquidity pool address,
- Real-time liquidity pool balance tracking your token supply.
A core feature of your token is the AMM (Automated Market Maker) list management. This system lets you control which smart contracts your token recognizes as valid DEX interactions. While your primary liquidity pool is configured automatically during deployment, you can expand trading options by adding secondary pools through the "Manage AMM contracts" interface.
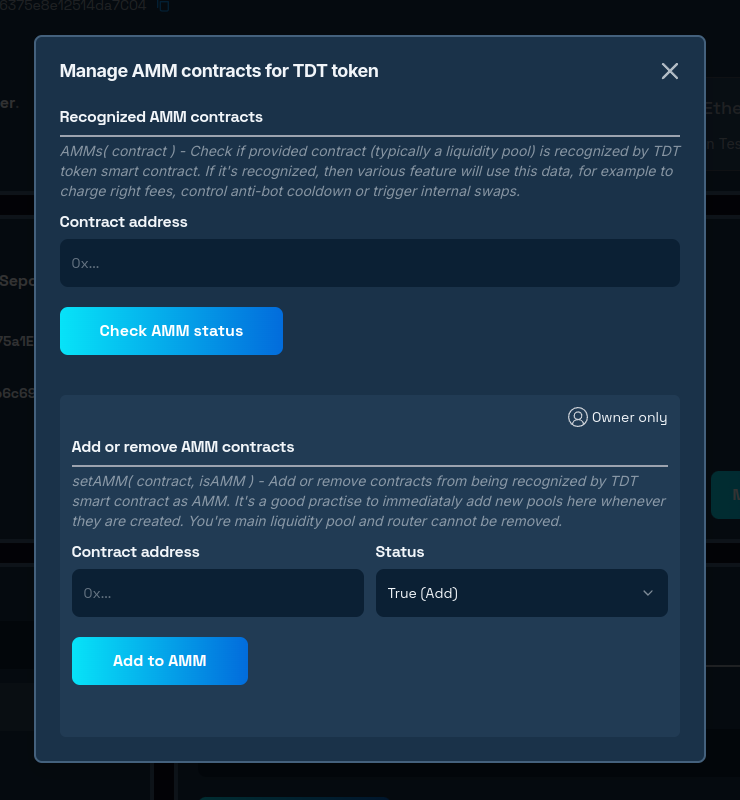
For example, if you start with a TokenX/ETH pair on Uniswap as your main trading location, you may later want to add a TokenX/USDT pool on SushiSwap. By adding this new pool contract to your AMM list, you ensure that your token recognizes transactions from all authorized liquidity pools, while maintaining security features such as trading limits and anti-bot protection across all pools.
Testing Your DEX Integration
To effectively test how the AMM list works, we will add liquidity to 2 liquidity pools: the main one and the secondary one. Remember that no matter how many liquidity pools you want to have, you must first add liquidity to your main pool before adding it to any other pool.
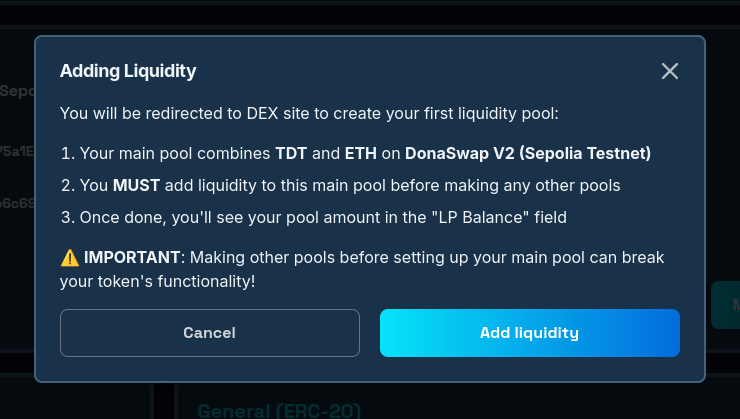
To add liquidity for your ERC-20 token, click the "Add Liquidity" button in your dashboard. This will redirect you to your chosen DEX's interface.
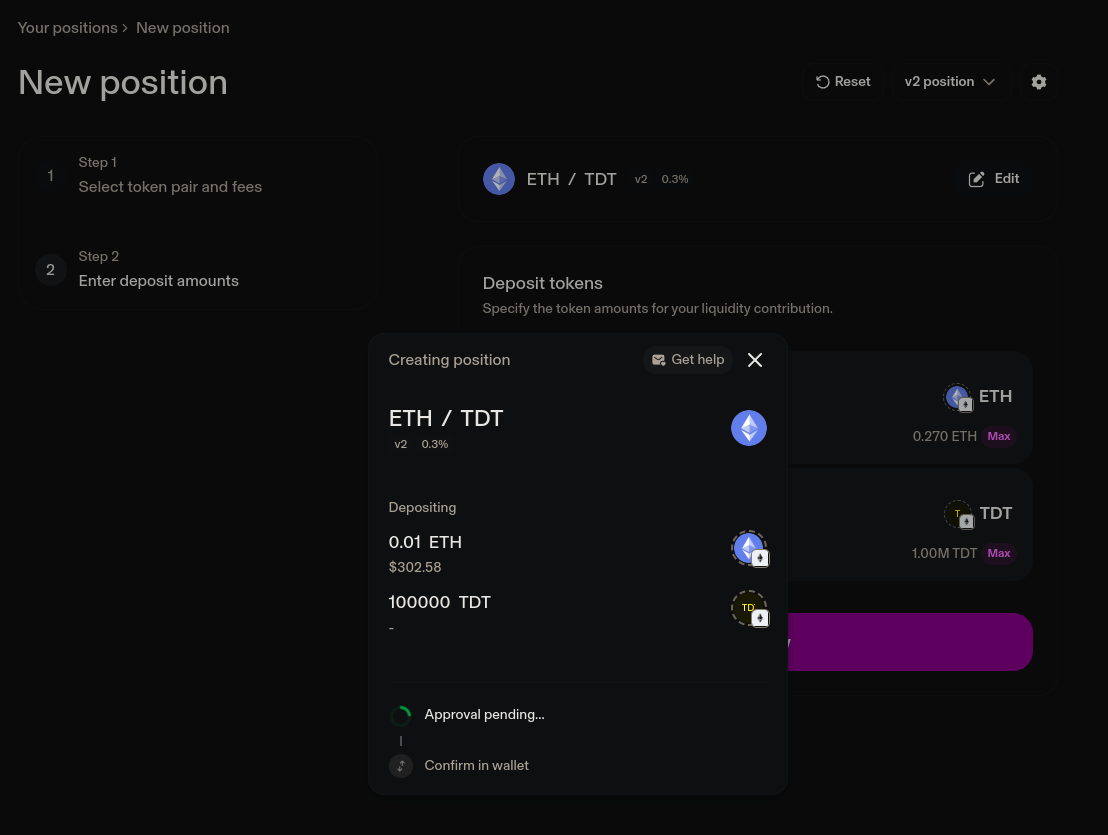
After adding liquidity, your 20lab dashboard will automatically update to show the current token balance in the main pool.
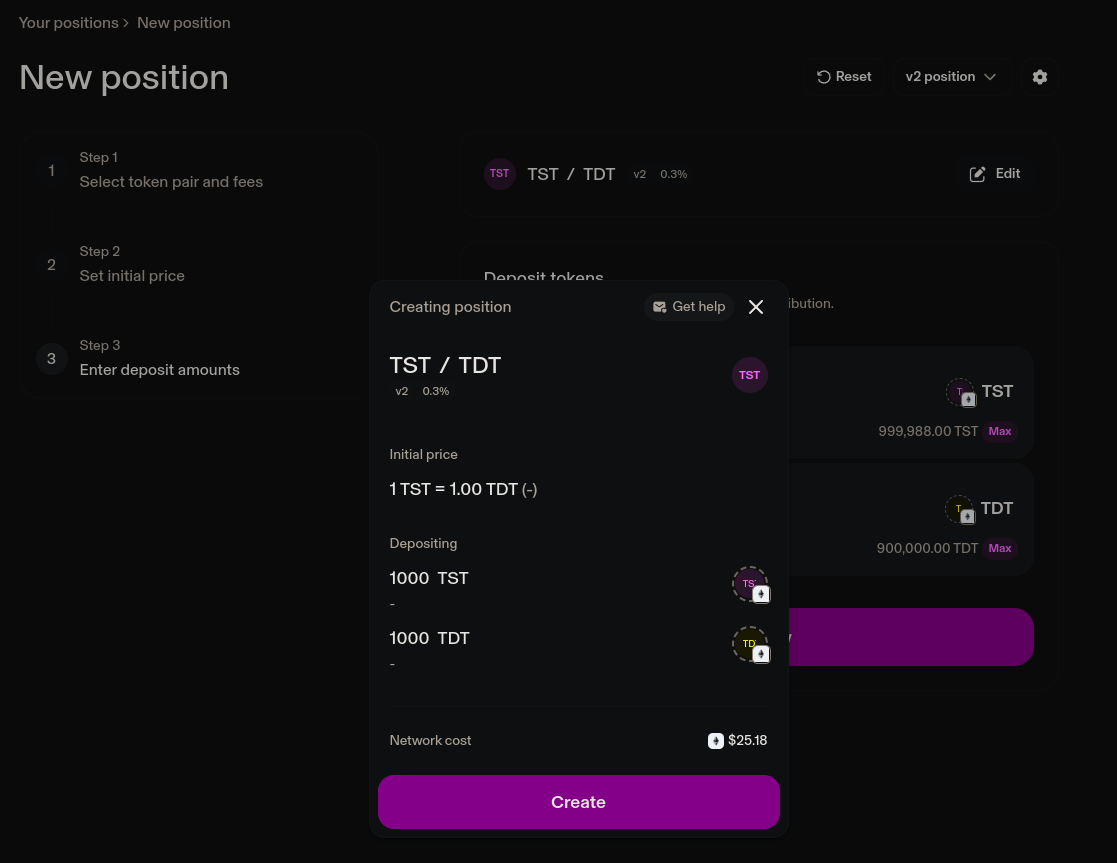
Next, we'll create a secondary pool using the TDT/TST pair. TST is my other test token without features like auto-burn tax, making it perfect for demonstrating the difference in behavior.
Once both pools are created, locate the secondary pool address in the "Holders" tab on the block explorer.
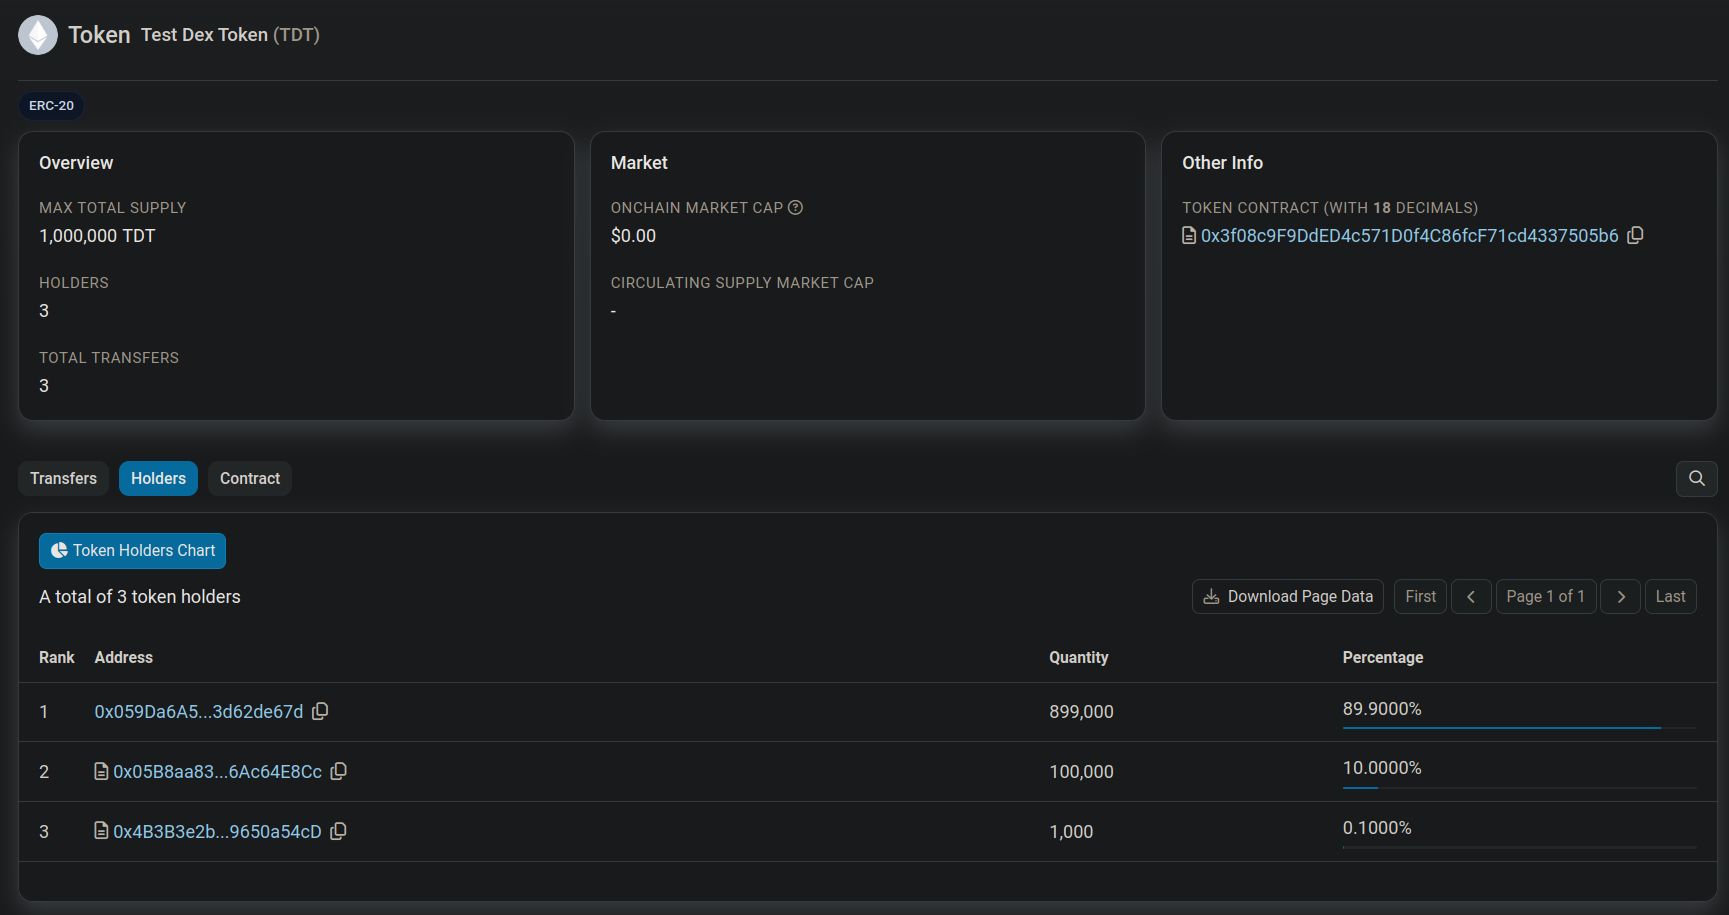
The secondary pool contains 1000 TDT tokens. Copy its address to add this pool to your token's AMM list.
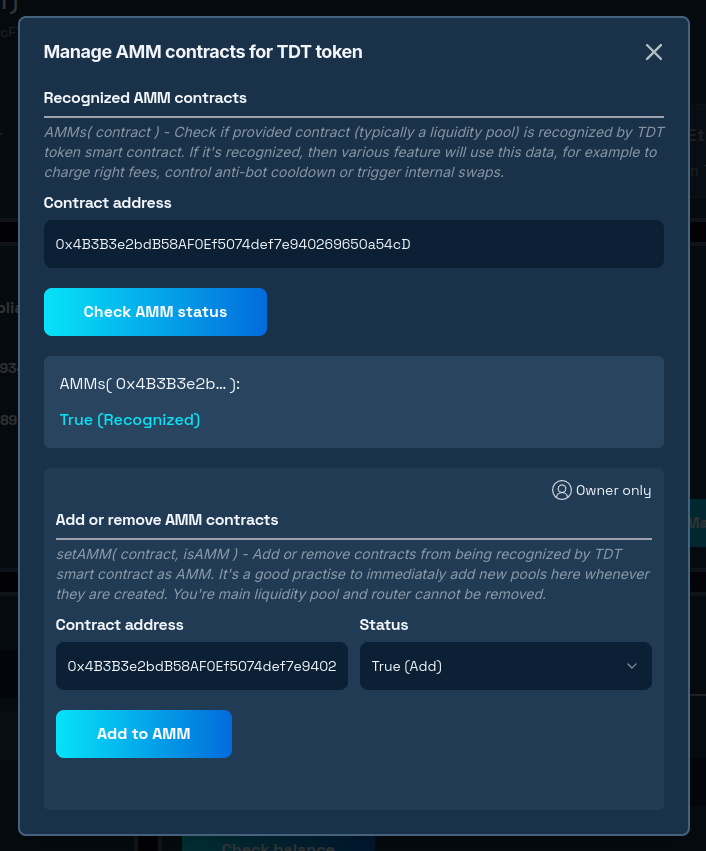
Upon successful addition, the pool's status will change to "True (Recognized)".
To test the configuration, we'll use a different wallet with TST tokens to purchase TDT and examine the transaction in the block explorer.
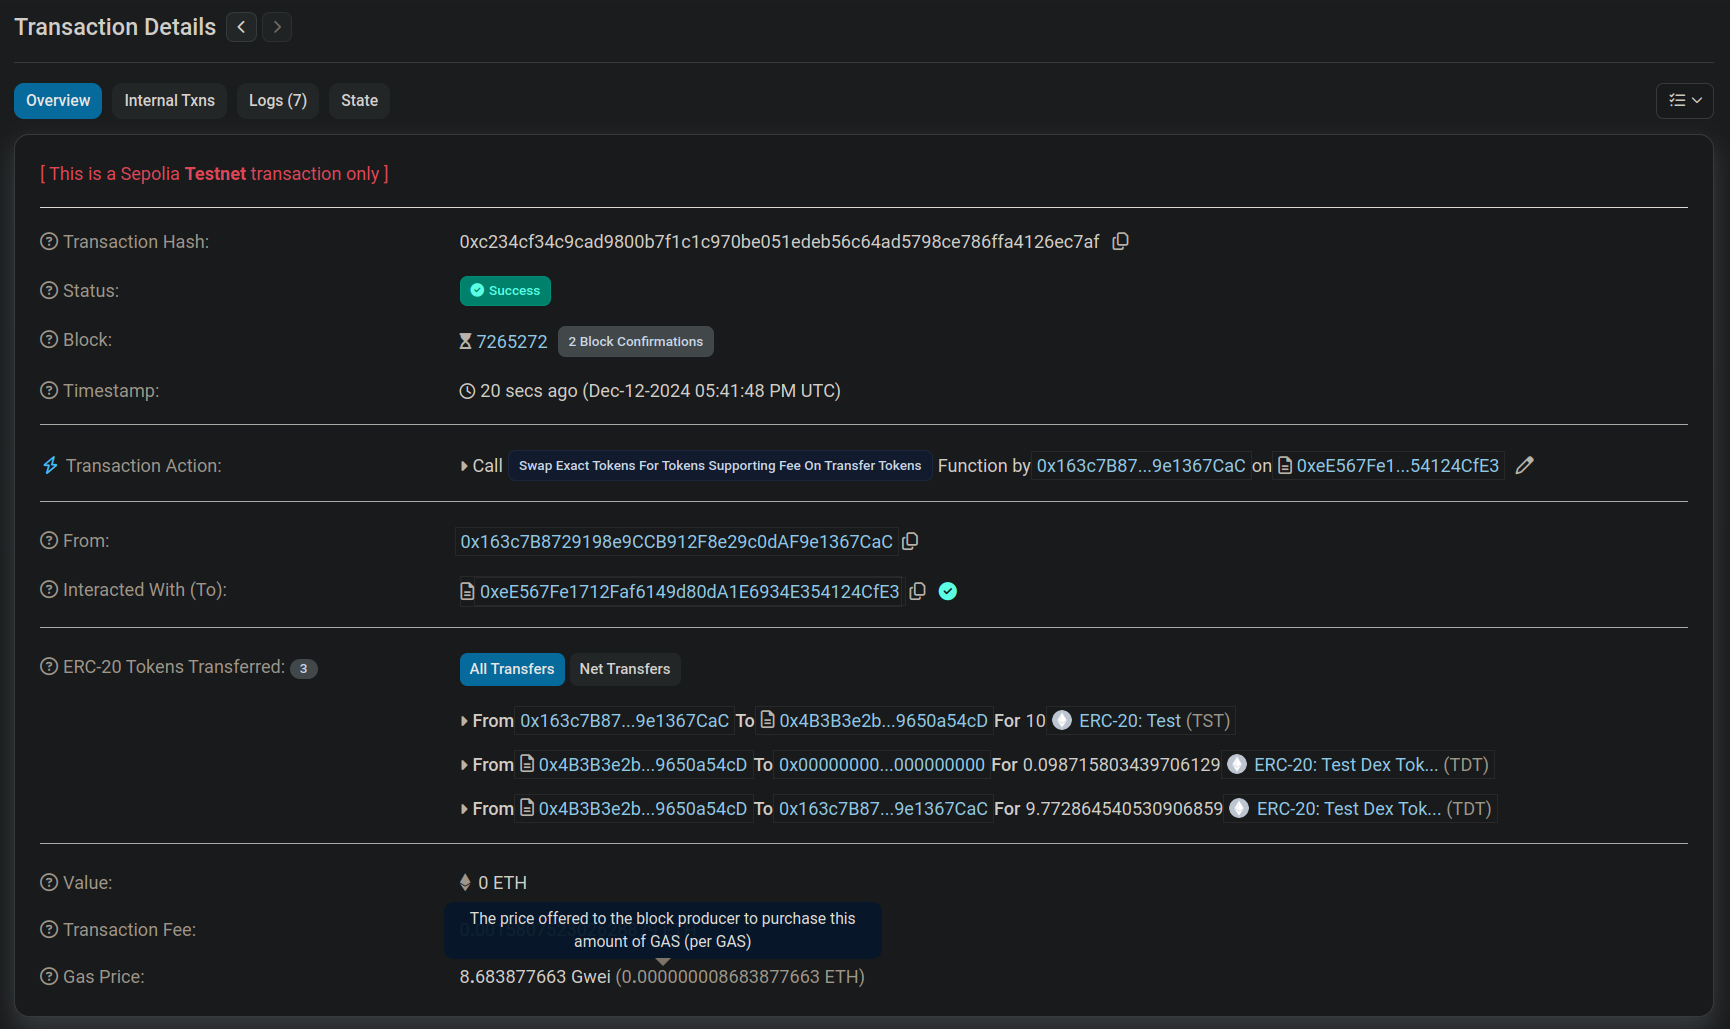
The transaction demonstrates that the 1% auto-burn tax applies to trades in the secondary pool, just as it does in the main pool. Without adding the secondary pool to the AMM list, buyers would be charged the 4% transfer tax rate instead of the correct 1% buy tax. Now, potential buyers cannot avoid paying the auto-burn tax, and it will be accurately calculated when they purchase TDT tokens from any of the existing pools.
Conclusion & FAQ
Setting up a default exchange connection is a fundamental step in creating a modern ERC-20 token. This integration not only enables basic trading functionality but also serves as the foundation for implementing advanced features that protect your token and its community. Through 20lab's intuitive interface, you can easily configure this connection and manage your token's interaction with your chosen DEX.
Frequently Asked Questions
What if I don't add a secondary pool to AMM?
In this scenario, your token will treat this pool as a normal token holder:
- It will be included in limits and dividends (if applicable).
- Instead of charging buy and sell fees, your token will charge transfer fees.
- Instead of maximum buy and sell transaction limits, maximum transfer limits will be enforced.
- Anti-bot won't work on trades with this pool.
- The EnableTrading function won't be applied on trades with this pool.
When should I add my secondary pools to the AMM list?
Secondary pools should be added to the AMM list as soon as they are created and liquidity is added. Many DEXes perform both operations in a single transaction, so it's difficult or even impossible to add them when the pool is completely empty.
If you have EnableTrading feature in your token, we don't recommend adding liquidity to secondary pools before trading is permanently opened. Even a small delay between adding liquidity and adding the pool to the AMM list can be used by buyers to buy your token earlier than it should be possible. It's better to add liquidity to secondary pools once your token is permanently open for trading.
How are multi-pool swaps handled by token contract?
Many ask what will happen if there is liquidity on multiple pools within the same DEX eg. Uniswap. Arbitrage bots or normal traders can use your pools not only to buy your token, but also to make other trades e.g. from ETH to USDT, which intermediately goes through TokenX/ETH and TokenX/USDT pools.
In this scenario, your token will jump from the first pool to the second or vice versa. Because both pools are added to your token's AMM list, your token contracts treat this action as an "internal dex transfer". This type is a special excluded transaction from all limits and taxes implemented in your token as the tokens are not leaving or entering the dex (buying or selling). In this case they stay within the dex ecosystem and don't apply for limits and taxes (if your token charges them).
Do I need to add additional RouterV2 contracts to the AMM list?
If your secondary liquidity pool is on a different DEX than your main liquidity pool, even if the RouterV2 contract is different, you don't need to add it to AMM in most cases. Just adding the liquidity pool is enough for the token to work properly.
If you have any questions about creating or managing your ERC-20 token, don't hesitate to reach out to us via our Telegram channel.


