
How Arbitrum Tokens Leverage Blockchain Efficiency and Speed
Arbitrum One stands at the forefront of Ethereum scaling solutions, offering a revolutionary approach to blockchain efficiency. As the flagship implementation of the Arbitrum Rollup Protocol, it provides a layer 2 network designed to significantly reduce Ethereum's computational burden. By processing transactions off-chain and then submitting batches to the Ethereum mainnet, Arbitrum One delivers faster and more cost-effective transactions while maintaining the security guarantees of the Ethereum ecosystem.
At its core, Arbitrum One utilizes an optimistic rollup mechanism, where transactions are assumed valid until proven otherwise. This approach, coupled with a robust fraud-proof system, ensures the integrity of the network while dramatically improving scalability. Built on the Arbitrum Nitro tech stack, which incorporates the standard Ethereum Virtual Machine, Arbitrum One offers a seamless experience for developers and users, opening new possibilities for decentralized applications without compromising on Ethereum's foundational principles of security and decentralization.
How to create your own ERC-20 token
Creating your own Arbitrum token has never been easier, thanks to generator platforms like 20lab.app. This user-friendly token generator simplifies the process, allowing even those with zero or minimal coding experience to launch their own tokens on Arbitrum blockchain. Here's how to get started:
Choose a token type
20lab.app allows users to create ERC-20, SPL, and Sui tokens. ERC-20 is the token standard for Ethereum-like blockchains, SPL is used on Solana, and Sui tokens operate on the Sui blockchain. The choice between these standards often depends on the specific needs of your project, its target audience, and which blockchain ecosystem you want to participate in.
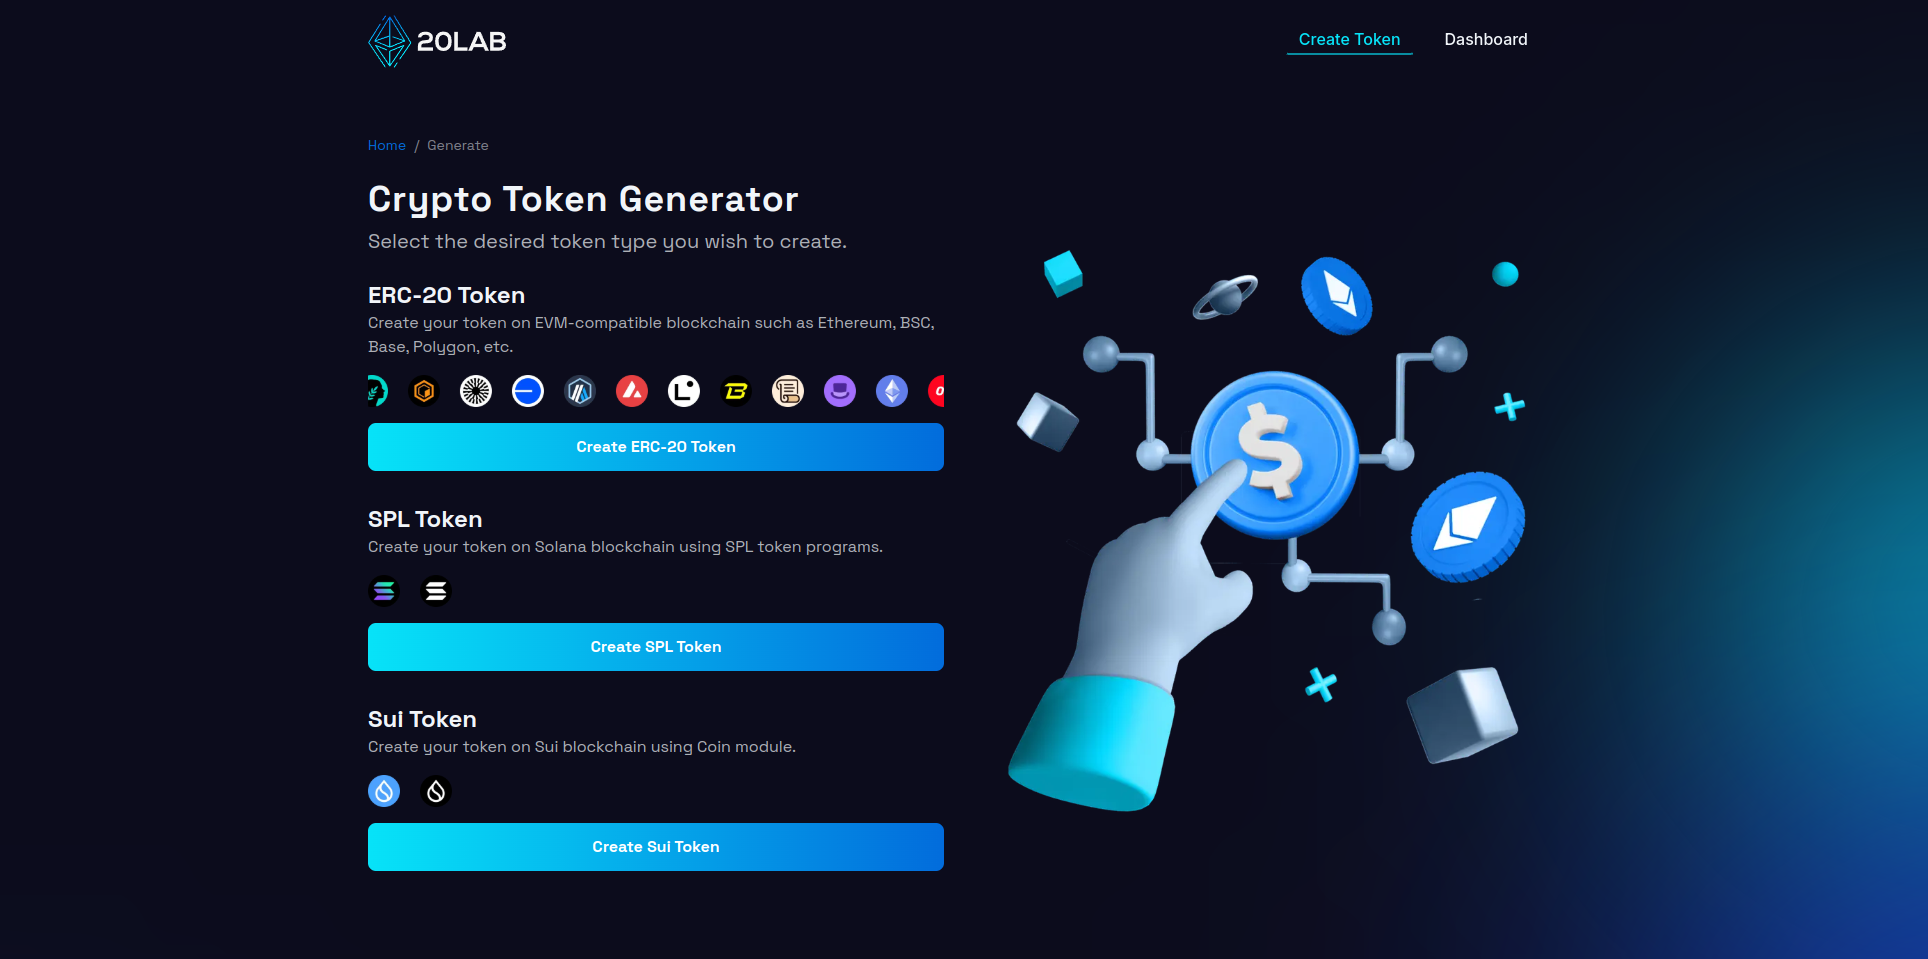
Here you can create Arbitrum token on Arbitrum blockchain.
Connect your wallet
To interact with most blockchain platforms, including token generators, you'll need to connect to a web3 wallet. Popular wallets include: MetaMask, Coinbase Wallet, Trust Wallet, and many other options. Most of them can be easily connected to any dApp that requires a blockchain connection.
To connect your wallet on 20lab.app, just click the "Connect Wallet" button. You will see a window that will guide you through all the steps. This includes approving the connection request in your wallet app.
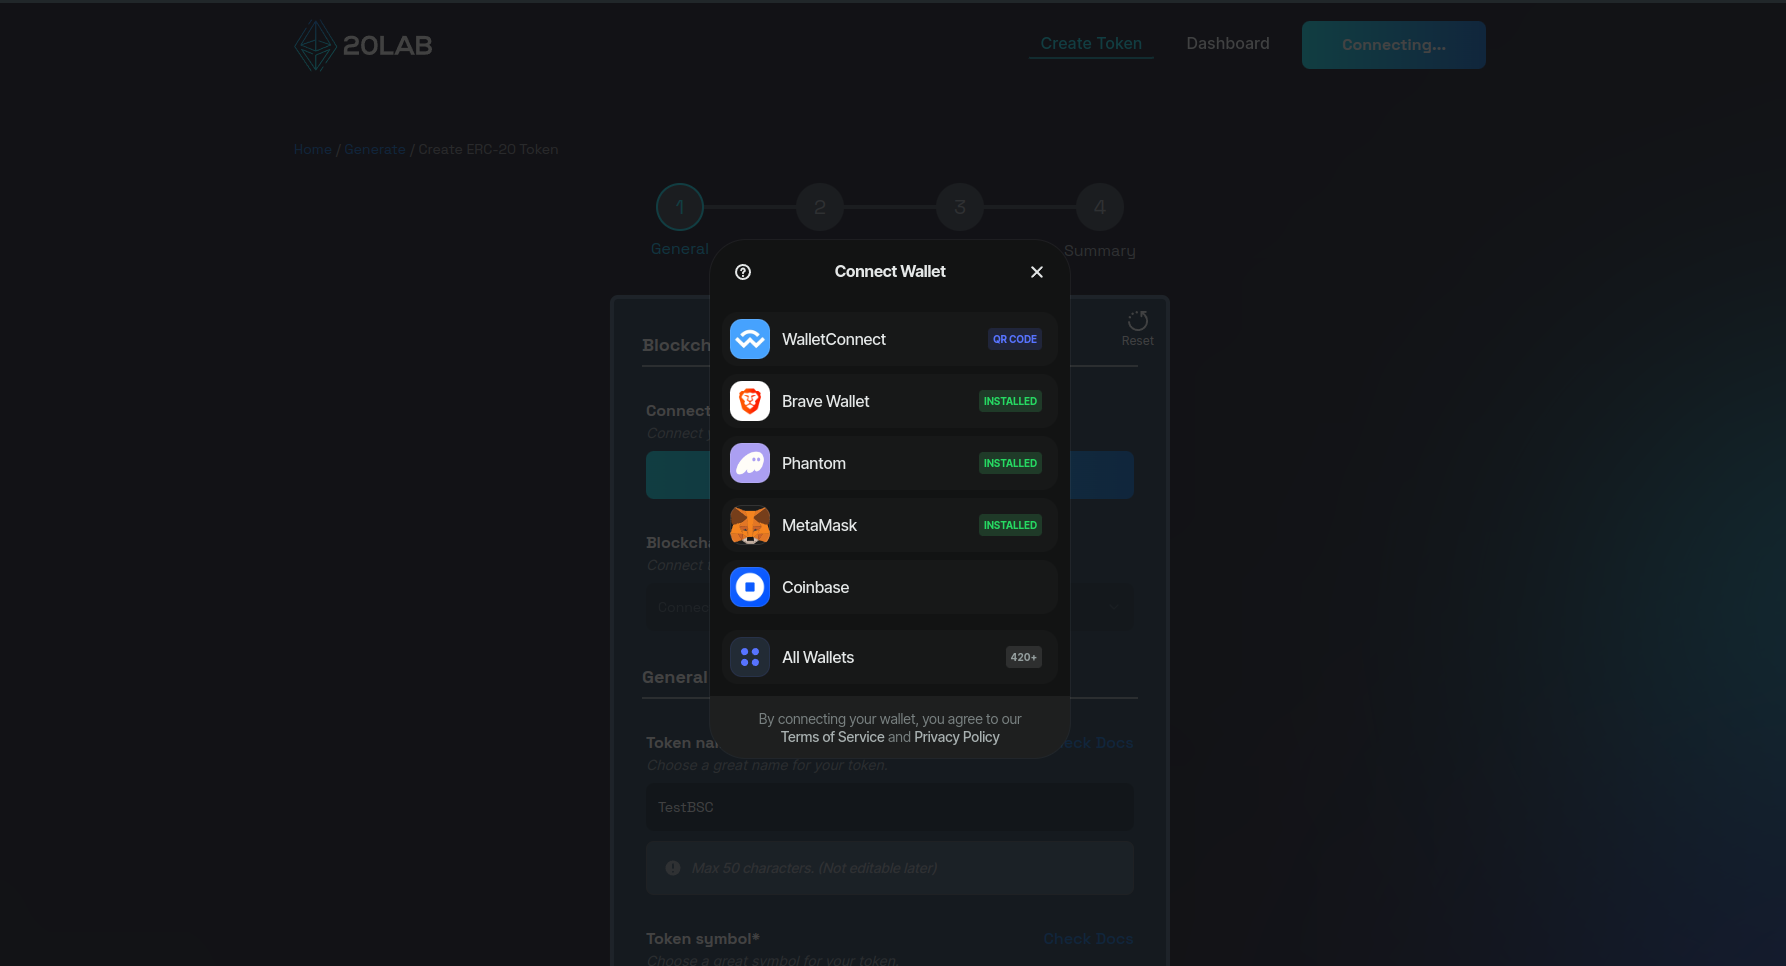
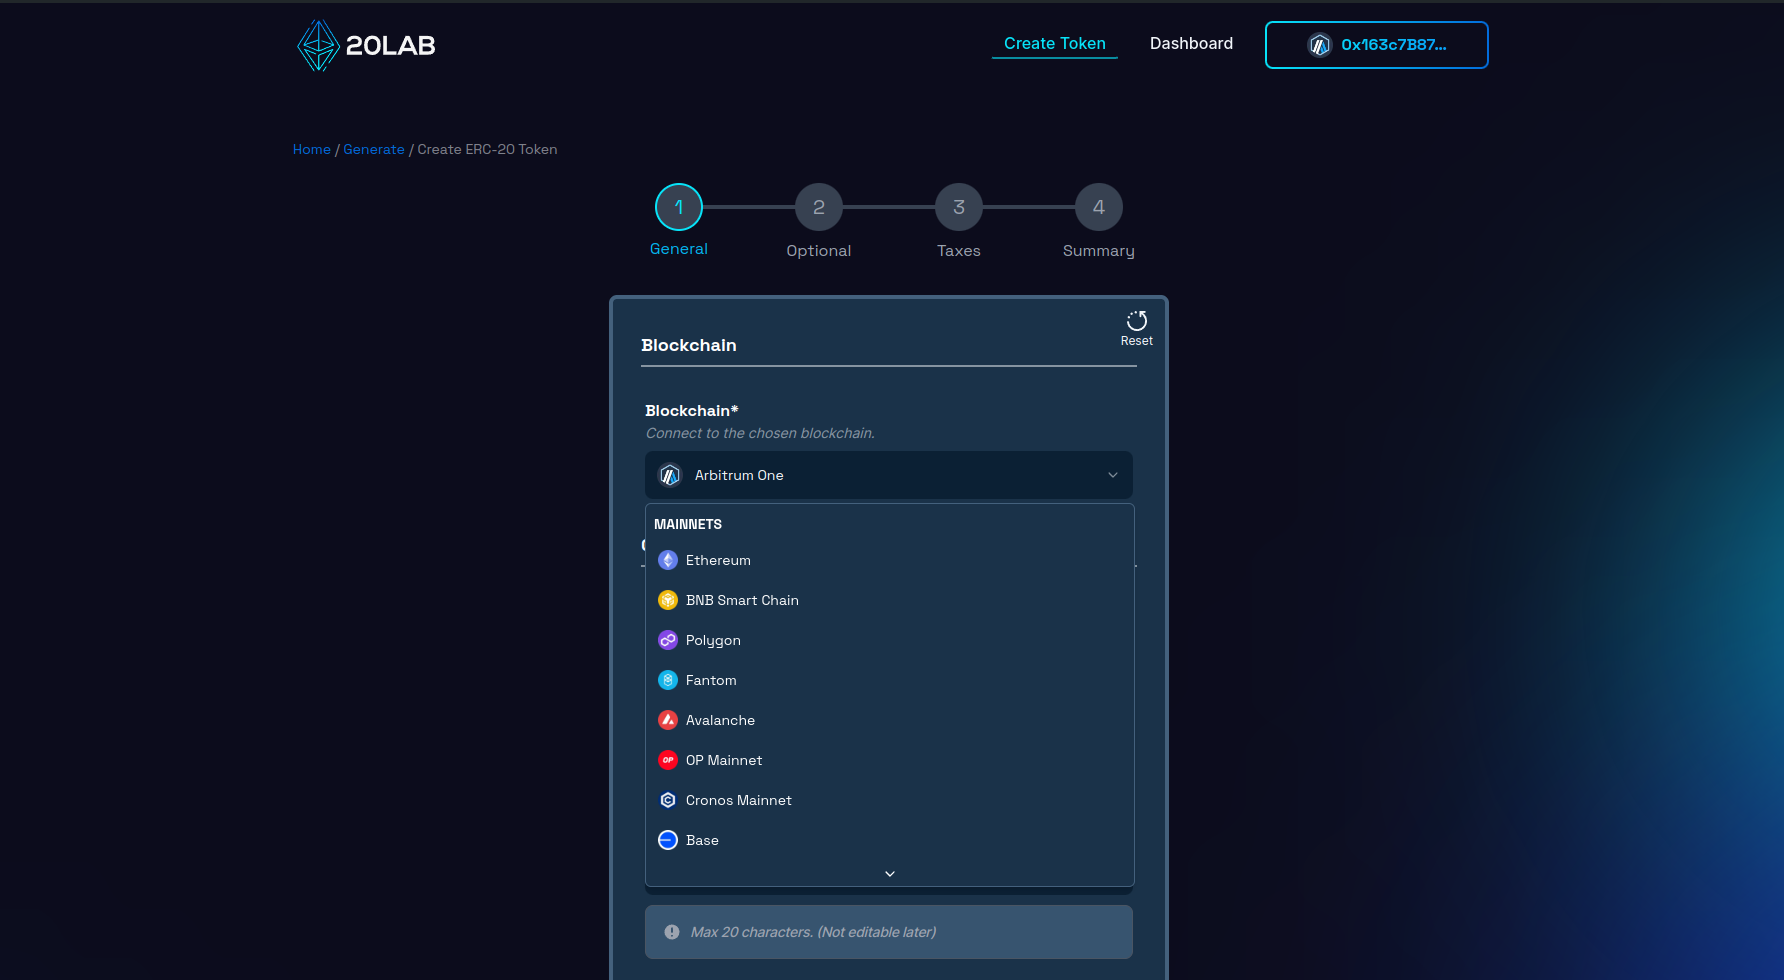
After successful connection, you may be automatically connected to a blockchain other than Arbitrum. To quickly change this, click on the blockchain drop-down list and find the Arbitrum network. After clicking it, your wallet should automatically prompt you to approve the change of blockchain.
If you are not ready for a Mainnet deployment or just want to test everything first, you can create your ERC-20 token for free on Testnets. Here you can find an up-to-date list of supported blockchains on 20lab.
Add general token information
The next part is to choose the most important characteristics of your token, which we can all agree are the token name and symbol.
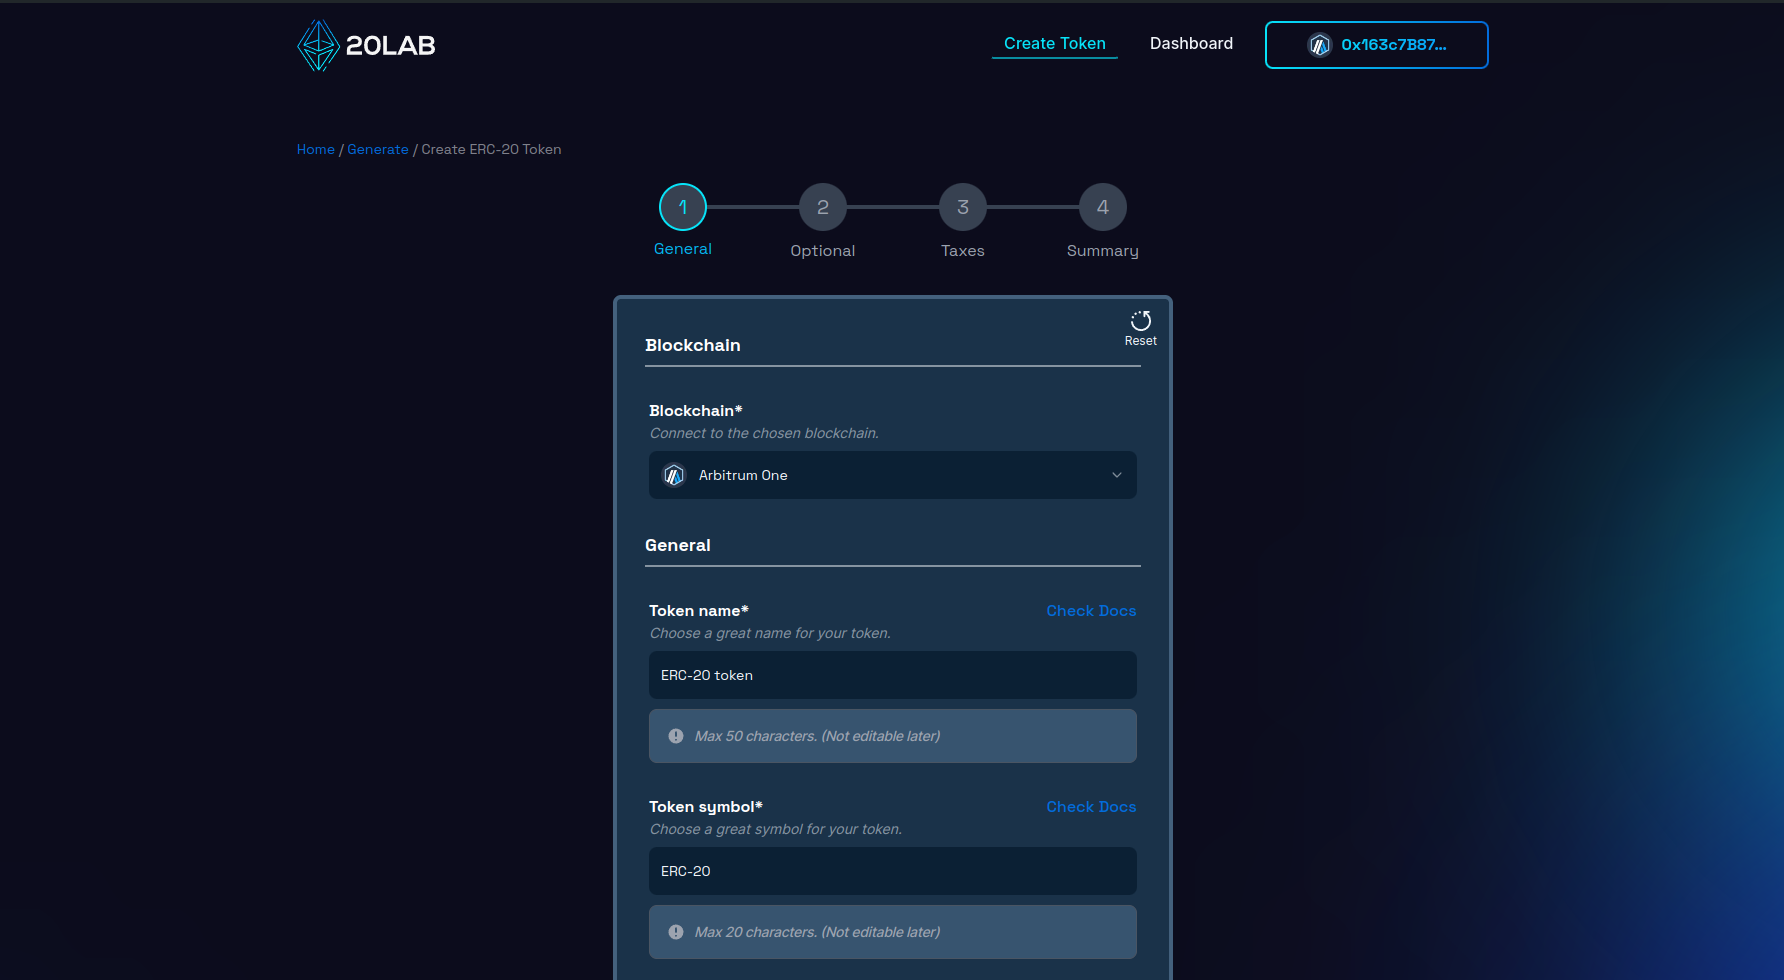
You are free to choose any name and symbol, but it is recommended to use unique ones that won't collide with already existing ERC-20 tokens. To check this, you can search popular cryptocurrency listing sites and see if similar tokens already exist, these sites are eg: CoinMarketCap or CoinGecko.
Other very important specifications of your token are: Initial supply and Decimals.
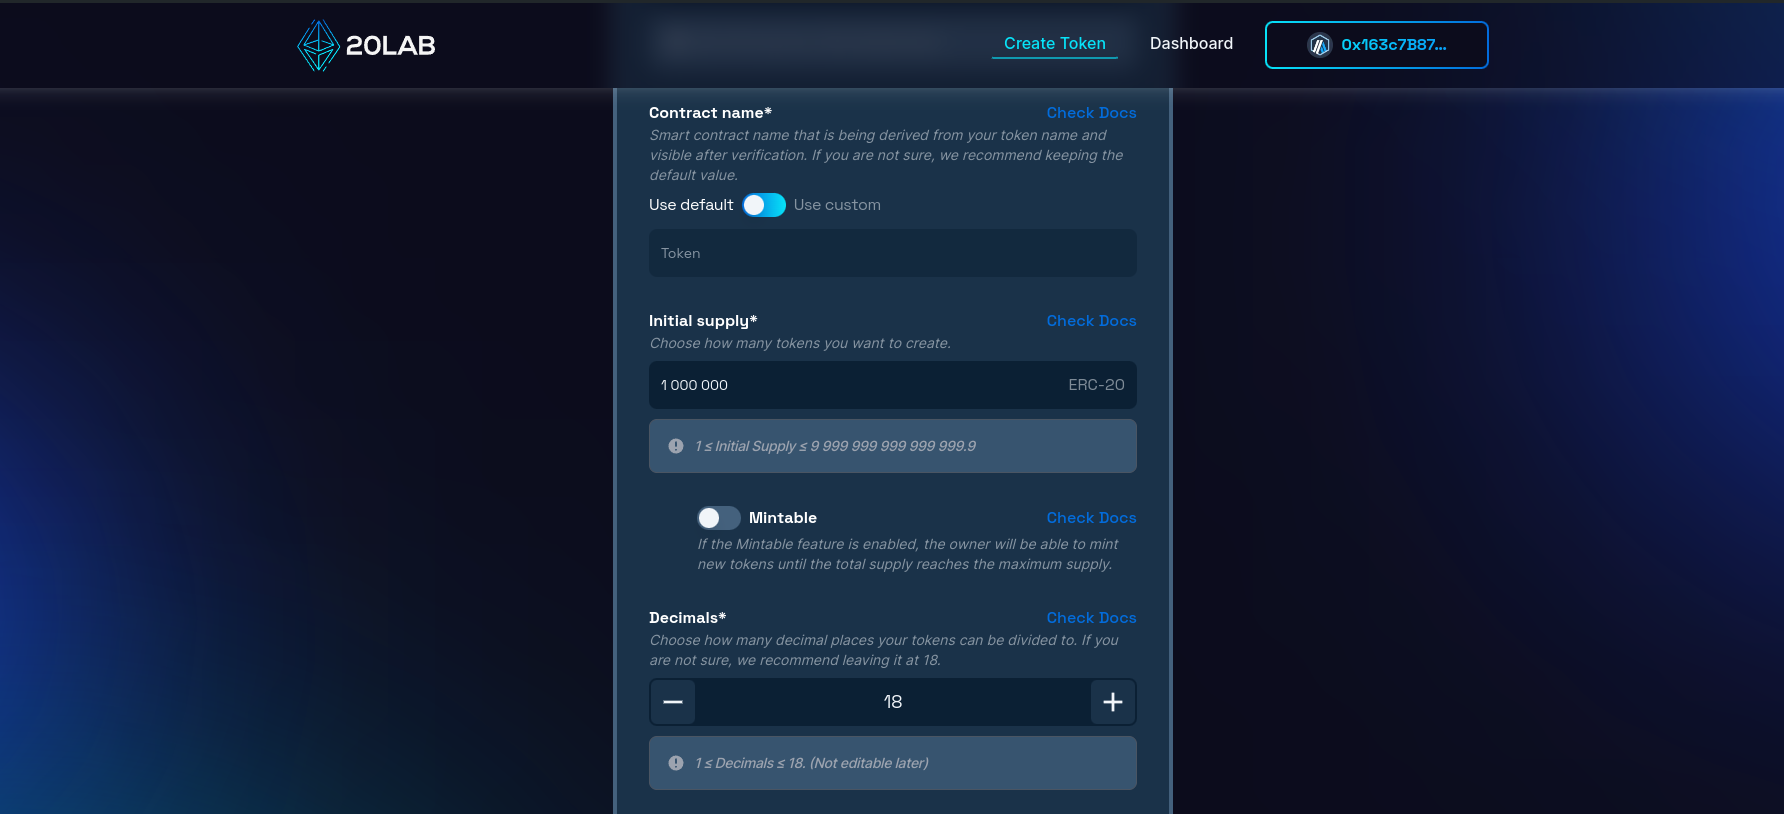
The initial supply of your ERC-20 token means how many tokens will be created at the start. Normally you will not be able to create more tokens after deployment unless you choose to enable the mintable feature. For simplicity, I will leave the mintable feature disabled to make the initial supply equal to the total supply of my token.
Decimals is how many decimal places your token can be divided into. For example, if you want to have 0.01 as your smallest unit like USD or EUR, then you should choose 2 decimals. For Arbitrum tokens, most choose to have 18 decimals and this is actually the most popular value so your token's data will be displayed correctly in all places.
Contract name is an additional feature to customize how your token contract is displayed after verification. I'm going to leave this option at the default value.
On 20lab.app you can also customize which wallet should receive the above initial supply and which should be the token owner. By default, your connected wallet will have both of these capabilities, but you are free to configure this according to your specific needs.
The token owner is an authorized wallet that can perform special actions. In the case of simple tokens without any additional features, this wallet won't be able to do much, but if you choose one or more features, then the owner can control various functions. For example, if you plan to enable mintable feature in your token, then the owner will be authorized to mint new tokens.
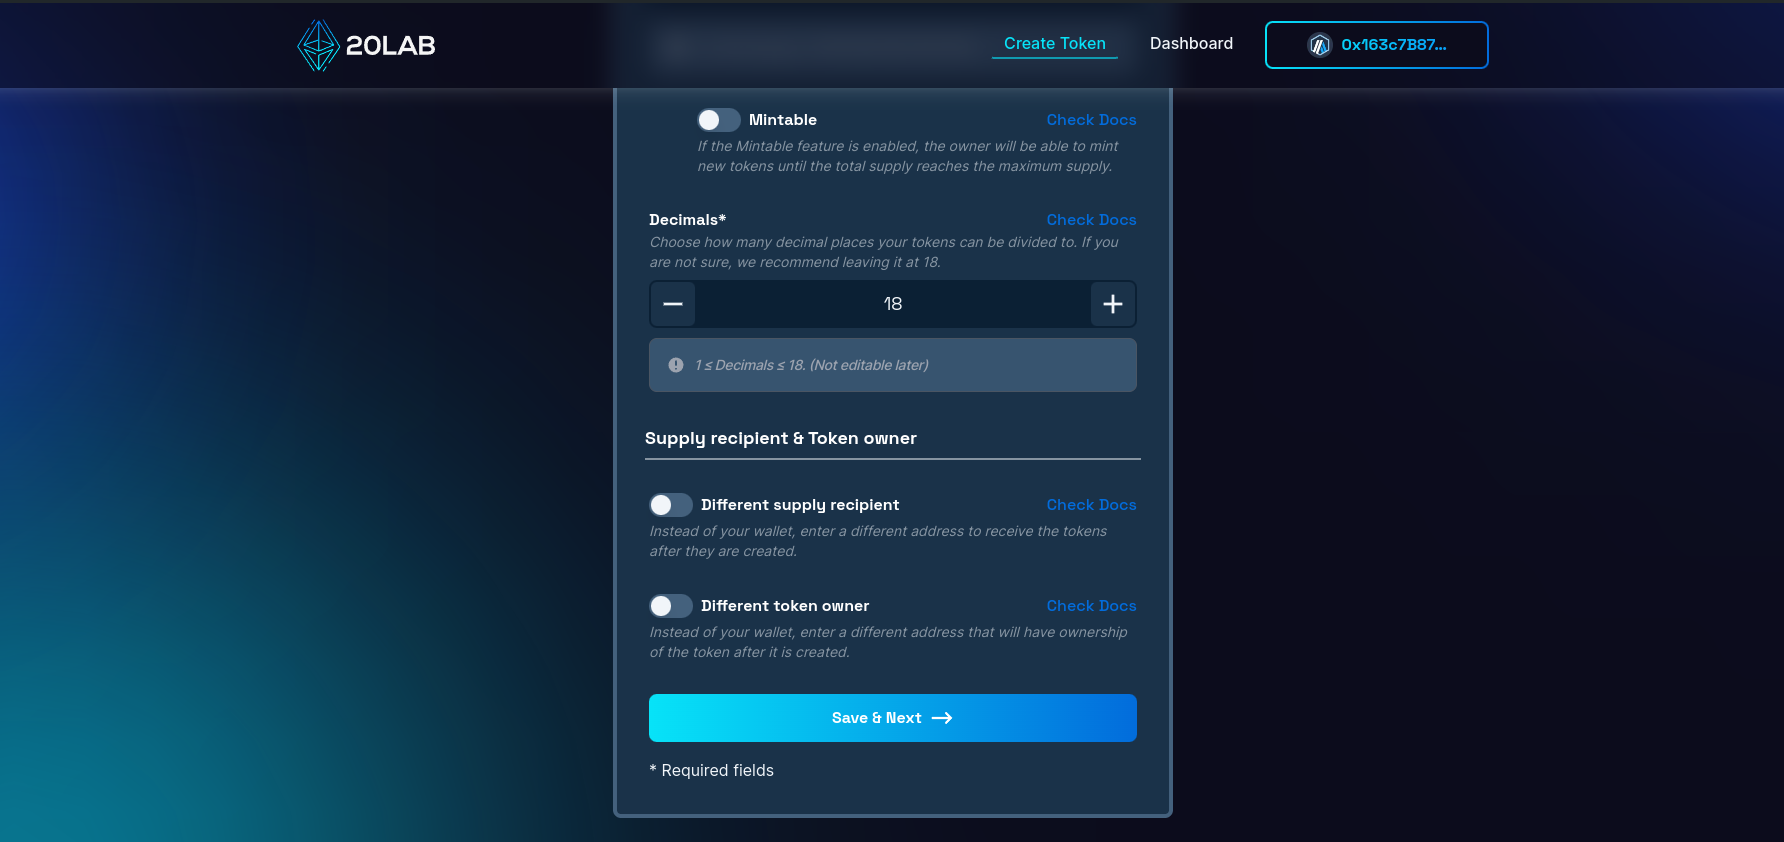
Let's click "Save & Next" to proceed further.
Select basic features
The next important feature to consider for your token is a default exchange. This option allows your token to detect the DEX where you plan to add liquidity to your token and use this information for other features.
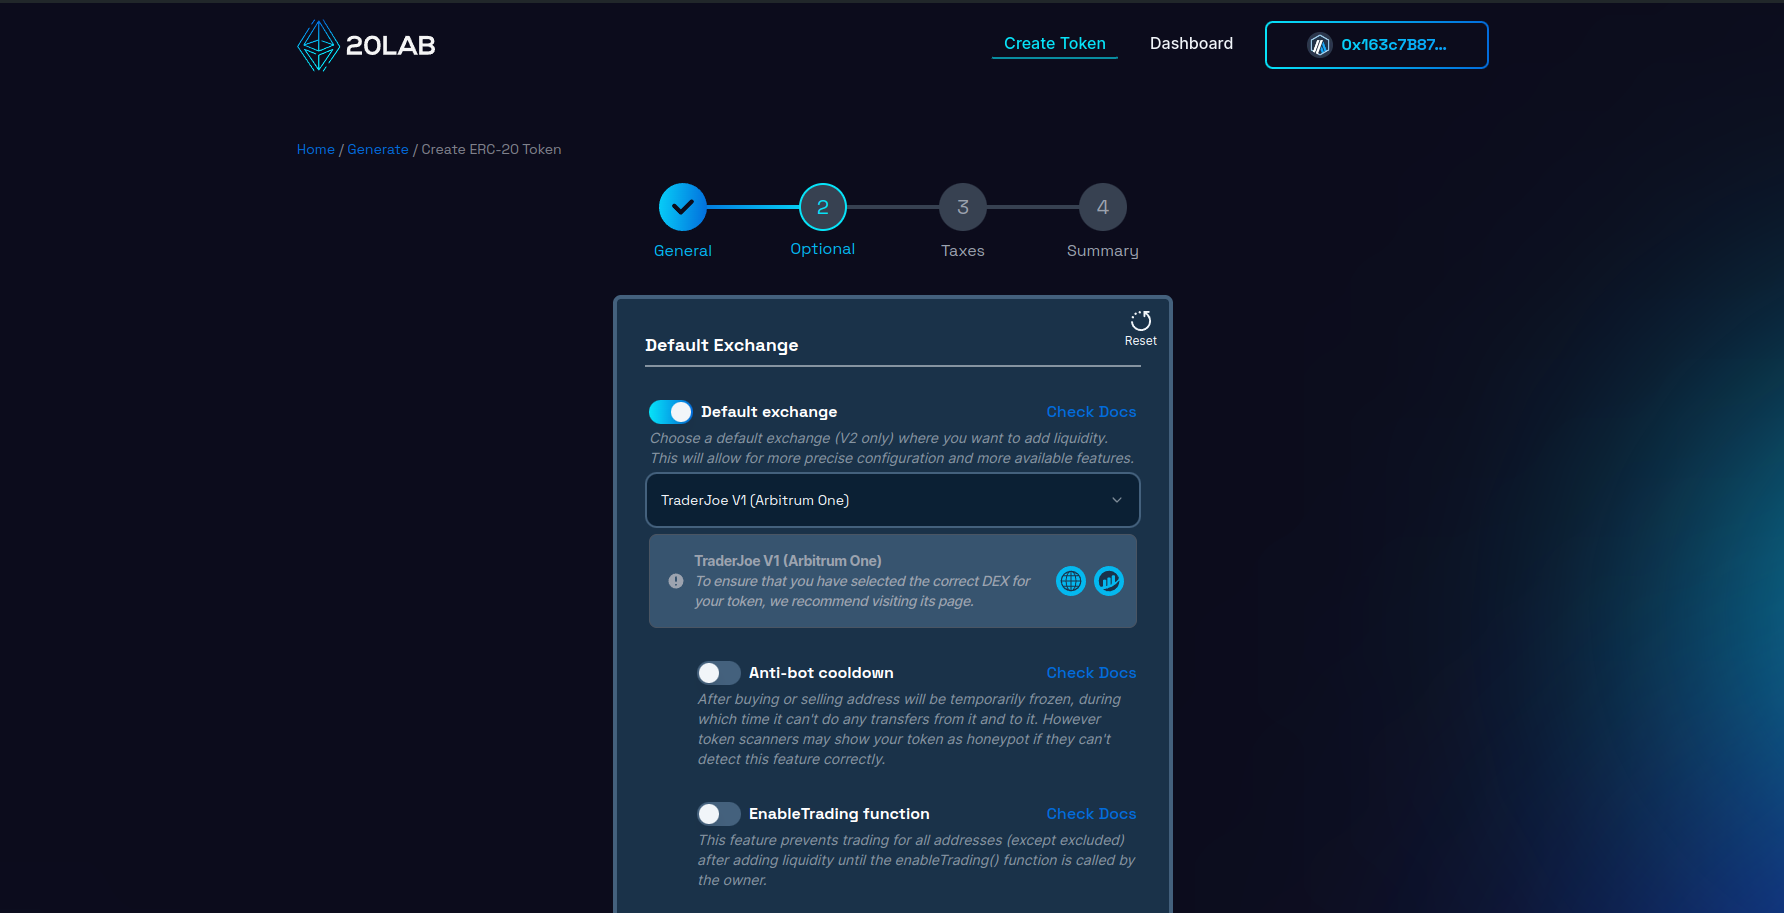
Good examples are taxes. The token will automatically detect the transaction type: buy, sell or other in order to charge the specific fee that can very much depend on the type. In case of simple tokens this feature does not do anything crucial and can be safely disabled.
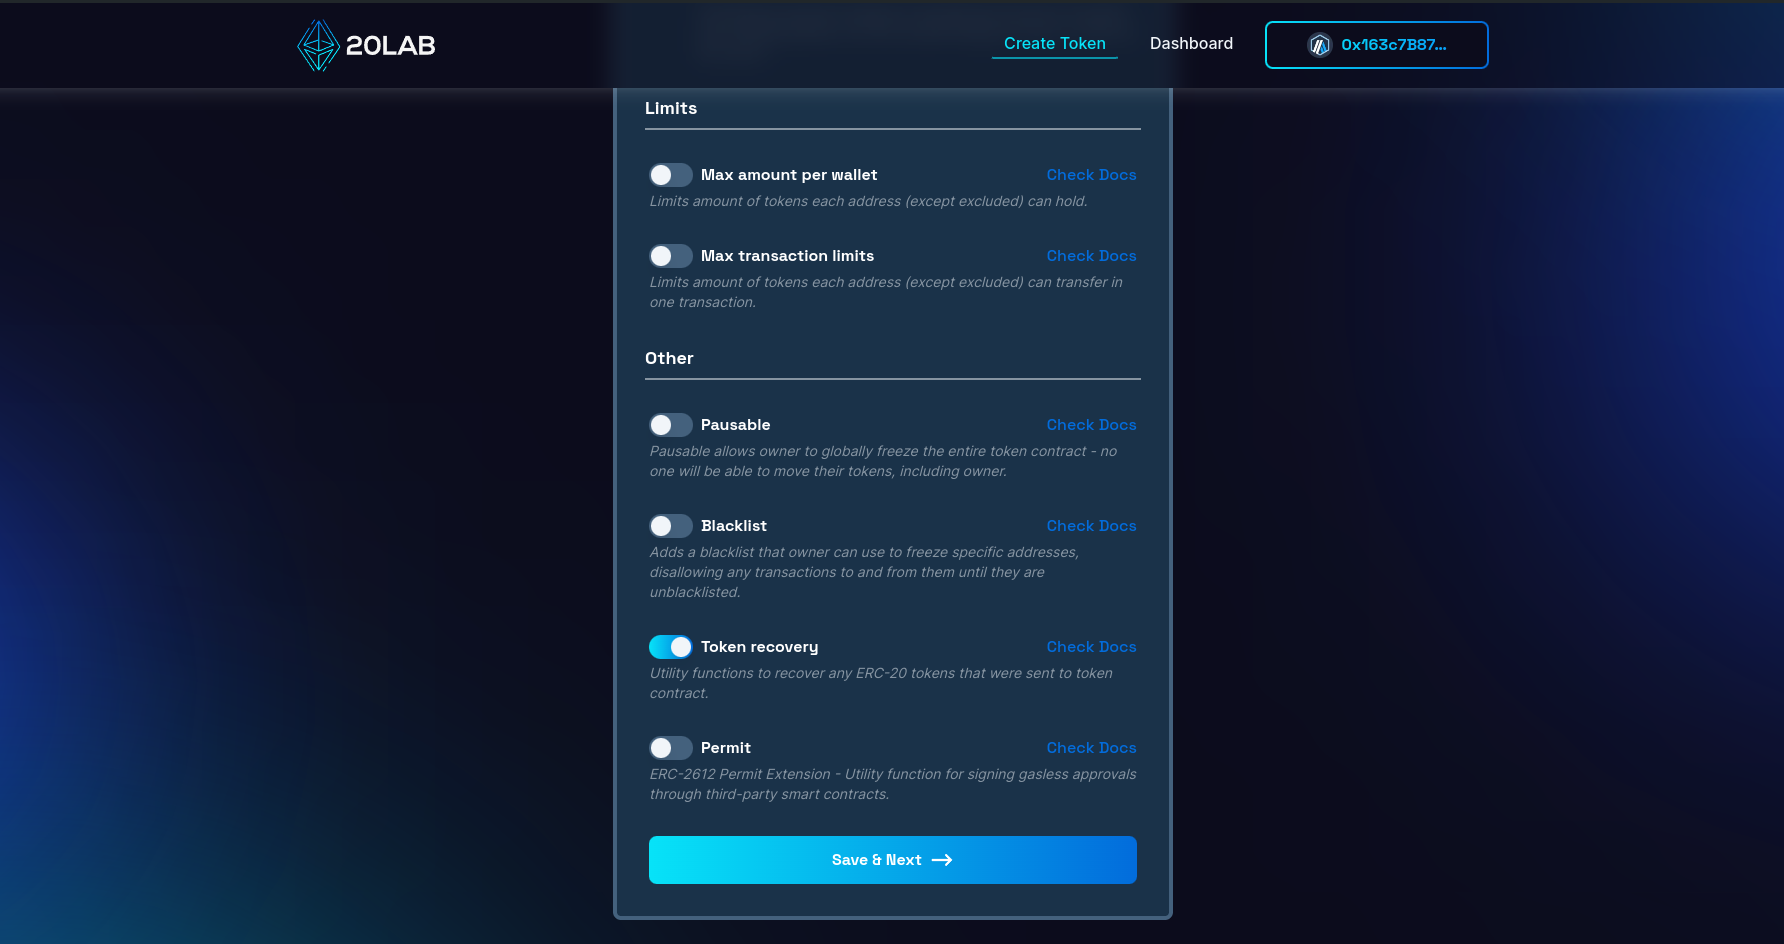
Apart from Default Exchange, 1 other feature is automatically enabled during the generation of your Arbitrum token. This is token recovery. We strongly recommend that you leave this feature enabled, as it allows the owner wallet to recover any ERC-20 tokens that were sent in error to the balance of your token contract. This way those tokens will not be burned forever.
Summary and deployment
Let's skip the tax section and go to the last page called "Summary". Here you can see all the features, values and information about your token before you create it. It's a good place to double-check that everything is correct, because once something is put on the blockchain, it usually can't be removed and will stay there forever.
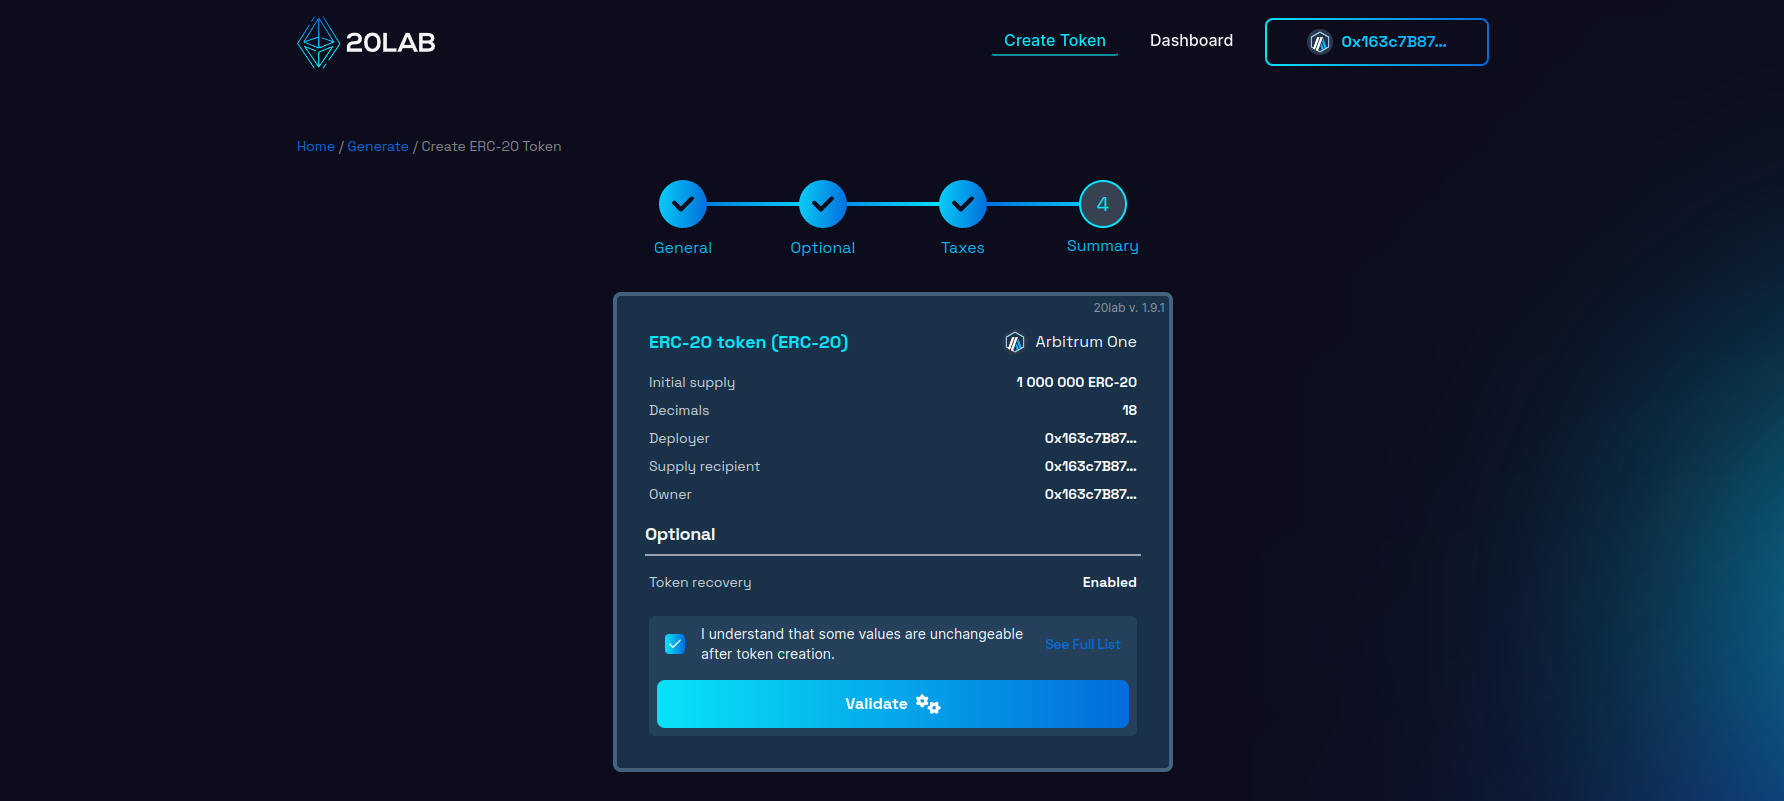
If all seems right, click on "Validate" for the deployment window to appear.
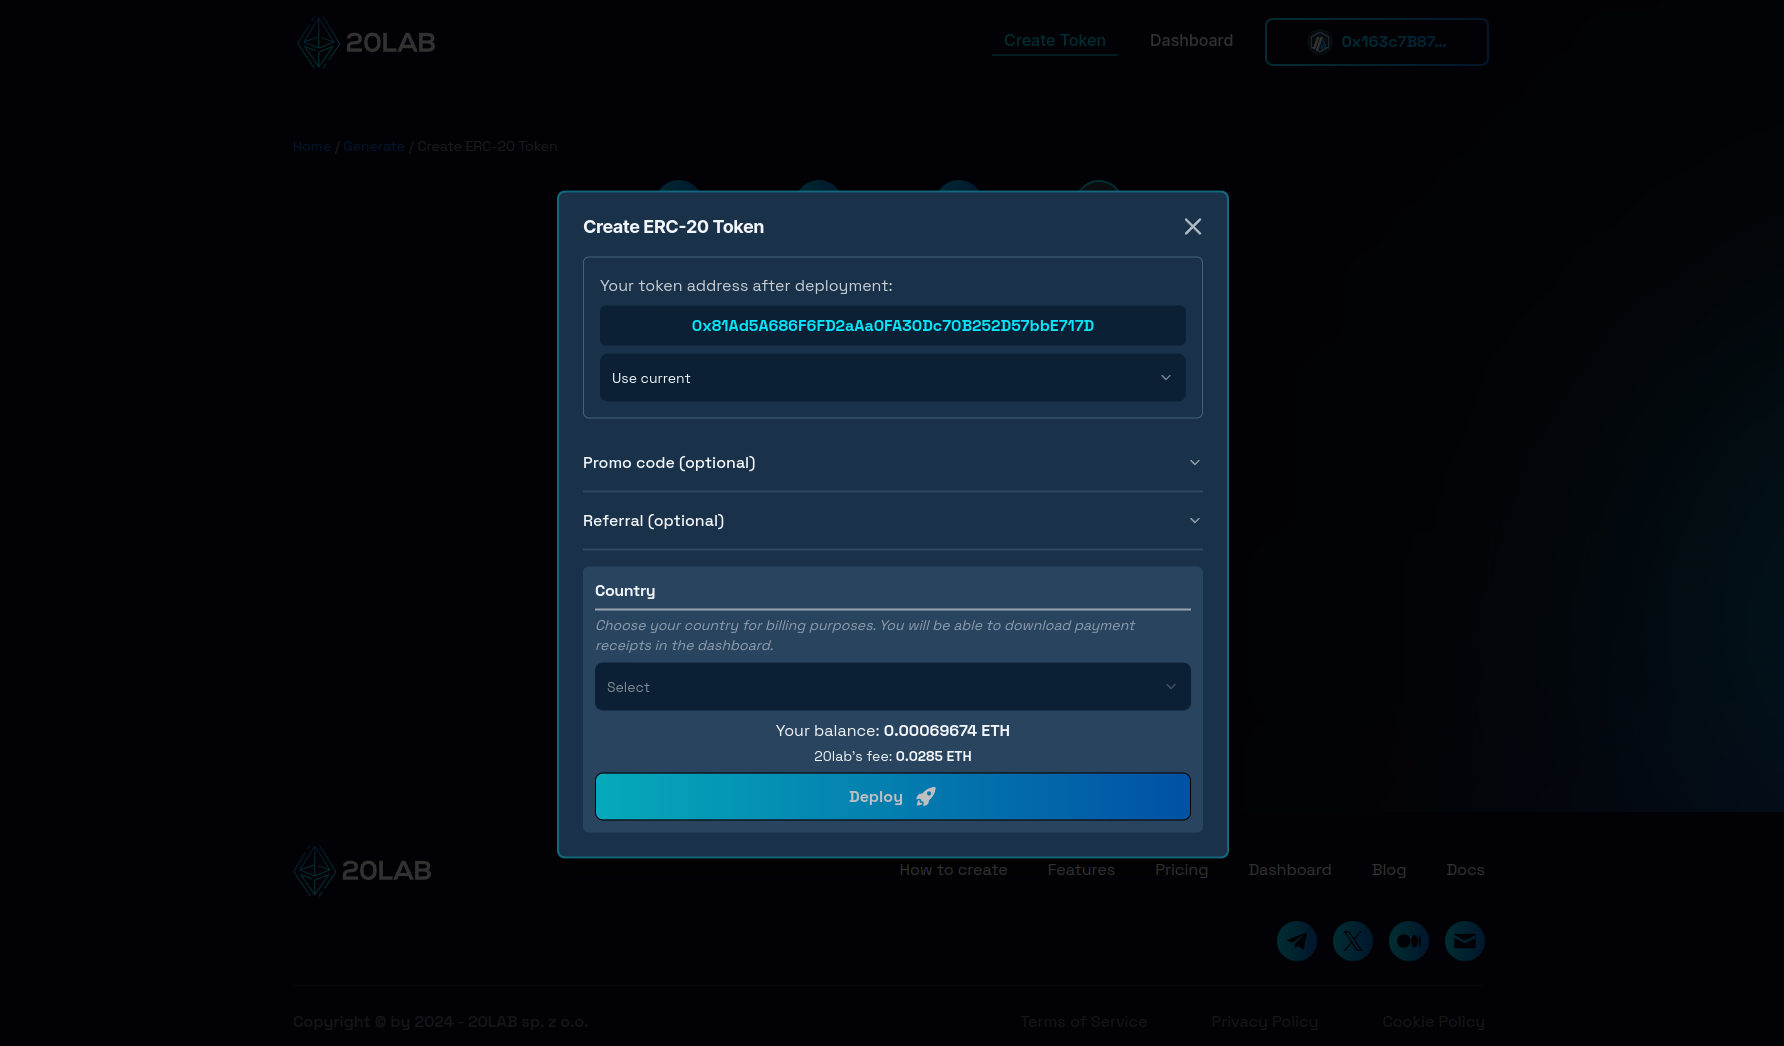
This window is a final step in the token creation process. Here you can see what your token address will be after generation and customize it by searching for a desired prefix, for example. The only thing left is to click "Deploy", confirm the transaction in your wallet and wait a few seconds until your token is officially live on the Arbitrum blockchain!
How to Manage Functions of Your Arbitrum Token
After successful creation, you can go ahead and open the dashboard page of your token. Dashboard allows to view all the token data in a user-friendly way.
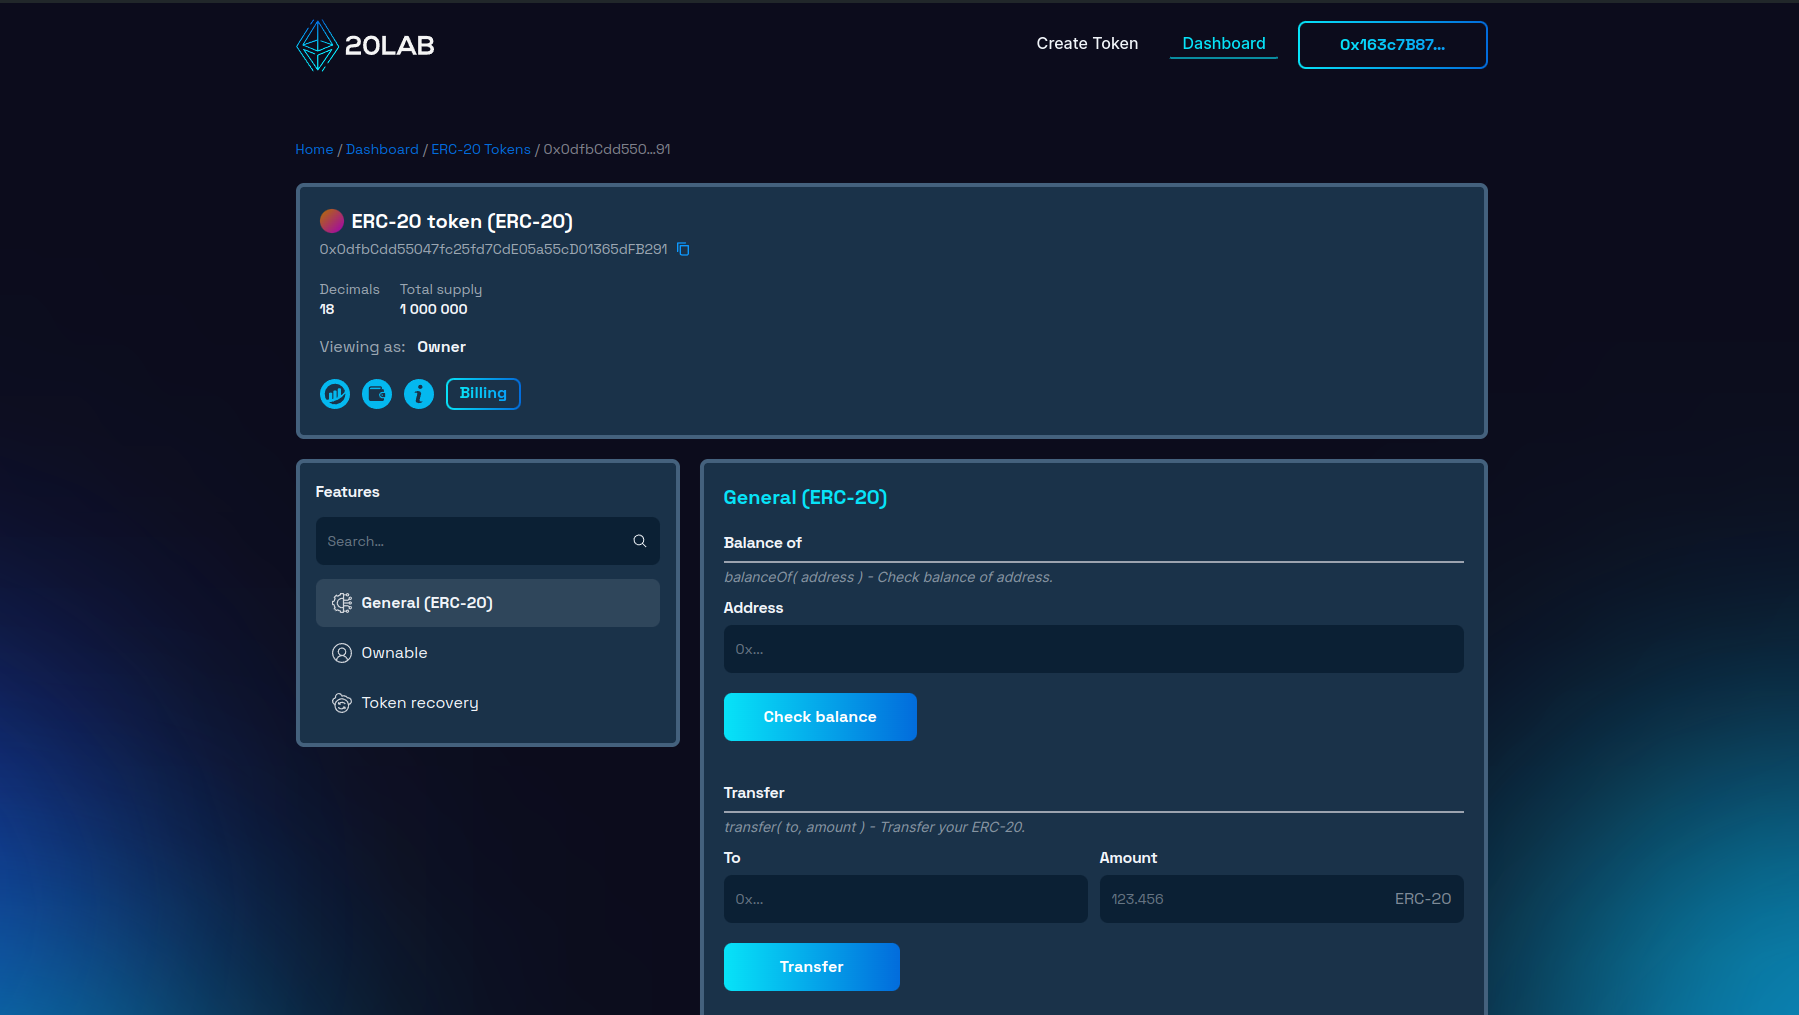
For a token with the above configuration, we have 3 function categories available:
- "General" contains functions that are common to all ERC-20 tokens.
- In "Ownable" are functions that allow you to transfer, accept or renounce ownership of your token.
- In "Token Recovery" you can easily recover any tokens that are in the balance of the token contract.
Conclusion
Creating Arbitrum token has never been more accessible than it is today, thanks to platforms like 20lab.app. Gone are the days when launching a token required extensive coding skills or hiring a blockchain developer. With 20lab's intuitive interface, anyone can design and launch their own ERC-20, SPL or Sui token in minutes, and then easily manage all of its features.
Whether you're starting a new project or experimenting with blockchain technology, 20lab simplifies the process so you can focus on the utility and potential impact of your token, rather than its technical implementation.
If you have any questions, we are happy to assist you. Join our Telegram channel.


