
Launching your own cryptocurrency token is an exciting venture, but it's important to ensure that your token contract has the right safeguards in place. One critical feature is token recovery - the ability for the token owner to retrieve any ERC-20 tokens that may become stuck in the contract.
Having these owner-restricted recovery mechanisms in place is an essential security measure. It protects your token holders from losing access to their funds and ensures that your cryptocurrency project maintains trust and stability.
Why the Token Recovery Matters
When you create an ERC-20 token, it's crucial to have mechanisms in place to protect your token holders from losing their funds. The ERC-20 token standard does not inherently include a way for the token owner to retrieve tokens that become stuck in the contract. This could happen due to a variety of reasons, such as:
- Users accidentally sending tokens to the wrong address,
- Issues with the other contracts connected to your token,
- Tokens being sent to the contract's own address.
Without a recovery system, these "stuck" tokens would be permanently inaccessible, resulting in significant losses for your token holders. This could damage the reputation and usability of your token.
By implementing token recovery functions, you give yourself the ability to rescue any stuck tokens. The recoverForeignERC20() and recoverToken() methods allow you, as the token owner, to withdraw ERC-20 tokens and your own token respectively from the contract's balance.
This protects your token ecosystem and ensures your holders never lose access to their funds due to unexpected issues. It's an essential safeguard that builds trust and stability for your cryptocurrency project. In the next section, we'll walk through the steps to set up these token recovery features when you create your own ERC-20 token. Moreover, creating such a token will take as little time as reading this post!
Creating Your ERC-20 Token with Token Recovery
Now that we've established the importance of token recovery, let's walk through the steps to create your own ERC-20 token with this critical functionality using 20lab's token generator. This powerful tool simplifies the token creation process and allows you to implement advanced features like token recovery without having to write complex smart contract code from scratch.
By following these steps, you'll be able to deploy a secure ERC-20 token that gives you more control over your cryptocurrency project.
Step 1: Choose Token Type and Connect Wallet
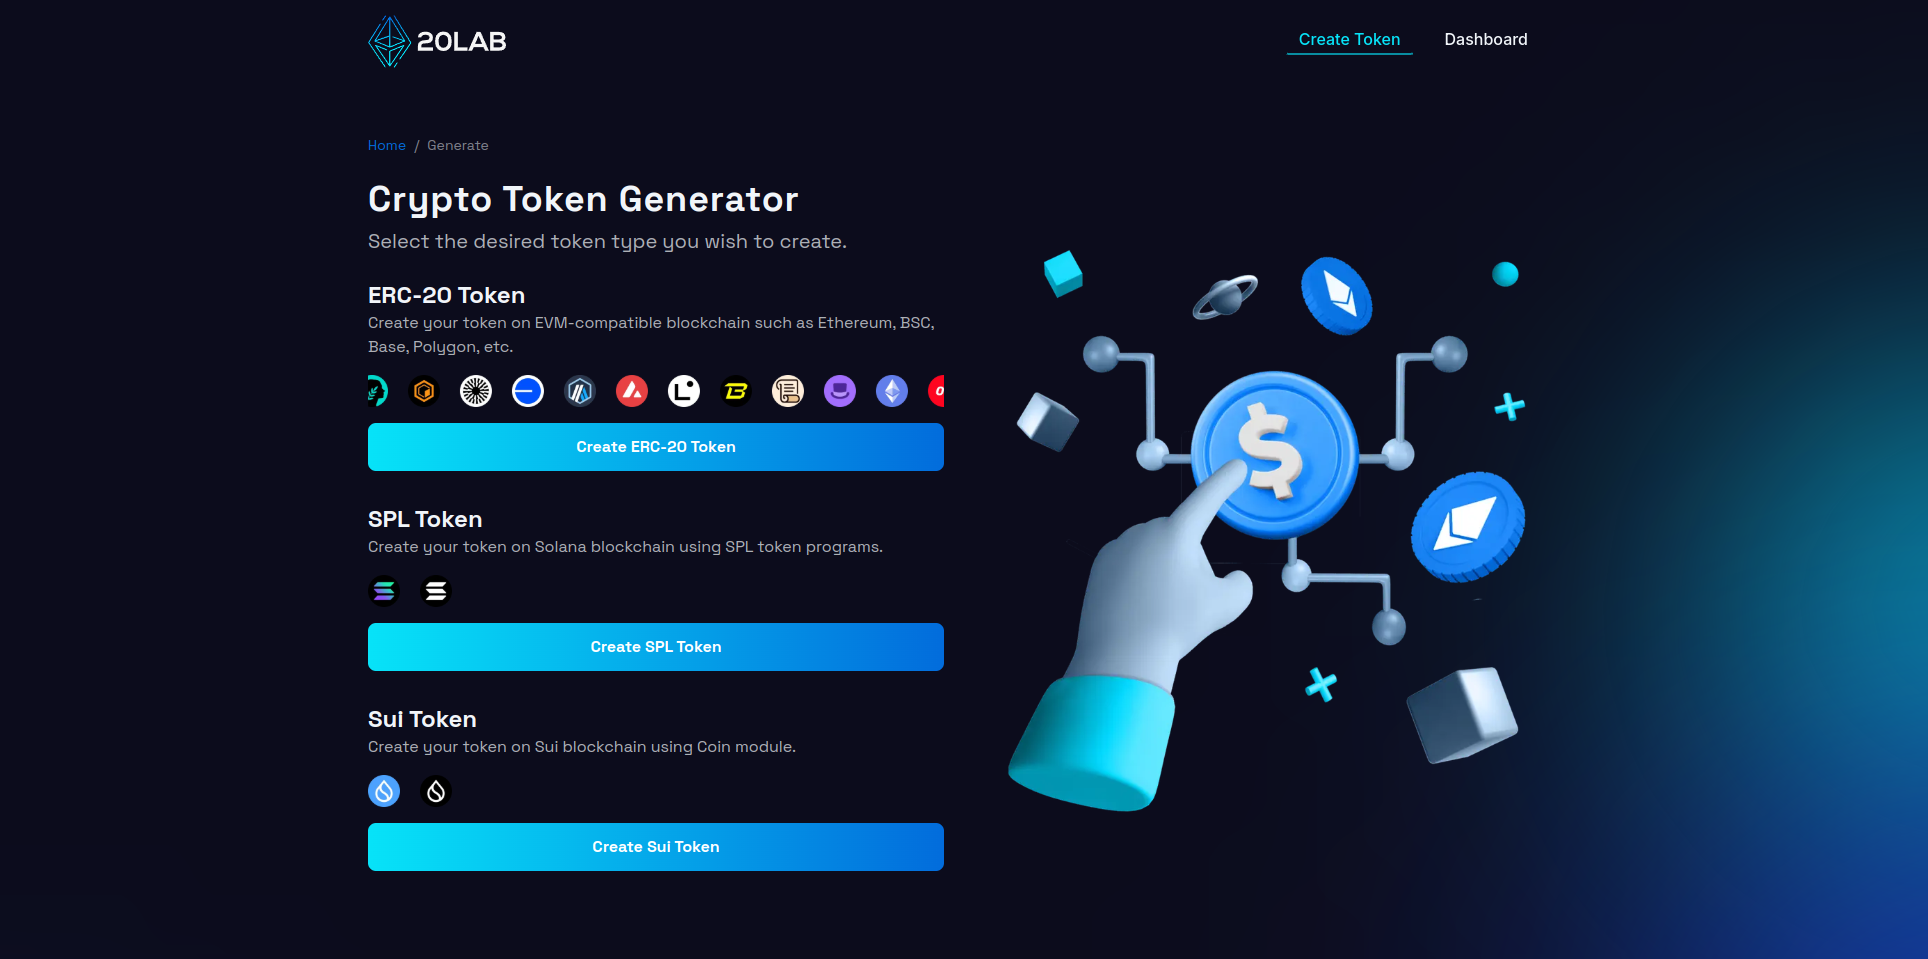
First, visit 20lab.app, navigate to the generator page and click on "Create ERC-20 Token". The next step is to connect your Web3 wallet (e.g. MetaMask, Coinbase Wallet or Trust Wallet) to the platform.
Once your wallet is successfully connected, you'll see your wallet address displayed in the top right corner of the page. This confirms that you're ready to proceed with token creation.
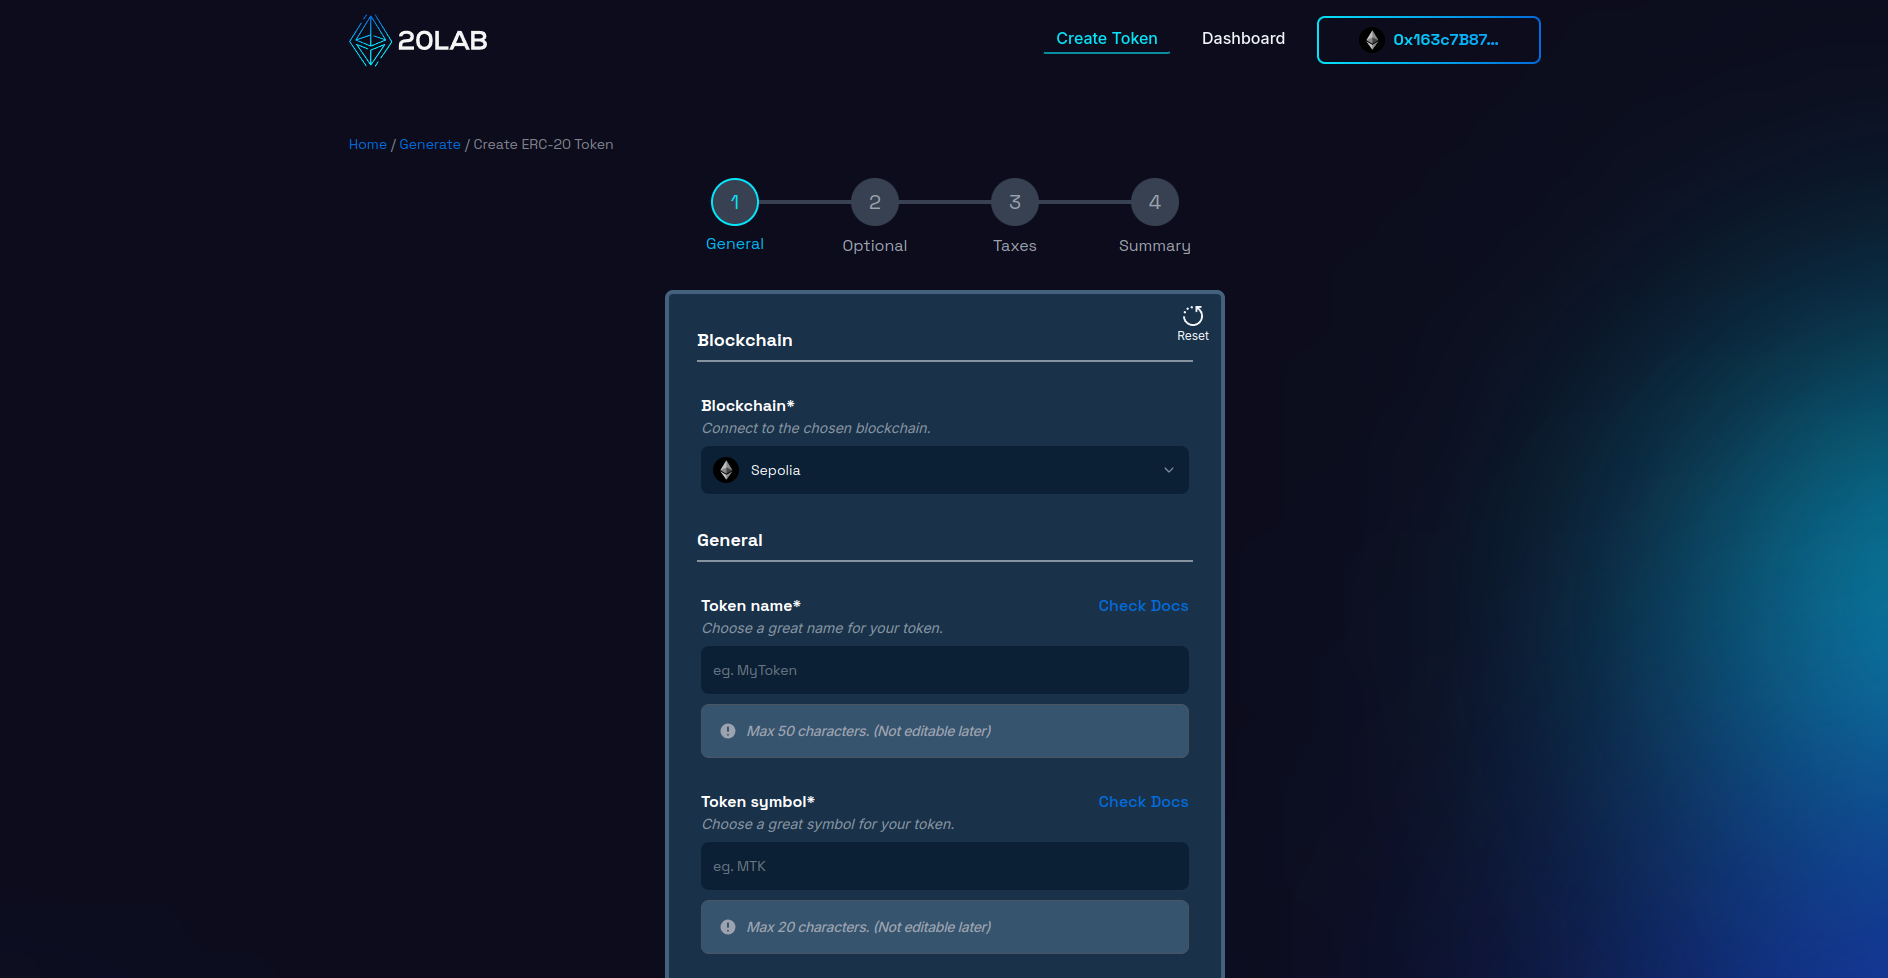
Before moving forward, ensure you're connected to the appropriate blockchain network:
- If you're launching a production token, select the desired Mainnet.
- For testing purposes, choose a suitable Testnet.
20lab offers a wide array of popular blockchains to choose from, allowing you to select the one that best aligns with your project's goals and target audience. Consider factors such as transaction costs, speed, and ecosystem compatibility when making your choice.
Remember, the blockchain you select will be the foundation of your token's operations, so choose wisely based on your project's specific needs and long-term strategy.
Step 2: Add General Token Information
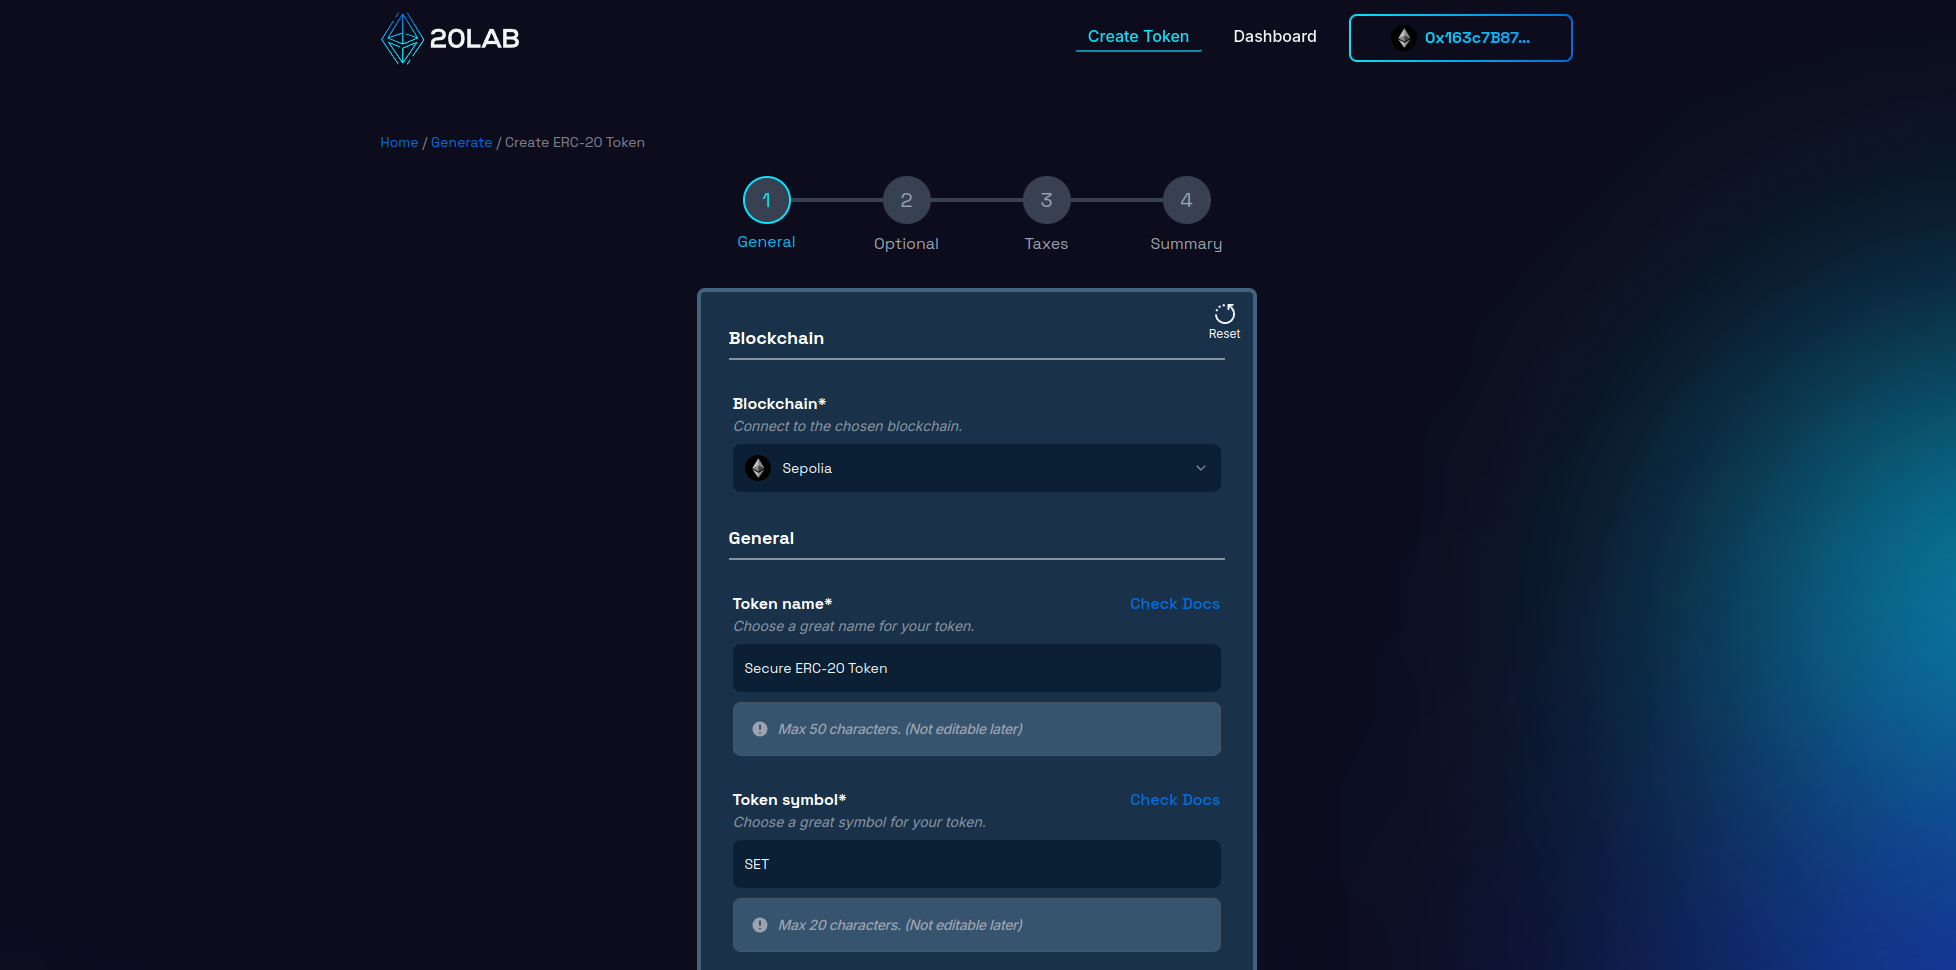
This phase is crucial because it determines the fundamental characteristics of your ERC-20 token. Start by creating a unique and descriptive name for your token, along with a concise and memorable ticker symbol. It's a good idea to do some research to make sure your chosen name and symbol aren't already in use.
Next, determine the total supply of tokens. For example, you might choose a total supply of 100,000,000 tokens to ensure sufficient liquidity while maintaining scarcity.
For the decimal places, decide how divisible you want your token to be. The default for most ERC-20 tokens is 18 decimal places, which mirrors the divisibility of ETH and other major blockchain currencies. This allows for precise transactions and micropayments.
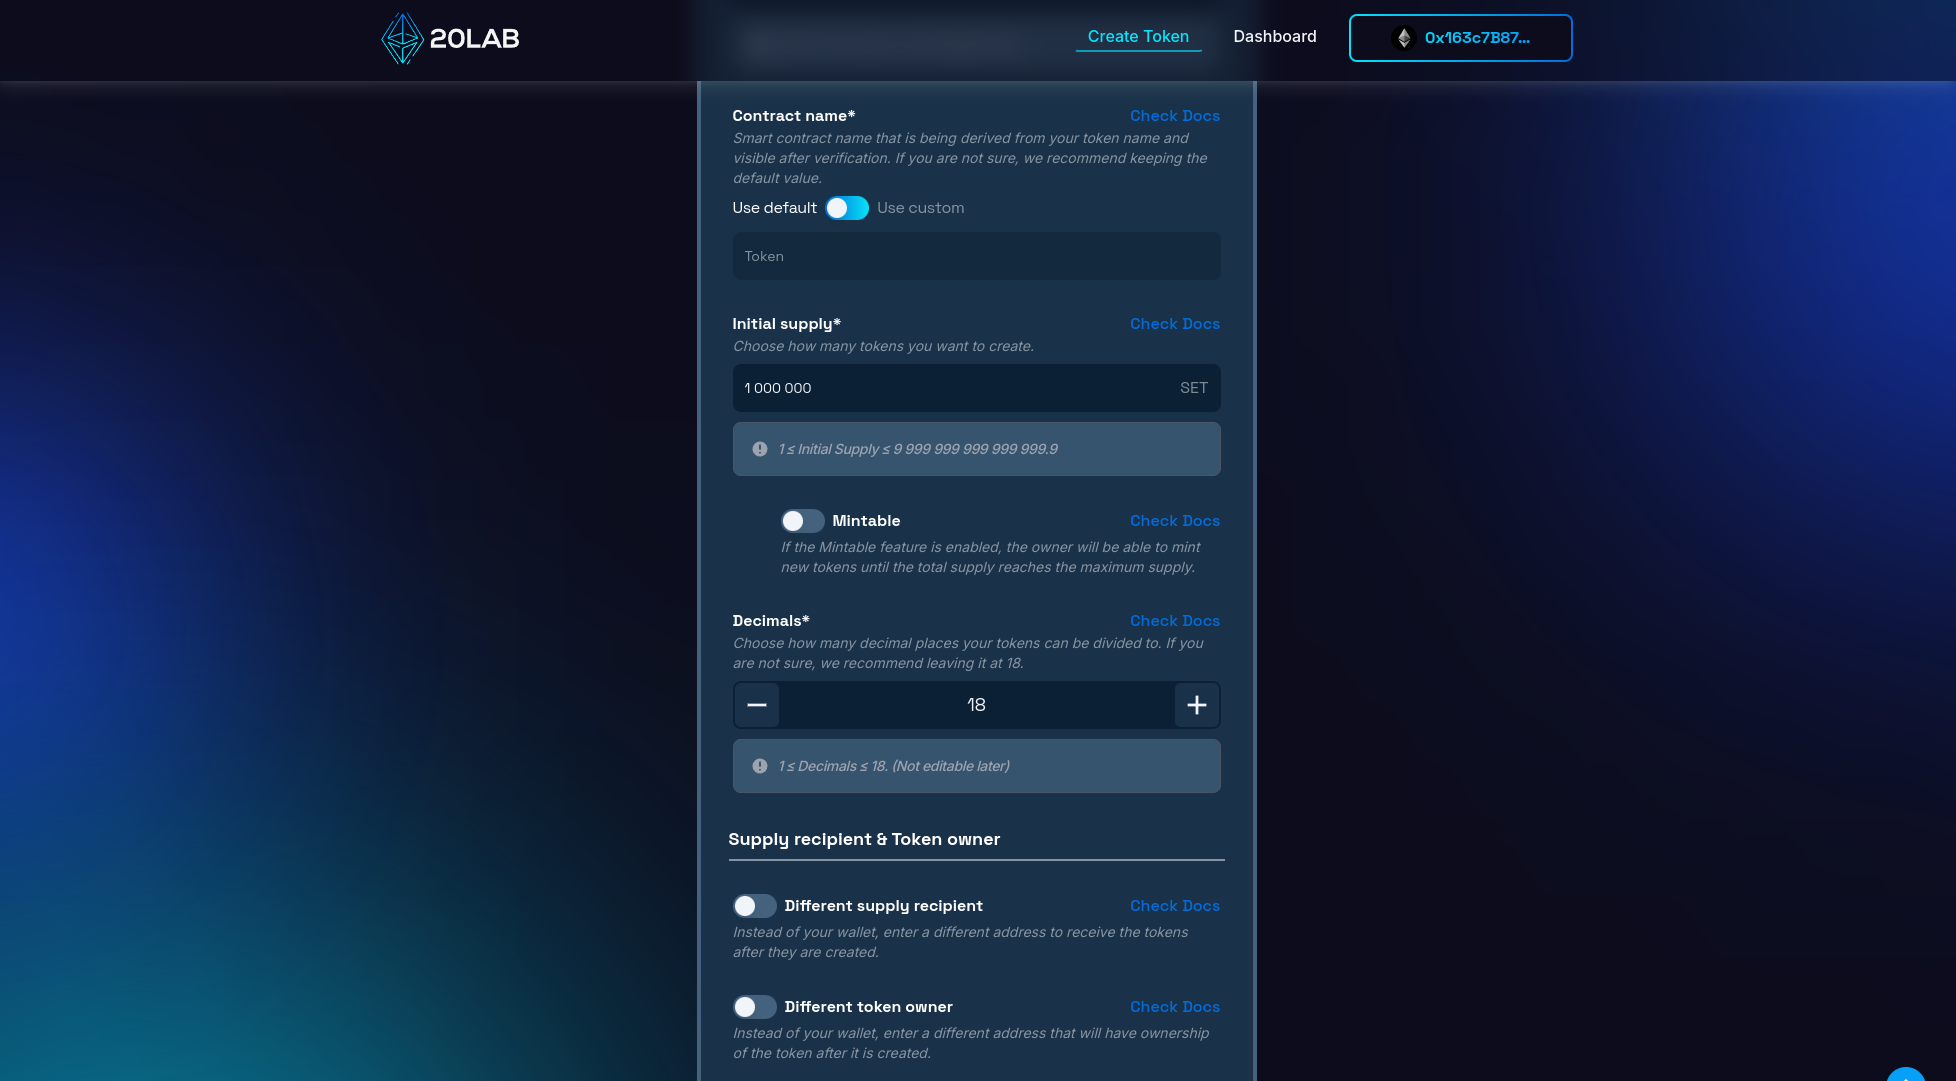
You have the option to specify a unique contract name, which is how your smart contract will be identified on block explorers after verification. This can be the same as your token name or something more technical like "SecureTokenV1".
Another important decision is selecting the wallet to receive the initial supply of tokens and the token owner. The supply recipient will hold all the tokens at launch, which can be your personal wallet or a dedicated project wallet. The token owner will have special permissions to manage owner-restricted functions. While this is often the same as the deployer, it can be a separate address if necessary. For added security, consider using a multi-signature wallet.
These initial settings are the foundation of your token's identity and functionality. Choose thoughtfully, considering your project's future aspirations and potential for expansion. The choices you make now will affect how your token is perceived and used in the future, especially in terms of its interoperability with decentralized applications and its ability to provide a seamless user experience.
Step 3: Implementing the Token Recovery Feature
Now that you've set up the general token information, it's time to add the token recovery functionality to your ERC-20 token.
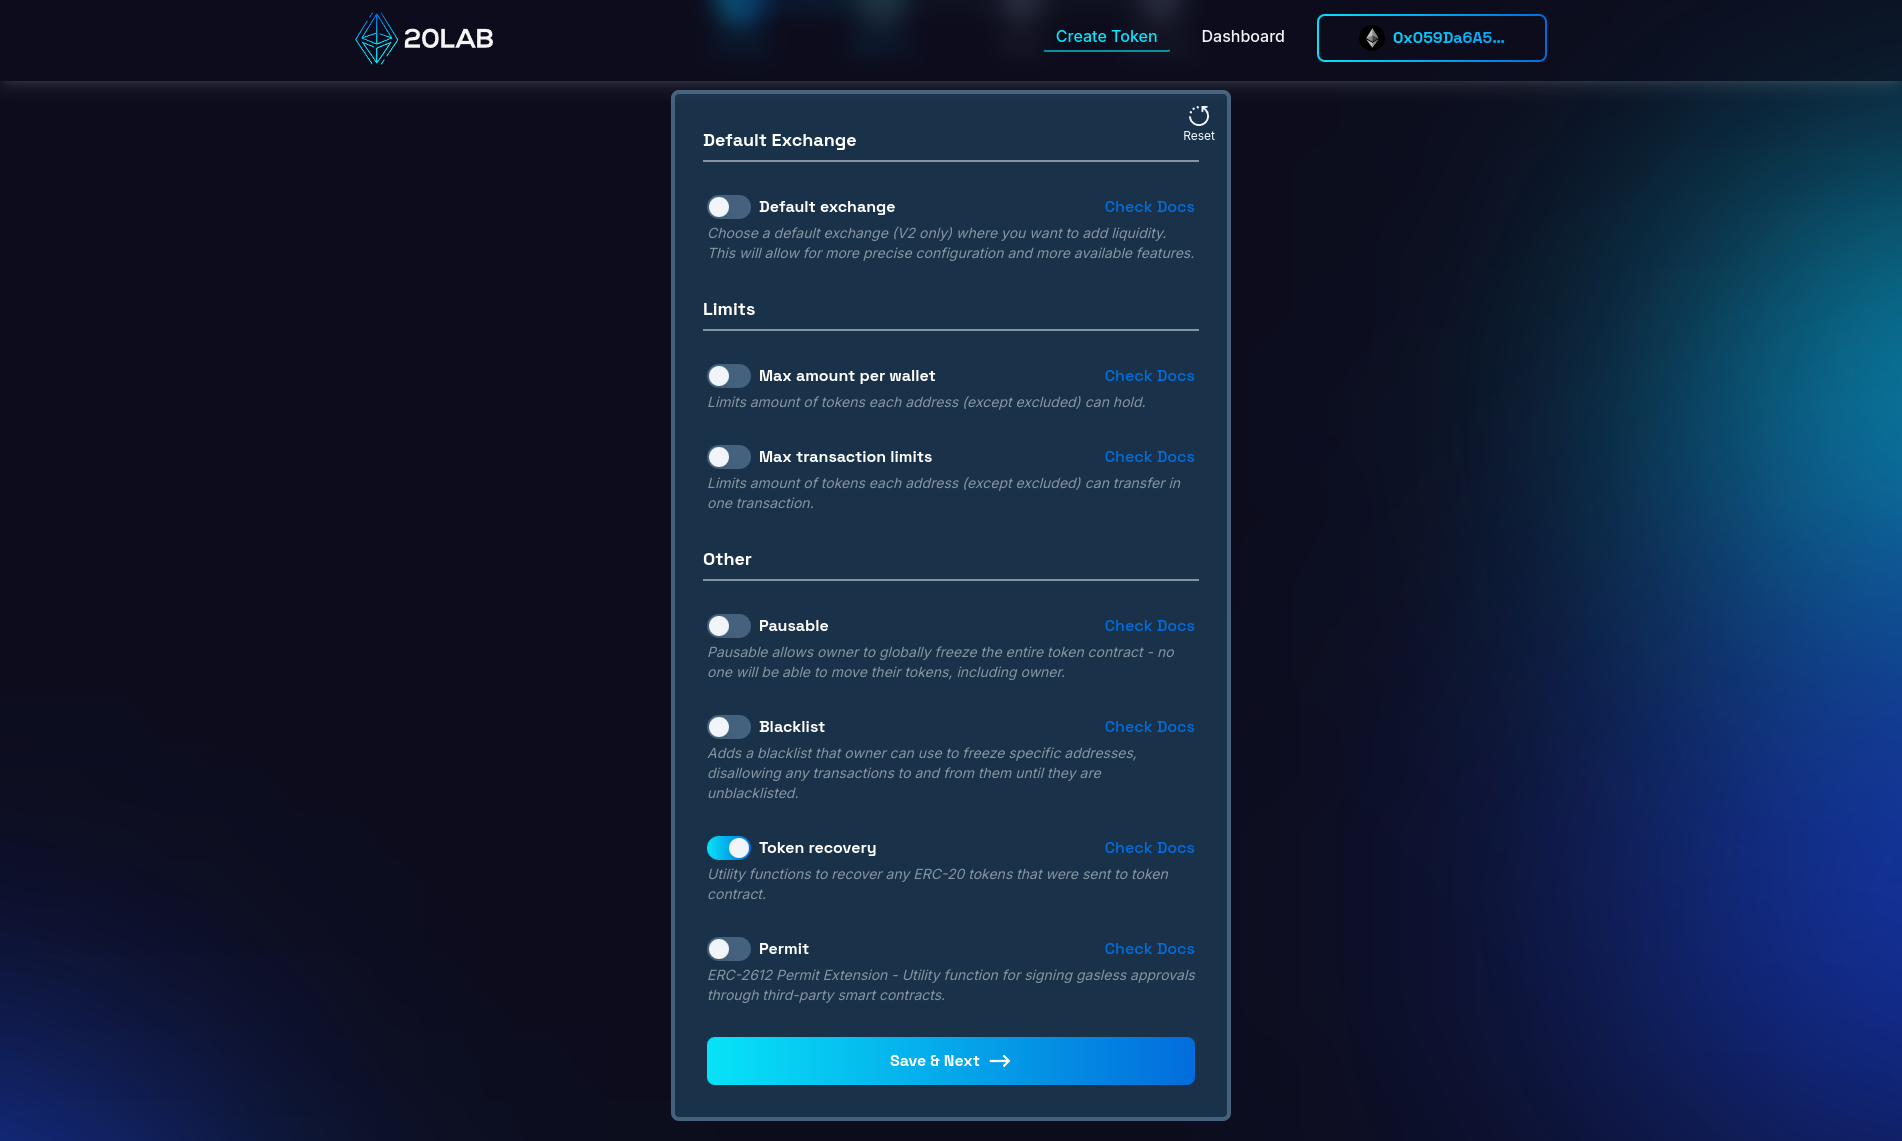
To set up the token recovery feature, first navigate to the "Optional" page of the token generation form and scroll down to find the "Token recovery" option. We always recommend having this feature in your ERC-20 token, so you may find it is already enabled. If it's not, be sure to enable it.
Step 4: Review and Deploy
Before putting the finishing touches on your new ERC-20 token, it's important to carefully review all of the configured parameters on the "Summary" page. This final review serves as an important checkpoint, allowing you to catch and address any potential errors or oversights that could become problematic after deployment.
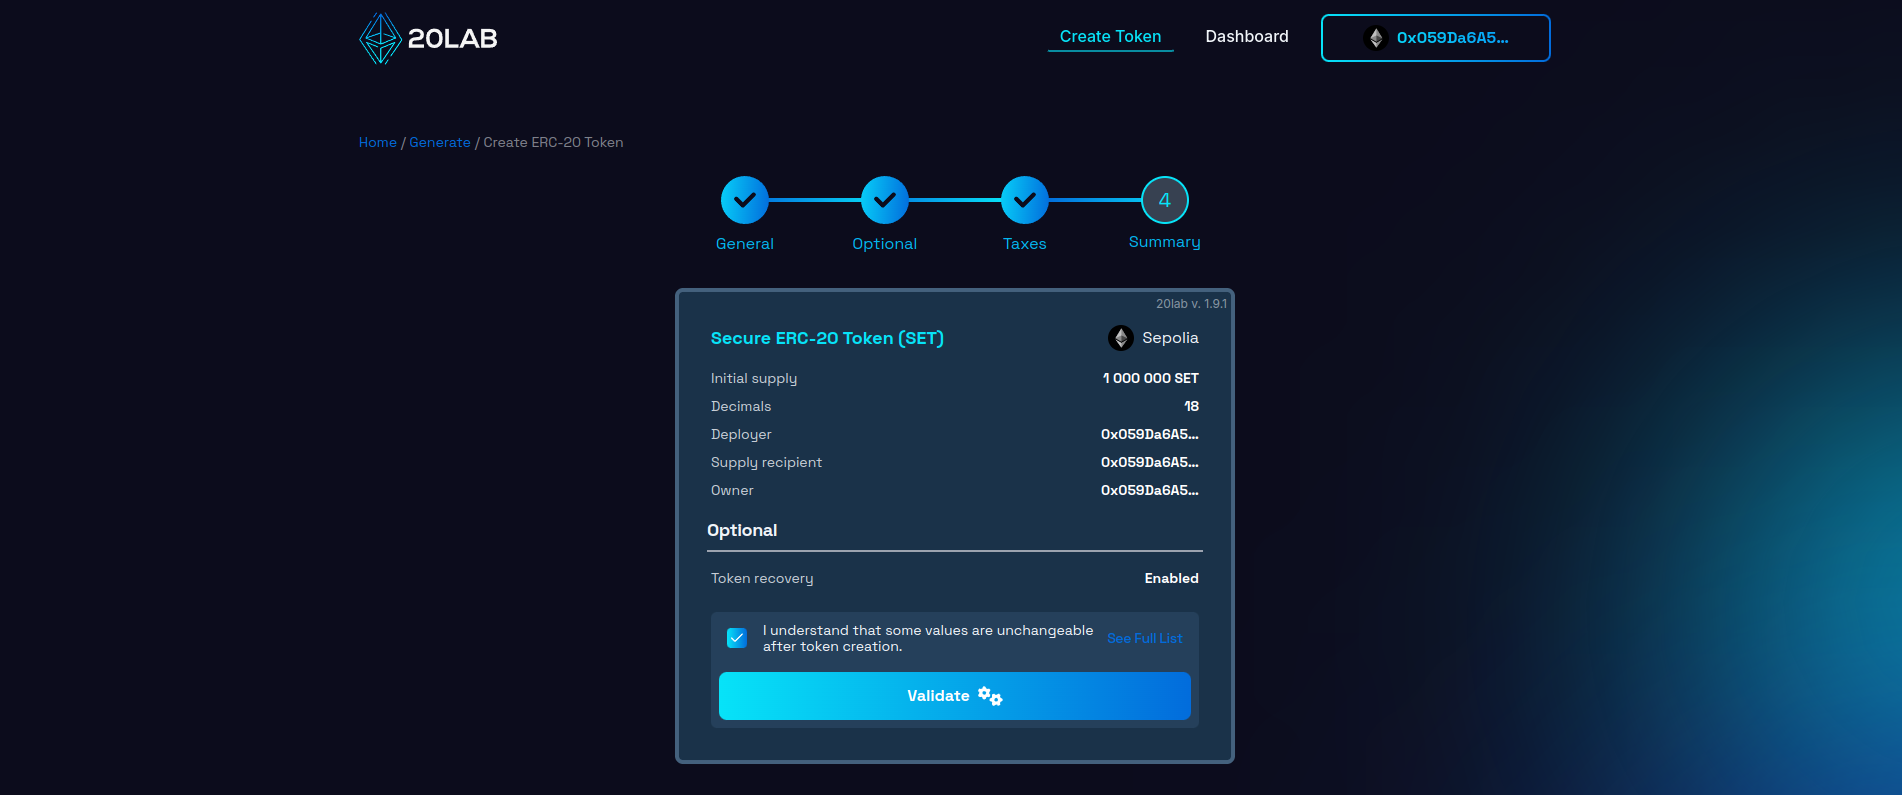
Take the time to thoroughly review every detail, from the token name and symbol to the supply and distribution settings. Identifying and correcting any issues now can save you a lot of headaches later.
Once you're satisfied with the configuration, it's time to initiate the validation process. This automated review acts as an additional layer of protection, checking your token contract for any technical inconsistencies or issues that could affect its functionality on the blockchain.
Upon successful validation, you may be presented with a deployment modal that also offers a unique feature - the ability to personalize your token's address pattern. This distinctive touch allows you to add a memorable, brand-aligned identifier to your token's blockchain address, increasing its visibility and recognition.
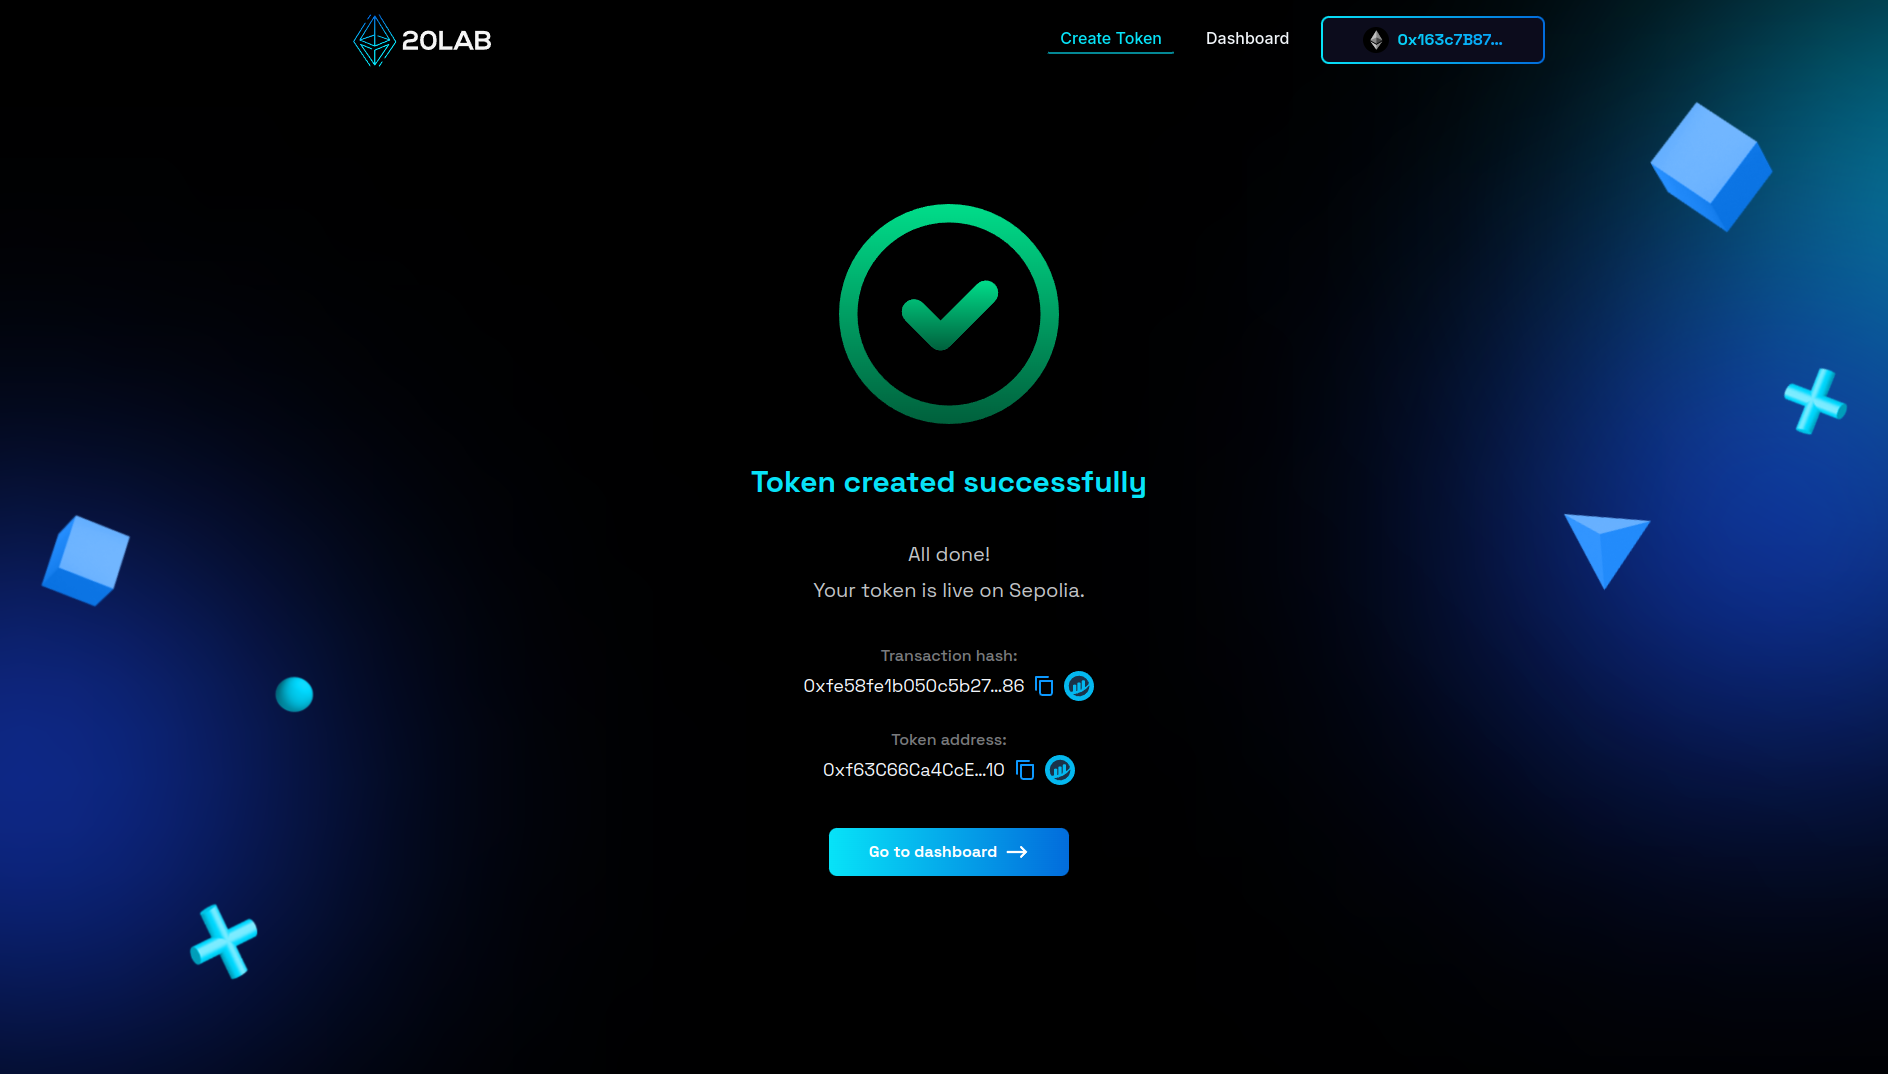
Now it's time for the main event. Click the "Deploy" button to begin the process of instantiating your token on your chosen blockchain network. This action will trigger a confirmation prompt from your connected wallet, and upon approval, your brand new ERC-20 token will be live on the selected blockchain, ready to take its place in the digital asset ecosystem.
Managing Your ERC-20 Token with Token Recovery
After successfully launching your ERC-20 token with the token recovery feature, the 20lab.app platform provides an intuitive management dashboard. This single control panel offers a comprehensive set of tools to monitor and control your newly created token.
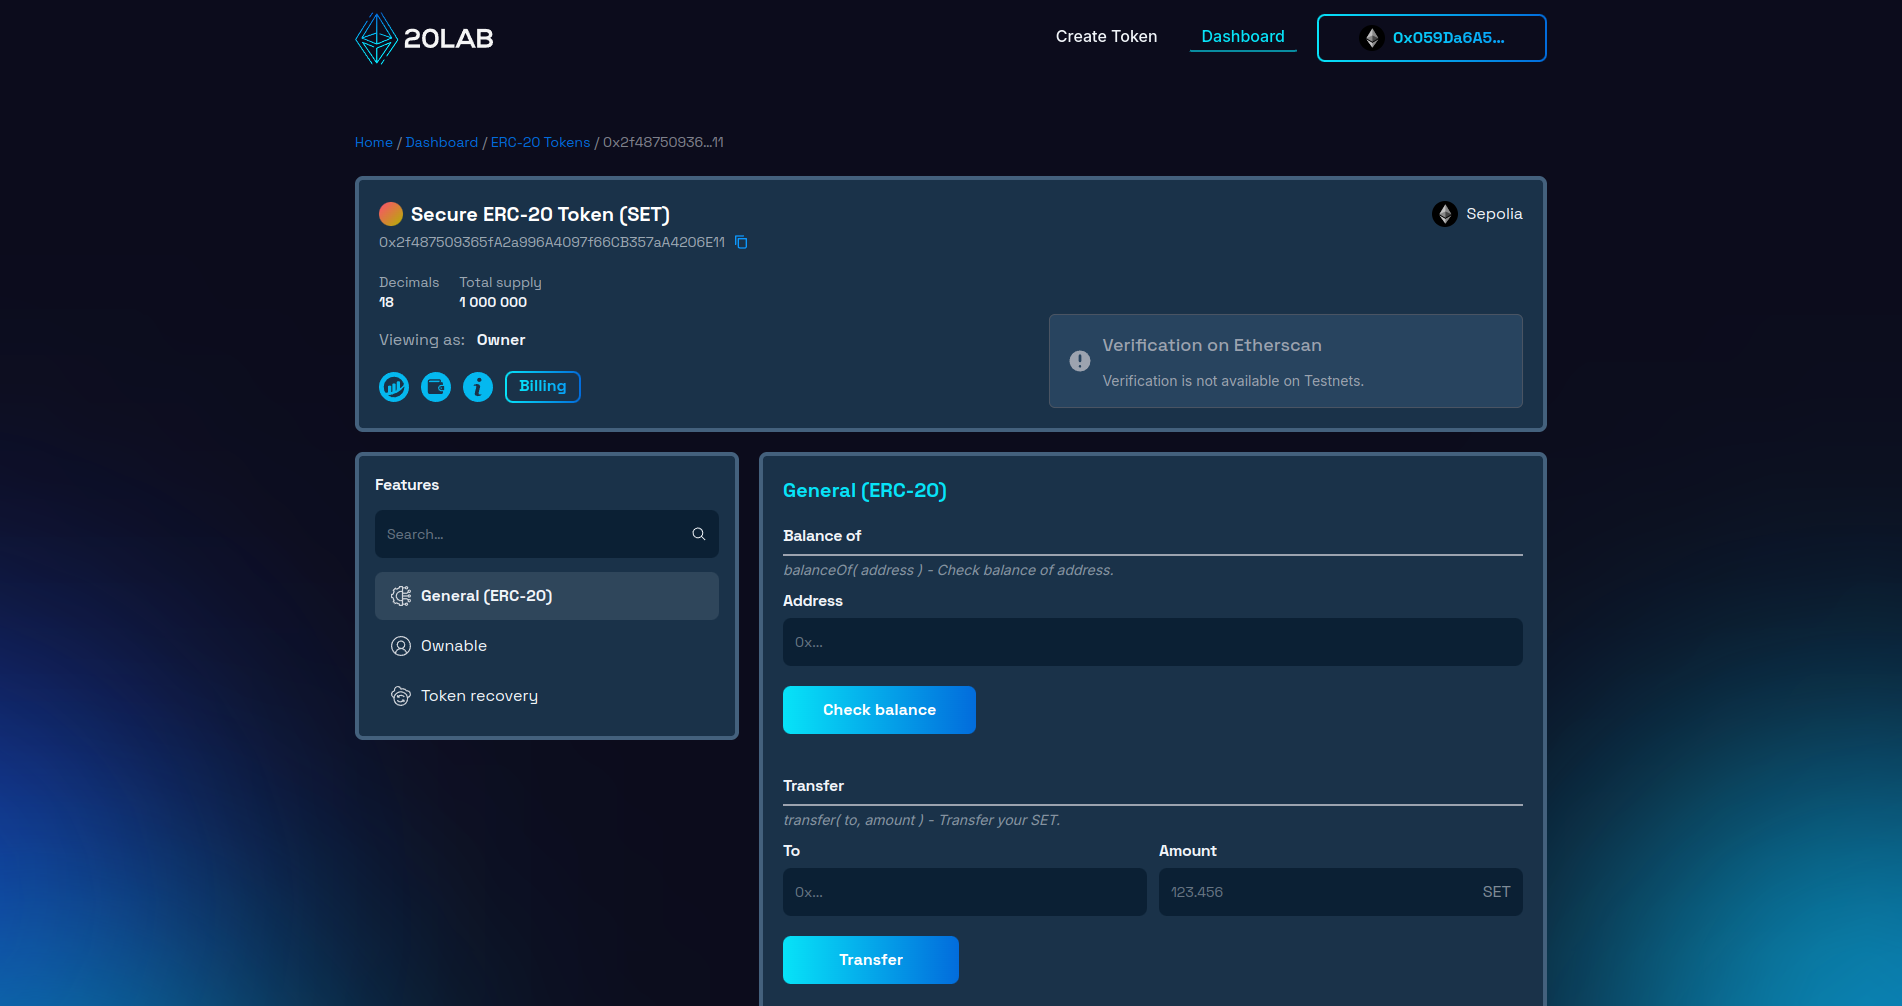
The core functionality of the dashboard is a comprehensive view of token information. At a glance, you can access critical details such as your token's blockchain address, total supply, token name, ticker symbol and decimal precision. This view ensures that you're always aware of your token's key metrics.
Another important component of the dashboard is the ownership management suite. This feature is essential for maintaining proper token governance. As the creator of the token, you retain initial ownership rights unless you've delegated those rights to another address during the creation process. Within the "Ownable" section, you have the ability to view current permissions, transfer ownership to a new address, or renounce ownership completely.
Additionally, since the token recovery feature is built into the token code, you can view it in the "Token Recovery" section of the dashboard. This owner-restricted feature allows you to recover any tokens that may become stuck in the contract, providing a quick way to recover funds in the event of user error or unexpected issues.
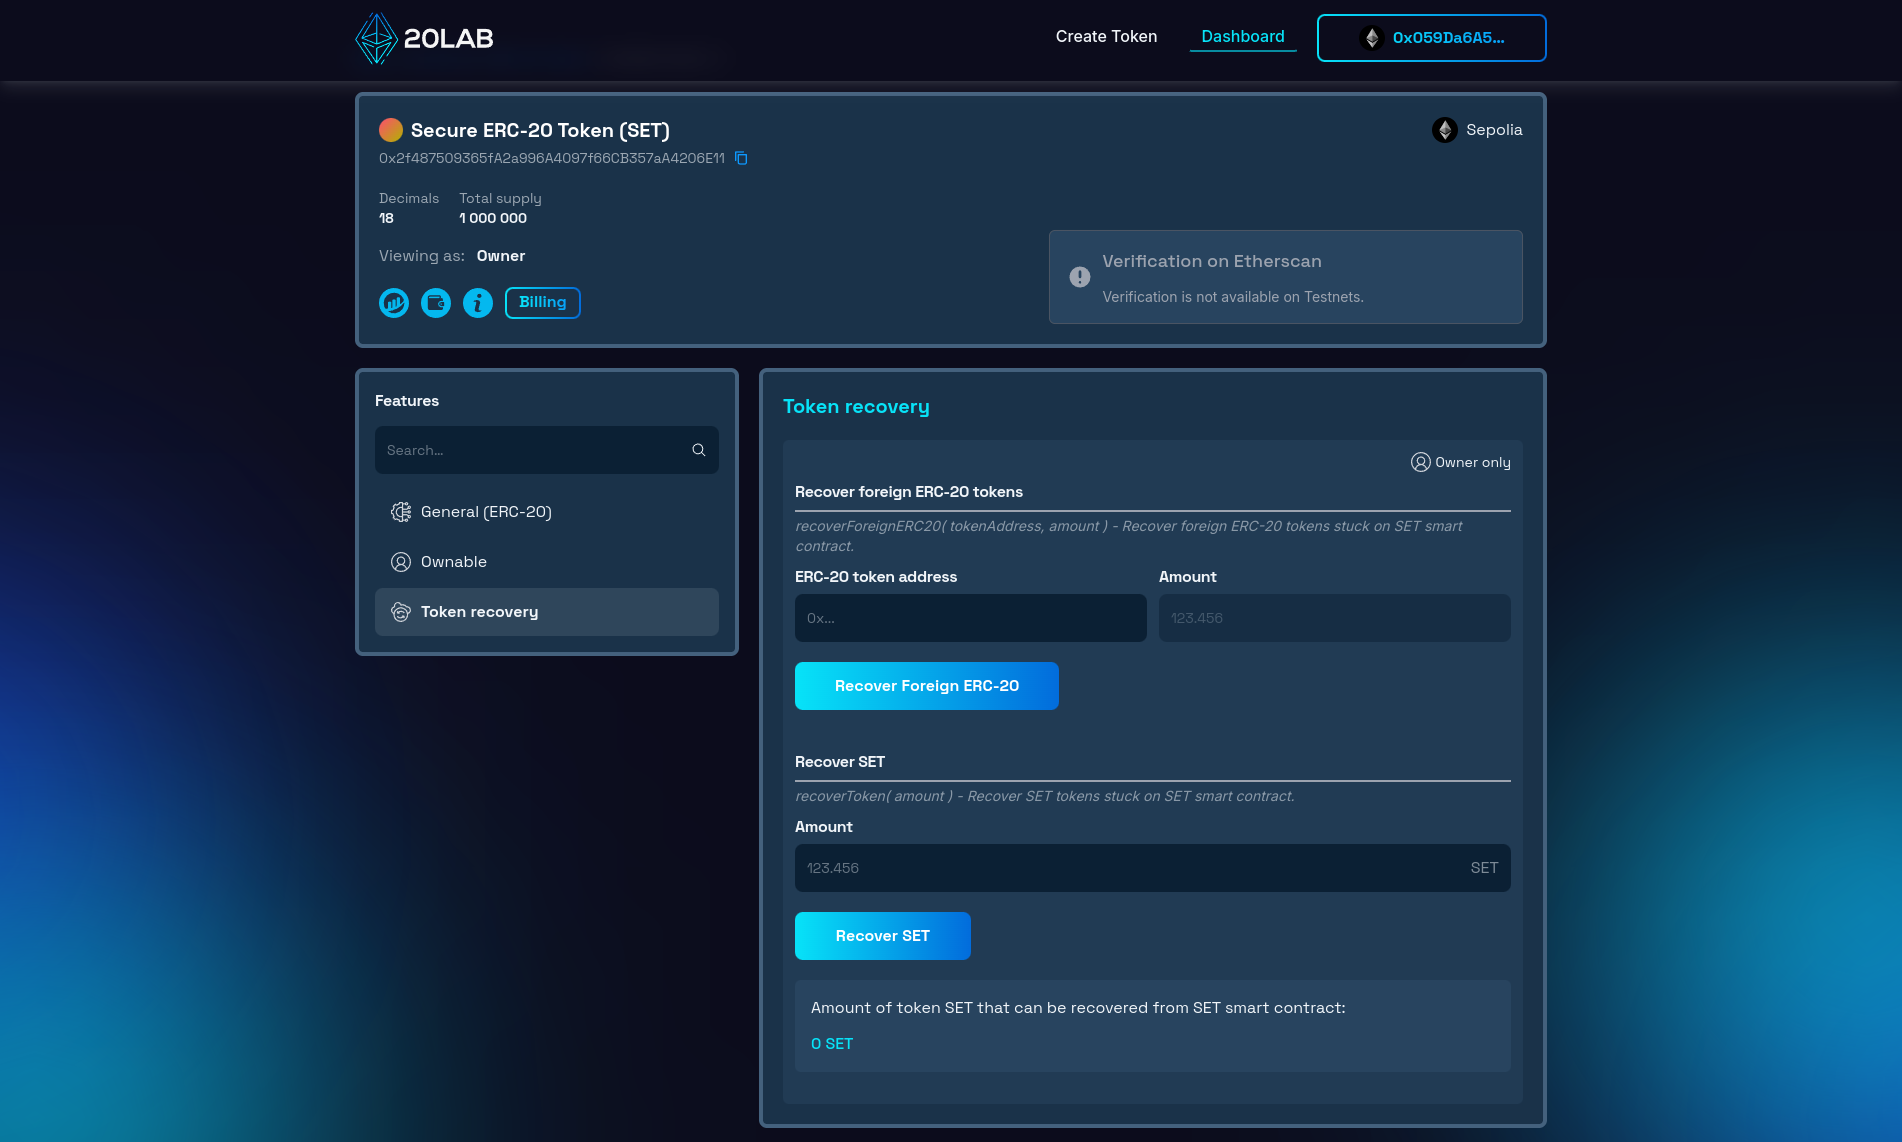
As you can see, the token recovery functionality is relatively easy to implement, but it's important to remember that it can only be accessed from the token owner's wallet. This safeguard ensures that only you as the creator, or another address to which you have explicitly transferred ownership, have the ability to use these recovery methods.
When using the first feature (Recover Foreign ERC-20 Tokens), you'll need to provide the contract address of the token you want to recover. After entering this information, the dashboard will display the exact amount of tokens you can recover from the contract balance.
The second function (e.g. Recover SET) makes the process even more convenient. Here you'll be able to see the current amount of your own tokens trapped in the contract, and you can simply enter the desired recovery amount directly into the dashboard.
Testing Token Recovery in Action
Let's look at a real-world scenario where we try to transfer tokens on our token contract and then attempt to recover them.
Transferring Tokens
Whenever a user accidentally transfers tokens to your token contract, you can initiate a recovery process. Depending on the token, you will use the first or second function.
Let's try to send different tokens to this token contract. I will use another token generated on 20lab to demonstrate the recovery process. First I will copy the SET token address and switch back to my other token - TST. Then I will transfer a small amount of TST to the SET token contract.
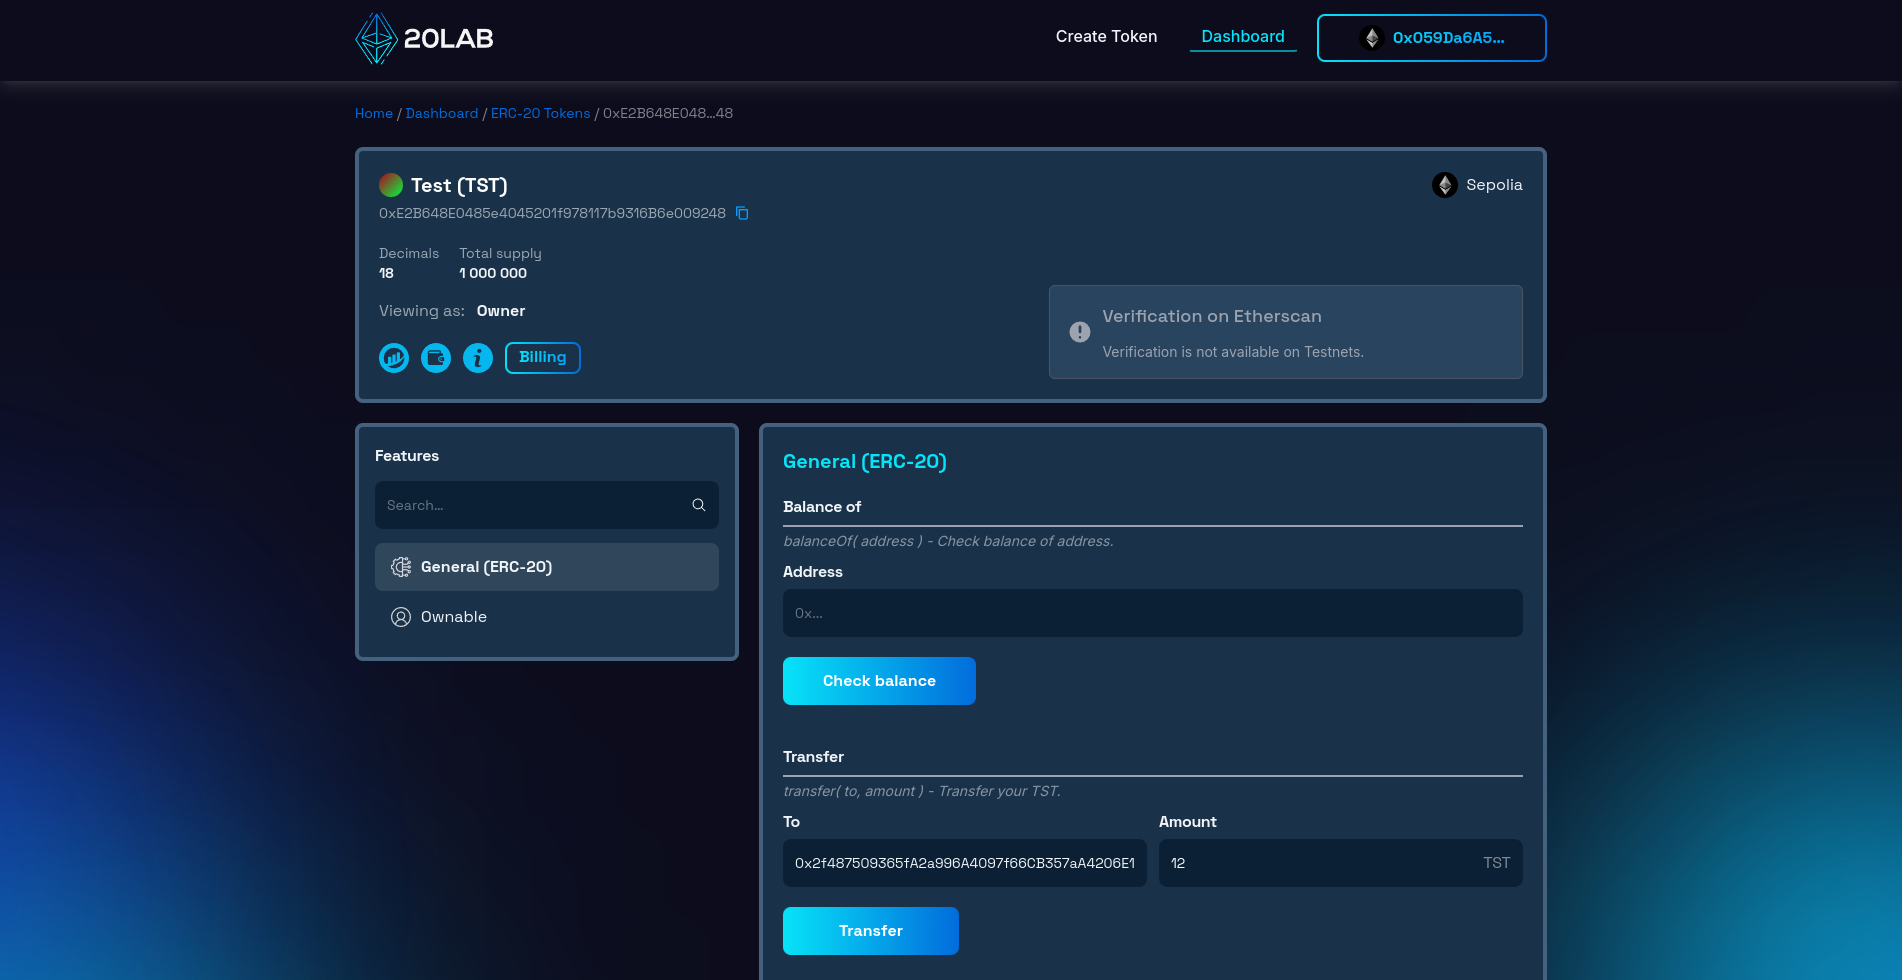
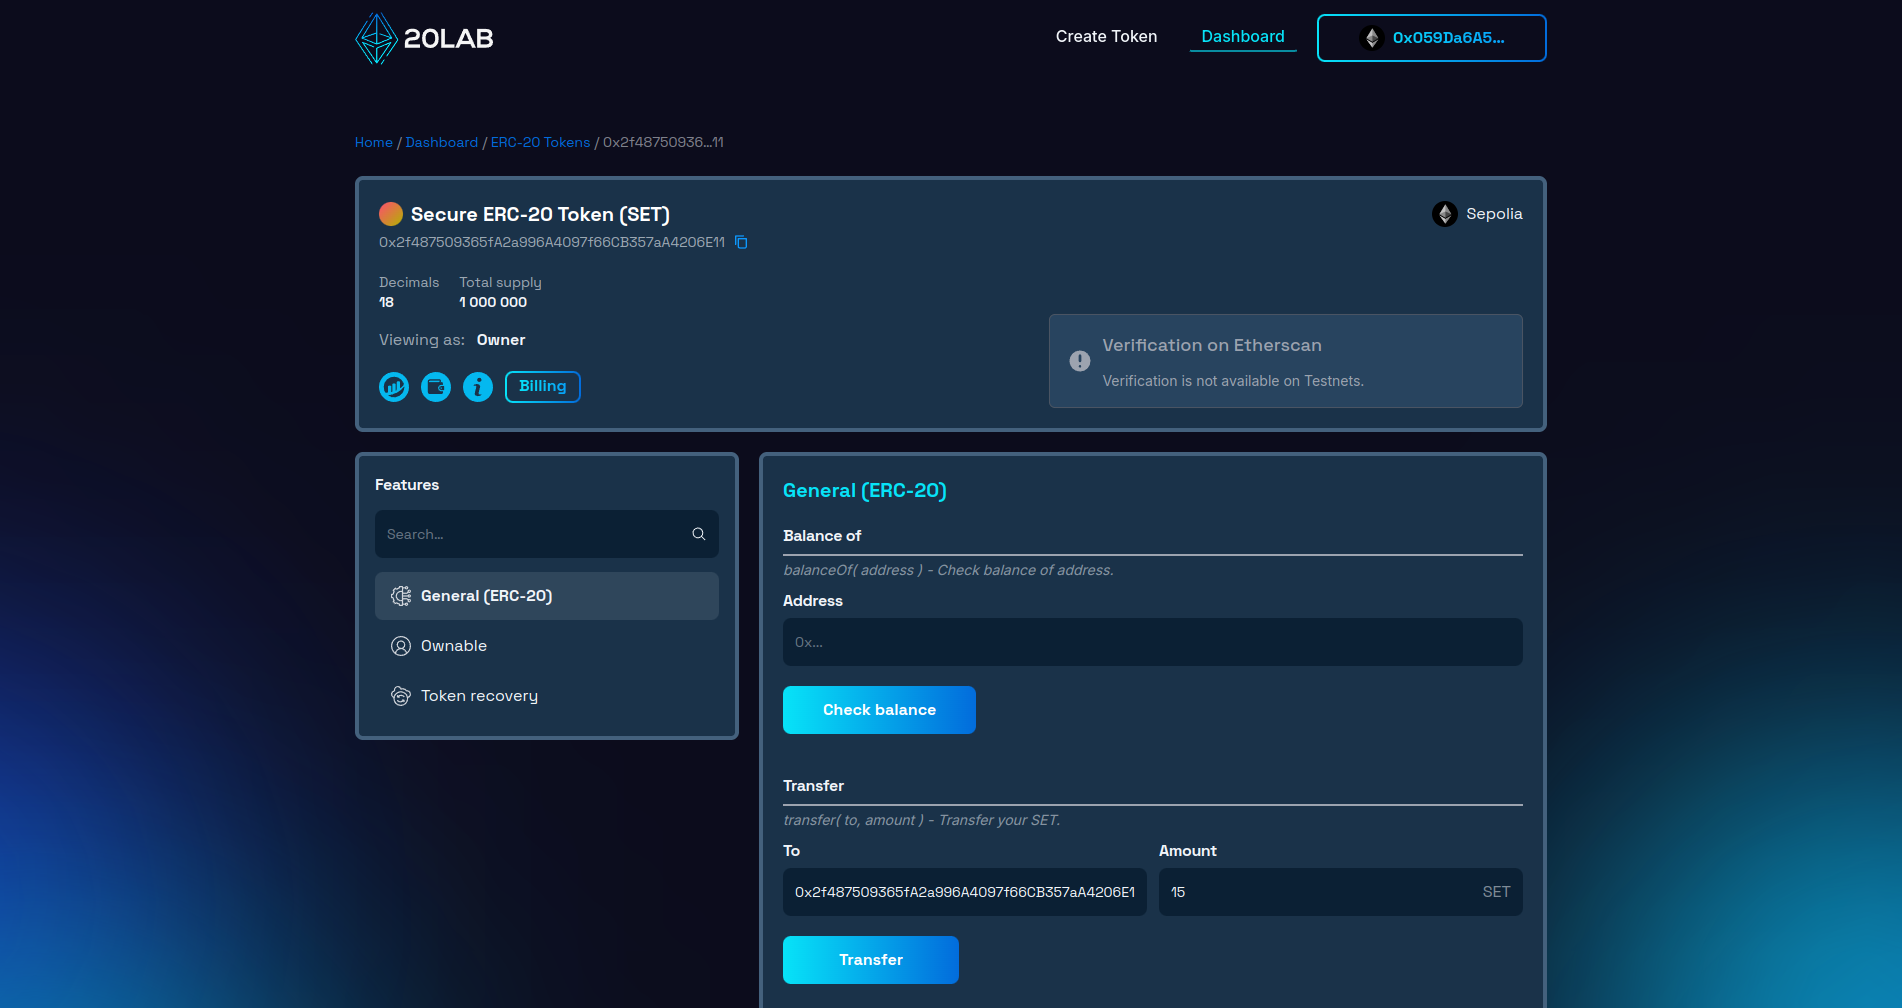
Now let's switch back to the SET token and do the same but with this token. I will also transfer a small amount to the SET token address that I copied from the top of the page.
Recovering Tokens
Now switch to the Token Recovery section of the dashboard and see if there are any TST and SET tokens that can be recovered immediately. We quickly see that both are sitting on the token contract balance. Let's recover them!
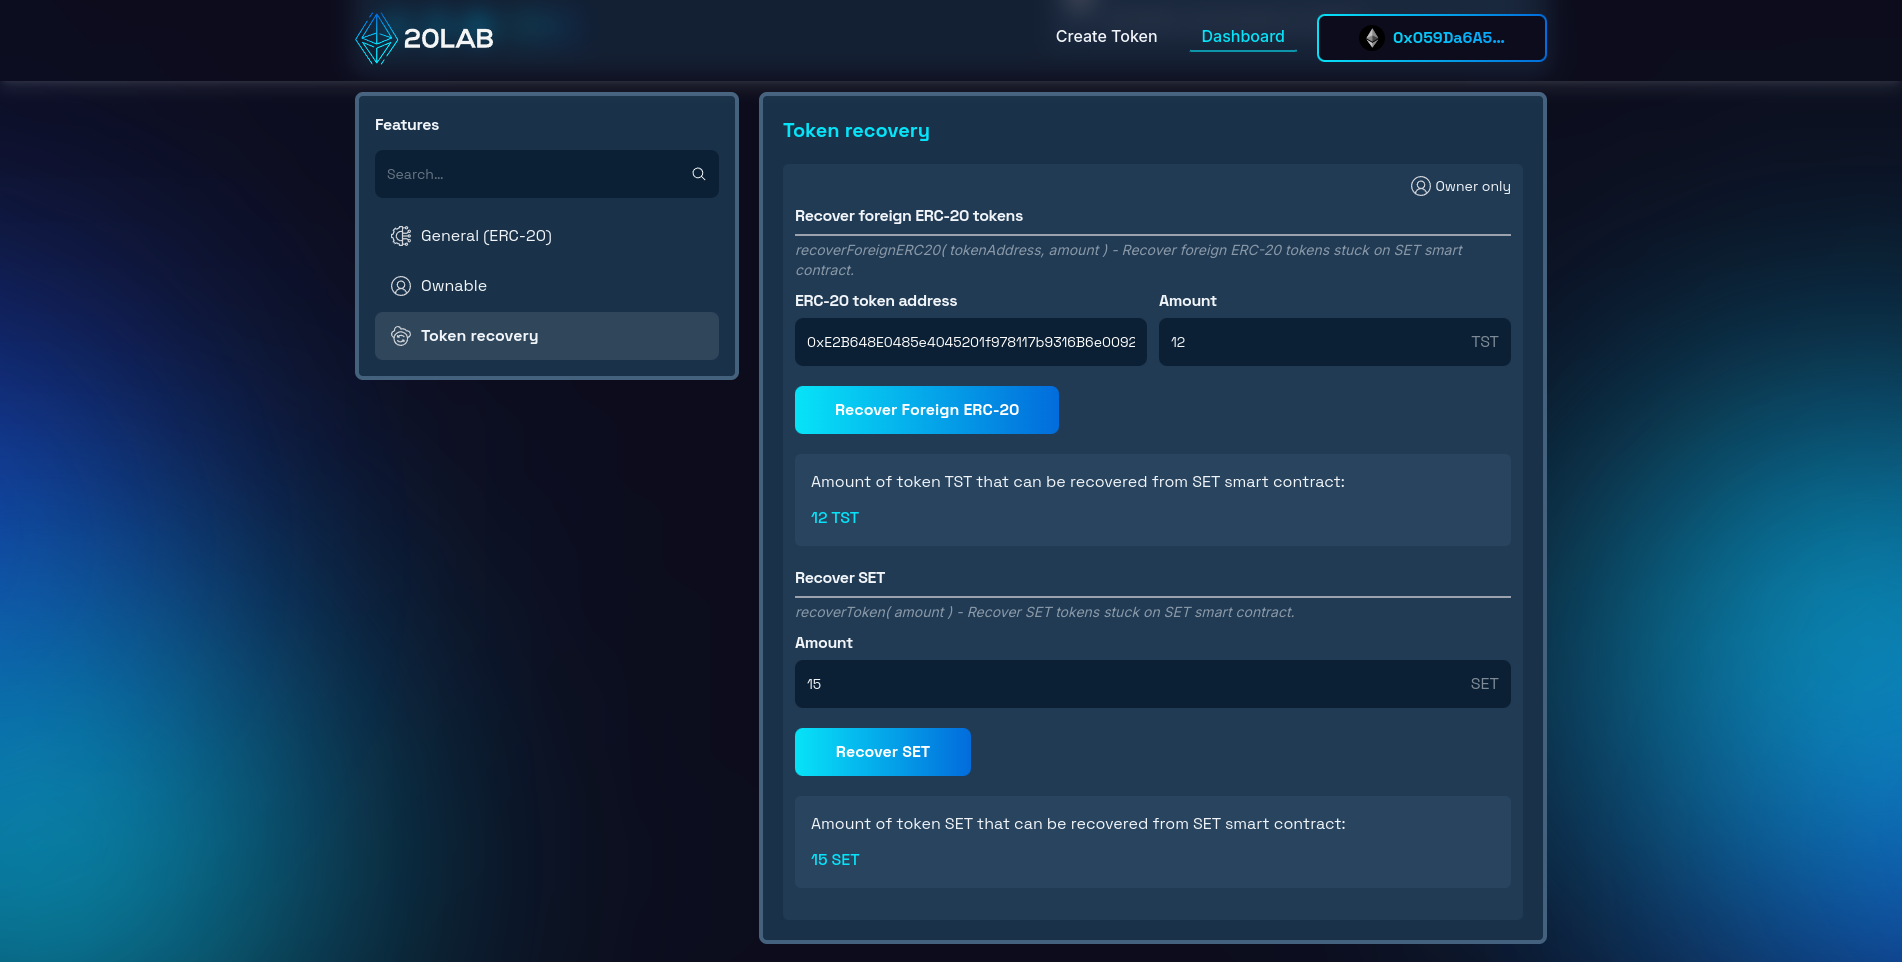
After confirming 2 transactions, both tokens were sent to the owner's wallet and successfully retrieved.
Conclusion
Implementing token recovery capabilities in your ERC-20 token can give you greater control over your token operations and significantly improve the security of your ecosystem. Whether you're launching a new DeFi project, a community token or any other blockchain-based asset, the ability to recover trapped or stuck tokens can be a powerful tool to protect your project from unforeseen circumstances and maintain the integrity of your token economy.
Platforms like 20lab.app have simplified the process of creating and managing tokens with advanced features like token recovery. This allows you to focus on the strategic aspects of your project rather than complex technical implementations, enabling you to build a more secure and reliable token ecosystem.
If you have any questions about creating or managing your ERC-20 token, don't hesitate to reach out to us via our Telegram channel.


