
In the fast-paced world of cryptocurrency, creating a secure and customizable ERC-20 token has never been more important. As the blockchain ecosystem expands and matures, the need for robust security measures has become paramount. With the rise of decentralized finance (DeFi) and the increasing threat of malicious actors, incorporating advanced features such as blacklisting capabilities into your token is becoming a game-changer for project owners and investors alike.
ERC-20 tokens have long been the backbone of the various blockchain ecosystems, powering countless projects and innovations. But as the market evolves, so must the tools and techniques we use to create and manage these digital assets. Enter the concept of ERC-20 tokens with blacklist functionality - a powerful extension that adds an extra layer of security and control to the traditional token model.
Ready to extend the capabilities of your token? Let's dive in and learn how to create an ERC-20 token with blacklist.
Why the Blacklist Feature Matters
Implementing a blacklist feature in your ERC-20 token isn't just a nice-to-have - it's becoming an essential tool for responsible token issuers. Let's take a closer look at why blacklisting is important and how it can significantly impact the success and longevity of your project. Key features are:
- Increased security: The primary benefit of a blacklist is the additional layer of security it provides. By allowing token issuers to prevent certain addresses from transacting with the token, you create a powerful defense mechanism against malicious actors that can help prevent various attacks.
- Investor confidence: In a market where trust is essential, implementing a blacklist can significantly increase investor confidence. It sends a clear message that you're committed to protecting your token ecosystem and the interests of your investors.
- Flexible governance: A blacklist feature provides token issuers with a flexible governance tool. It allows for quick action in case of emergencies or unforeseen circumstances.
- Market Stability: By preventing large-scale dumps from malicious actors or compromised accounts, a blacklist can help maintain market stability.
As we move forward in this guide, we'll explore how to implement this crucial functionality effectively and responsibly, ensuring that your token is well-equipped to thrive in the dynamic world of cryptocurrency.
Creating Your ERC-20 Token with Blacklist
In the realm of token creation, implementing a blacklist feature can seem daunting, especially for those without extensive coding experience. This is where 20lab's innovative token generator comes in, providing an easy-to-use solution for creating sophisticated ERC-20 tokens with built-in blacklist functionality.
20lab simplifies the entire process, allowing you to focus on the strategic aspects of your token instead of getting bogged down in complex smart contract development. In the following steps, we'll guide you through using 20lab's platform to create a secure, blacklist-enabled ERC-20 token, empowering you to launch a token that meets today's demanding security standards.
Step 1: Initiating Your ERC-20 Token Creation
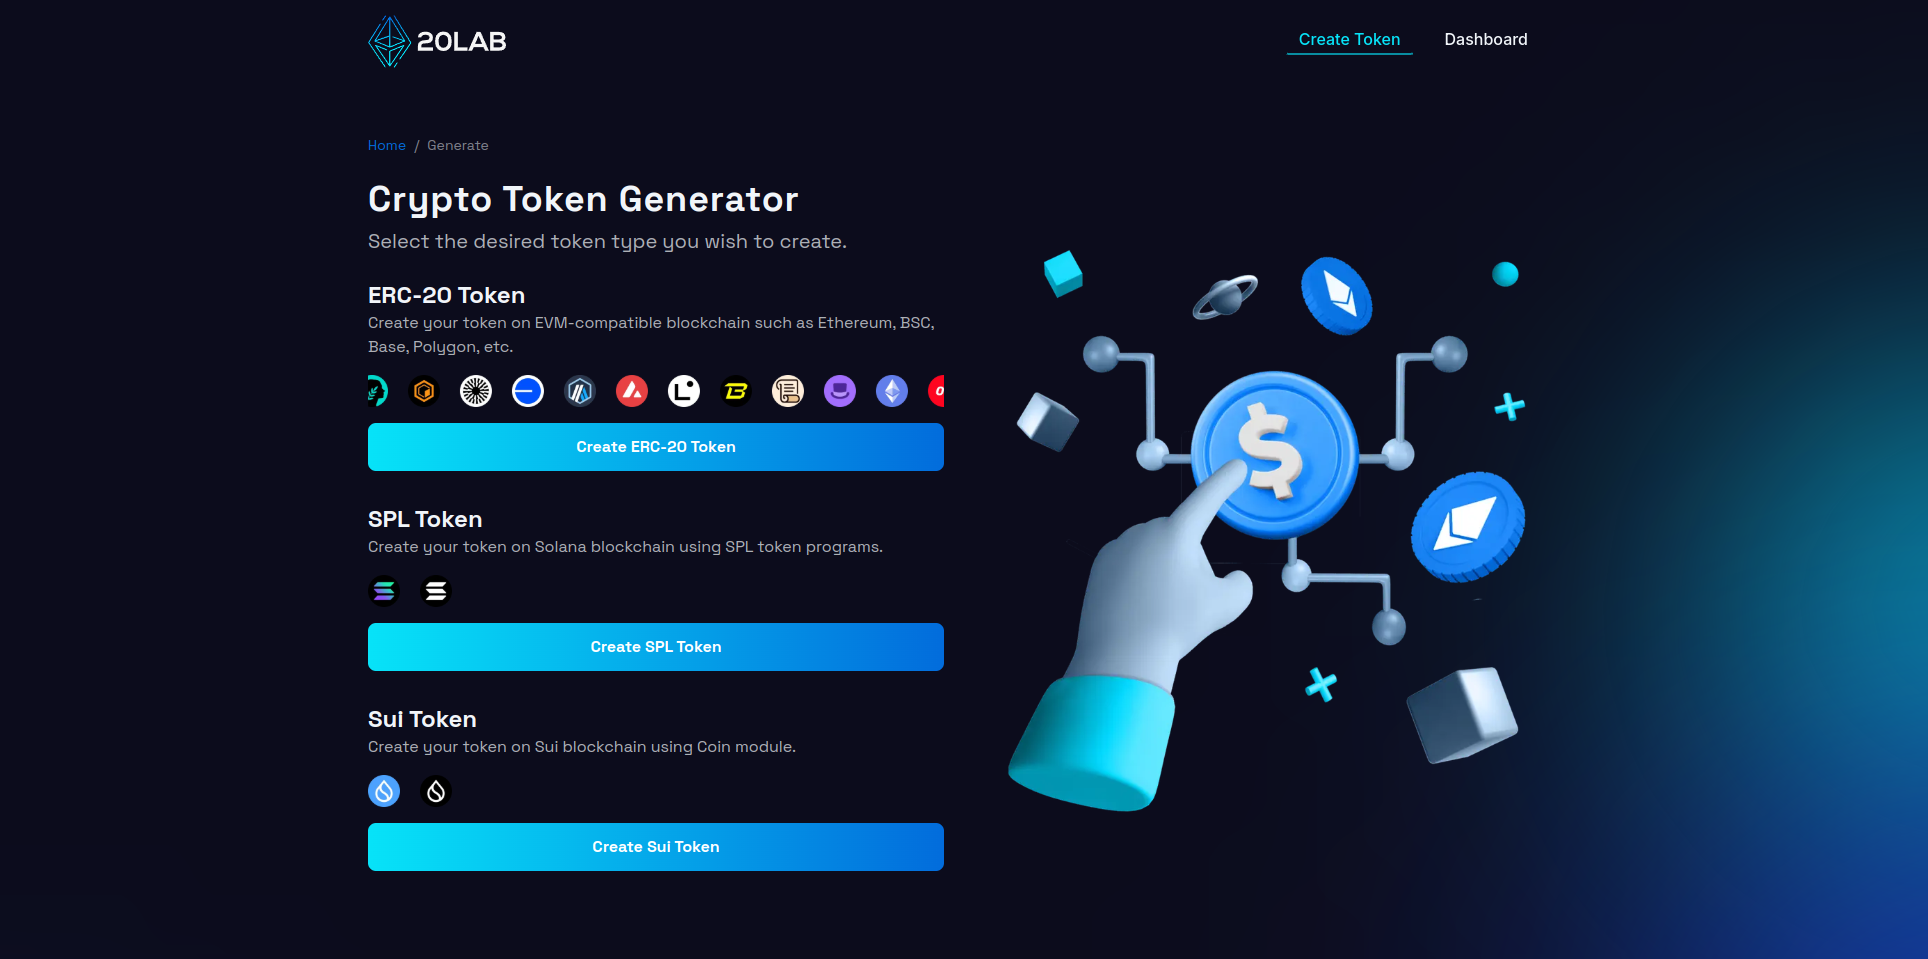
First, visit 20lab.app and navigate to the generator page. Click on "Create ERC-20 Token" to start the process.
The next important step is to connect your Web3 wallet to the platform. 20lab supports a wide range of wallets including MetaMask, Coinbase Wallet and Trust Wallet. Once connected, your wallet address will appear in the top right corner of the page, confirming successful integration.
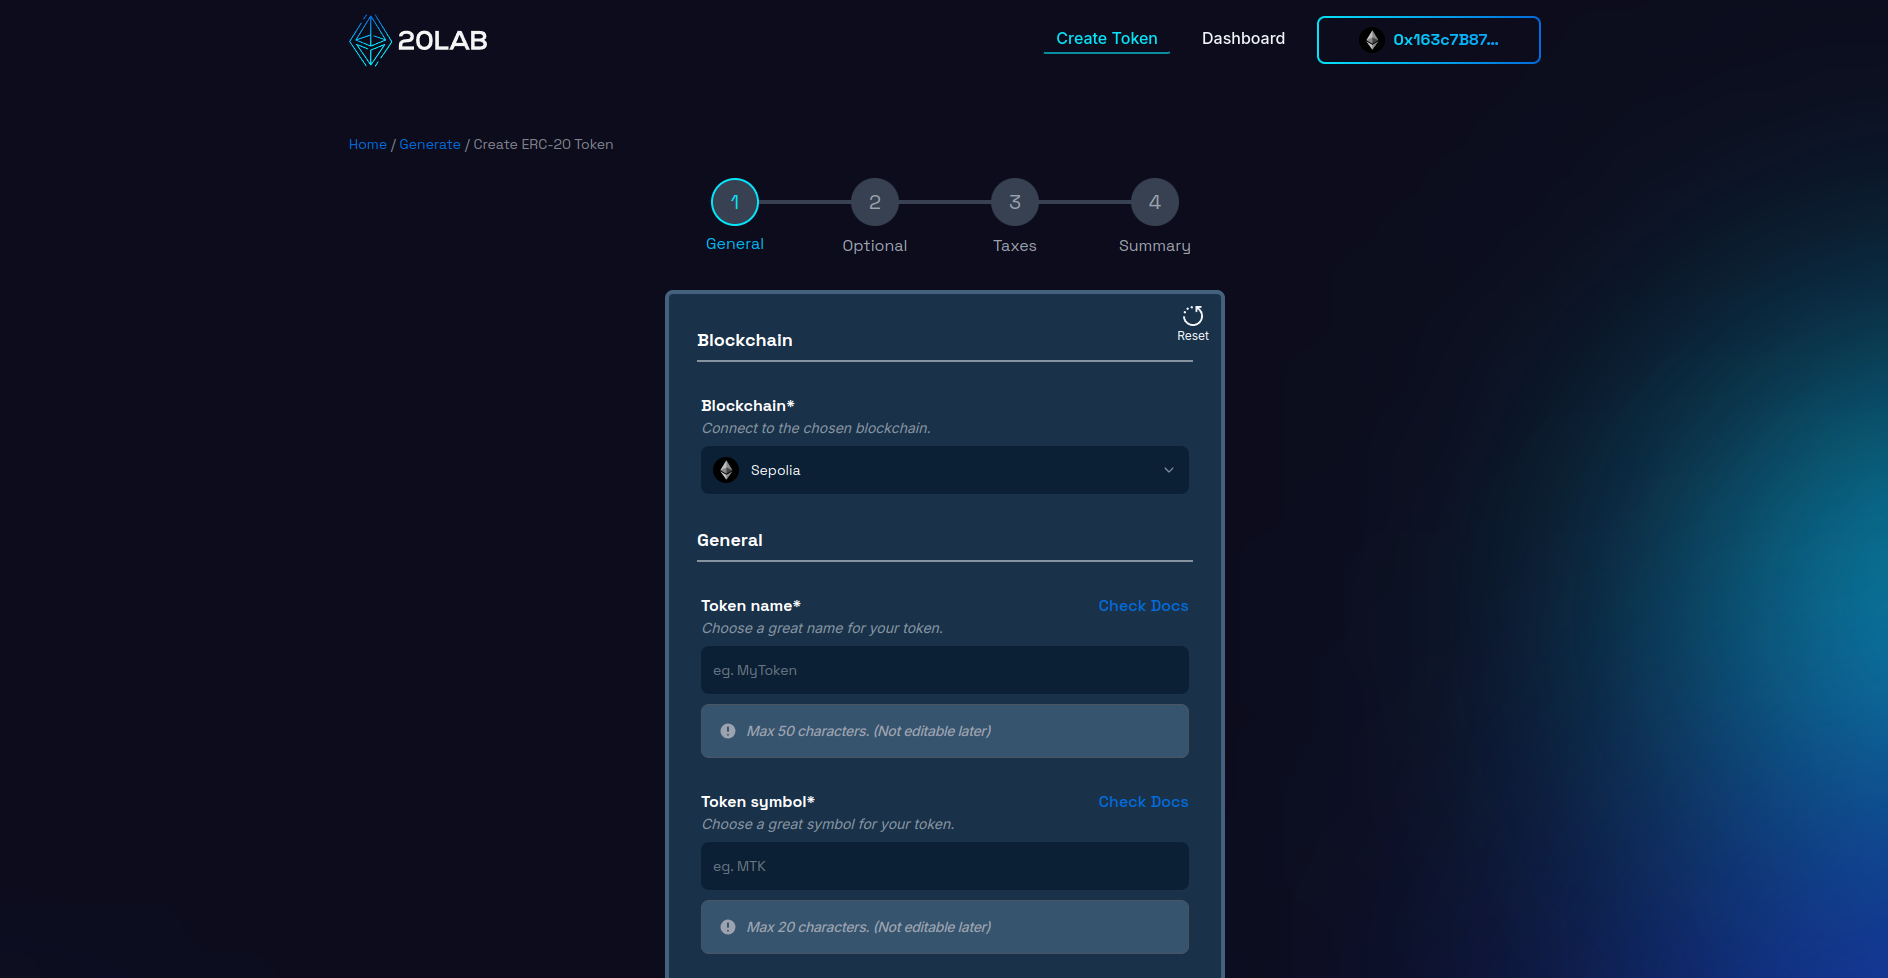
Before proceeding, make sure you're on the appropriate blockchain network:
- For production tokens, select the desired Mainnet,
- For testing purposes, choose a suitable Testnet.
20lab offers a range of popular blockchains, allowing you to select one that aligns with your project requirements. Consider factors such as:
- Transaction costs,
- Network speed,
- Ecosystem compatibility,
- Target audience preferences.
Your choice of blockchain will significantly impact your token's functionality and adoption, so carefully evaluate your options based on your project's specific needs and long-term objectives.
Step 2: Establishing Your ERC-20 Token's Core Parameters
This phase is critical because it defines the essential attributes of your ERC-20 token. Start by creating a distinctive and meaningful name for your token, accompanied by a short, memorable ticker symbol. It's a good idea to do some research to ensure that your chosen identifiers are unique in the crypto space.
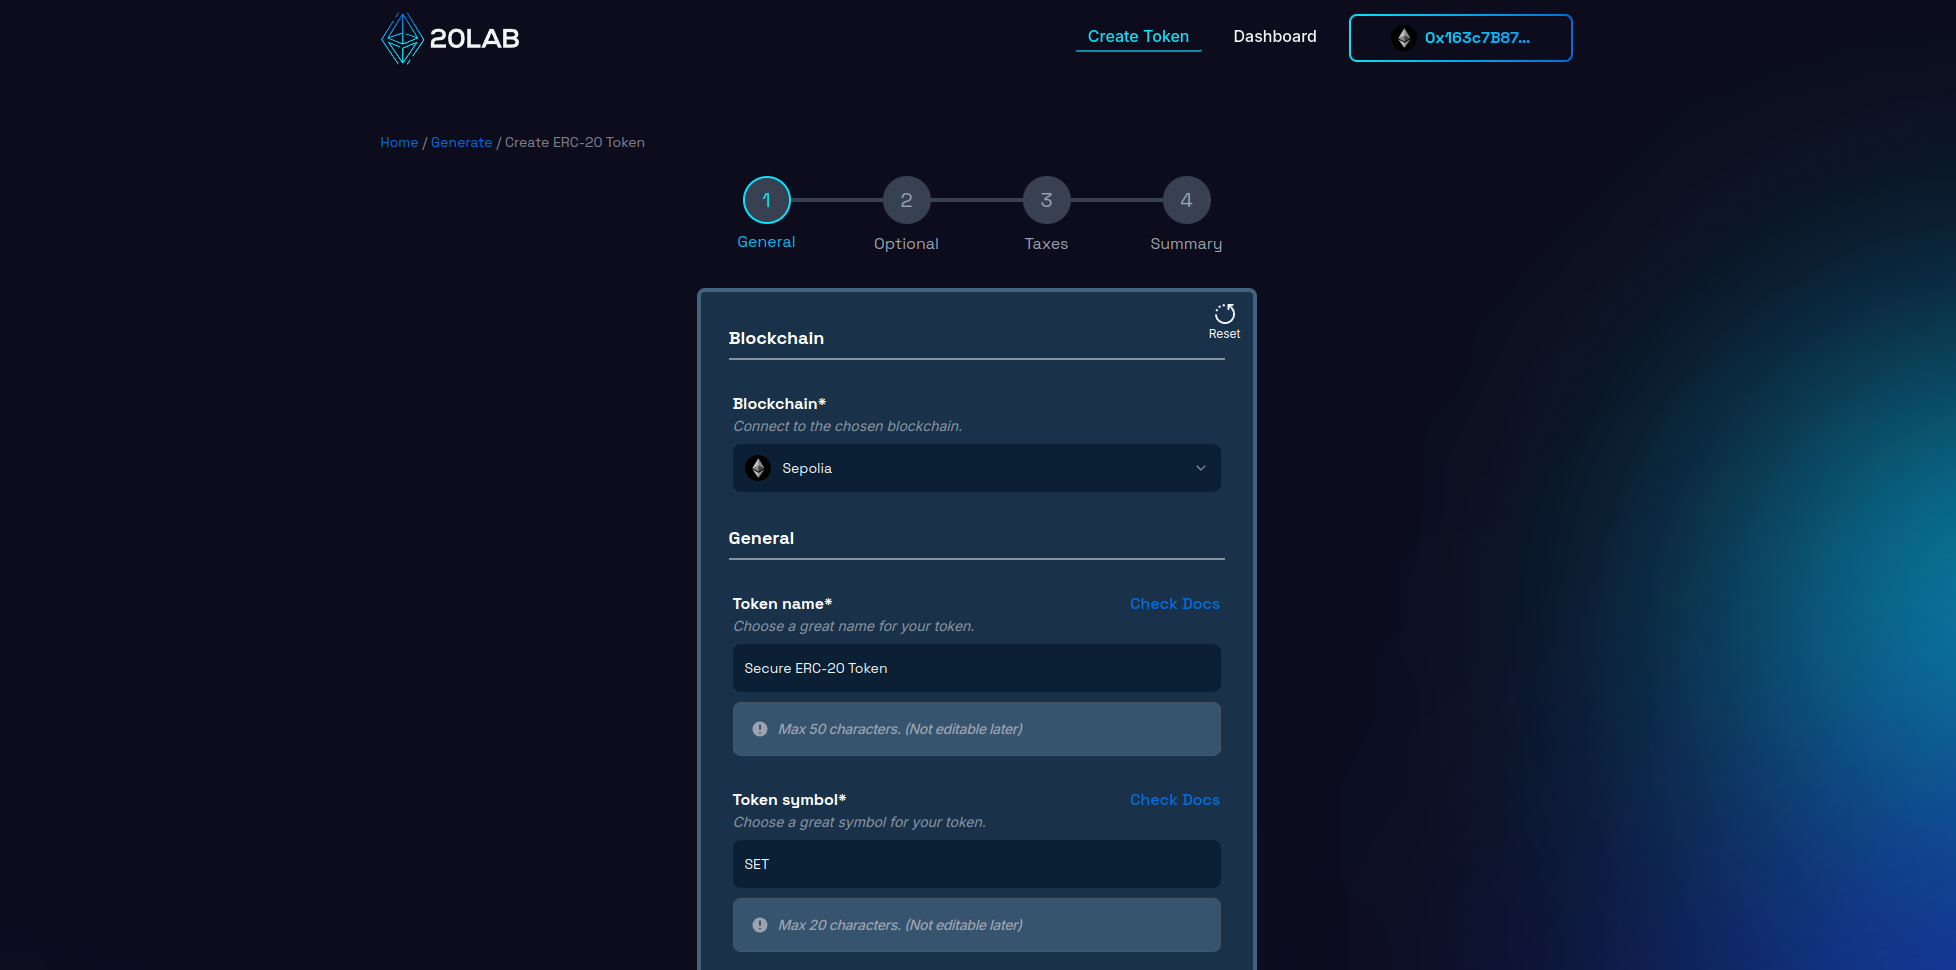
Next, specify the total supply of tokens. For example, setting a supply of 100,000,000 tokens can provide sufficient liquidity while maintaining a sense of scarcity.
Determine the divisibility of the token by setting the number of decimal places. The industry standard for ERC-20 tokens is 18 decimal places, mirroring the divisibility of Ethereum and other major cryptocurrencies. This level of precision facilitates microtransactions and fine-tuned token economics.
You have the option to specify a unique contract name that will be the identifier for your smart contract on Block Explorer after verification. This can be the same as your token name or a more technical name such as "SecureTokenV1".
Critical decisions include selecting the wallet to receive the initial token supply and determining the token owner. The supply recipient will hold the entire token allocation at launch, which can be your personal wallet or a dedicated project wallet. The token owner will have administrative rights to owner-restricted functionality. While this is often the same as the deployer, it can be a separate address if desired. For added security, consider implementing a multi-signature wallet.
These basic settings shape the identity and operational framework of your token. Make informed choices, taking into account your project's long-term goals and scalability potential. Decisions made at this stage will affect your token's perception, utility, and integration capabilities with decentralized applications, ultimately impacting the user experience.
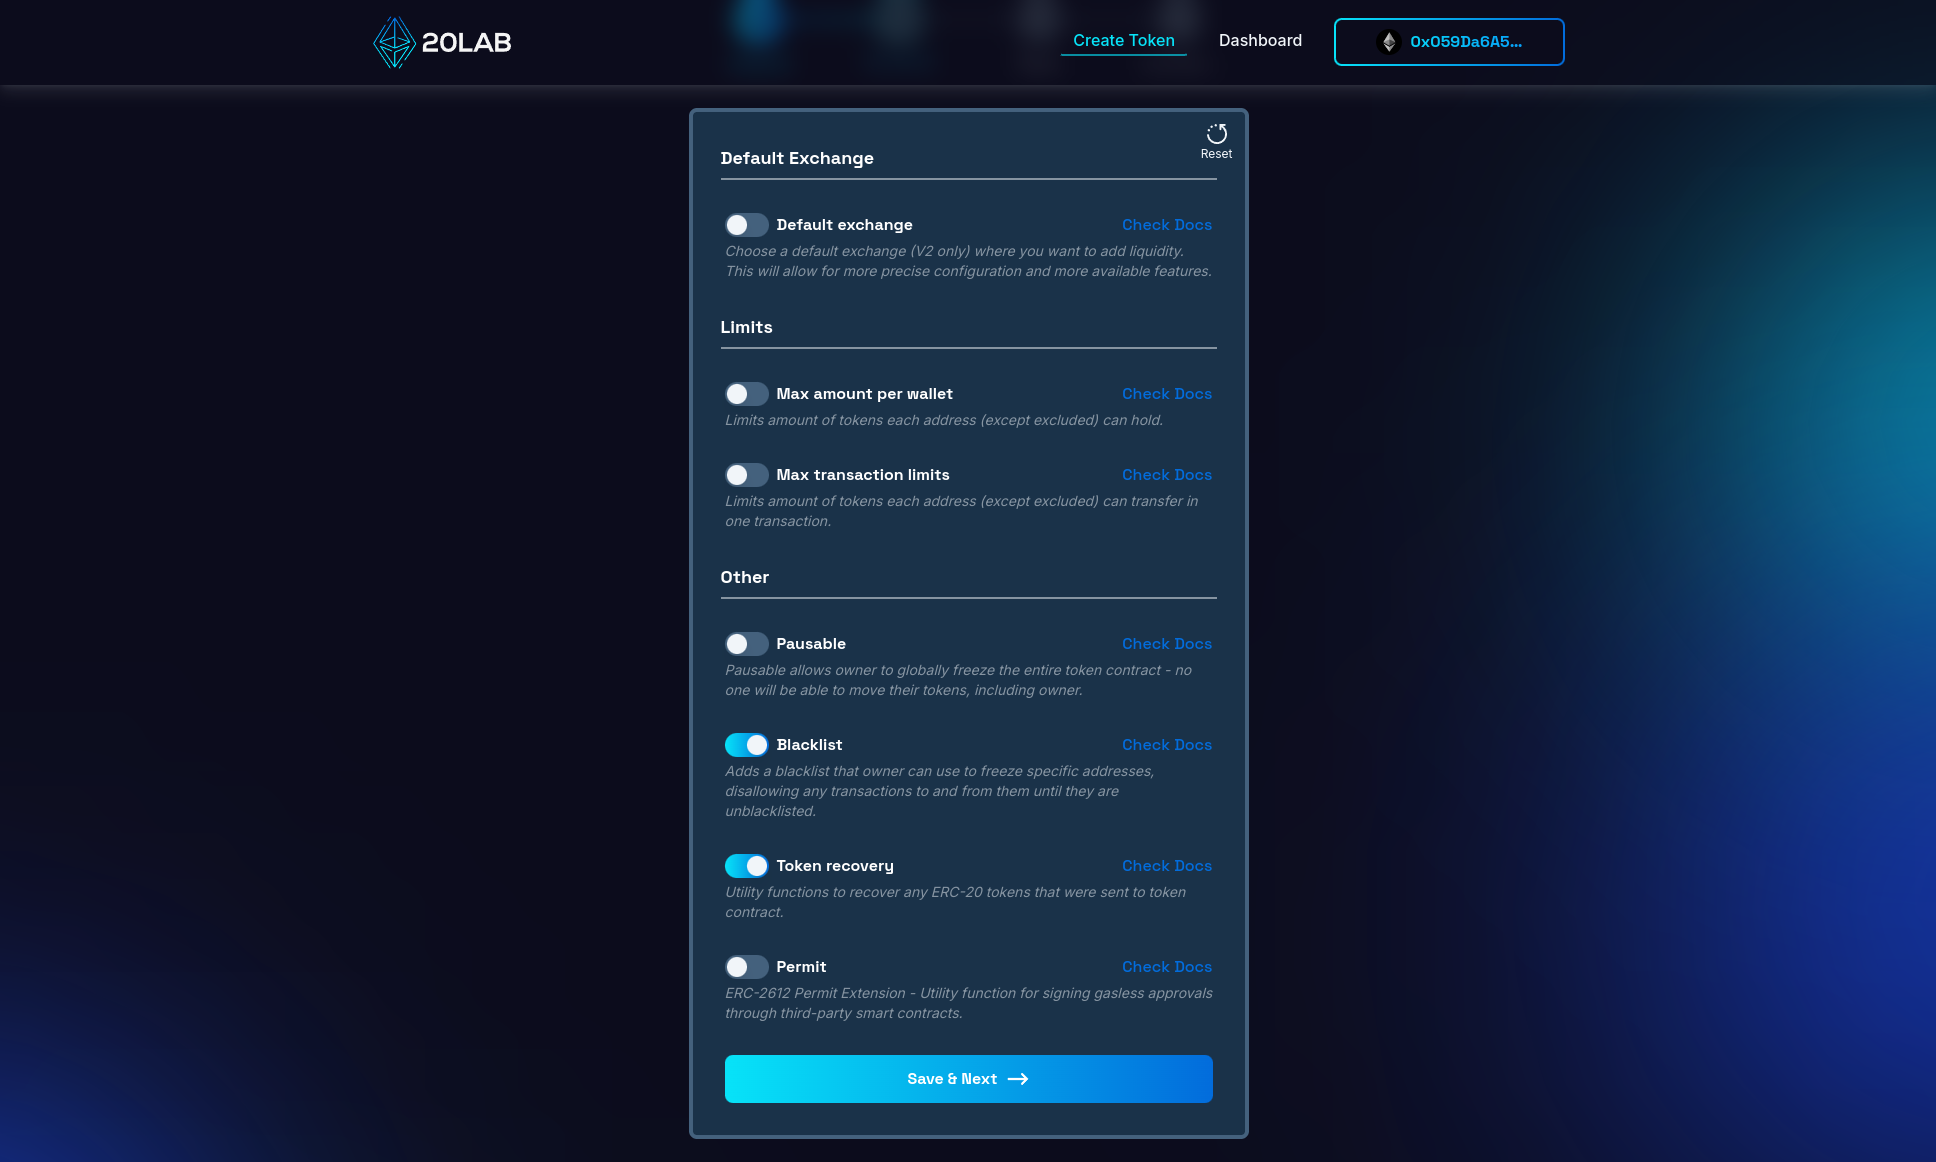
Step 3: Implementing the Blacklist Feature
To set up the blacklist feature, navigate to the "Optional" page of the generation form. Scroll down until you find the "Blacklist" option.
By enabling this feature, you're adding a powerful layer of security to your token. The blacklist feature allows you to prevent certain addresses from participating in token transactions. These functions will later be available in the dashboard for the token's owner.
Step 4: Review and Deploy
Before finalizing your token creation, it's important to carefully review all configured parameters on the "Summary" page. This final review stage acts as an important check, allowing you to catch and correct any potential errors or oversights that could become costly after deployment.
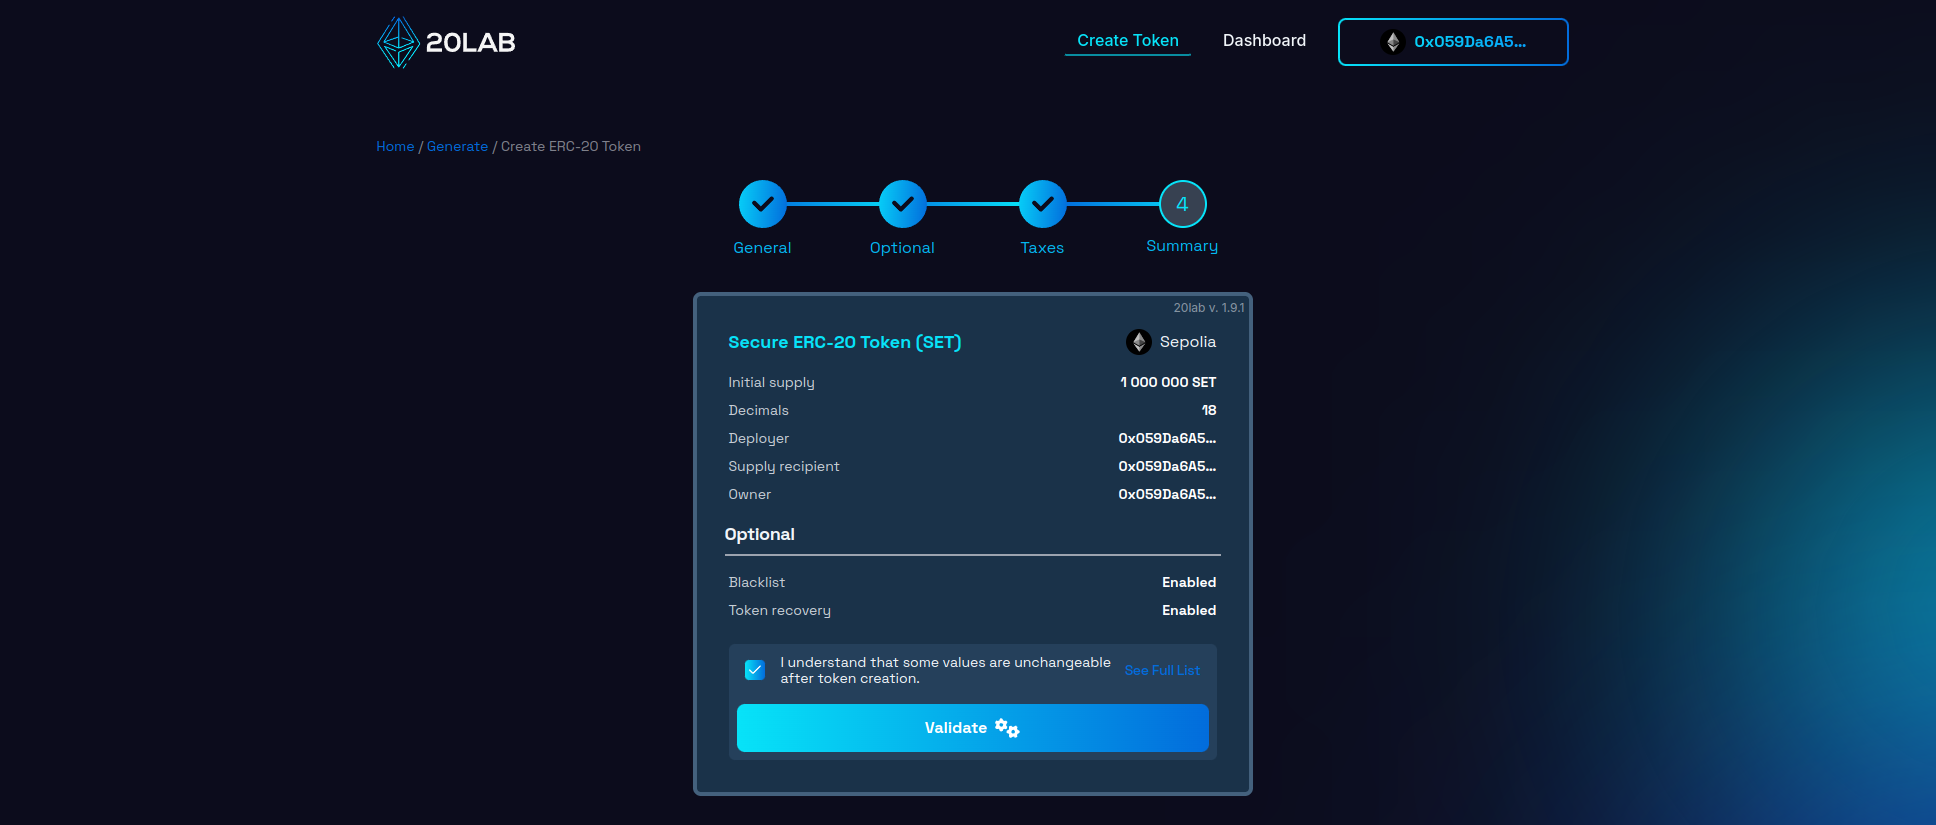
Once you have thoroughly reviewed all the details, click the button to initiate the validation process. This automated check serves as an additional layer of protection, identifying any technical inconsistencies or issues that could compromise the functionality of your token on the blockchain.
Upon successful validation, you may be presented with a deployment modal that allows you to personalize your token's address pattern. This unique feature allows you to add a distinctive touch to your token's blockchain identifier, enhancing its memorability and brand alignment.
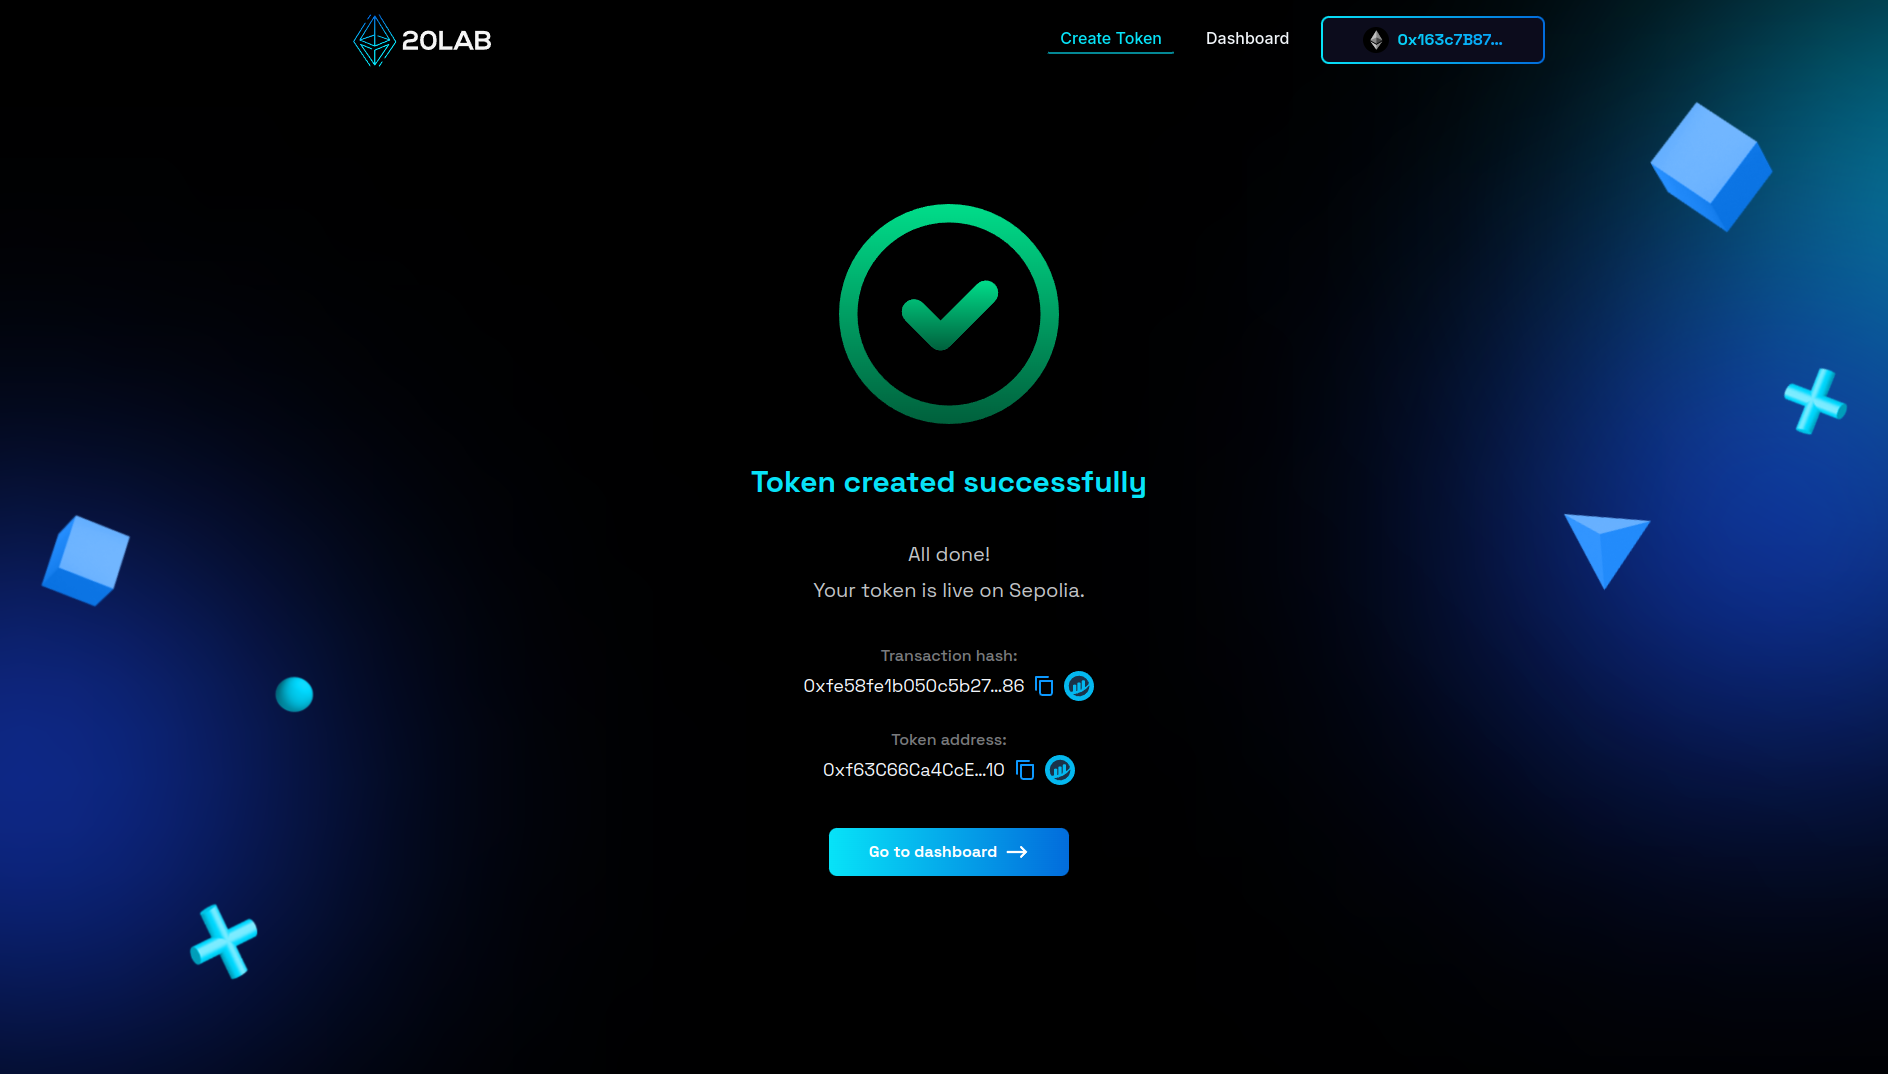
Now you're ready for the big moment. Click "Deploy" to begin the process of instantiating your token on your chosen blockchain network. This action will trigger a prompt from your connected wallet requesting transaction confirmation. Upon confirmation, your ERC-20 token will be live on the selected blockchain.
Managing Your ERC-20 Token with Blacklist
After successfully deploying your ERC-20 token with the blacklist feature, 20lab.app provides a comprehensive management dashboard. This central control panel provides a set of tools to effectively monitor and manage your newly created token.

The primary function of the dashboard is to provide an overview of essential token information. You can quickly access important details such as your token's blockchain address, total supply, token name, token symbol, and decimal precision. This dashboard ensures that you're always aware of your token's key metrics.
A vital component of the dashboard is the ownership management suite. This feature is crucial for maintaining proper token governance. As the token creator, you retain initial ownership rights unless you've designated another address during the creation process. The "Ownable" section allows you to view current permissions, transfer ownership to a new address, or renounce ownership if needed.
With the blacklist feature built into your token, you'll find a dedicated "Blacklist" section in the dashboard. This owner-restricted feature allows you to manage addresses that are prohibited from participating in token transactions. The dashboard displays the current blacklist status and provides options to add or remove addresses from the blacklist, providing a streamlined way to control token accessibility.
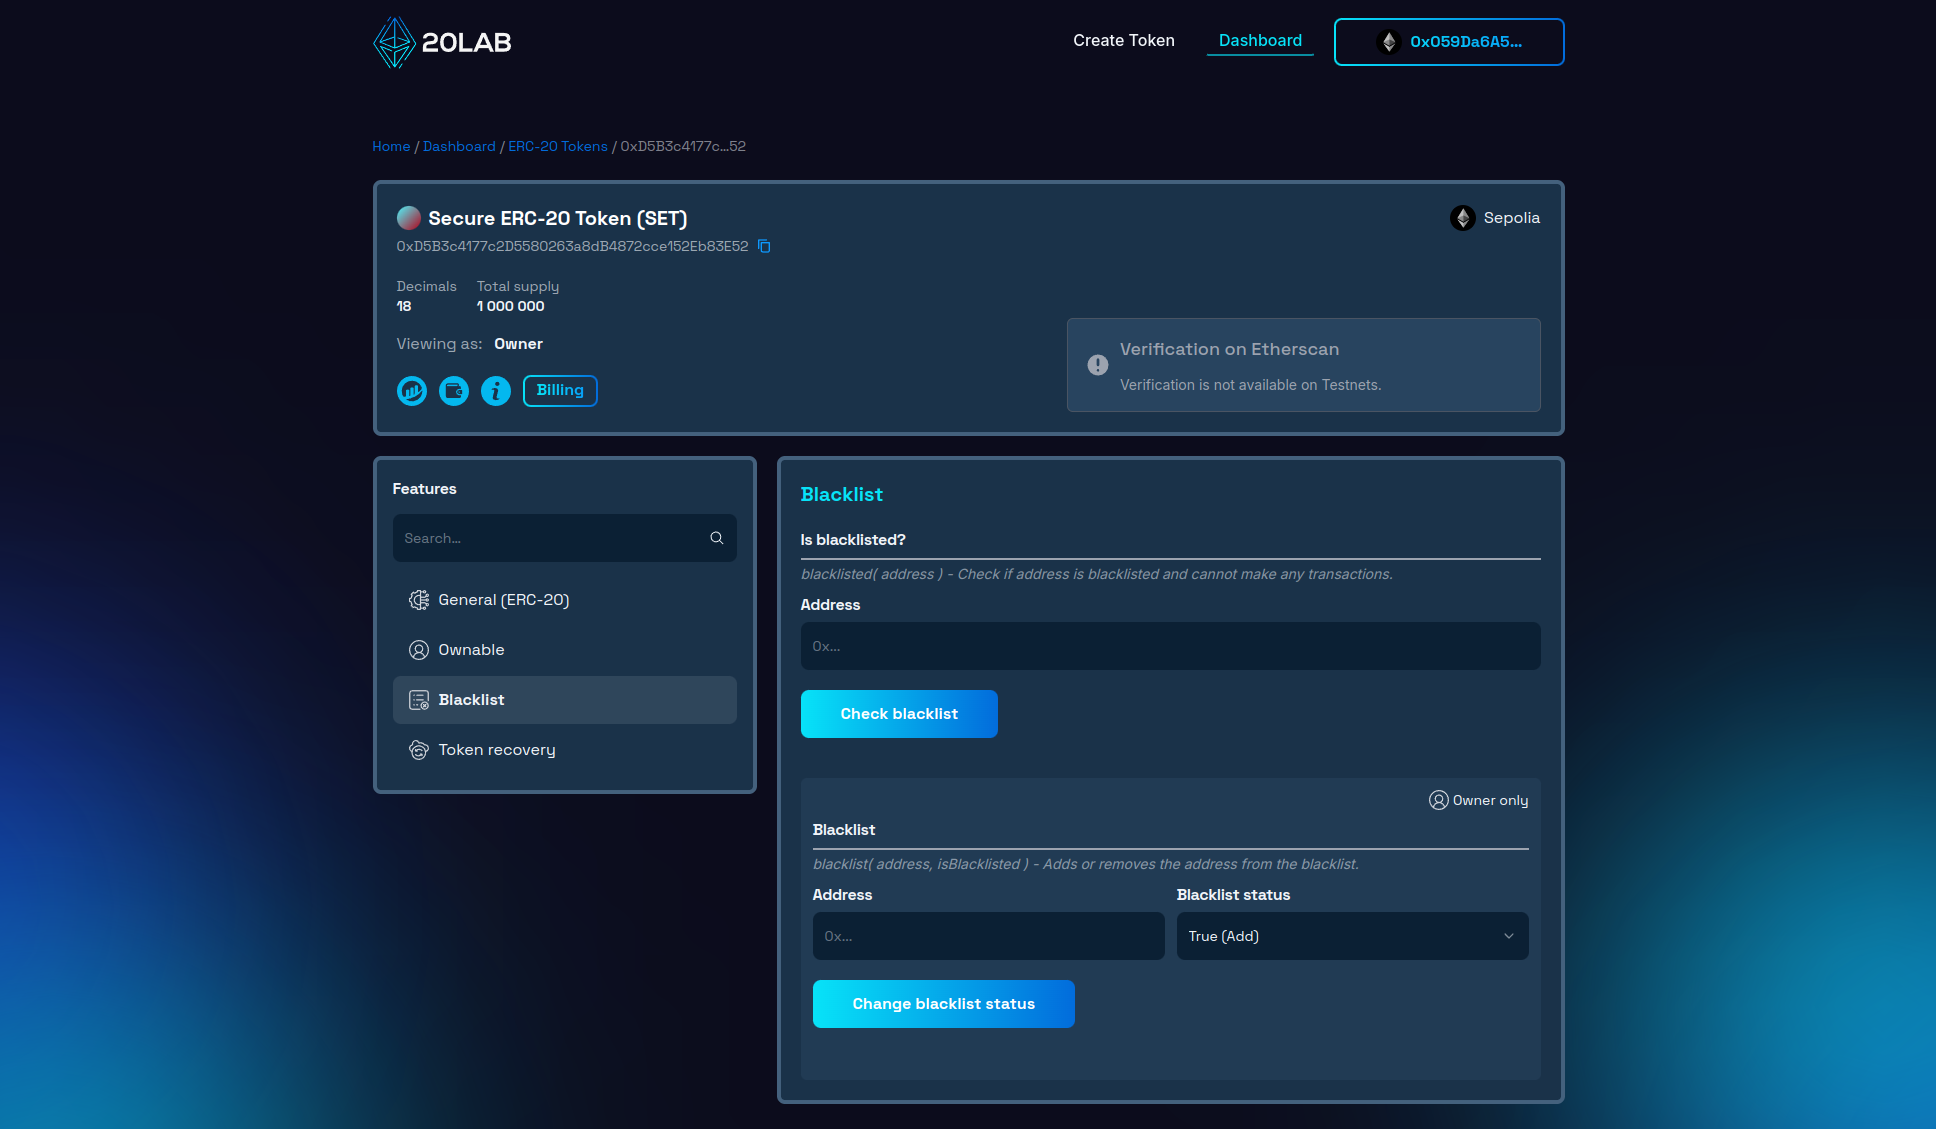
Managing the blacklist is simple. You can add an address to the blacklist by entering it in the field provided, setting blacklist status to "True" and clicking "Change blacklist status". Similarly, you can remove an address by pasting it and setting status to "False". Each action requires confirmation from the token owner's wallet.
Testing Blacklist in Action
To better understand the practical implications of the blacklist feature, let's go through a real-world scenario that demonstrates its functionality.
Transferring tokens: Before and After Blacklisting
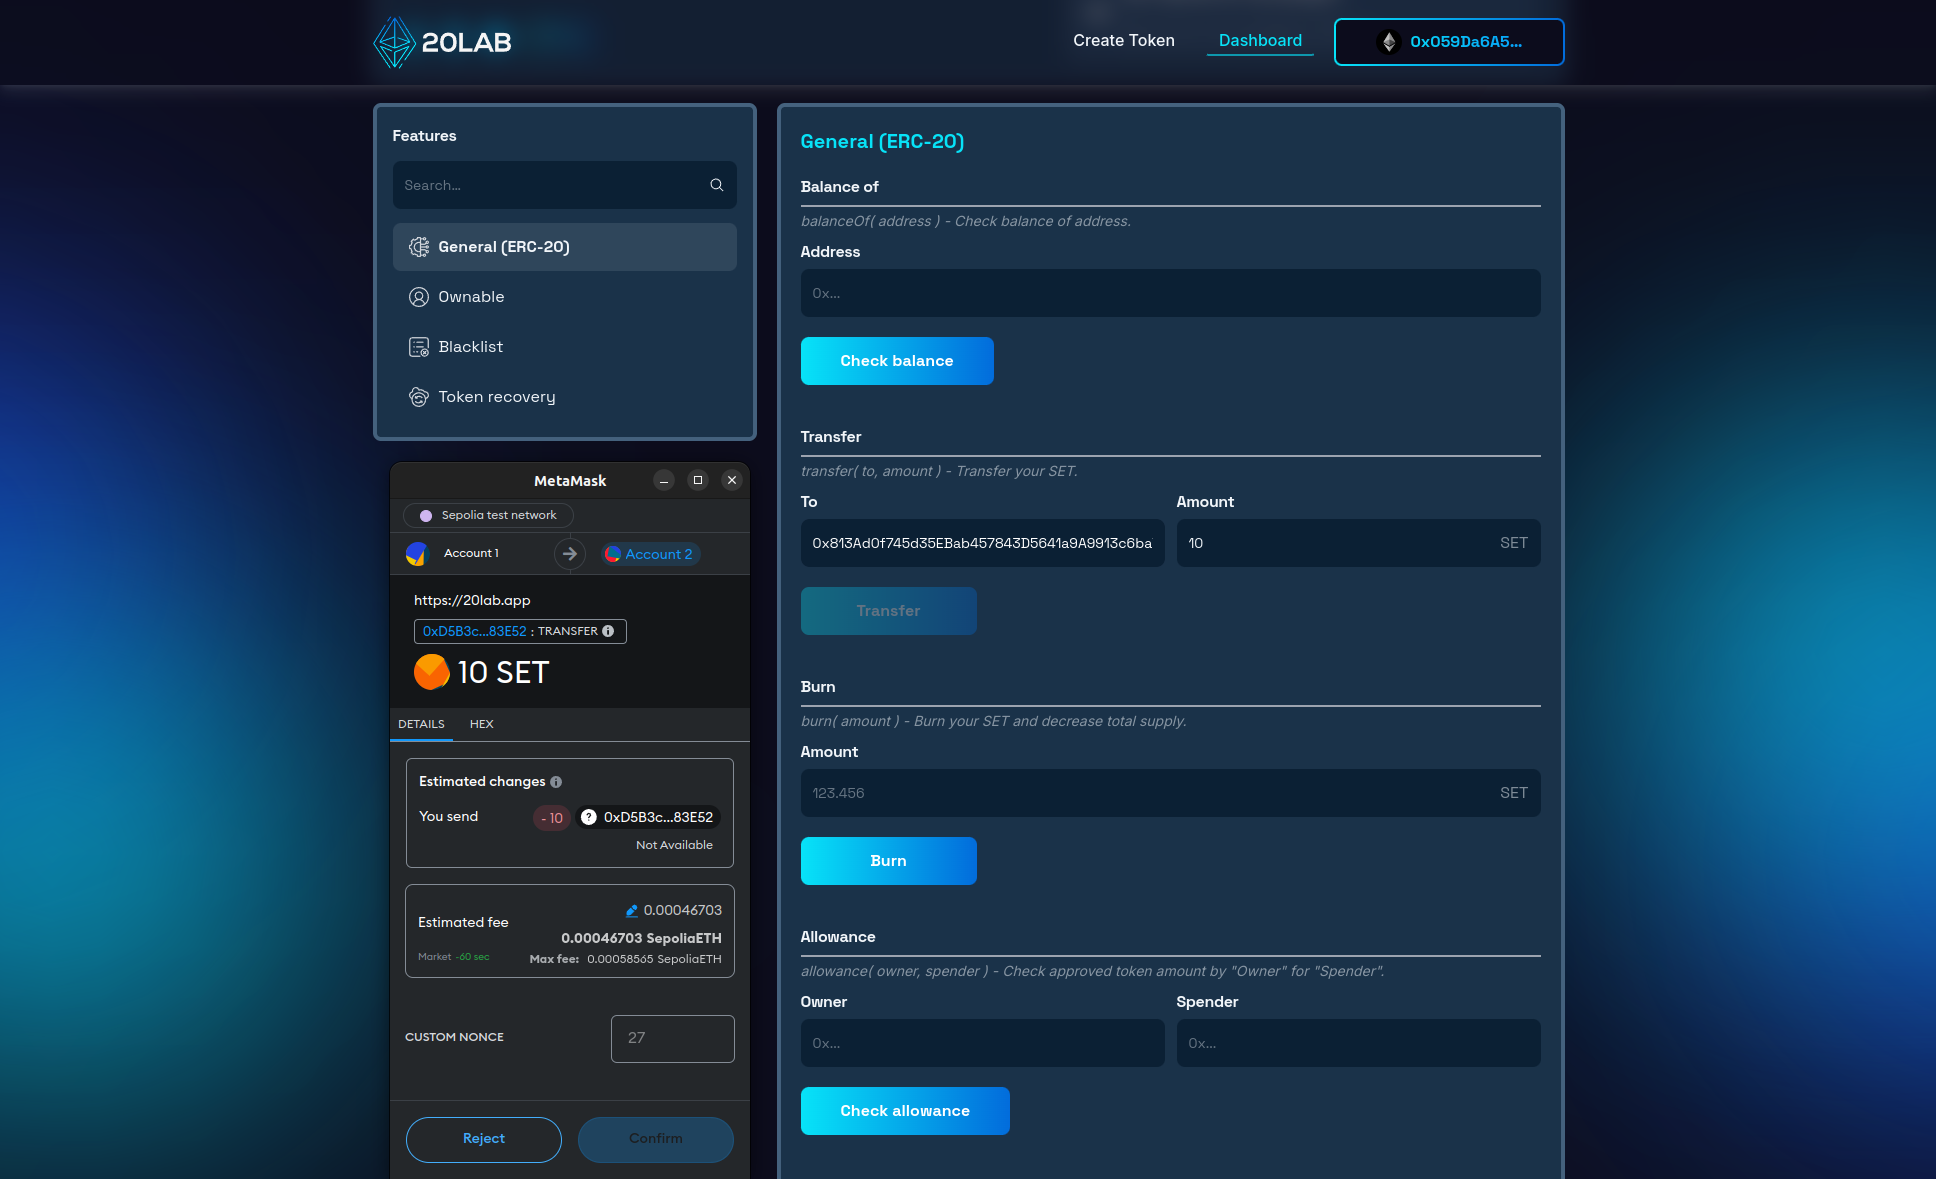
Initial Transfer (pre-blacklist)
Navigate to the "General (ERC-20)" section of your dashboard. Here you'll find the transfer feature. Attempt to send tokens to a non-blacklisted address. You'll notice that the transaction goes through without a problem, confirming normal token functionality.
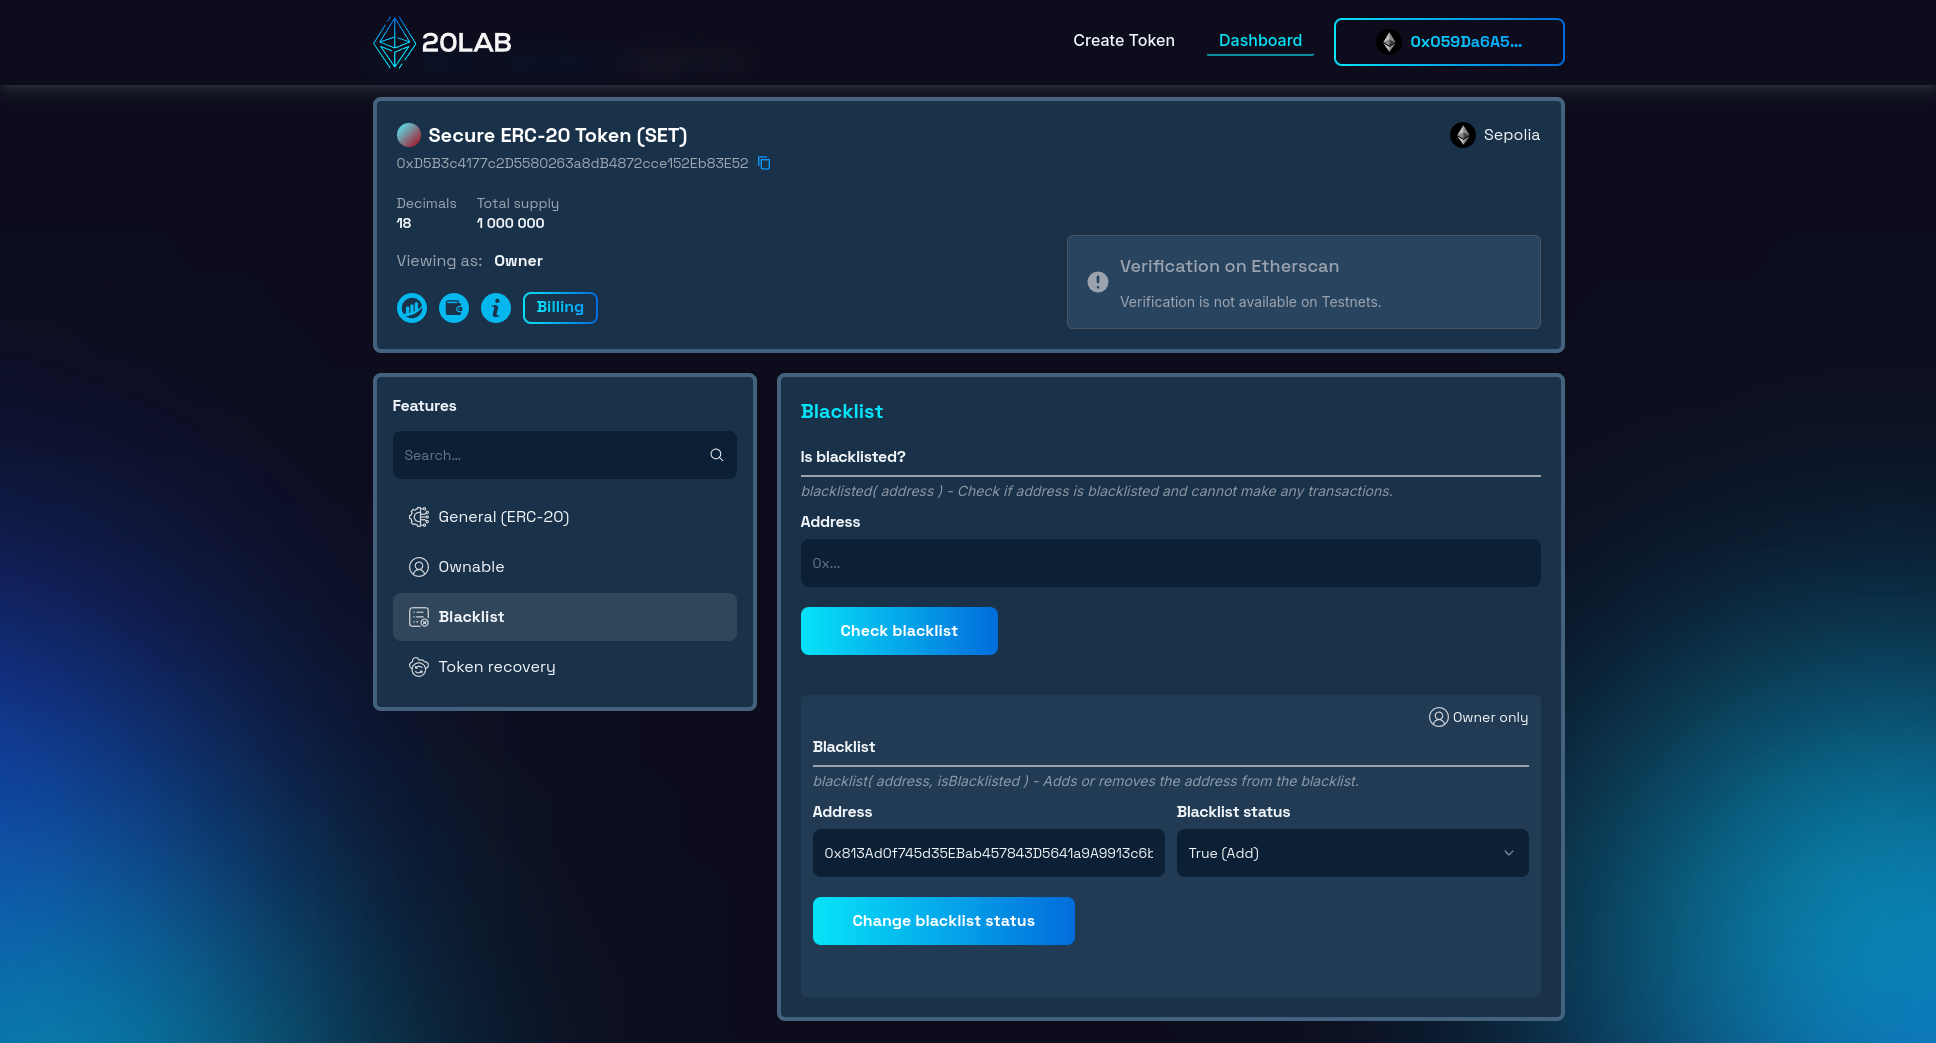
Implementing the Blacklist
Now go to the "Blacklist" section of your dashboard. Add the address that just received tokens to the blacklist. This action requires transaction confirmation from the owner wallet to ensure secure blacklist management.
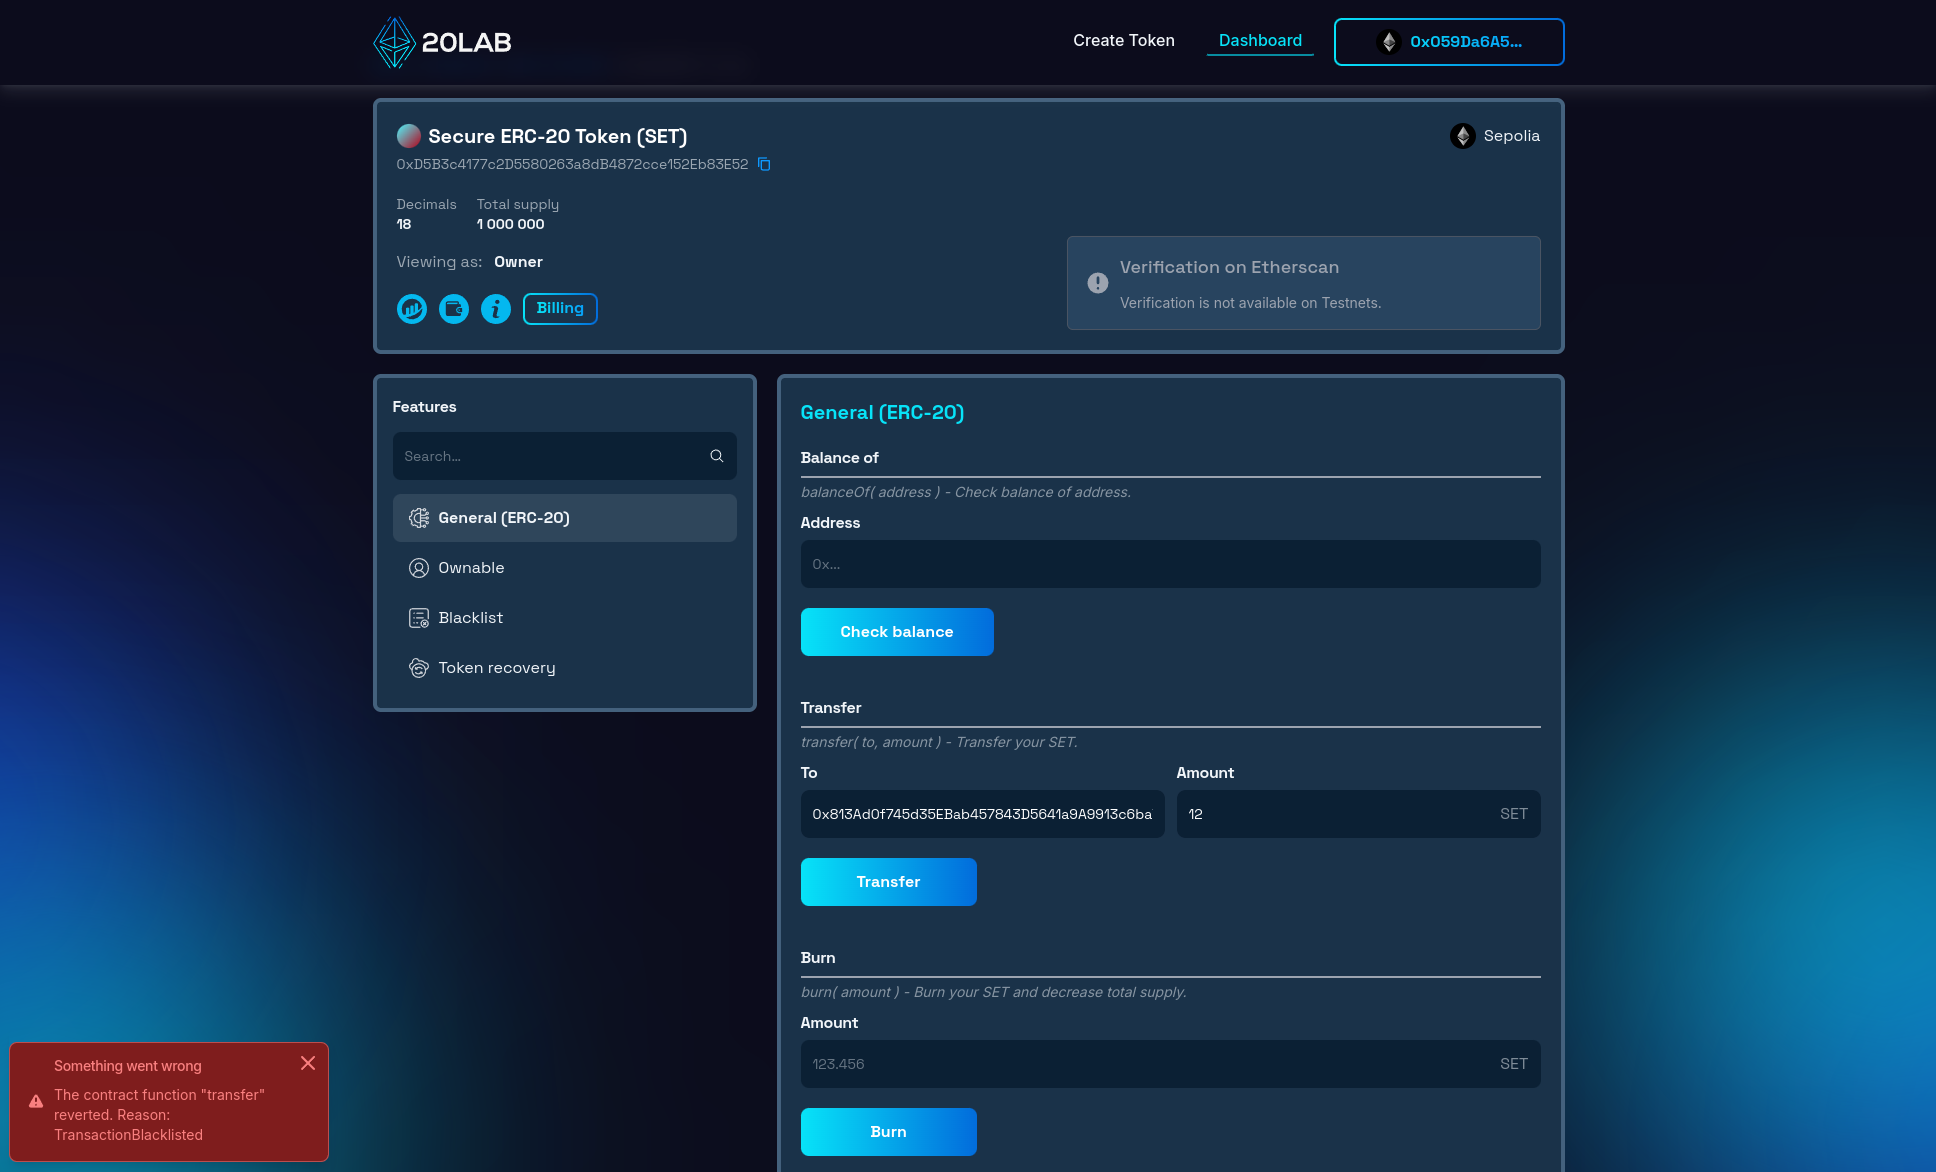
Attempted Transfer to Blacklisted Address
Return to the "General (ERC-20)" tab and attempt another token transfer to the now blacklisted address. You'll receive an error message indicating that the transaction cannot be completed. This demonstrates the effectiveness of the blacklist feature in restricting token movement.
Impact on the Blacklisted Address
It's important to note that the blacklisted address is now severely restricted in its interactions with the token. The address cannot:
- Receive tokens,
- Send tokens,
- Participate in any token-related activity (e.g., voting, staking).
This restriction remains in place until the address is removed from the blacklist by the token owner.
Conclusion
Incorporating a blacklist feature into your ERC-20 token significantly increases your control over token operations and strengthens the security of your ecosystem. Whether you're launching an innovative DeFi project, a community-driven token, or any other blockchain-based asset, the ability to restrict certain addresses from participating in token transactions is a powerful tool. This feature helps maintain the integrity of your token economy, and provides a quick response mechanism to potential threats or regulatory challenges.
Platforms like 20lab.app have revolutionized the process of creating and managing tokens with advanced features like blacklisting. This simplification allows you to focus on the strategic and creative aspects of your project, rather than getting bogged down in complex technical implementations.
If you have any questions about creating or managing your ERC-20 token, don't hesitate to reach out to us via our Telegram channel.


